Olive green walls bring the outdoors in, and I love how they feel calm yet grounded in a kitchen. Start with sage undertones for a breezy look or olive for warmth, then layer with warm woods and brass accents to make it pop. Pair crisp whites for contrast, add mirrors or textures to keep things bright, and mix in plants for life. If you keep it simple and thoughtful, your space will invite you in—and there’s more to explore below.
How to Pick Olive Green: Foundational Shades for Kitchens
Choosing olive green for your kitchen starts with the foundational shades that set the mood.
I pick a base that feels warm—sage, eucalyptus, or moss—then layer with lighter or darker accents to match light.
Consider undertones in cabinets and walls, and test samples on large patches.
Practical picks help balance busy kitchens and still keep it inviting. Incorporating dark green and wood elements can enhance the modern rustic feel of your space.
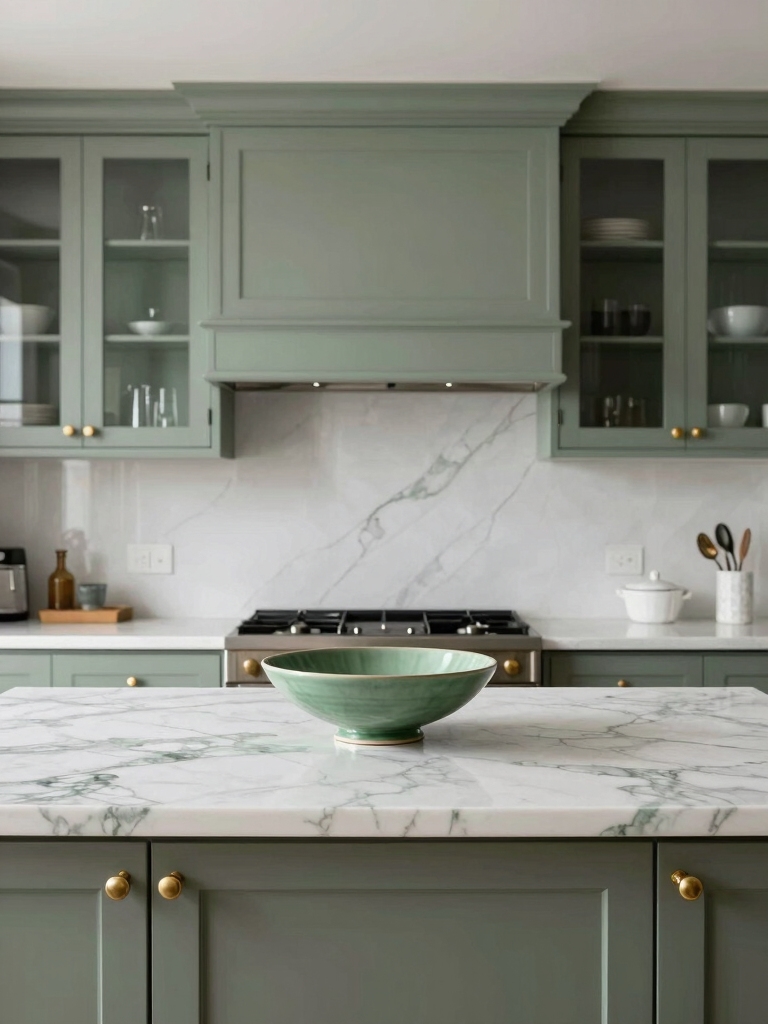
Sage vs. Olive: Which Undertones Work Best in Your Space
Sage and olive aren’t just colors—they’re moods you can tune with undertones.
In my space, sage reads airy and fresh, olive feels grounded and warm, especially with soft browns or creamy whites nearby.
I mix them by balance: use sage on walls, olive in accents, or vice versa.
Test swatches, observe lighting, and trust your everyday feel—your kitchen will breathe. Incorporating inspiring green kitchen ideas can elevate your design and connect your indoor space to nature.
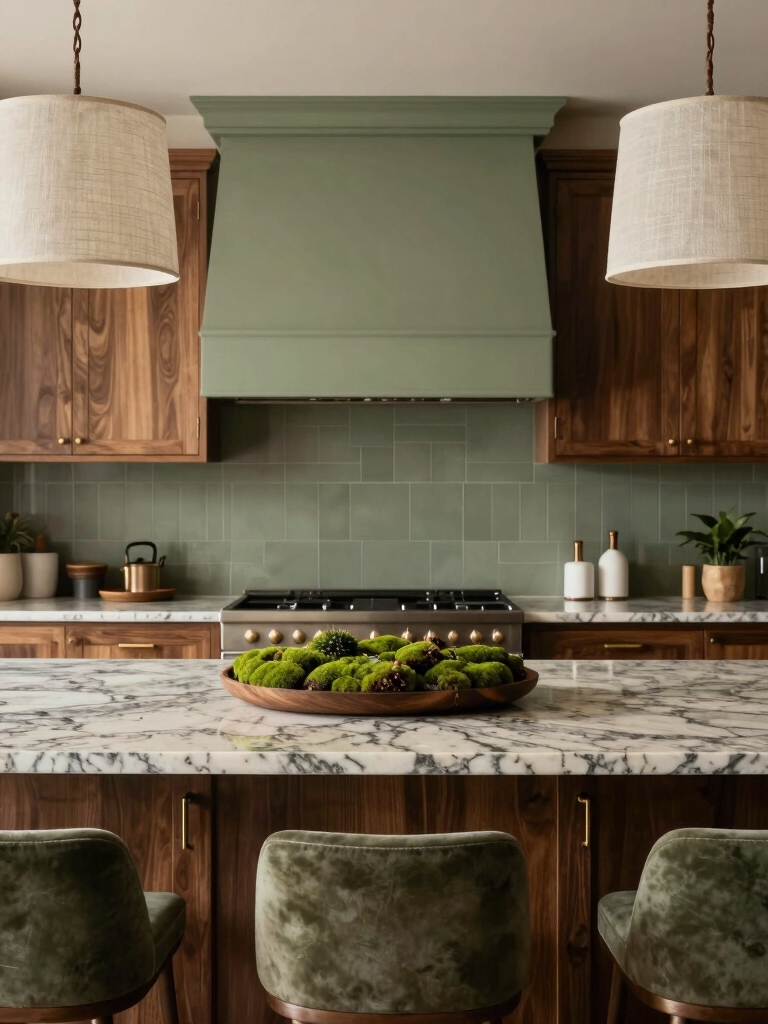
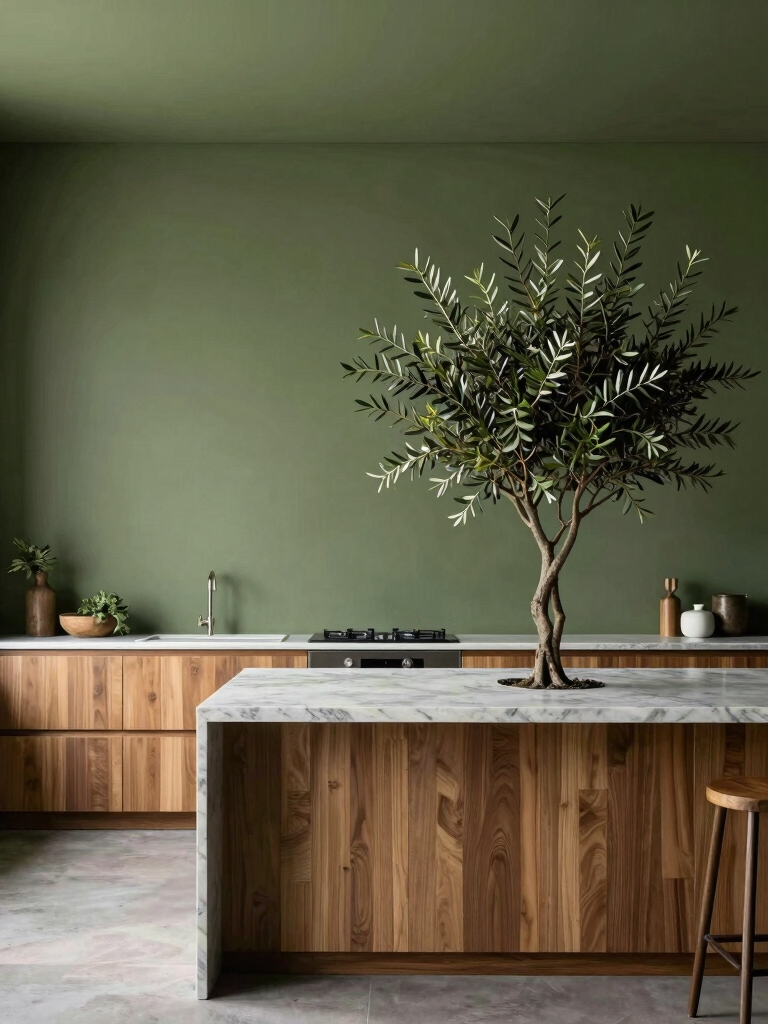
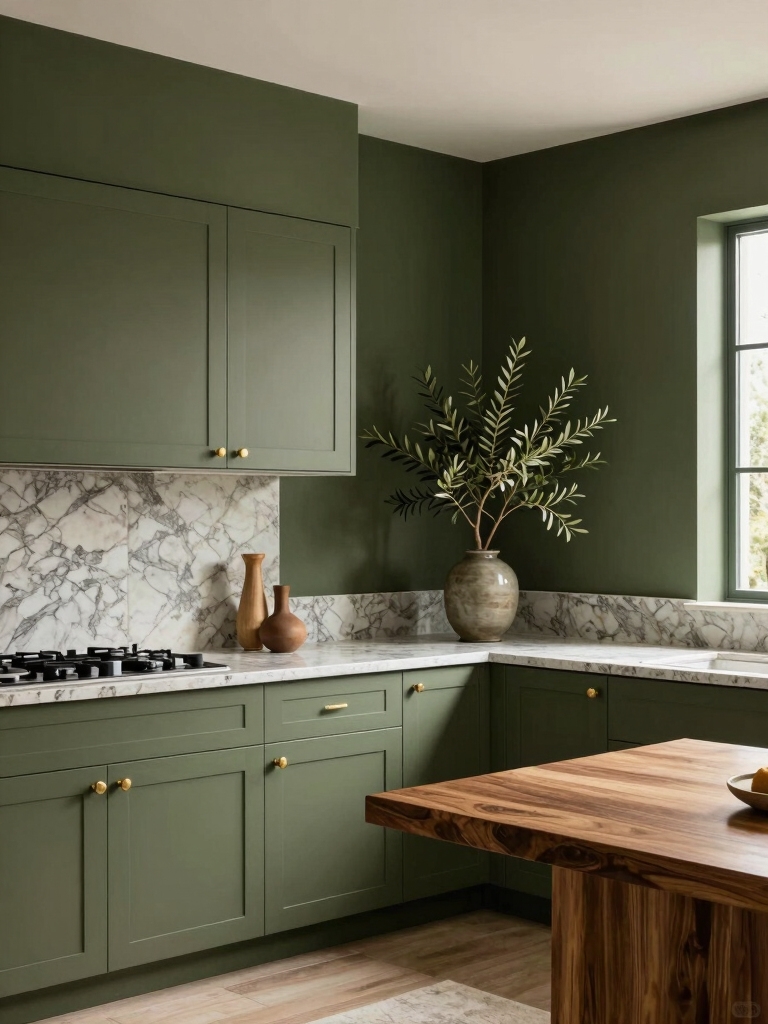
Warm Wood Pairings That Make Olive Pop
I love pairing warm woods with olive walls, letting the natural grain and rustic accents do the talking.
Think of rustic wood highlights, like a live-edge shelf or oak countertops, that warm up the room without overpowering the color.
I keep tones in harmony, using warm wood pairings that let olive pop while highlighting texture and depth. The combination of olive green and warm wood tones creates an inviting atmosphere that embraces organic living.
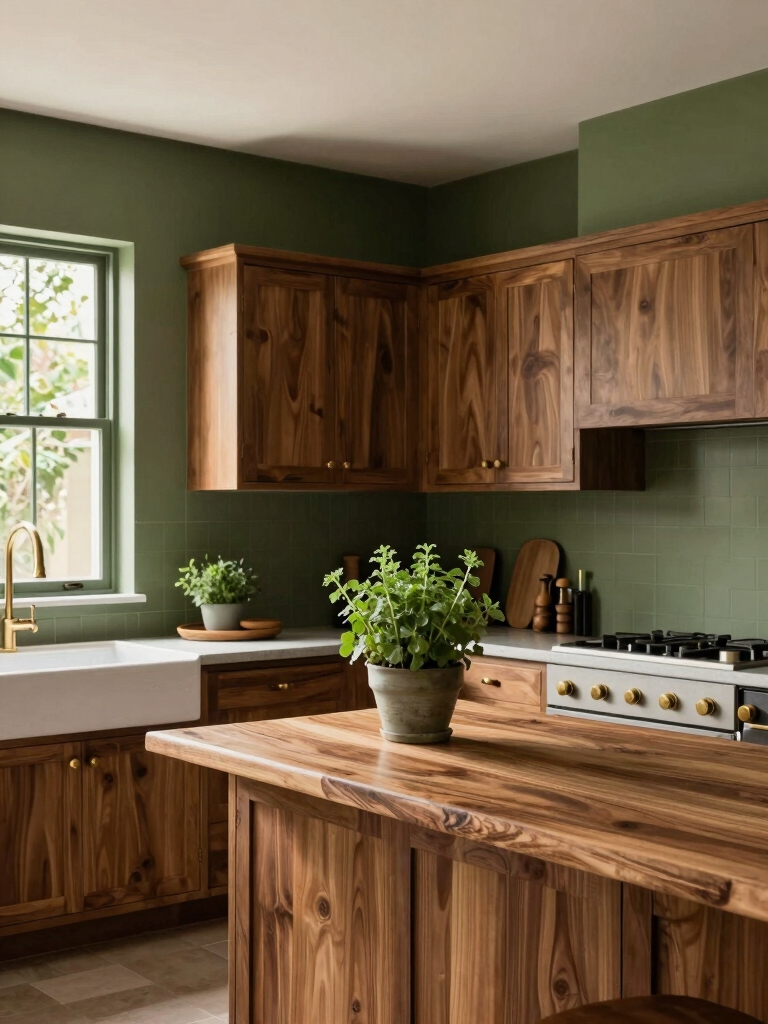
Rustic Wood Accents
To make olive green pop in the kitchen, I love pairing it with warm wood accents like honeyed oak or distressed walnut—the kind that feels lived-in and inviting. Rustic strips of reclaimed lumber add texture without clutter, while simple shelves showcase ceramic mugs and greenery. I keep lines clean, finishes matte, and let natural grain guide the room’s calm, practical mood. Incorporating green and brown kitchen tones can enhance the overall aesthetic and create a harmonious environment.
Warm Tone Pairings
Warm woods do the heavy lifting here, pairing olive with tones like honeyed oak, chestnut, and amber maple to make the green feel inviting rather than echoey.
I’ll guide you to balance warmth and depth without overpowering the wall color. Choose finish consistency, test samples, and layer textures. Incorporating light oak cabinets can enhance the natural simplicity of your kitchen design.
The result: a cozy, practical kitchen that feels grounded and welcoming.
Natural Grain Highlighting
Natural grain takes olive from pretty to polished, especially when you let warm woods glow through their markings.
I share simple, honest pairings that keep your kitchen calm and inviting, without fuss. Subtle contrasts, durable finishes, and natural textures let olive breathe. You’ll notice depth, character, and an easy shine that feels handpicked for home.
- Pair warm oak with olive accents for warmth
- Maples soften edges while keeping contrast
- Walnut adds depth without overpowering
- Clear matte finishes preserve grain and glow
Incorporating sage green and wood kitchens into your design can elevate the overall aesthetic, bringing a touch of nature indoors.
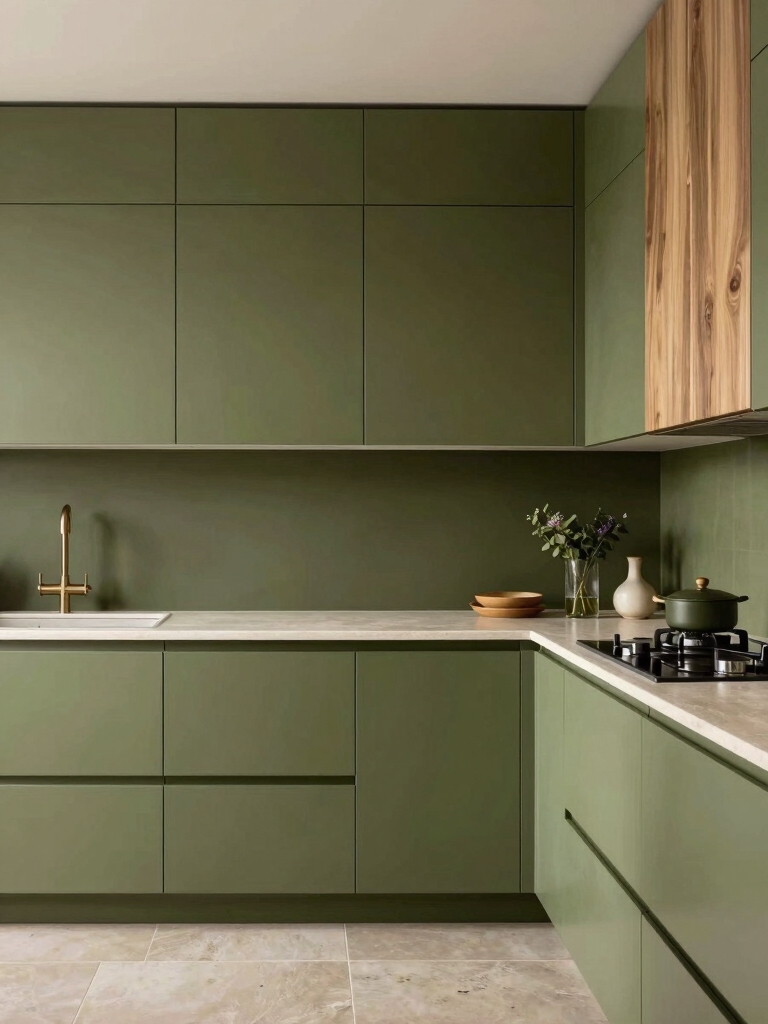
Crisp Whites and Olive: Creating Bright Contrast
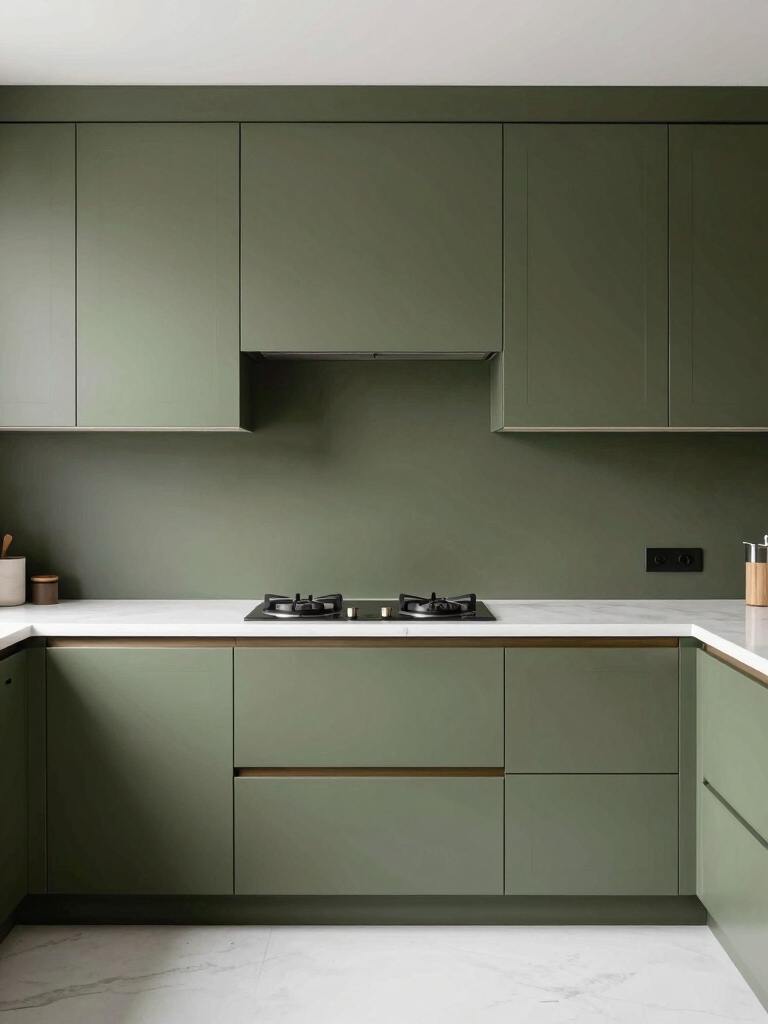
Crisp whites keep olive walls feeling fresh, and I’ll show you how to balance the contrast without it feeling clinical.
I mix matte whites with warm accents—dishes, towels, and light fixtures—that lift the olive without shouting. Choose simple hardware and soft textures. Adding small green accents throughout the kitchen can enhance the natural vibe and create a sense of harmony with the olive walls.
The room stays bright, welcoming, and practical, so cooking feels effortless and cozy, not sterile.
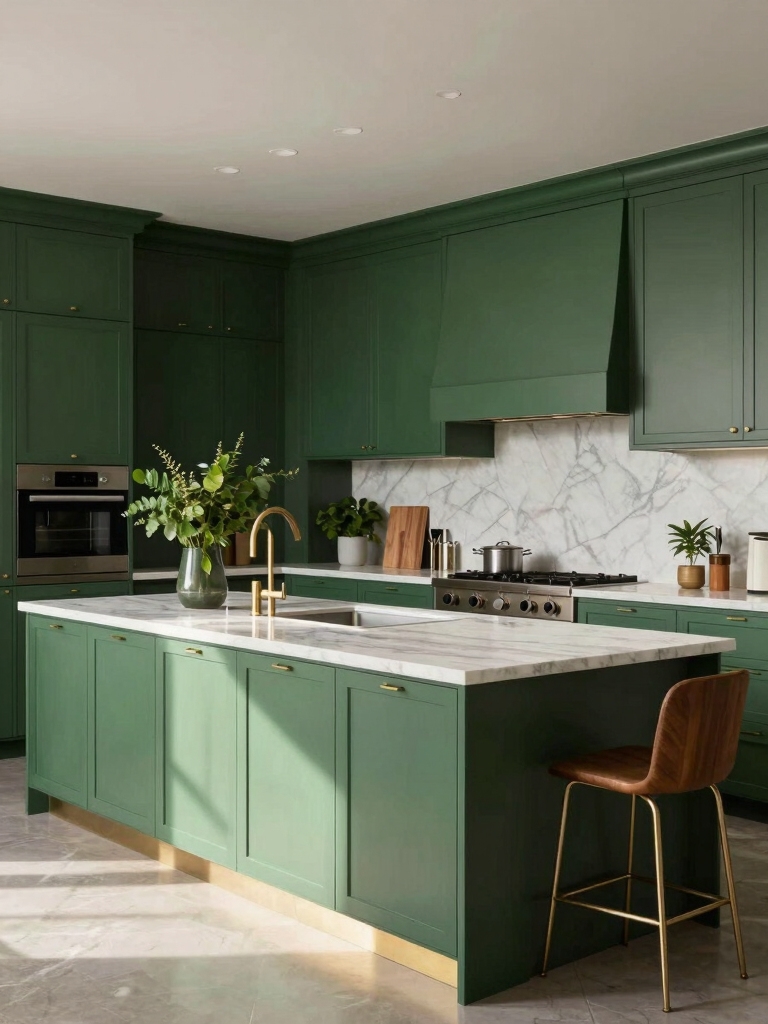
Deep Olive Accents for Depth and Drama
Deep olive borders bring depth and drama to the kitchen without losing warmth. I pair deep green accents with natural textures, creating a layered, inviting space. You’ll notice how pops of olive enrich cabinetry, ceramics, and textiles, adding character without shouting. Subtle contrast keeps everything cohesive and practical, perfect for everyday cooking and lingering mornings.
- Rich olive bowls and textiles for warmth
- Dark-aged hardware as quiet drama
- Olive framed art for focal points
- Potted herbs to echo outdoors
Incorporating green cabinets into your design can also enhance the overall aesthetic of the kitchen.
Finishes and Sheens: Matte, Satin, or Luster
When I choose matte, I get a soft, whispery texture that hides fingerprints and glare, perfect for a calm olive backdrop.
Satin brings just-enough sheen for light play and easy wipe-downs, making a busy kitchen feel polished without shouting.
Luster amps the lighting with a touch of glow, so higher ceilings and morning sun feel warmer—let’s talk about which finish fits your space and routine.
Matte Finish Texture
A matte finish, with that soft, nonshiny look, brings warmth and a touch of coziness to olive green kitchen walls.
I notice texture reads as smooth, not flat, and fingerprints stay gentle. It hides minor flaws, keeps surfaces easy to wipe, and ages gracefully.
- Subtle depth enhances natural light
- Easy touch-up for daily wear
- Calm, timeless kitchen vibe
- Complements warm woods and brass accents
Satin Sheen Versatility
Satin finishes bring a balanced shine to olive green kitchen walls, offering a soft glow that’s less reflective than gloss but easier to wipe than matte.
I trust satin for high-traffic spaces, because it resists splashes and fingerprints while staying calm and clean.
It bridges warmth and practicality, letting natural light bounce without glare, guiding my everyday meals and chats.
Luster Lighting Effects
Luster lighting isn’t just about brightness; it’s about how the finish on olive green walls changes the room’s mood with every hour of the day.
I guide you through memory-friendly choices, practical tweaks, and a cozy glow you can trust.
- Matte, satin, or luster: pick for texture
- Reflective accents that echo natural light
- Task-ready placement for mornings
- Warm bulbs to soften greens and edges
Texture Play: Subtle Patterns That Enhance Green
Texture can quietly elevate green walls by adding subtle patterns that feel both tactile and timeless.
I mix linen-look wallpapers, soft embossing, and gentle textures that echo nature, so your kitchen gains depth without shouting.
You’ll notice warmth from woven mats, speckled ceramics, and matte paint surfaces.
It stays calm, practical, and inviting—just enough texture for everyday cooking and lingering conversations.
Lighting Your Olive Kitchen: Natural and Artificial
Natural light can transform olive kitchen walls into something warm and inviting, while well-placed artificial lighting keeps every task easy and comfortable after dark.
I blend sunlit cheer with practical lamps, so the space feels bright yet cozy, never harsh. Here’s how I light thoughtfully:
- maximize daylight with sheer curtains
- use dimmable LEDs for zones
- warm white bulbs for comfort
- task lighting over prep areas
Small Kitchen Tips: Making Olive Readable in Limited Space
Olive walls can feel bold in a small kitchen, but with smart tweaks they read as welcoming rather than overwhelming.
I keep textures light and mirrors near work zones to reflect light, and I roll in compact, warm accents that stay practical.
I test color balance at dawn and dusk, then adjust.
Simplicity, function, and a touch of greenery guide my approach.
Entry-Level vs. Statement Walls: Where Olive Works
I’ve found that olive starts small at the entry level and grows bold with a gentle statement wall.
I’ll show you how a single olive tone can read as calm and cohesive, or how a bolder strip can become a focal point without shouting.
Let’s talk about where olive works best and where a statement wall could carry the room.
Entry-Level Olive Potential
If you’re just exploring olive walls, this is the sweet spot: olive can warm a space without overwhelming it, so it’s a natural entry point between a bland neutrals-only room and a full-on statement wall.
- Adds warmth without drama
- Pair with natural textures for depth
- Keeps kitchen light and inviting
- Easy to accessorize with brass or wood
Statement Wall Impact
A bold olive wall can steal the show, but you don’t have to go full-on to make it work.
I’ve learned that a single statement wall anchors a kitchen without shouting. Pair it with calm cabinets, natural textures, and smart lighting.
This keeps olive practical, not overpowering, so you feel cozy, grounded, and ready to cook with the outdoors in reach.
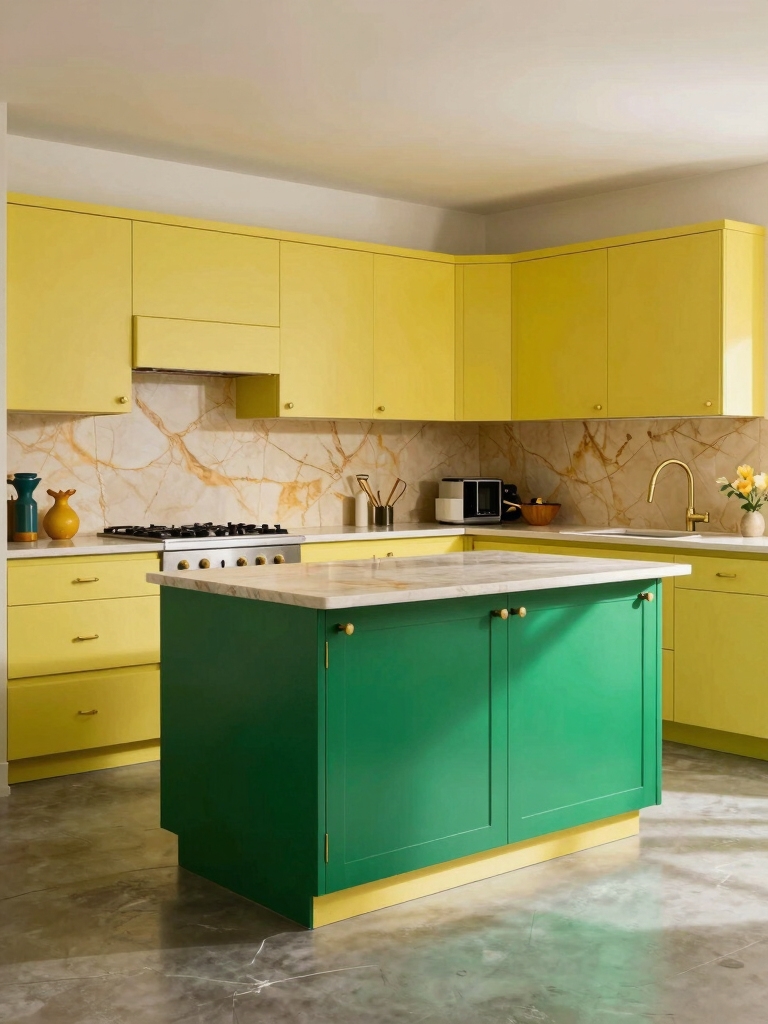
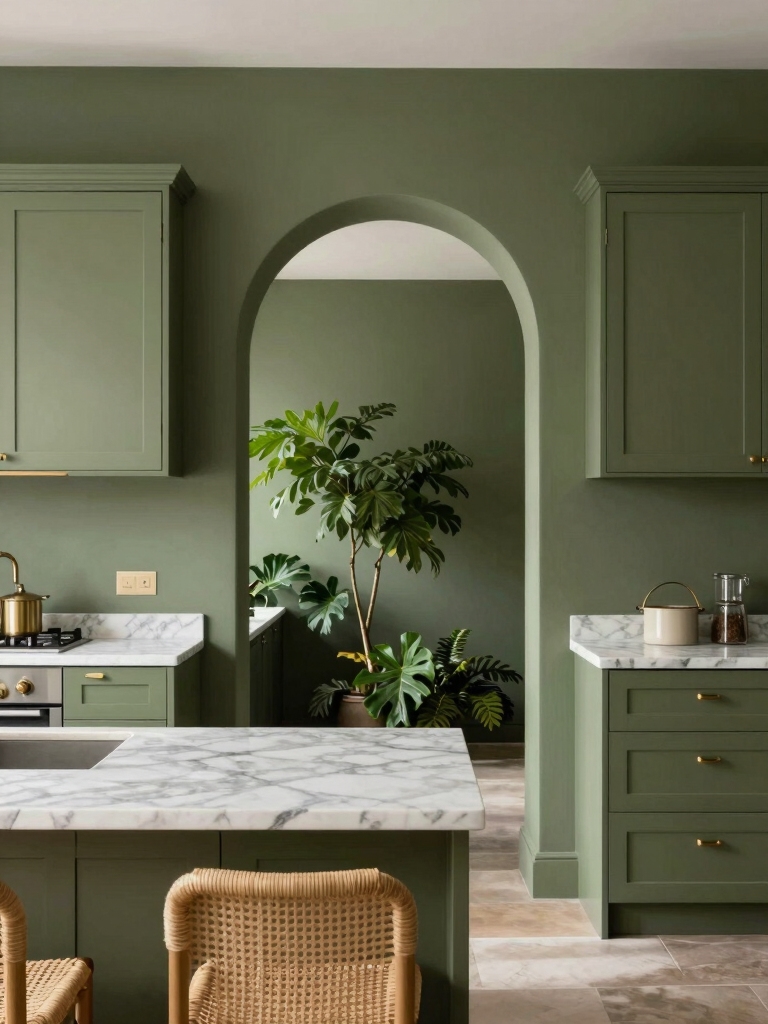
Palettes by Room: Islands, Backsplashes, and Cabinets
When you’re planning olive green kitchen palettes, separate colors for islands, backsplashes, and cabinets help you create depth without overdoing it.
I mix tones to keep each zone distinct yet connected, so the room feels curated, not fussy.
- Islands: warm sage for contrast
- Backsplash: muted olive for cohesion
- Cabinets: creamy white for brightness
- Accessories: soft gray accents tying it together
Maintenance and Cleaning: Keeping Olive Fresh
Olive green kitchen walls stay fresh with simple upkeep: I wipe them down regularly, use mild cleaner, and avoid harsh scrubs that can dull the color.
I spot-clean spills promptly, rinse lightly, and dry with a soft cloth to prevent streaks.
Frequent but gentle cleaning keeps the finish calm, consistent, and inviting, without fuss or harsh surprises.
Budget-Friendly Olive Ideas That Look Luxe
I’ll show you how to get a luxe look without breaking the bank, using Budget-Friendly Olive Finishes that still feel rich.
I’ll mix Luxe Texture Ideas with affordable options and share practical pairings that elevate any olive wall.
Let’s explore budget-friendly ideas for affordable accessories that tie everything together and make your kitchen feel polished.
Budget-Friendly Olive Finishes
Budget-friendly olive finishes can transform your kitchen without breaking the bank, and you’ll love the warm, inviting vibe they bring.
I’m sharing practical options you can trust, with simple steps and durable results that feel luxe without the price tag.
- Magnetic or chalkboard accents for nightly menus
- Matte olive paint for a soft, even backdrop
- Sealed concrete or tile borders for character
- Cork or wood veneers to warm floors and cabinets
Luxe Texture Ideas
Textures make olive schemes feel luxe without a big price tag.
I mix budget-friendly textures like linen, rattan, and matte ceramic to add depth without shouting. You’ll see soft weaves, subtle embossing, and warm sheen that catch light just right.
I keep surfaces practical, easy to clean, and cozy, so your kitchen feels curated, not overdone.
Affordable Accessory Pairings
To keep olive kitchen accessories feeling luxe without overspending, start with a few cohesive, budget-friendly pieces and build from there.
I’m sharing practical pairs that feel elevated yet affordable, and I’m keeping it simple so you can recreate the look with confidence.
- Ceramic jars in matte cream
- Brass-toned utensil holder
- Linen oven mitts in sage
- Wooden serving board with lip
Trend vs. Timeless: When to Repaint Olive
Wondering whether olive walls feel trendy or timeless?
I stay practical: repaint when the color loses contrast with cabinets or lighting, not on every fashion wave.
I look for sunlit days, steady wear, and your kitchen’s personality.
If you still smile at it after a season, keep it. If you hesitate, time to refresh with care.
DIY Finishes: Toning Olive With Glazes
I love exploring glaze options, because the right glaze can softly elevate olive without losing its warmth.
We’ll look at glaze color choices and how layering olive hues lets you tailor depth and glow to your own kitchen light.
Let’s chat about practical tips for applying glazes that feel natural, not flashy, so your walls stay cozy and inviting.
Glaze Color Choices
Glazing olive can feel like a small experiment with big impact, and I’ll walk you through choosing glaze colors that enhance the warmth without overpowering the olive base.
I favor subtle tints that deepen depth, keep brightness, and leave texture readable.
- Warm gray-dleck hues that soften edges
- creamy ivory for contrast
- sage-green for cohesion
- soft caramel for depth
Layering Olive Hues
Layering olive hues is where the color story really comes alive, letting you build depth and warmth without losing the olive base.
I share simple glazing tricks I use—thin coats, test on scrap, and wiping for variation—so your cabinets or walls gain texture without becoming muddy.
You’ll tame brightness, add richness, and keep that cozy, inviting kitchen you crave.
Photo Ready: Rendering Olive Concepts in Real Rooms
Photo rendering olive concepts in real rooms is easier than you might think: I start by picking a base olive tone, then build with accents that pull it together without shouting.
- Visualize texture and lighting for depth
- Pair with warm woods and natural fibers
- Use metal accents sparingly for polish
- Keep contrast gentle for cohesive, ready-to-shot scenes
Common Mistakes With Olive Greens and How to Fix Them
Olive greens can feel fancy or flat when misused, so I’d rather go simple: the biggest mistakes are oversaturation, mismatched undertones, and neglecting lighting.
I’ll keep tones balanced, test with swatches, and pick warm neutrals as anchors. Avoid busy contrasts, and use natural light to reveal depth.
When in doubt, step back, recheck undertones, and adjust until the mood feels natural.
Shopping List: Paint, Materials, and Tools for Olive Kitchens
Choosing the right paint, materials, and tools for an olive kitchen starts with a simple plan: pick durable paints, easy-to-clean surfaces, and essentials that you’ll actually use.
- durable paint for walls
- stain-resistant primer
- satin finish for easy cleaning
- dependable brushes and rollers
Quick-Start Guide: 5 Steps to Implement Olive Green Now
Ready to transform your space in five simple steps?
I’ll walk you through quick, practical moves: pick a warm olive shade, test swatches on walls, collect finish options, and choose one matte or eggshell for easy cleanup.
Plan two contrast accents, prep surfaces, and paint in smooth, even strokes.
Finish with nourishing trim touches and a simple, cozy vignette.
You’ve got this.
Conclusion
Choosing olive is really choosing a mood—calm, grounded, a touch adventurous. I’ll admit, I once painted a tiny kitchen olive to hide my coffee spills, and it turned into a warm nook I never wanted to leave. Data-wise, homes with olive greens paired with crisp whites feel brighter and larger. So start small: 5% wall accent, add one wood note, then breathe. Olive isn’t a trend; it’s a cozy invitation to linger.