
I’ll reclaim every inch of my cabinets with practical steps that free up space fast. Start by identifying wasted areas, then stack bowls and plates with tiered organizers. Use slim pull-out racks for vertical storage and turn doors into storage with organizers. Convert cabinet space into drawers with inserts, and install door-mounted spice racks and utensil holders. Track a simple KPI, keep costs smart, and set a quick maintenance routine—you’ll see results and lots more tips ahead.
Identify Wasted Cabinet Space First
Start by locating wasted cabinet space, because identifying it’s the quickest way to reclaim every inch.
I’ll map shelves, note dead zones, and flag oddly shaped gaps.
Then I’ll measure clearance, tally unused spaces, and prioritize fixes.
You’ll gain breathing room fast by relocating awkward items, removing duplicates, and standardizing bin sizes.
By implementing smart kitchen cabinet organization techniques, clear visuals come from simple, practical adjustments you can replicate.
Stack Bowls and Plates With Tiered Organizers

Stacking bowls and plates with tiered organizers makes every inch count. I place the heaviest items on the bottom tier, then lighter dishes above, so I don’t twist or reach awkwardly. Label or color-code sections to quick-pick what I need. I rotate seasonal favorites to the front, keeping the routine simple and tidy, with visible, accessible stacks. Additionally, utilizing smart organization tips can help maximize your kitchen space even further.
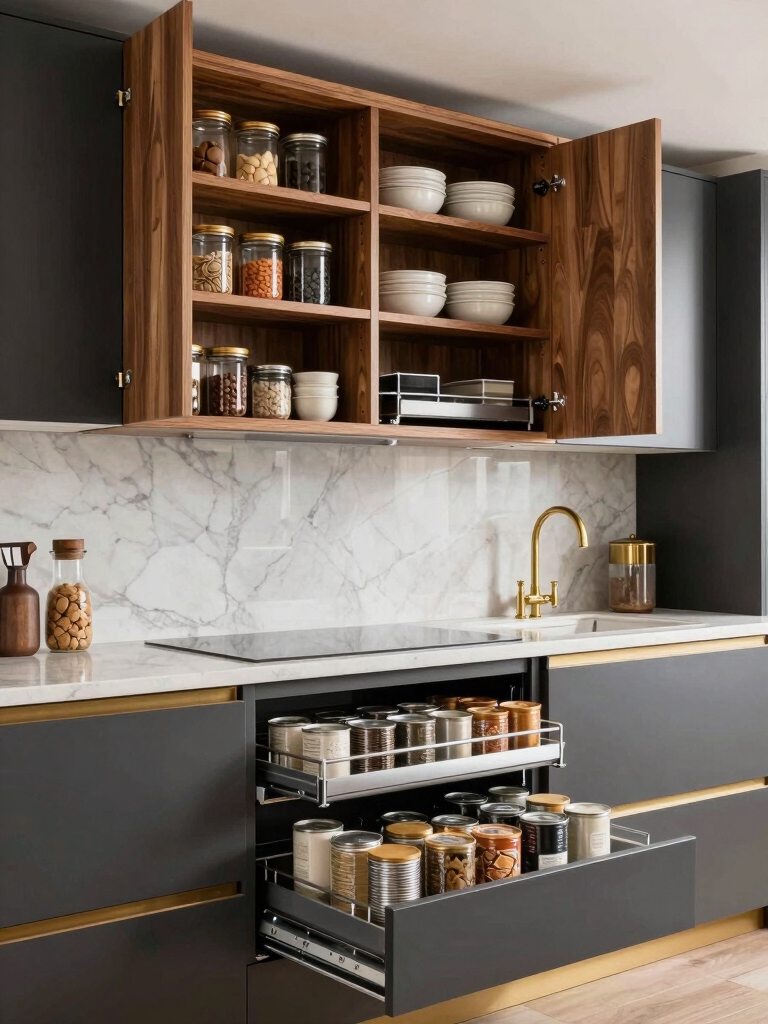
Use Slim Pull-Out Racks for Vertical Storage

I like using slim pull-out racks to make vertical storage work in tight cabinets. These racks keep slim items accessible and organized without wasting space. I’ll show you how a rack-powered approach can transform your cabinet flow. Additionally, incorporating creative ways to organize your kitchen drawers can further enhance your overall kitchen organization.
Slim Vertical Storage
Slim vertical storage keeps hard-to-reach items accessible without hogging cabinet space.
I use slim pull-out racks to glide tall cans, spices, and baking sheets into view. No digging, no spills, just order.
- Quick access, every shelf feels widened
- Clear labeling, less rummaging
- Gentle pulls, smooth operation
- Compact footprint, more usable room
Additionally, this method aligns perfectly with space saving ideas that maximize your kitchen’s efficiency.
Rack-Powered Organization
Rack-powered organization hinges on slim pull-out racks that glide in and out with minimal effort, turning vertical storage into a fast-access workspace. I embrace these rails to maximize cabinet depth, rotate items to visible spots, and reduce rummaging. You’ll notice cleaner counters, quicker finds, and smarter meal prep. Additionally, utilizing effortless kitchen organization techniques can further streamline your morning routine. Install once, enjoy organized flow, and reclaim shelf space confidently.
Turn Doors Into Storage With Organizers
Doors can become hidden storage with simple organizers, turning wasted space into a tidy, accessible area.
I share practical, ready-to-use ideas that keep you organized without clutter. You’ll gain quick access, cut searching time, and feel calmer each day.
Try these options:
- Over-the-door racks for spices
- Slim hanging bins for lids
- Hooks for mugs and towels
- Magnetic strips for tools
Incorporating smart storage ideas can significantly enhance your kitchen’s efficiency and appearance.
Convert Cabinet Space Into Drawers With Inserts
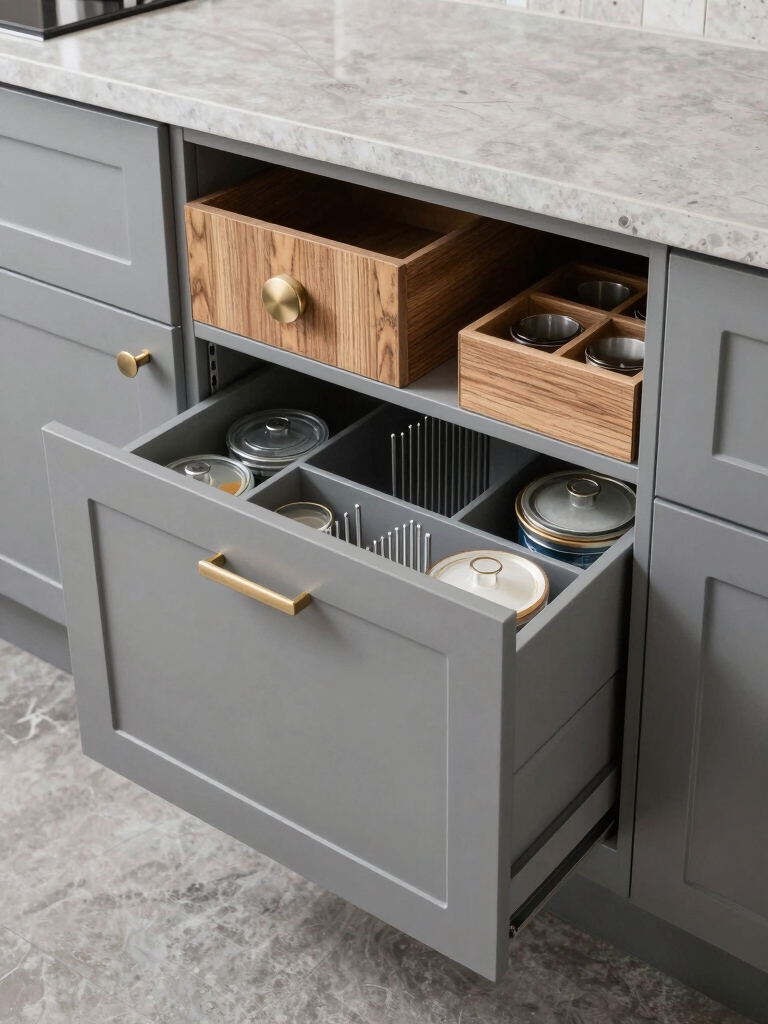
Turning cabinet space into drawers is easier than you think with the right inserts. I show you a simple setup: choose adjustable dividers, stackable trays, and slim organizers that fit your existing shelves. Measure carefully, install once, and enjoy instant access. Clear labeling helps, too. With careful placement, you maximize every inch without clutter or extra bulk. Additionally, utilizing smart cabinet organization techniques can enhance your kitchen’s efficiency.
Group Items by Function to Save Rummaging Time
I organize by function so you can grab what you need without rummaging.
Think in zones: group utensils, prep items, and everyday dishes, then label each area for quick access. This approach cuts search time and keeps your cabinets calm and efficient, while also utilizing hard to reach zones for additional storage space.
Group By Function
Grouping items by function saves rummaging time by placing similar items together where you use them most.
I lean into practical choices, keeping like with like so you can grab what you need fast.
Here’s how I do it:
- Keep everyday staples together for quick access
- Group utensils near prep zone
- Place cookware near stove and burners
- Store measuring tools with mixing bowls for efficiency
Designate Zone Sections
Designating zone sections is how I take Group By Function from idea to action.
I create clear, purpose-driven areas: bakeware with bakeware, prep staples with prep tools, and daily-use dishes near the sink.
I place related items together, label lightly, and keep a small, intuitive map.
You’ll save rummaging time and gain calm, practical flow that supports effortless cooking.
Label for Quick Access
Label for quick access is all about making sense of your space at a glance.
I group by function, not just place, so I can grab what I need fast and minimize rummaging.
You’ll feel calmer with clear labels guiding you.
- See at a glance
- Group by use
- Easy-to-read tags
- Consistent placement
Label Everything for Quick Access
Labeling is my go-to move for fast, frustration-free access in the kitchen.
I label drawers, shelves, and containers with clear, legible names and dates when needed. This keeps items where I expect them, so I grab the right thing fast.
Use consistent labeling styles, update as you reorganize, and keep a simple key visible for everyone. Clarity saves minutes daily.
Hide Tall Gaps With Smart Storage Hacks
I’m going to show you how smart vertical stacking can hide tall gaps and keep everything reachable.
Think slim profile solutions that fit tight spaces without crowding shelves.
Smart Vertical Stacking
Smart vertical stacking is all about maximizing space by building up rather than out, so tall gaps disappear behind smart storage hacks.
I show you practical moves that keep items visible and reachable, without clutter. You’ll feel organized and confident as you implement these tight-shelving tricks.
- Elevate frequently used tools for quick grabs
- Use labeled bins to reduce rummaging
- Install adjustable dividers for flexible widths
- Stack jars with uniform lids for stability
Slim Profile Solutions
Slim profile storage makes the most of every inch by tucking tall gaps behind slim, smart organizers.
I show you how to collapse wasted space with low-profile dividers, stackable trays, and pull-out sections.
You’ll access every item without digging.
I keep the setup simple: measure, plan, place, and label.
Ready to reclaim shelf space quickly and calmly.
Maximize Under-Sink Space With Modular Bins
Under the sink, space is precious but often wasted, so I turn to modular bins that stack, slide, and nest to fit irregular gaps. They transform clutter into order, letting me grab what I need in seconds and prevent spills.
- Simple, sturdy dividers that hold small bottles upright
- Stackable trays for cleaners and sponges
- Narrow, deep bins for awkward gaps
- Clear labels for quick, calm access
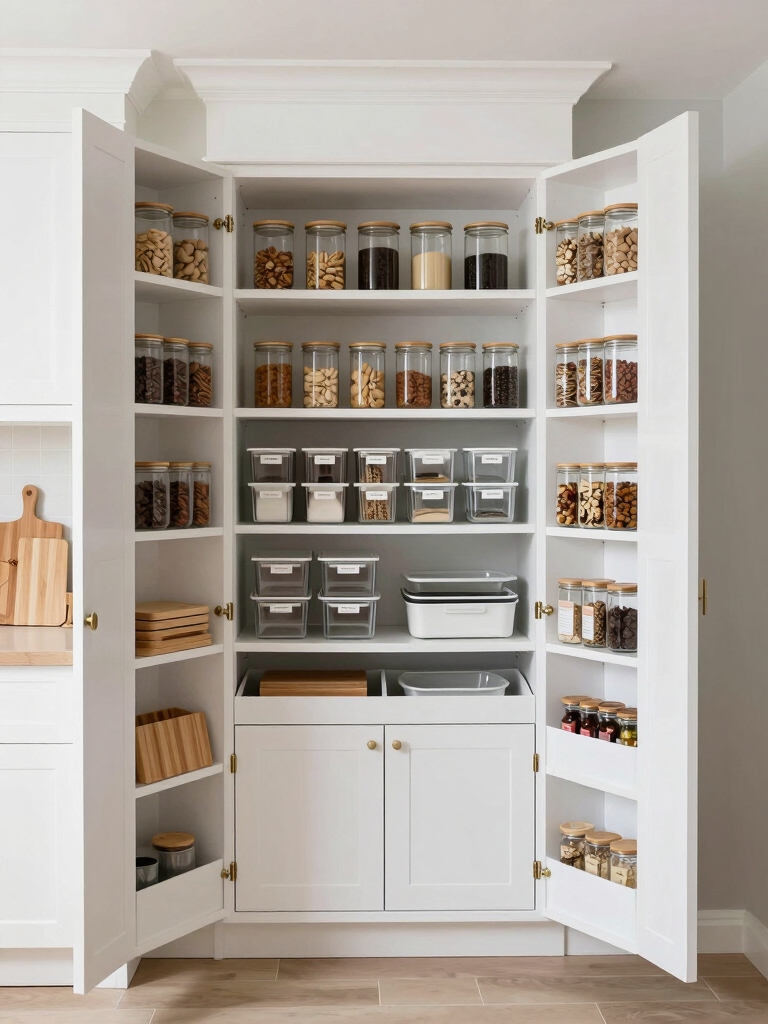
Use Clear Containers for Quick Visibility
Clear containers make it easy to see what you’ve got at a glance, so you waste less time digging through cabinets.
I keep staples in uniform jars, label tops, and stack them by use. Transparent lids snap tight, preventing spills.
With quick visibility, I grab the right item first, maintain order, and reclaim shelf space without loud reorganizing.
Simple, steady efficiency.
Free up Counters With Counter-Free Zoning
With the extra visibility from clear containers, I’ve learned to reclaim every inch of counter space by keeping surfaces free of daily clutter.
Counter-free zoning means designating zones, not items, so I can prep fast. Keep essentials tucked away. I avoid overflow. This mindset keeps mornings calm and counters clean.
- Assign zones for prep, bake, and bulk
- Store rarely used tools out of sight
- Use vertical stacking to maximize surface flow
- Rotate items seasonally to prevent crowding
Rotate Seasons to Keep Only What You Use
Seasonal rotation isn’t about tossing items out of sight; it’s about keeping only what you actually use.
I review what I reach for each season, then tuck away the rest. I label boxes, group similar items, and keep only two spice jars per recipe set.
This keeps cabinets streamlined, reduces clutter, and makes room for essentials I actually rely on.
Install Door-Mounted Spice Racks and Utensil Holders
Door-mounted spice racks and utensil holders are a game changer for small kitchens and cluttered drawers. I install them on inner cabinet doors, freeing shelf space and sweeping clutter from counters.
You’ll reach spices without rummaging. Utensils stay visible, grab-and-go ready.
- Save drawer depth and keep essentials at hand
- Labeled sections boost quick finds
- Easy cleanup, fewer spills
- Flexible reorganization as needs change
Track a Simple Cabinet-Organization KPI
I’ll start by choosing a simple KPI, like cabinet utilization, to track how efficiently I’m using the space.
I’ll monitor what shelves see the most use and what’s left empty, then adjust layouts accordingly.
This keeps my cabinet organization practical, measurable, and easy to tweak over time.
Track A Simple KPI
To track a simple cabinet-organization KPI, start with one clear metric you can act on, like how many labeled bins you pull from a cabinet each week.
- I can see where clutter hides and how to fix it quickly
- You’ll gain confidence as numbers drop and space grows
- Your routine will feel calmer and more under control
- Progress becomes a repeatable, satisfying habit
Monitor Cabinet Utilization
When I monitor cabinet utilization, I start with a single, actionable KPI: how efficiently you’re using each cabinet space.
I track shelf gaps, duplication, and reachability, then log findings in a simple chart. We adjust by rearranging items into zones, label sections, and measure a two-week improvement.
This practical approach keeps your cabinets organized, tidy, and predictable.
Budget-Smart Organization: No Fancy Tools Needed
Consistent, clutter-free cabinets don’t require fancy tools—just smart, budget-friendly moves you can do today.
I show you practical swaps that save space and stress, without breaking the bank. Here are quick, doable ideas:
- Rehome lids with containers to halves that stack
- Use cereal organizers for spice jars
- Group similar items in labeled bins
- Hang measuring spoons on a magnetic strip
Establish a Maintenance Routine to Keep Shelves Tidy
Now that you’ve tucked away clutter with budget-friendly swaps, it’s time to keep those shelves tidy with a simple maintenance plan.
I’ll schedule 5-minute weekly checks, returning items to their proper spots and wiping surfaces quickly.
I’ll rotate products with short shelf lives, label boxes, and adjust height as needed.
With routine, chaos becomes calm, and space stays maximized.
Conclusion
If you’re worried this will take ages, it won’t—start with one cabinet. I’ve been there, thinking I’d never reclaim space, but tiny changes add up fast. Quick wins? tiered organizers, slim pull-outs, and door racks. You’ll see clutter vanish and shelves breathe. If you skip maintenance, it’ll collapse—so schedule a 5-minute weekly tidy. You’ll stay organized, and your cabinets will stay usable without overhauling everything. Give it a week, and you’ll be hooked.


