I design open kitchens with clear sightlines and comfy living zones, so conversations flow naturally. Think peninsula seating for casual chats, and a kitchen island that acts as a social hub with multitask surfaces nearby. I favor mixed seating, edge-to-edge layouts, and soft acoustics from rugs and textiles to keep the room inviting. Seasonal updates and cohesive lighting tie the spaces together, while storage and quiet boundaries define the zones. If you keep exploring, you’ll pick up more practical tweaks.
How an Open-Plan Layout Boosts Conversation

Open-plan living naturally invites conversation by removing walls that block sound and sight.
I’ve seen how sightlines connect comfy seating with kitchen prep, so chatter stays natural. When spaces breathe, energy moves between tasks.
I’ll share simple cues—clear sightlines, mixed zones, soft acoustics—so you feel invited to talk, cooks stay included, and relationships stay front and center. Additionally, an open kitchen layout enhances the flow of interaction, making it easier for guests to engage with one another.
Define Kitchen-Adjacent Zones for Flow

Define kitchen-adjacent zones to guide flow, not barriers. Think clear buffers, sightlines, and accessible storage.
- Prep zone near counters
- Cooking zone with safe clearance
- Cleanup zone by sink and trash
- Serving zone adjacent to dining
- Connecting pathways avoiding crowding
Incorporating open concept design principles can enhance the overall functionality and aesthetic appeal of your space.
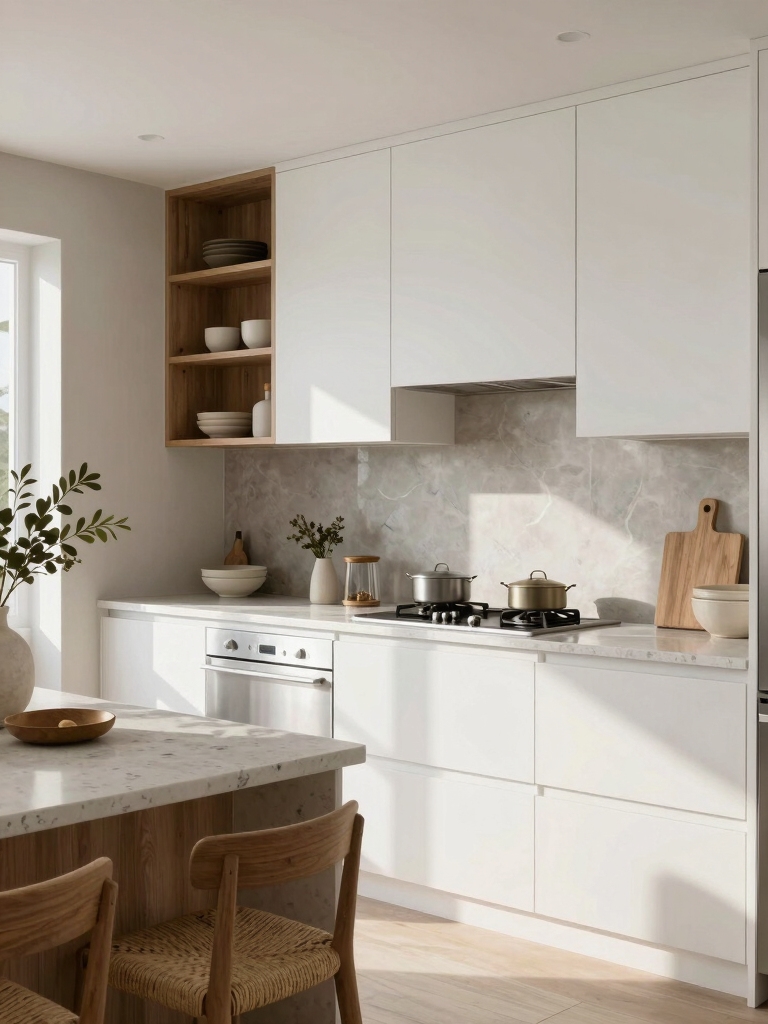
Peninsula Seating That Encourages Casual Chats
A peninsula that invites casual chats starts with seating and geometry that don’t shout “spot for meals.”
I’ll shape it so you can lean in for a quick chat or pull up a stool for a longer convo without feeling crowded.
Choose a balanced overhang, comfortable height, and enough space for legs.
The result is inviting, practical, and naturally social. Additionally, incorporating open island kitchen designs can further enhance the social atmosphere of your space.
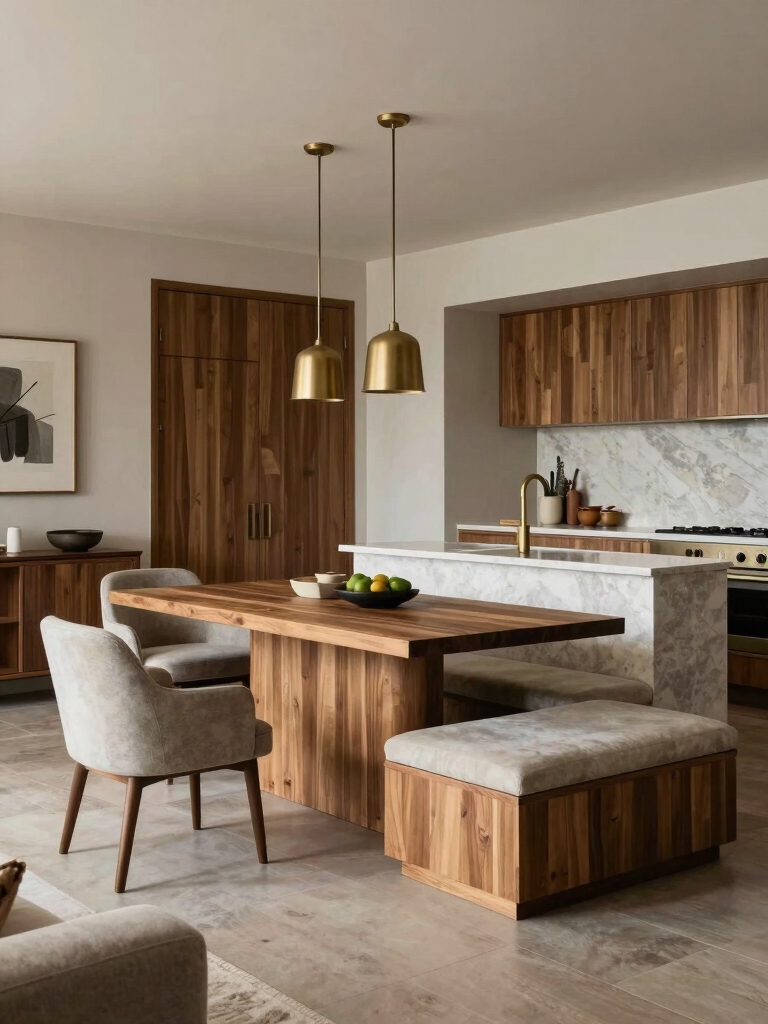
The Island as a Social Hub: Layouts and Seating
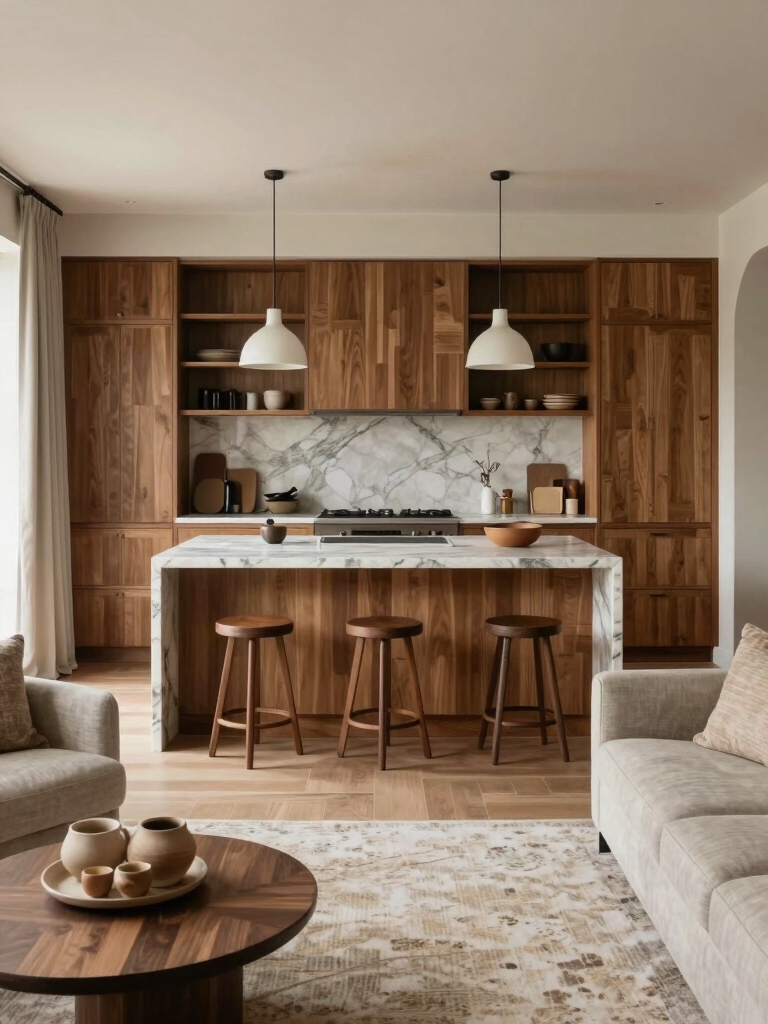
The island isn’t just a counter; it can be the social heart of your kitchen if the layout and seating invite conversation.
I focus on creating clear sightlines, varied heights, and intimate nooks that pull people in without shouting.
- Prioritize a clear flow between prep and hangout
- Use conversation-friendly seating distances
- Mix bar stools and casual banquette
- Install accessible power outlets
- Add a small kinetic focal point
- A spacious kitchen island with comfortable family seating can enhance the overall social experience.
Seating Arrangements That Face Both Rooms

Listen, seating that faces both rooms should draw people in without doubling as a barrier.
I mix sofas with compact chairs so conversations drift between spaces, not demands.
Place a low coffee table central to anchor sightlines, and angle seats for easy eye contact.
Use edge-to-edge seating to keep flow open while inviting shared listening and quick, casual interaction.
Incorporating open plan kitchen layouts can further enhance the seamless interaction between the living and kitchen spaces.
Lighting That Unifies Cooking and Living
Lighting that unifies cooking and living should feel seamless, so I mix task-focused fixtures with ambient options that keep both spaces comfortable and connected.
I prioritize adjustable brightness, coordinated color, and switchable zones. This approach helps conversations flow, icons stay readable, and cooking stay practical.
- Under-cabinet task lighting for prep
- Pendant lights over the island
- Dimmable ceiling ambient lighting
- Separate switch zones for zones
- Warm color temperature for coziness
Incorporating pendant lights over your island can also enhance the visual appeal of the space while providing targeted illumination for cooking and dining.
Color Schemes That Tie Rooms Together
Color is the thread that ties a living room to a kitchen, so I keep a shared palette that feels cohesive without being matchy-matchy.
I choose neutrals as anchors, then add 1–2 accent hues drawn from textiles and art.
Repeat those core colors in rugs, cabinets, and accents, keeping contrast gentle.
This guarantees flow without shouty consistency. Additionally, incorporating natural textures can enhance the overall ambiance, making the space feel even more inviting and connected to nature.
Texture Pairings for a Cohesive Look
Texture is how you add warmth and tactility to a space without overhauling the palette.
I pair subtle textures with bolder ones for balance, then vary scales so each item enhances, not competes.
Try these:
- Leather vs. linen contrasts
- Rough wood with smooth metal
- Velvet cushions, cotton rug
- Woven baskets, glass accents
- Matte finishes with glossy highlights
Rug Zoning to Define Areas
Rug zoning helps me define areas without walls, using boundary rugs to carve out the living and dining zones.
I look for color and texture contrast to subtly cue each space, while keeping the flow smooth for traffic circulation.
Together, we’ll choose options that balance function and style, so movement stays effortless and the rooms feel joined rather than separated.
Define Boundary Rugs
A boundary rug is a simple, smart trick for separating living areas without walls. I use it to spark flow and define zones without closing spaces. It guides feet and signals function, not borders.
- Choose a size that feels proportional to the area
- Pick a durable, easy-care material
- Align with traffic patterns
- Contrast subtly with surrounding floors
- Layer with a small, cohesive seating cluster
In addition to creating visual separation, a boundary rug can also enhance the overall style of your space by adding texture and warmth, contributing to the concept of cozy open kitchen and living spaces.
Color and Texture Contrast
I’ve found that adding color and texture contrast is a simple way to carve out zones without walls, especially after using boundary rugs.
Use a lighter sofa with a bold throw, or a woven rug under a dining area to anchor the space.
Pair matte finishes with subtle sheen to emphasize separate zones without crowding the room.
Traffic Flow Circulation
Good traffic flow is your friend when you’re using rug zoning to define areas; it helps rooms feel connected rather than cramped, so people can move naturally from the living area to the kitchen without stepping over edges or tripping on furniture.
- Define clear paths
- Use appropriately sized rugs
- Align seating with traffic
- Avoid clutter on walkways
- Zone softly with color contrast
Furniture Placement for Easy Flow and Reach
I like to keep furniture so there’s a clear path between the living area and the kitchen.
That means arranging pieces for easy reach and smooth, no-step changes so you can grab a snack or answer a call without stepping around obstacles.
Let’s focus on keeping walkways open and furniture within reach for everyday flow.
Clear Pathways Between Zones
Clear pathways between zones make daily living smoother, so I start by mapping a simple flow from the living area into the kitchen.
- Use furniture to guide foot traffic, not block it
- Leave 32–36 inches of clearance at key openings
- Place seating to face each corridor, not into it
- Centralize task zones for quick reach
- Test routes with real daily moves
Under-Foot Reach and Access
Under-foot reach is all about keeping the things you use most within easy reach while you move through the space.
I design around frequent grabs—remote, drinks, chargers—so paths stay clear and flows stay smooth.
I place essentials within arm’s reach from seating, and I group items by activity, reducing steps without clutter, enhancing comfort and effortless conversation.
Storage and Surfaces That Support Socializing
Think of storage and surfaces as social tools: they should invite conversation, not clutter.
I choose pieces that spark chat, not chaos, and keep essentials within reach for guests.
- Low, open storage that invites browsin’
- A tray for appetizers or coasters
- Hidden cords, visible surfaces, tidy edges
- A couple of warm-toned, durable finishes
- Flexible, multi-use surfaces for drinks and displays
Beverage Stations: Parking the Bar for Guests
I’m thinking about where the beverage station sits so guests flow naturally from the seating area to the kitchen.
I’ll share tips on keeping bar access easy, so no one line-crosses the room or blocks traffic.
I’ll also cover smart storage ideas for drinks and glassware that stay neatly tucked away yet ready to serve.
Bar Placement Flow
When planning the bar area, I start by imagining it as a natural stop along the guest flow, not a standalone gadget in the corner.
- position near seating for easy access
- maintain clear path to kitchen
- set height to invite conversation
- keep stations compact and organized
- use visible cues for guests to find beverages
Access For Guests
Access for guests means designating a clear, inviting spot for self-service while keeping the flow uninterrupted.
I place a compact beverage station near the entry to the kitchen, with a simple tray, cups, and basic mixers.
I keep paths open, label the area, and rotate supplies.
Guests help themselves, feel welcome, and conversation stays natural, not crowded or hurried.
Beverage Storage Tips
Beverage storage is most effective when it’s simple to grab what you need and keep the flow smooth.
I’ll share practical tips that fit a living room–kitchen setup, keeping guests comfortable.
- Keep a small, labeled caddy for bottles and mix-ins
- Use a portable bar cart for easy access
- Chill essentials and organize by type
- Stock 1-2 nonalcoholic options
- Reserve counter space for glasses and ice
Acoustic Solutions for Open Plans
Open-plan living can feel lively, but sound can bounce around unless we treat it on purpose.
I start with practical steps: place soft textiles, like rugs and cushions, to absorb chatter; add curtains or screens to break sightlines and sound; choose furniture layouts that create defined zones; consider acoustic panels or wall hangings for targeted control.
Simple, effective, and budget-friendly choices.
Kitchen Helper Zones: Prep, Serve, and Lounge
I’ve been talking about how sound behaves in open plans, and now I’ll shift to how a kitchen can support daily rhythm: Kitchen Helper Zones for prep, serve, and lounge.
I’ll show how to keep flow smooth.
- Clear prep zone adjacent to fridge, sink, and counter
- Inviting serve area near dining
- Cozy lounge nook for quick chats
- Hidden cords and clutter control
- Flexible storage for essentials
Common Kitchen-Open-Plan Design Mistakes to Avoid
Common kitchen-open-plan design mistakes pop up when we rush to blend spaces without thinking through daily rhythms.
I’ve learned to map flows—cooking, cleaning, entertaining—before placing furniture or appliances.
Don’t overestimate sightlines or storage; clutter slows conversation and use.
I avoid isolating zones, favor flexible seating, and respect natural light.
Plan zones, test paths, revise, then enjoy functional, welcoming rooms.
Seasonal Textiles to Refresh the Space
Seasonal textiles are an easy, budget-friendly way to refresh a living room that’s open to the kitchen.
I swap fabrics with the season and keep palettes cohesive, simple, and inviting for conversations.
- Toss cushions in a fresh hue
- Layer throws for warmth and texture
- Try seasonal drapes or a light curtain
- Bring in a patterned rug accent
- Swap table linens and napkins regularly
Small-Scale Islands for Tight Budgets
Small-scale islands can brighten a tight kitchen-living room layout without eating into precious space.
I’m sharing budget-friendly options you can actually pull off this weekend. Think repurposed carts, slim butcher-block tops, or compact basement shelving as a breakfast bar.
Add wheels for flexibility, and pair with one or two stools. Focus on function first, then affordable style. You’ll gain flow, not clutter.
Multilevel Surfaces to Improve Eye Contact
Multilevel surfaces are a smart way to improve eye contact in a living room–open kitchen setup, because they create varying sightlines without sacrificing function.
I keep lines short, use varied heights, and guide conversations naturally.
- Use low counters for quick glances
- Elevate desks to cue attention
- Soften with rounded edges
- Integrate seating at eye level
- Align with traffic flow for comfort
Personalize With Art and Greenery That Span Both Rooms
I love how artful pieces can create an Artful Flow Between Spaces, guiding your eye from the living room into the kitchen.
Greenery Bridging Rooms softens connections and adds a fresh, cohesive feel that doesn’t shout design, it whispers it.
Let’s talk about how to choose items that establish Shared Visual Harmony without clutter.
Artful Flow Between Spaces
To create an artful flow that ties your living room and kitchen together, I start by placing pieces and greenery so they feel like one continuous scene rather than two separate spaces.
- Integrate a single color palette across walls, art, and plants
- Use open shelving that echoes through both rooms
- Choose scalable artworks and botanical accents
- Mirror textures for cohesion
- Let natural light unify spots
Greenery Bridging Rooms
Greenery that spans both rooms instantly ties the spaces together, so I start by choosing plants and vines that feel intentional rather than decorative afterthoughts.
I mix upright greens with trailing varieties, placing them where sightlines cross between the living room and kitchen.
Personal touches—art alongside greenery—cue conversation, while simple, tidy pots keep the area calm and inviting.
Shared Visual Harmony
Blending art and greenery across both rooms pulls the spaces together without shouting “matchy-matchy.”
I’ll choose pieces that share a common mood or color palette with the plants, so a bold canvas next to trailing vines feels intentional rather than random.
- unify textures and tones across shelves and walls
- repeat subtle plant motifs in frames and textiles
- balance scale between art and greenery
- use natural materials for cohesion
- keep lighting consistent for harmony
Conclusion
I’m inviting you to see your home as a living conversation, not a rigid floorplan. Think of the open space as a shoreline where two rooms kiss: kitchen and living room, coffee and arms, laughter and tasks. Let the peninsula be a friendly pier; the island, a gathering buoy. Use textures and art like weather vanes, guiding eyes and hearts. Create zones that breathe, so every hello travels softly across the room.