
I turn wasted corner space into practical, open-shelf storage that keeps my kitchen organized and accessible. Start by measuring the space, then plan goals that prioritize depth and visibility. I love floating cubbies, tiered ladders, and corner inserts to reclaim dead space. Material choices—wood for warmth, glass for light, metal for durability—keep it cohesive and budget-friendly (often under $100). Regular maintenance seals the deal. Want more ideas to maximize every hidden inch? I’ve got you covered.
What Corner Storage Solves in Small Kitchens
Corner storage is a smart fix for small kitchens, turning awkward nooks into usable space.
I map out what it solves: wasted corners become usable shelves, freeing counter space; tools and ingredients gain easy access; clutter reduces with dedicated spots; visibility improves, so you spot what you have instead of buying duplicates. Additionally, utilizing clever small kitchen storage techniques can maximize your corner space even further, enhancing overall organization.
Practical, organized, and approachable, I’ll guide you efficiently.
Assessing Corner Space: Measure, Plan, and Set Goals

I’ll start by measuring the corner space accurately so we understand what we’re working with.
Next, I’ll plan an efficient layout that fits what you actually use, not just what looks good.
Let’s set clear goals for storage, access, and future tweaks so this corner stays practical and organized. Incorporating compact kitchen layouts can significantly enhance the use of corner space, making it both functional and stylish.
Measure Corner Space
To assess your corner space, start with careful measurements: width, depth, and height at multiple points, since corners aren’t perfectly square.
I map each dimension, noting irregularities and the wall angles that matter for shelves.
Then I draft a simple, realistic goal: maximize useful depth, maintain accessibility, and avoid clash with doors or appliances.
Precision guides safer, smarter placement. Additionally, consider kitchen ideas for small spaces that can help optimize your corner shelving design.
Plan Efficient Layout
Now that we’ve measured your corner space, it’s time to plan an efficient layout by mapping how the shelves will fit and how you’ll use them. I’ll prioritize flow, accessibility, and weight load. Group items by frequency, place heavy jars lower, and keep frequently used tools nearby. Create a simple grid, note zones, and iterate until everything feels intuitive and neat. Additionally, consider utilizing smart solutions for small kitchens to maximize every inch of your corner space effectively.
Floating Corner Cubbies to Maximize Visual Space
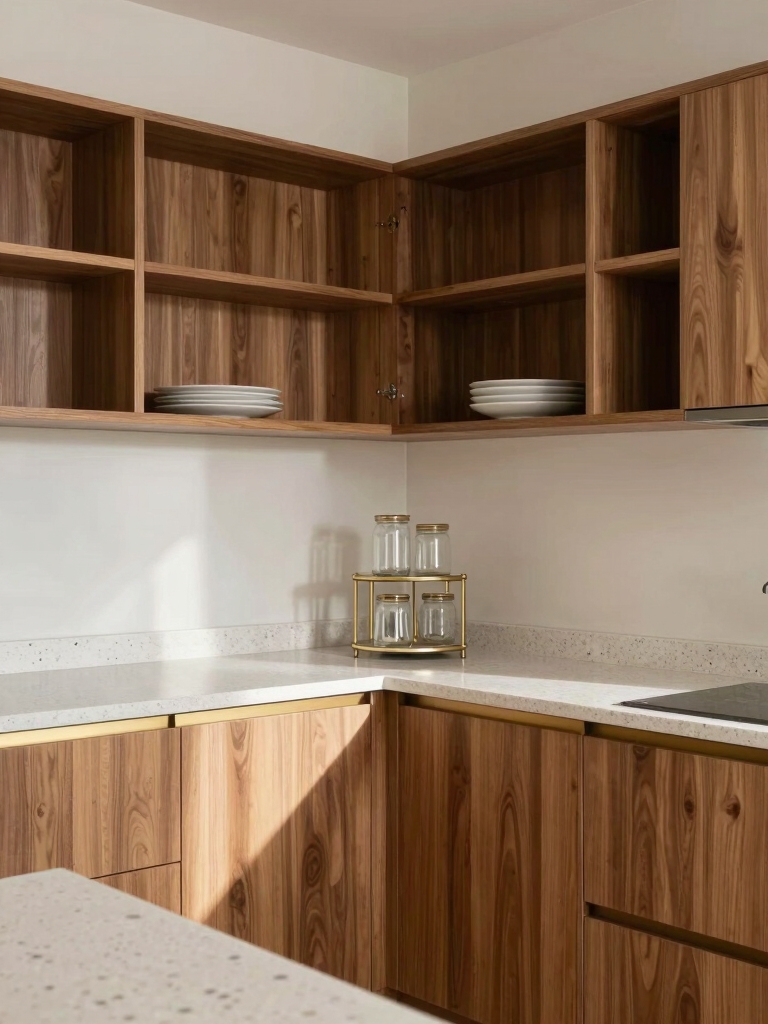
Floating corner cubbies are a smart, space-saving solution for small kitchens, and they’re easier to install than you might think.
I place lightweight shelves at eye level, keeping counters clear and corners accessible. Use clear brackets for a barely-there look, and stagger depths to expose utensils and mugs.
I label zones, yank cords tidy, and maintain clean sightlines for calm, efficient cooking. Additionally, smart organization tips can help you utilize every inch of your kitchen effectively.
Tiered Ladder Shelves for Vertical Corner Storage
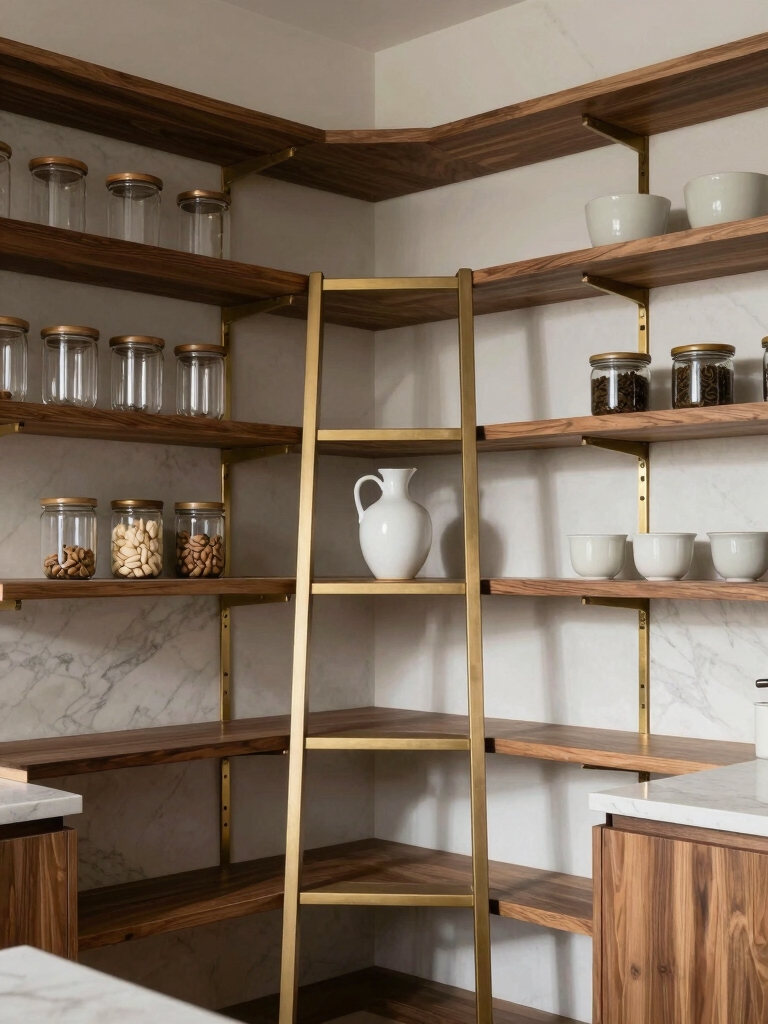
Tiered ladder shelves make vertical corner storage practical and accessible. I design them to fit tight nooks, stacking books, jars, and small appliances without crowding. I measure height, depth, and clearance, then pick durable wood and extendable brackets. Keep frequently used items lower, seasonal pieces higher. Label shelves, group by use, and maintain clean lines for a calm, organized kitchen look. Incorporating clever small kitchen cabinet ideas can further enhance your space efficiency and style.
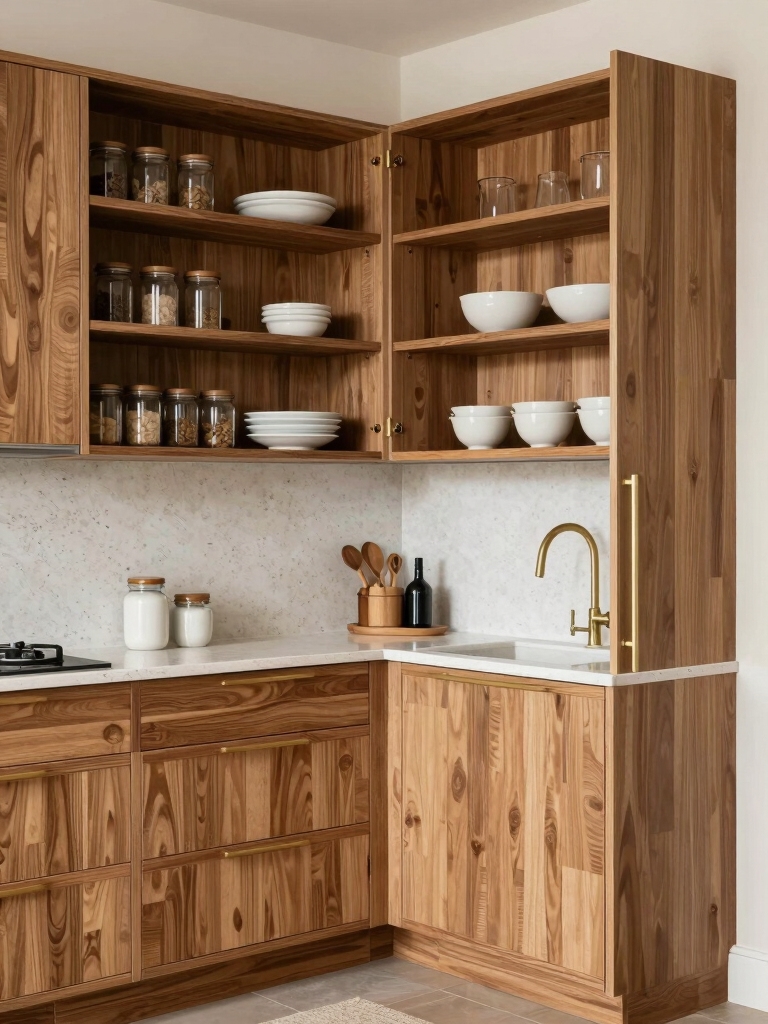
Corner Cabinet Inserts to Reclaim Dead Space
Corner cabinet inserts reclaim the dead space that often hides in tight kitchens.
I’ll share practical tricks you can use today to maximize what you already have, without costly upgrades.
You’ll learn simple inserts that convert blank corners into usable storage, streamlining steps and boosting efficiency.
- Install pull-out corner shelves for easy access
- Use adjustable dividers to separate small items
- Choose slim, vertical organizers to maximize height
Additionally, consider utilizing clever small kitchen solutions that enhance your overall storage capacity while keeping your kitchen organized and accessible.
Slim Pull-Out Shelves for Pantry-Style Access
Slim pull-out shelves give you pantry-style access without redesigns.
I install them along the back or side walls, so every jar and box becomes reachable without bending or digging. They glide smoothly, organize by category, and keep items visible.
Use labels and dividers for quick scanning, then pull out one shelf at a time to avoid crowding. Efficient, practical, tidy. Adding space-saving solutions like these can significantly enhance your kitchen’s functionality.
Magnetic and Copper Strips for Edge Spice Organization
Magnetic and copper strips make edge spice storage simple and visible. I keep jars labeled and aligned, so grab-and-go flavor boosts aren’t chaos.
The magnetic line holds tins steady, while copper adds a quick, clean view of staples. You’ll gain accessibility without crowding counters.
- Quick install tips for secure placement
- Labeling and orientation strategies
- Maintenance and magnet strength guidance
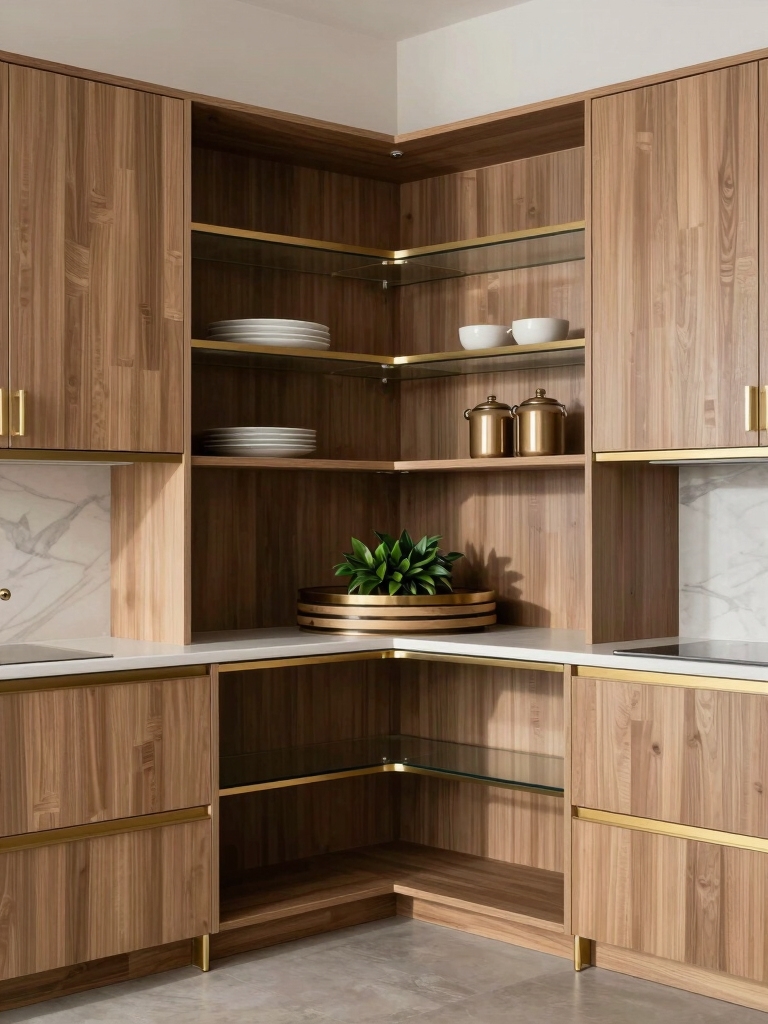
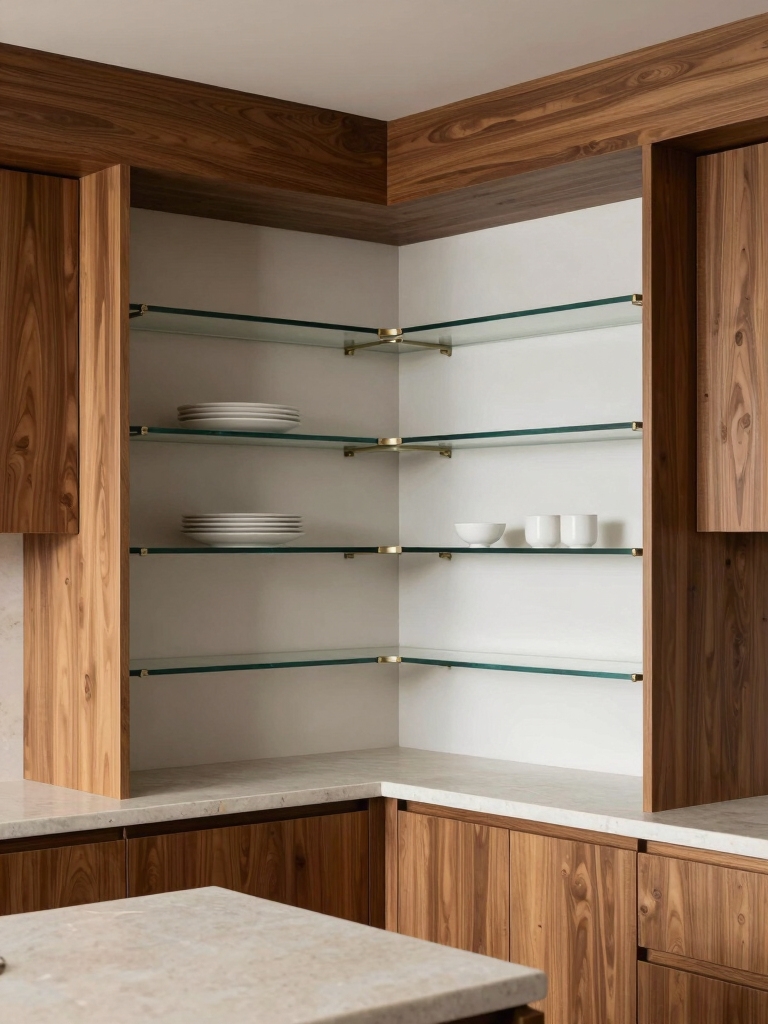
Corner Glass Shelves for Light, Airy Display
Floating corners aren’t a problem with glass shelves that rise light and airy.
I show you how to install sturdy, clear units on walls, not in the way, with brackets hidden beneath. They visually expand counters, reflect natural light, and keep items organized.
Choose tempered glass, proper spacing, and easy-to-reach heights for practical, accessible displays.
Recessed Back Panels to Deepen Storage Near Corners
Recessed back panels can dramatically deepen corner storage without expanding the footprint of your cabinets.
I’ll show you practical tweaks that maximize space, keep lines clean, and avoid clutter. We’ll use smart panel storage, easy access, and durable materials to maintain function.
- Install shallow recessed grooves for slim bins
- Align panels with cabinet faces for seamless look
- Choose moisture-resistant backing to prevent warping
Matching Finishes: Unit Grouping for Cohesive Corners
To create cohesive corners, I start by grouping units with matching finishes and consistent detailing across the adjacent walls.
I choose subtly contrasted textures to keep depth without distraction, then align hardware and trim for a seamless look.
I keep gaps consistent, use same cabinet depths, and plan sightlines so corners read as a single, calm sculpture.
Practical, approachable, organized.
Multi-Zone Corner Setups: Recipes, Mugs, and Daily Essentials
When I design multi-zone corner setups, I separate spaces for recipes, mugs, and daily essentials so workflows stay smooth and clutter stays out of sight.
I keep zones clearly labeled, heights balanced, and reach reachable. This keeps prep fast, cleanup simple, and corners calm.
- Clear recipe nook with measuring tools
- Mug station at eye level, with rails
- Daily-essentials shelf within easy reach
Kid-Friendly Corner Shelves for Accessible Cooking Nooks
Kid-friendly corner shelves make cooking nooks accessible without sacrificing safety.
I design them with kid-height storage for easy reach and sturdy brackets to prevent wobble.
I group kid tools by tag, label trays, and keep sharp items out of reach.
I use door-stops and soft-close hinges, so little hands stay safe while we prep, cook, and clean together.
Lighting Ideas to Highlight Corner Shelves
I’ve already got kid-friendly corner shelves in mind, so now I’m thinking about lighting to make them pop and be practical.
I’ll choose fixtures that boost visibility and mood without clutter. The goal is warmth, efficiency, and accessibility for nightly routines.
- Under-shelf LED strips for safe, even glow
- Small puck lights with dimmers for flexibility
- Task-focused spotlights to highlight display pieces
Material Choices: Wood, Metal, and Glass Pros and Cons
I’ll break down the materials by real-world signals: wood brings a warm, timeless aesthetic; glass adds light and openness, while metal offers durability and a modern edge.
I’ll point out where each choice shines and where it might need reinforcement, so you can match it to your space and use.
Let’s weigh aesthetics with practicality, so you can plan shelves that look great and hold up over time.
Wood Aesthetic Pros
Wood brings warmth and versatility to a kitchen, making countertops, shelves, and accents feel inviting while remaining durable with proper care.
I like wood for its natural grain, easy customization, and timeless appeal. It stays sturdy with routine sealing, resists wear with sensible finishes, and layers well with other materials.
- Natural warmth and grain that elevates decor
- Easy customization and repair with simple steps
- Timeless look that blends with many styles
Glass and Metal Durability
Glass and metal bring a different kind of durability to corner open shelves.
I value their strength in daily use: resistant to moisture, heat, and bumps, with easier cleaning. Metal supports stay steady, while glass showcases items without hiding them.
Pairing with proper finishes prevents scratches, fingerprints, and corrosion. I’d recommend sealed glass and powder-coated steel for longevity.
Practical, precise choices matter.
Budget-Worthy Corner Ideas Under $100
Corner shelves don’t have to breaking the bank. I’ll show practical, budget-friendly ideas under $100 that still look polished and organized.
You’ll save space, maximize function, and avoid clutter. Here are simple options you can implement this weekend:
- DIY plywood shelves with a clear finish for a clean, affordable look
- Wire rack accents paired with glass jars for storage
- End-cap corner cabinet conversion using inexpensive brackets and measurements
Maintenance and Durability Tips for Corner Shelving
Maintenance and durability matter as soon as you install corner shelving, and I’ll show practical steps to keep them sturdy.
I inspect mounting brackets regularly, tighten screws, and choose proper anchors for walls. I weight-test shelves after loading, avoid overhangs, and use non-slip pads beneath items.
I clean with a damp cloth, seal wood if needed, and replace worn hardware promptly for long-lasting stability.
Before-and-After Corner Shelf Transformations You Can Imitate
I’ll show you simple before-and-after corner shelf ideas that boost hidden storage and keep things tidy.
We’ll focus on clever ways to tuck items away while maintaining a cohesive look that ties the room together.
If you’re aiming for both practicality and style, these tweaks point you toward cleaner shelves and a more unified kitchen vibe.
Hidden Storage Gains
Hidden storage in a corner shelf makes a big difference in a small kitchen, and these before-and-after swaps prove it’s doable for any budget.
I show practical gains you can copy now, without fuss, keeping essentials accessible and tidy.
Here are quick ideas you can imitate:
- Install slim pull-out trays behind the door
- Use vertical dividers for lids and tins
- Add a magnet strip for utensils and spice tins
Cohesive Aesthetic Tips
Corners aren’t just storage spots; they set the look.
I share practical, cohesive tips from my before-and-after corner shelf tweaks. Start with a unified color and material palette, mirror shapes, and balanced scale.
I imitate clean lines, minimal decor, and purposeful accents. You’ll see steady shifts, deliberate styling, and organized displays that feel intentional and easy to replicate.
Conclusion
I’ve shown how corner storage can reclaim lost space without chaos, and you can map it out step by step today. Start small, measure twice, and pick a solution that fits your kitchen’s rhythm. As you install, you’ll see every inch become usable, not clutter. It’s not magic, it’s method—and the payoff is a calmer, smarter kitchen you can actually love. Take the leap; the clutter is about to disappear, and your space will breathe easier.


