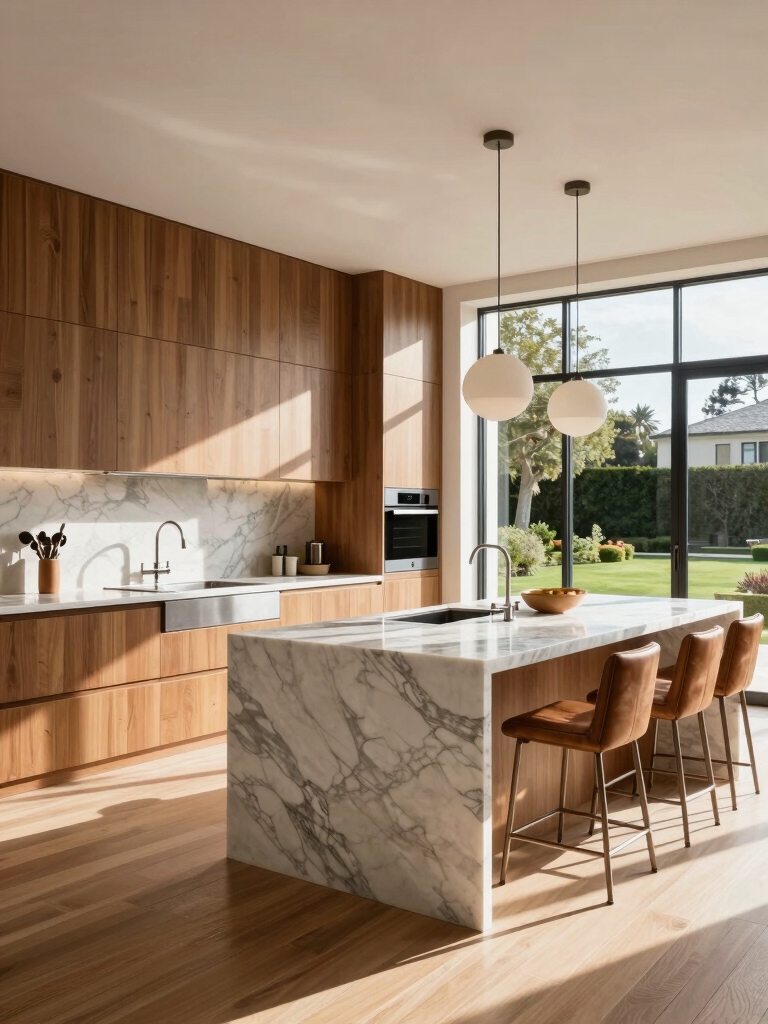
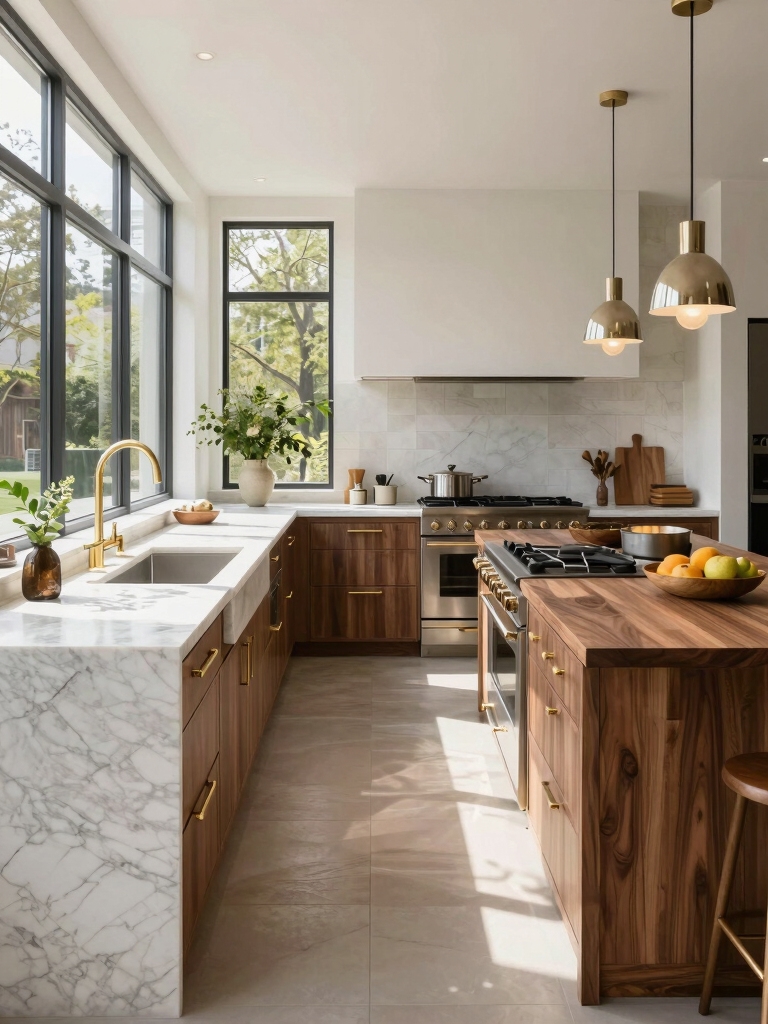
I design double-island kitchens so one island handles heavy prep and appliances while the other anchors casual dining, plating, and service, keeping flow clean and clutter hidden. I size islands for three-to-four-foot clearances, match heights for comfort, and layer materials with a shared palette and subtle contrasts.
I tuck appliances and outlets behind coordinated panels, route circuits and Ethernet early, and place lighting to define zones—keep going and I’ll show how these moves come together in real plans.
The Case for Two Islands: When Scale and Function Demand It
Because a single island can’t always do everything, I often recommend two when the kitchen’s scale and workflow demand it.
I balance one island for heavy prep and appliances with a secondary island for casual dining, serving, or staging.
That separation preserves flow, reduces clutter, and lets each island have a distinct material and purpose, creating a cohesive, flexible luxury environment.
I also incorporate island bench setups to reflect current trends and enhance functionality.
Zoning Essentials: Prep, Cooking, Serving and Social Hubs
Having two islands sets the stage, but good kitchens feel like a well-orchestrated house party where everyone knows their place.
I design one island as a rigorous prep and cleanup zone with sink and storage, the other for cooking, plating and casual dining.
Serving flows between them; seating becomes the social hub. Clear sightlines and task-specific tools keep movement effortless and elegant.
Inspired by how island kitchens transformed my view of cooking spaces, I focus on balance and flow with an emphasis on Island Kitchens.
Optimal Proportions: Sizing Islands for Flow and Balance
When I plan two islands, I size each so movement feels natural rather than forced: one island stays compact enough for prep and cleanup without crowding traffic, while the other stretches long enough for cooktop, plating and comfortable seating.
I favor proportional relationships—clearances of three to four feet, balanced heights, and scaled seating—so spaces feel intentional, elegant and effortlessly livable.
I often reference common kitchen island layouts to visualize how the islands interact and maintain flow.
Aligning Workstations: Sightlines and Efficient Circulation
I often think of islands as stages, so after sizing them for flow I align workstations so sightlines and circulation feel effortless: the prep island faces the main sink and fridge so I can scan tasks at a glance, the cooking island sits a bit farther back with clear lanes for pull-out pans and service, and seating edges are angled to keep guests out of the main traffic path.
I balance lighting and material cues to guide movement, keeping zones intuitive and unobstructed.
Many luxury layouts incorporate seamless kitchen islands to enhance overall flow and circulation.
Storage Strategies: Deep Drawers, Appliance Garages and Open Shelves
I’ll show how deep drawers keep pots, pans and linens orderly so you can grab what you need without rifling.
Thoughtful appliance garage placement hides countertop clutter while keeping mixers and toasters within easy reach.
And I’ll explain how curated open shelving balances function and display, letting the things you use and love become part of the room’s personality.
These ideas echo clever kitchen island storage tricks you’ll love, like using island storage hacks to maximize every inch.
Deep Drawer Organization
I often rely on deep drawers to make the island feel both tidy and accessible, so I arrange them with purpose: heavy pots and pans on the bottom, sheet trays and cutting boards upright along one side, and modular inserts for utensils and lids.
I add clear bins for pantry overflow, soft-close guides for quiet order, and labeled zones so every item has a calm, curated home.
Many homeowners also screenshot striking kitchen island designs to save inspiring layouts for future remodels.
Appliance Garage Placement
After organizing deep drawers so every pan and tray has its place, I look to appliance garages to keep countertop clutter out of sight but still within easy reach.
I place them near prep zones, size them for mixers and toasters, and use roll-up or bi-fold doors for quick access.
Hidden outlets and convenient shelving make daily use effortless and elegant.
I also design islands with thoughtful circulation and storage to maximize every inch and support multiple workstations.
Curated Open Shelving
A few well-chosen open shelves can turn everyday dishes and favorite cookbooks into a practical display that still feels edited and calm.
I lean into mixed textures—ceramic, glass, woven baskets—so essentials stay accessible but beautiful. I group items by color and function, limit quantity, and pair shelves with closed storage nearby.
The result feels intentional, lived-in, and effortlessly refined.
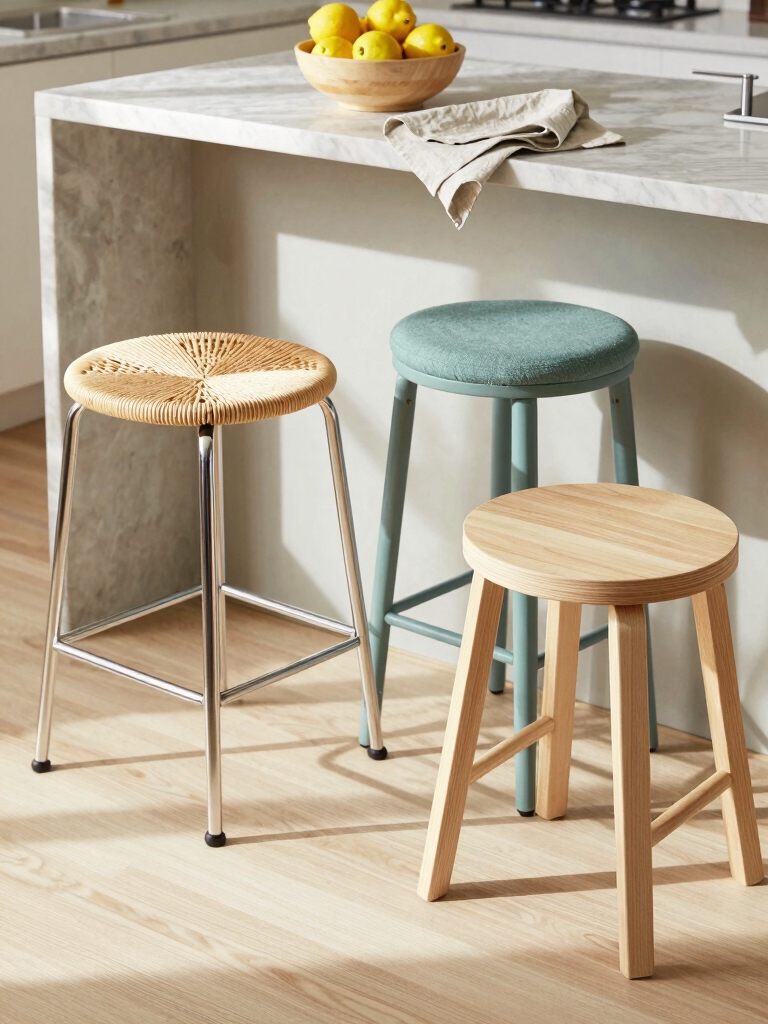
Seating Configurations: Breakfast Bars, Banquettes and Entertaining Zones
When I plan seating around a double island, I think about how people will move, linger and interact—breakfast bars for quick mornings, banquettes for cozy family meals, and dedicated entertaining zones for gatherings.
I choose varied heights, comfortable stools, and a plush banquette with storage. Lighting defines each zone, rugs anchor layouts, and durable fabrics keep the look refined yet welcoming for everyday life.
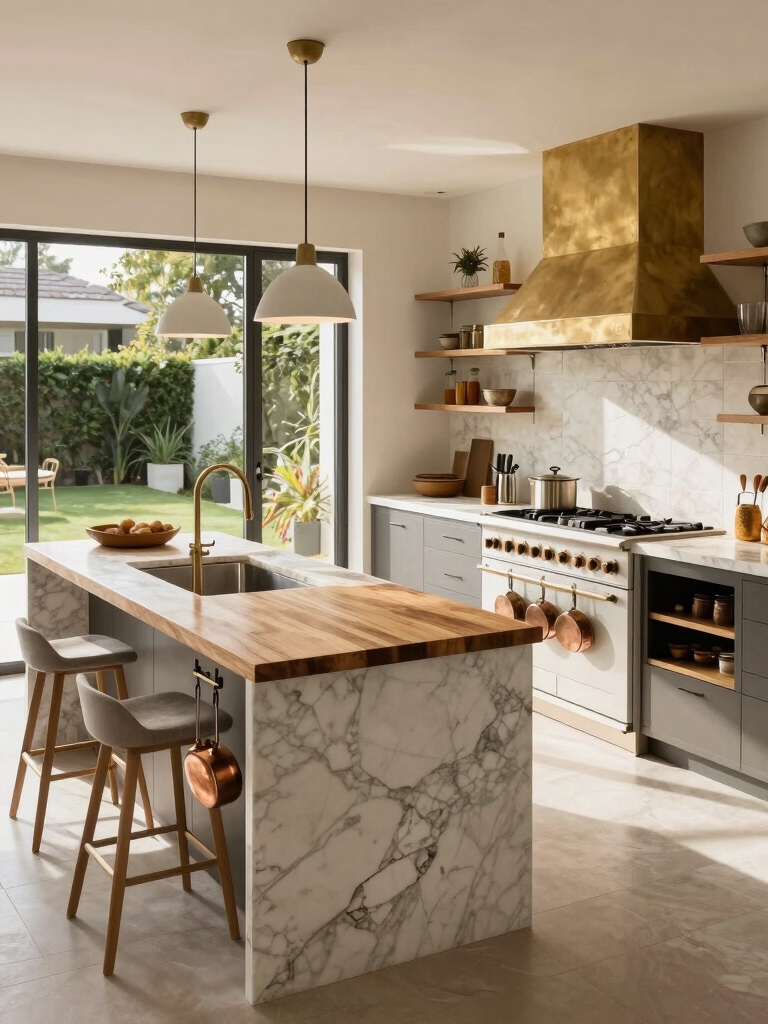
Integrating Sinks and Cooktops: Safety, Venting and Plumbing Considerations
When I plan double islands I keep sinks and cooktops intentionally separate to prevent splashes, cross-traffic, and safety hazards.
I also consider hood placement and venting early so the cooktop performs well without eating into sightlines or storage.
Finally, I map plumbing and gas routing with my contractor so functionality and code compliance are seamless from day one.
Sink–Cooktop Separation
Because I value both safety and flow, I separate sinks and cooktops thoughtfully so water, steam and grease don’t compete in the same work zone.
I place prep sinks on the island for cleanup and staging, keeping the cooktop island dedicated to heat and pans.
This reduces splatter, prevents slips, simplifies plumbing runs, and creates distinct, elegant task zones that feel intentional.
Venting and Hood Placement
I keep my cooktop island focused on heat, but I also think about how venting and hood placement shape safety, smells, and how plumbing runs fit around those zones.
I choose powerful, quiet hoods centered above burners, consider ceiling or island-mounted vents for sightlines, and balance airflow to pull steam away without disrupting nearby prep islands—practical, elegant, and quietly efficient.
Plumbing and Gas Routing
Start by mapping the hidden arteries: I treat plumbing and gas routing as the backbone that lets dual islands feel effortless rather than cluttered.
I plan sinks, drains, traps and gas lines to minimize runs, prioritize venting and access panels, and separate wet and cooking zones.
Safety valves, shutoffs and proper ventilation are nonnegotiable—elegant layout meets rigorous code for calm functionality.
Material Pairings: Durable Surfaces That Read Luxurious
When I pair materials for a double-island kitchen, I aim for surfaces that can take daily wear while still feeling deliberately luxe.
I mix honed stone countertops with hand-finished wood islands, add leathered accents and brushed metal hardware, and choose waterproof, textured cabinetry finishes.
Each pairing balances resilience and tactility so the space reads refined without fragile pretension.
Lighting Layering: Task, Accent and Architectural Fixtures
Pairing resilient, tactile materials set the stage, but lighting is what gives those surfaces life and function.
I layer task lights over prep zones, warm accent beams to highlight texture, and architectural fixtures to define volume.
I choose dimmable, color-accurate sources and mixed scales so each island reads distinct yet cohesive, creating a kitchen that’s practical, inviting, and quietly luxurious.
Concealing Appliances and Trash for a Streamlined Look
I tuck dishwashers, microwaves, and trash drawers behind coordinated panels so the island reads like a single, calm surface rather than a collection of appliances.
I balance hidden utility with easy access—push-to-open fronts, integrated handles, and soft-close mechanisms.
Concealed bins and appliance garages keep clutter out of sight while curated finishes and subtle hardware let the island feel intentional, warm, and effortlessly refined.
Flooring and Rug Choices to Define Island Areas
I like carving out durable hardwood zones around each island to handle traffic and spills while keeping the layout visually anchored.
Over those hardwood anchors, I often layer well-chosen area rugs to add texture, soften sound, and define seating or prep areas without hiding the floor’s character.
Let’s look at how to pick finishes and rug materials that withstand kitchen life while elevating the design.
Durable Hardwood Zones
Often I start by thinking in zones: you want hardwood that can take spills, traffic, and the occasional dropped pan while still framing each island like a piece of furniture.
I choose wide-plank, hand-scraped oak with a durable finish, stain-resistant oils, and slightly darker borders to anchor islands.
It reads elegant, feels lived-in, and survives real kitchen life without fuss.
Layered Area Rugs
Moving from hardwood zones to how rugs can define each island, I like to layer area rugs to add softness, pattern, and practical spill protection without hiding the floor’s character.
I choose low-pile jute or sisal as a base, then a washable patterned runner for traffic lines.
It creates visual rooms, cushions steps, and lets you swap looks seasonally with ease.
Electrical and Data Planning for Modern Connectivity
Because kitchens have become command centers as much as cooking spaces, I plan electrical and data layouts with equal parts function and finesse.
I balance dedicated appliance circuits, discreet under-counter outlets, and recessed USB and wireless chargers so devices stay powered without clutter.
I route Ethernet for smart hubs, position task lighting controls for zones, and guarantee future-proof capacity while keeping aesthetics calm and considered.
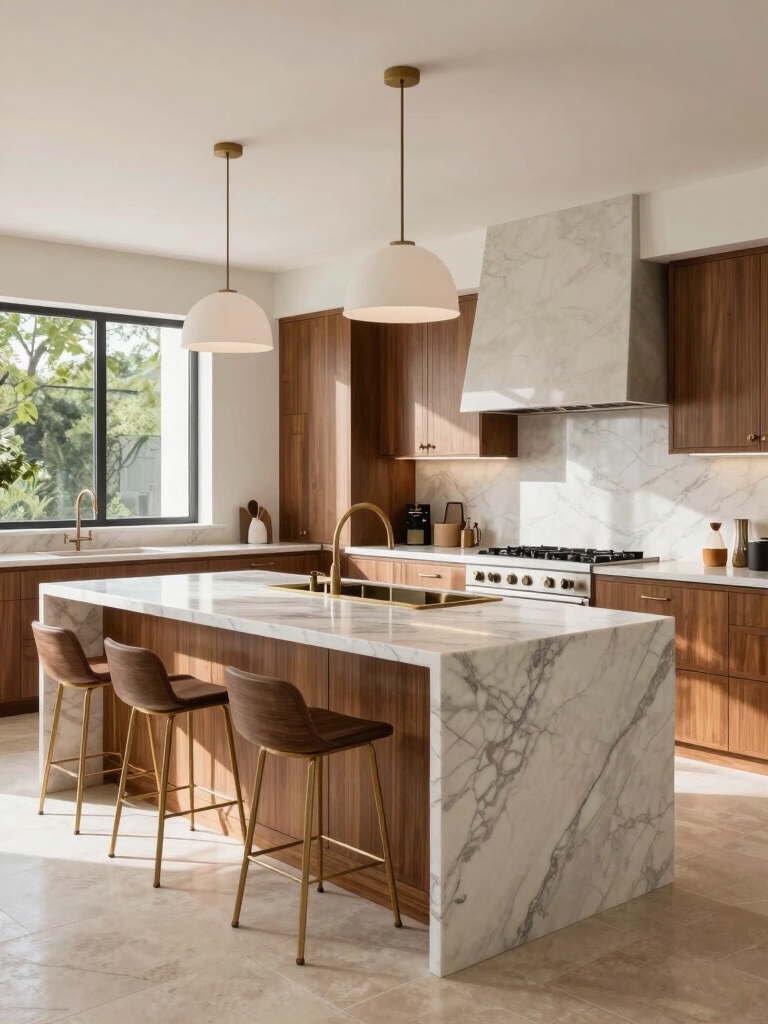
Color, Trim and Hardware to Tie Dual Islands Together
After mapping outlets and lighting, I turn to the visual details that make two islands read as one composed statement.
I choose a shared palette, echoing a dominant cabinet hue with a complementary accent on the second island.
Matching trim profiles and consistent hardware finishes—matte brass or satin nickel—create cohesion, while subtle contrasts in texture and countertop edge keep the scheme layered and intentionally curated.
Transitioning Between Kitchen and Adjacent Living Spaces
I want to help you create a seamless flow between the double-island kitchen and the adjacent living areas so movement feels natural and inviting.
We’ll balance open-plan continuity with clear zone delineation through changes in flooring, lighting, and furniture placement that signal purpose without closing things off.
With a few thoughtful interventions, the whole space will read as one cohesive home while still supporting cooking, lounging, and entertaining.
Open Plan Flow
When I open up a kitchen to the living area, I think about flow as both movement and mood—how people circulate, where conversations land, and which surfaces anchor the eye.
I favor sightlines, comfortable pacing, and layered textures that invite lingering.
- Anchor with a visual focal point
- Use consistent materials to unify spaces
- Scale seating for easy interaction
Clear Zone Delineation
Although open sightlines keep a kitchen feeling generous, I make deliberate moves to define clear zones so the cooking life and the lounging life don’t blur into chaos.
I use subtle floor changes, a low glass partition, and contrasting rug palettes to cue shifts.
Lighting layers, strategic seating placement, and cabinetry backs create purpose without closing off space, balancing hospitality with functional order.
Case Studies: Successful Double-Island Plans From Luxury Homes
Because great design balances beauty with function, I’ll walk you through real luxury homes that got their double-island layouts absolutely right.
I describe how each plan clarifies workflow, supports entertaining, and layers materials for depth.
Learn practical cues you can adapt, from lighting to seating. Examples:
- A prep-focused island paired with a casual dining island.
- Hidden service island with appliance wall.
- Symmetrical islands for entertaining flow.
I’ve walked you through why two islands can transform a kitchen into a living, breathing room — think sunlit marble stretching into a warm walnut workbench where laughter, prep and calm coexist.
Picture guests circling a casual bar while a quiet prep island hums with hidden storage and chargers.
When scale, flow and purpose align, the result feels curated yet effortless — a practical, elegant stage for everyday rituals and memorable gatherings.