


I design L-shaped kitchens with islands that actually work by prioritizing a clear work triangle—stove, sink, fridge—while keeping 36–48″ aisles and 42″ for active cooking. I size islands to room scale (4–6′ medium, 7–9′ large) and tuck seating so stools don’t block flow.
I place ovens and dishwashers with landing zones, hide small appliances, and add kid-safe touches. Stick around and I’ll show layouts, clearances, and storage tricks that make everyday cooking effortless.
Planning the Work Triangle in an L-Shaped Kitchen With an Island

Think of the work triangle as the choreography of your kitchen — I map the stove, sink, and fridge to make daily moves smooth and efficient.
I size clear pathways around the island, keep prep near the sink, and place the fridge for quick grabs.
I balance sightlines, storage, and traffic so cooking feels effortless, playful, and undeniably practical.
I also consider different kitchen sizes and layouts to recommend appropriate island configurations, including kitchen island layouts that suit various square footages.
Optimal Island Sizes for Different Room Dimensions
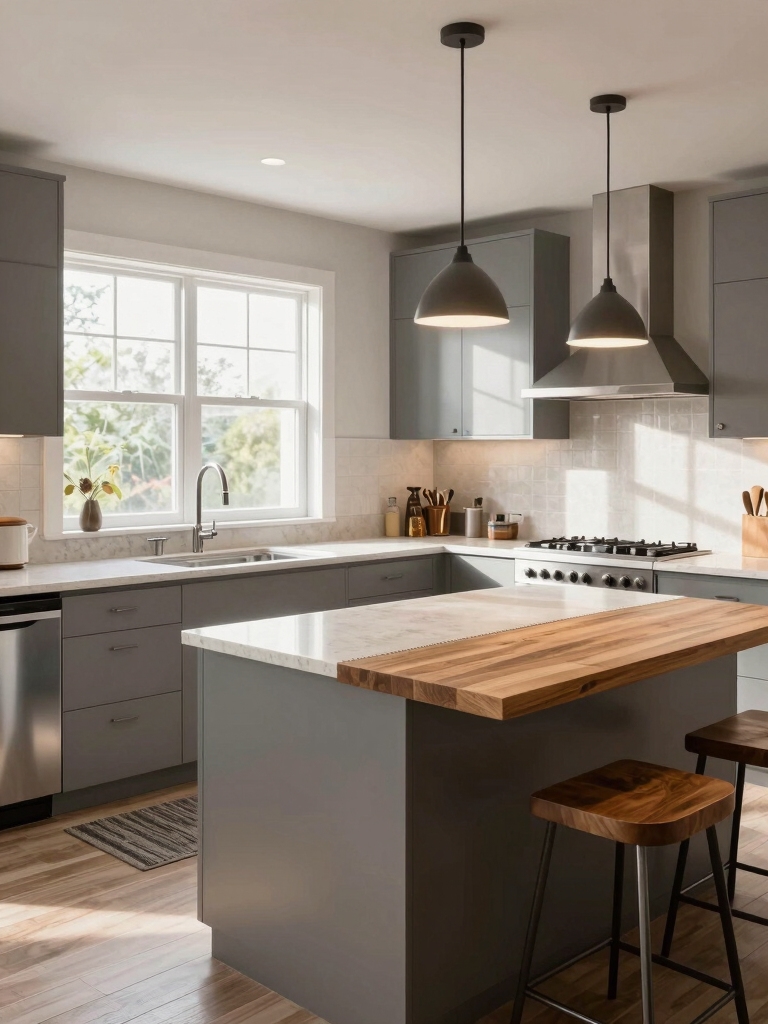
For different room sizes, I size the island to match how you move, cook, and gather — not the other way around.
In small kitchens I favor narrow, long islands for prep and flow; medium rooms get a balanced 4–6 foot island for seating and workspace; large spaces allow 7–9 foot islands with zones for cooking, storage, and lounging without overwhelming the L-shaped layout.
Many of these layouts are inspired by practical island templates that are easy to copy and adapt.
Island Seating Arrangements That Don’t Block Traffic
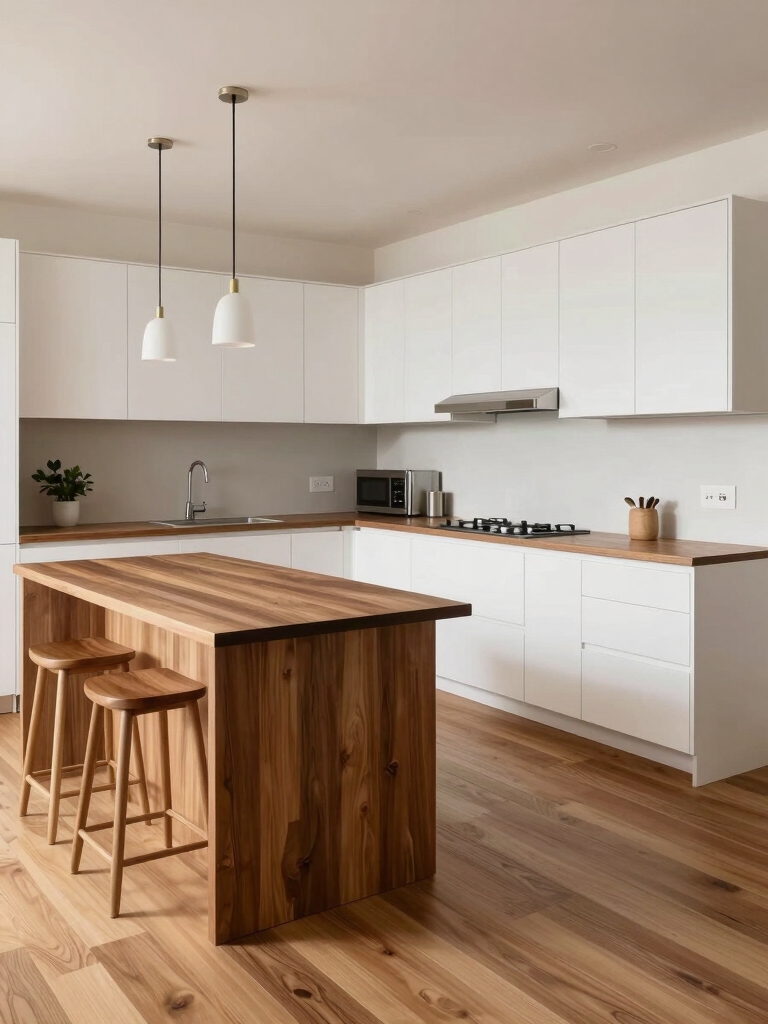
I size islands so they fit movement and purpose, but seating is where good layouts either hum or trip people up — especially in an L-shaped kitchen where aisles and appliance reach matter.
I favor staggered overhangs, back-to-back seating, and banquettes to keep stools out of main paths. I allow 36–42 inches behind seats and choose slim-profile stools so circulation stays effortless and inviting.
A well-planned island can serve as the heart of an L-shaped kitchen with practical island layouts that support traffic flow and function.
Appliance Placement: Ovens, Dishwashers, and Cooktops
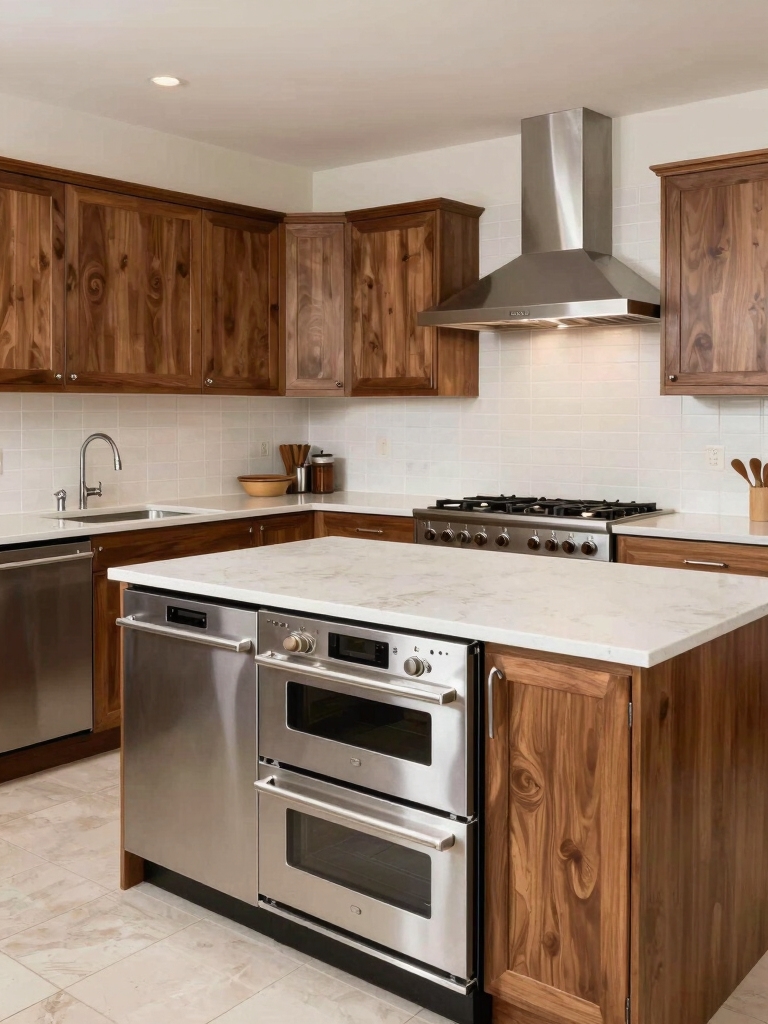
Place ovens, dishwashers, and cooktops with clear intent so the kitchen works like a well-rehearsed show: ovens need landing space, dishwashers require clearance, and cooktops demand safe work zones.
I place ovens at accessible heights, keep dishwashers near sinks but not blocking paths, and position cooktops with counters on both sides for prep. It’s tidy, sensible, and slightly cheeky.
Design islands to avoid common pitfalls like overcrowding and poor workflow by ensuring proper spacing and clearances island mistakes.
Maximizing Storage With Peninsula-Style Islands
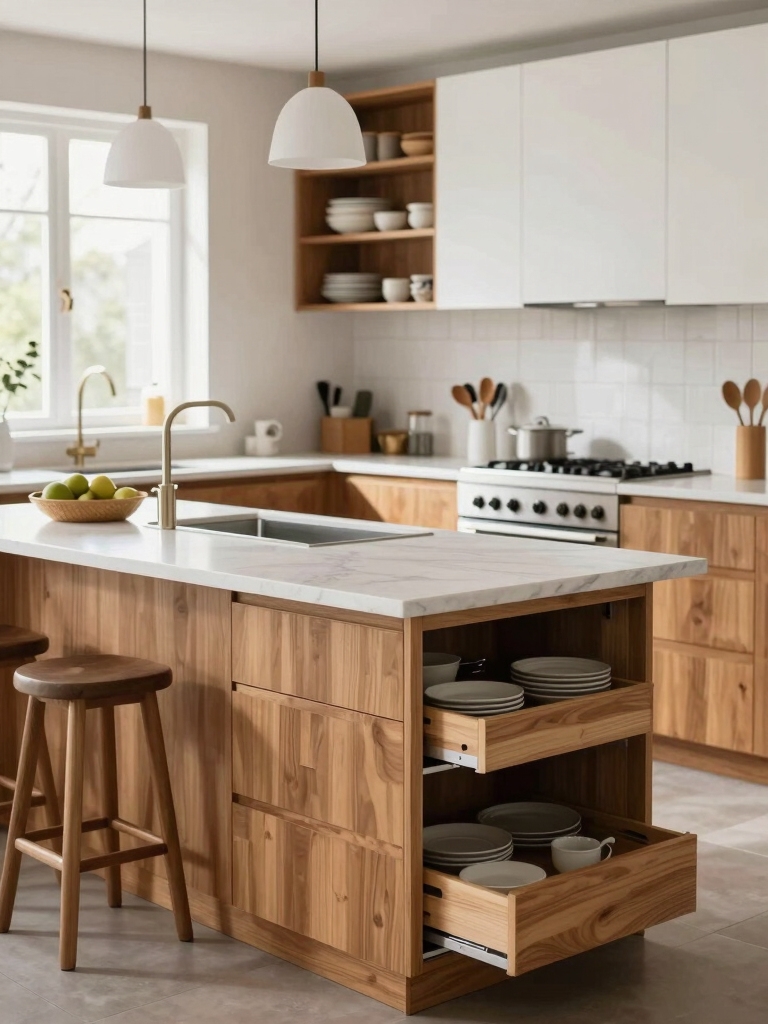
I love using a peninsula-style island to squeeze extra function out of tight L-shaped kitchens, and it’s perfect for smart corner cabinets that actually work.
I’ll show you tricks for turntables, pull-out trays, and toe-kick drawers that make those awkward corners usable.
I’ll also cover integrated appliance storage so your mixers and microwaves stay handy but out of sight.
Peninsula layouts often outperform islands in space-limited homes by providing continuous countertop and seating options without sacrificing traffic flow.
Optimized Corner Cabinets
I often start by imagining how many times we’ll reach into that corner cabinet and how annoyed we’ll be if it’s a black hole—so I design the peninsula-style island to make every inch usable.
I specify pull-out lazy Susans, swing-out shelves, and angled drawers that eliminate blind spots.
It feels clever, tidy, and practical—no choreography required when you’re cooking, grabbing, or stashing.
These solutions are inspired by successful Galley Kitchen transformations that prioritize function and flow.
Integrated Appliance Storage
When you bake, freeze, and brew in the same kitchen, you need appliances to feel like teammates, not intruders—so I tuck them into the peninsula-style island where they work hard without hogging counter space.
Slide-out shelves hide mixers, a shallow under-counter fridge keeps drinks handy, and a recessed coffee station stays tidy.
It’s organized, efficient, and oddly joyful. Clever Kitchen Island Storage Hacks save space and make daily tasks smoother.
Creating Separate Prep and Cleanup Zones
Because prep and cleanup have different rhythms, I like to design L-shaped kitchens with distinct zones so each task flows without getting in the other’s way.
I place a roomy prep counter near the stove with knives, cutting boards, and a trash drawer, and a dedicated cleanup area with a deep sink, dishwasher, and drying rack.
It keeps cooking joyful and mess contained.
Walkway Clearances and Ergonomics to Keep in Mind
When I plan an L-shaped kitchen with an island, I always start by checking minimum walkway widths so people can pass and drawers can open without bumping into each other.
I also keep the work triangle—sink, stove, fridge—tight enough for efficiency but roomy enough to avoid traffic jams.
Let’s walk through the sweet spots for both clearances and triangle distances so your kitchen feels effortless to use.
Minimum Walkway Widths
I usually start by thinking about how people move through a kitchen, and for an L-shaped layout with an island that means prioritizing clear walkways so cooking doesn’t feel like obstacle course navigation.
I favor practical minimums that keep traffic flowing and chefs happy:
- 36″ for a single walkway
- 42″ for two people passing
- 48″ around active zones
- 60″ for heavy traffic or appliance doors
Work Triangle Distances
While I love a dramatic island, I also keep the classic work triangle in mind so cooking stays efficient and comfortable; think of the sink, stove, and refrigerator as teammates that need clear lanes between them.
I aim for 4–9 feet between stations, total triangle perimeter 12–26 feet, and at least 42 inches around islands for two cooks. It’s ergonomics, not rules.
Multi-Function Islands: Breakfast Bar, Prep Station, and Desk
Because an island can do more than hold a bowl of fruit, I like to design it as a trio of zones—breakfast bar, prep station, and mini desk—so every morning, cooking task, or quick admin chore has a dedicated spot.
- Raised counter for casual meals and conversation
- Dedicated prep area with clear work surface
- Petite desk nook for bills or homework
- Unified storage to keep zones tidy and flexible
Integrating a Sink or Cooktop Into the Island Safely
If you’re thinking about putting a sink or cooktop in your island, I’ll walk you through the must-haves so it works smoothly and safely.
We’ll cover plumbing and drainage routing, proper ventilation and fire-safety measures, and the clearances and workflow you need so cooking and cleaning don’t trip over each other.
With a few smart choices your island can be gorgeous and totally functional—without surprises.
Plumbing and Drainage Planning
As you plan plumbing and drainage for an island sink or cooktop, I’ll help you balance function, code compliance, and clean lines so the island stays as beautiful as it’s useful.
I walk you through choices that minimize runs, hide pipes, and prevent clogs without drama.
- Place drains near main stacks
- Use accessible cleanouts
- Insulate against noise
- Coordinate with electrician
Ventilation and Fire Safety
Plumbing and vents often share the same quiet choreography under an island, so when you plan drains and cleanouts you’ll also want to think about airflow and fire safety around a sink or cooktop.
I recommend a dedicated range hood vented outside, splashproof outlets, and clearances from combustibles.
I also suggest installing automatic shutoffs and a nearby extinguisher for calm, confident cooking.
Workflow and Clearance Zones
When I design an island with a sink or cooktop, I start by mapping clear work zones so people can move, prep, and clean without bumping into each other.
I balance safety, sightlines, and entertaining flow, then enforce clearance standards so traffic stays smooth.
- 36–48″ between island and counters
- 42″ for active cooking aisles
- Dedicated landing zones
- Drawer and door swing checks
Lighting Strategies for L-Shaped Kitchens With Islands
I often start by picturing how each light will work — task lighting over prep zones, ambient light to set mood, and accent fixtures to highlight the island — because an L-shaped kitchen with an island needs layered lighting to function and feel inviting.
I pick adjustable pendants, under-cabinet strips, and dimmable overheads so cooking, dining, and late-night chats all look and feel right.
Materials and Finishes That Tie the Island to the L-Shape
Think of the island as the conversation starter and the L-shape as the supporting chorus — I choose materials and finishes that make them sing together.
I blend contrast and continuity: matching countertop veining, echoed hardware, intentional paint accents, and mixed textures to define zones without discord.
- Coordinated countertops
- Unified hardware finishes
- Accent paint tie-ins
- Textural contrasts
Designing for Entertaining: Buffet and Serving Flow
Now that we’ve linked the island and L-shape visually, let’s plan how they’ll work when guests arrive. I position the island as a staging zone—plates, drinks, hot trays—while the L runs prep and refill stations.
Clear walkways, reachable outlets, and trash spots keep flow smooth. I favor layered serving heights and cozy spill zones so guests can mingle without traffic jams.
Kid-Friendly Layouts and Safety Considerations
Designing with little ones in mind means balancing function, safety, and a bit of whimsy—I’ll show you how to make an L-shaped kitchen with an island both practical and kid-friendly.
I focus on zones, durable finishes, and simple rules that keep chaos charming.
- rounded island corners and soft-close drawers
- lower storage for kid dishes and snacks
- non-slip flooring near prep areas
- safety locks and clear sightlines
Small-Space Solutions: Slim Islands and Floating Shelves
I love how a slim island can pack serious function into a tight L-shaped kitchen without feeling bulky.
I’ll show how a narrow island gives you prep space and storage while keeping traffic flowing, and how floating shelves lift visual weight to make the room breathe.
Let’s look at practical ways to pair a slim island with shelves for maximum usability and style.
Slim Island, Big Function
I’ll show you how a slim island can punch well above its weight: in tight L-shaped kitchens it creates extra prep space, storage, and a casual dining spot without crowding the flow.
I lean into narrow profiles, clever drawers, and seating that tucks away.
Think sleek, useful, charming.
- slim countertop for chopping
- shallow cabinets for dishes
- pull-out trash
- tucked stools for two
Floating Shelves for Flow
Slim islands give you a neat, usable spine in a tight L — now let’s layer in floating shelves to keep the vibe open and airy.
I love how slim shelving adds display without heaviness: ceramics, herbs, a curated cookbook stack. They free counter space, echo the island’s lines, and make the room feel breathable.
Install at staggered heights for playful rhythm and easy reach.
Open-Plan Coordination With Dining and Living Areas
When I plan an open L-shaped kitchen with an island, I think about how each zone—cooking, dining, lounging—will flow together so guests can move naturally from chopping to chatting without feeling crowded.
I balance sightlines, circulation, and scale, then tweak lighting and textures for cohesion.
- Clear pathways
- Matching materials
- Flexible seating
- Zoned lighting
I’ve loved mapping L-shaped kitchens with islands that actually work — and here’s a tidy takeaway: you’ll want at least 36 inches of clear walkway around an island (studies say 90% of designers recommend it).
That simple stat helps me decide island size, seating, and traffic so kitchens feel roomy, safe, and sociable.
Mix clever storage, purposeful seating, and playful finishes, and you’ll get a kitchen that’s both curated and completely livable.


