I’ll help you revive a 1960s kitchen so original cabinets, playful colors, and vintage details feel fresh and useful. I start by saving sturdy “bones” — hardwood, tile, and cabinetry — then update systems and insulation before finishes.
I blend modern laminate or terrazzo-look counters with warm butcher block, sculptural brass pulls, retro-inspired appliances, layered lighting, and smart storage that hides clutter. The result is nostalgic, practical, and surprisingly chic — keep going to pick up practical how-tos and sourcing tips.
Assessing What to Keep From Your Original 1960S Kitchen

Let’s start by taking a clear-eyed walk through the room: I look for bones worth saving—built-in cabinetry, original hardwood, funky tile patterns—that can anchor a modern update without feeling dated.
I catalog charm versus compromise, keep what’s structurally sound and character-rich, and rip out what limits function.
Then I prioritize fixes that reveal vintage soul while enabling fresh, efficient living.
Additionally, when original elements are preserved I lean on authentic restoration techniques to honor the era’s detail and craftsmanship, especially with period cabinetry that defines the room.
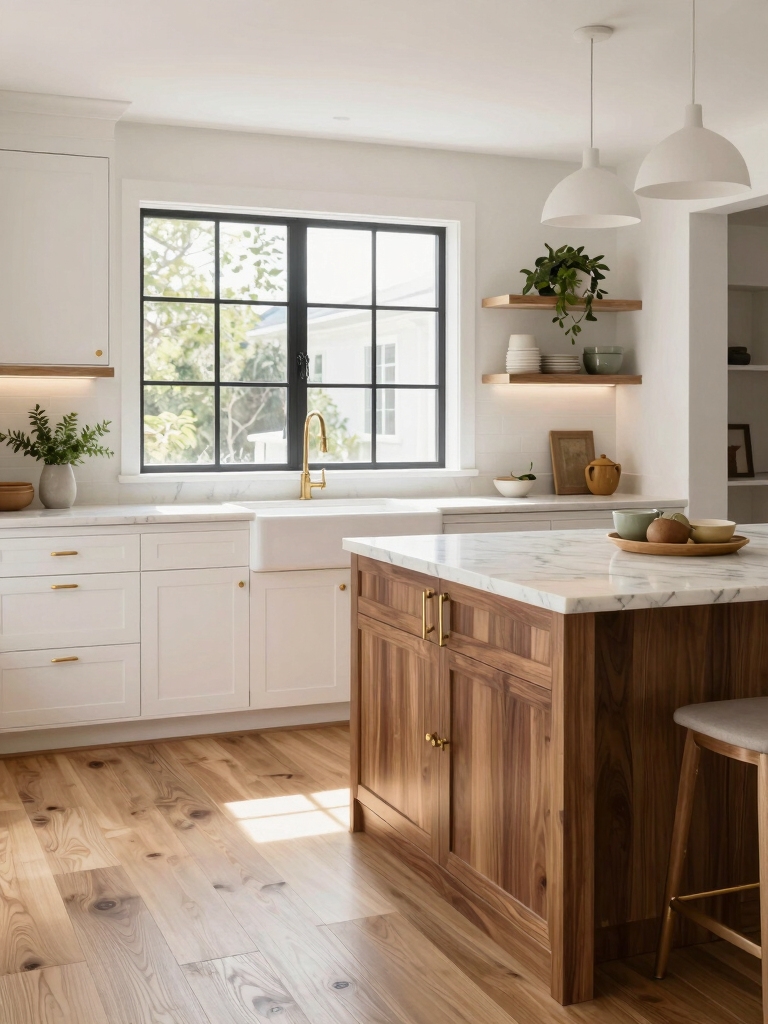
Planning a Layout That Respects the Era and Modern Flow

Having picked which vintage pieces earn a second life, I start reworking the floorplan so the room feels both period-right and pleasantly usable today.
I balance classic zones — prep, cook, serve — with modern sightlines and circulation.
I tuck appliances where they respect original sightlines, add a cozy breakfast niche, and keep traffic flowing so nostalgia and function live happily together.
I often center the layout around a sturdy island inspired by Cozy Rustic designs to anchor the room and provide versatile workspace.
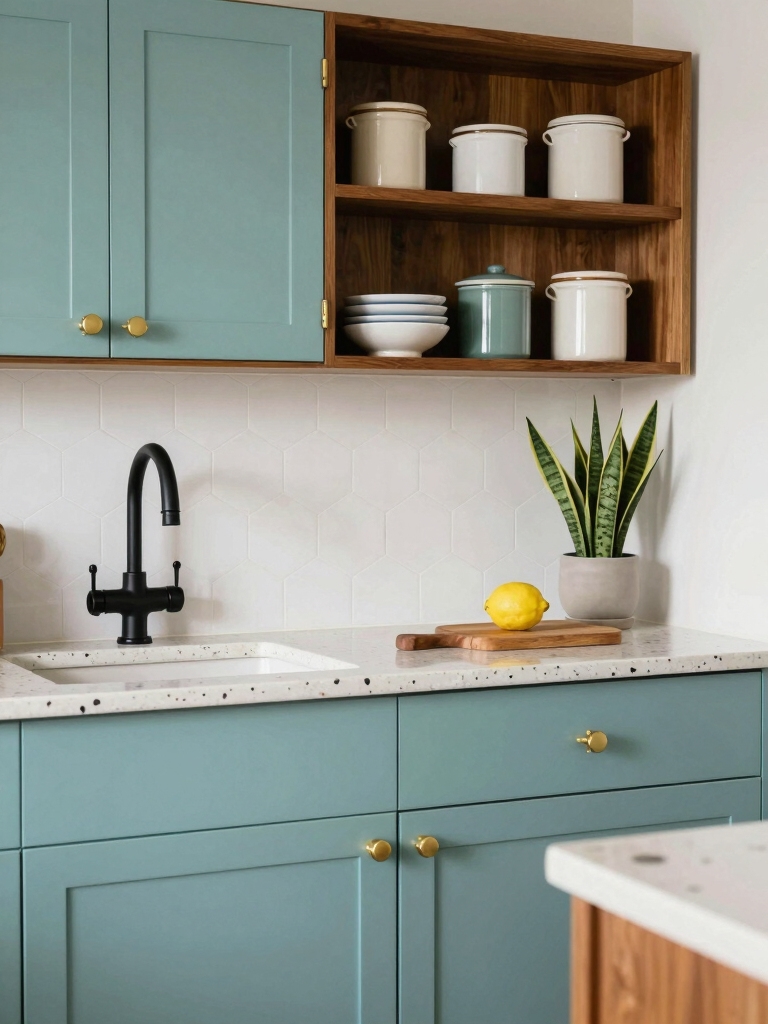
Choosing a Color Palette That Nods to the 1960s

I lean into color like a conversation — a wink to 1960s optimism without getting trapped in kitsch — so I pick a restrained palette that still sings: avocado and mustard feel bold when paired with warm cream and charcoal anchors, while mint or pale aqua become airy counterpoints to walnut and brass accents.
I balance saturation, add graphic pops, and keep surfaces calm. Dark green cabinets bring a moody, luxurious vibe and can elevate the whole scheme when paired with warm metals and wood moody dark green.
Updating Appliances With Retro-Inspired Efficiency

I’m updating the appliances so the kitchen runs like a modern engine while still smiling in 1960s clothes: think sleek, energy-efficient tech wrapped in shapes and finishes that hint at an era of optimistic design.
I pick pieces that balance charm with performance.
- Color-matched retro fridge, ENERGY STAR.
- Quiet induction range with vintage knobs.
- Smart washer-style dishwasher, chrome accents.
Small Island Kitchen Ideas stealing the spotlight
Laminate Countertops: Modern Materials With Vintage Looks

I love how modern laminates let you get those bold 1960s patterns without sacrificing performance.
They’re scratch- and stain-resistant, easy to care for, and surprisingly affordable, so you can play with color and texture without breaking the bank.
Let me show you how to pick a pattern that reads vintage but holds up to everyday life.
Concrete kitchen islands are having a moment, and pairing laminate counters with a concrete island can balance vintage pattern with modern gravitas.
Retro Patterns, Modern Durability
I’ll call out a secret: you can get that unmistakable 1960s vibe without sacrificing durability or budget.
I chose laminate that mimics terrazzo and bold geometrics, then tested finishes for scratch and heat resistance.
I love how color pops meet practical wear.
- Terrazzo-look laminates
- High-pressure options
- Protective matte finishes
Marble kitchen islands remain a timeless investment because their natural veining and long-lasting surfaces elevate resale value and aesthetic appeal, even when you opt for durable alternatives like laminate that replicate those looks — see Marble Kitchen Islands for more.
Affordable, Easy-to-Maintain Surfaces
Often I reach for laminate when I want vintage flair without the fuss: it gives me that glossy 1960s pop — think bold colors, terrazzo patterns, and slim retro edges — while staying tough and affordable.
I choose low-maintenance surfaces that resist stains and scratches, mix playful colors with sleek profiles, and refresh my kitchen’s soul without heavy cost or upkeep—practical, chic, and utterly joyful.
Many budget-friendly projects, like building a simple prep island or repurposing a dresser, can be completed for under $500 and add both function and vintage charm to the space with affordable materials.
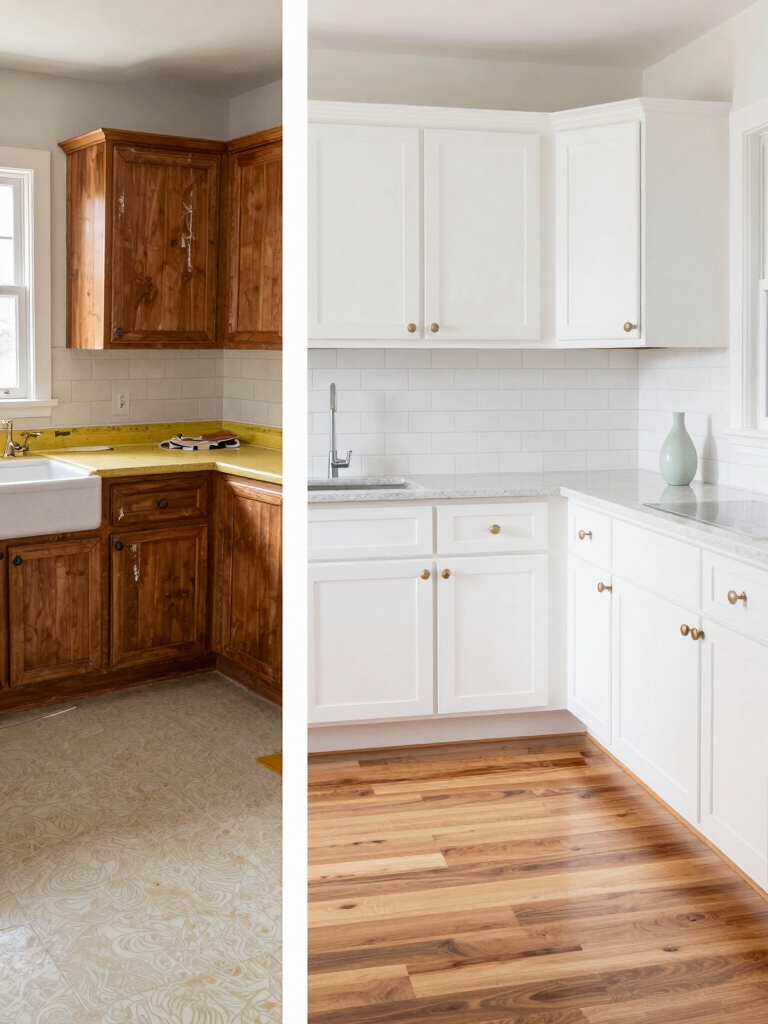
Refacing and Restoring Original Cabinetry
Let’s peel back the decades and bring your original cabinets back to life—I’m talking careful restoration that keeps their midcentury soul while swapping dated finishes for a cleaner, more current look.
I’ll guide you through selective sanding, gentle repairs, and smart refacing that honors original lines while reviving color and texture.
- Strip and sand
- Reglue and reinforce
- Reface with veneer
Hardware and Pulls: Small Details, Big Impact
Swap a tired knob for a sculptural pull and you’ll see how tiny hardware choices rewrite a room’s mood—I’m talking about the difference between “vintage flea-market charm” and “intentional modern warmth.”
I like to start by evaluating scale and sightlines: thin bar pulls read sleek on flat-front doors, while rounded brass knobs soften angular midcentury lines. I mix finishes for rhythm and focus.
Flooring Options That Balance Durability and Period Style
I usually start by matching a floor’s wearability to the room’s personality: you want something that stands up to kids, pets, and parties but still reads like it belongs in a 1960s kitchen.
- Terrazzo-inspired porcelain — durable, speckled vintage vibe.
- Warm walnut-look vinyl plank — resilient, midcentury warmth.
- Checkerboard linoleum — easy-clean, graphic period charm.
Lighting Strategies to Evoke Midcentury Ambiance
Often I start with layered light — a mix of task, ambient, and accent — because it lets me shape both function and mood while staying true to midcentury sensibilities.
I pick warm-toned bulbs, sculptural pendants, and undercabinet strips to highlight surfaces and silhouettes.
Dimmer controls and strategic placement make evenings cozy or bright for cooking, keeping the vibe clean, playful, and effortlessly chic.
Backsplash Ideas That Blend Pattern and Practicality
While keeping cleanup and durability top of mind, I look for backsplash patterns that sing without shouting — think small-scale geometric tiles, glazed brick in soft hues, or a playful checker that ties counter and cabinetry together.
- Matte subway with contrasting grout for subtle rhythm.
- Hexagon mosaics for midcentury geometry and easy wipe-down.
- Soft-glazed brick for texture that resists stains and feels warm.
Open Shelving and Display for Vintage Dishware
Bring out the best in those chipped floral plates and avocado-green tumblers by staging them on open shelves where form meets function.
I mix heights and negative space, arranging stacks, single-plate stands, and grouped glassware so each piece breathes.
I keep styling intentional—curate, rotate seasonally, and anchor displays with a few modern accents to keep the look playful, fresh, and surprisingly chic.
Integrating Modern Storage Solutions Seamlessly
After a few rotating seasonal displays, I like to fold modern storage into the same visual story so vintage pieces stay accessible without feeling cluttered.
I choose unobtrusive bins, slim pull-outs, and magnetic strips that complement retro colors. They hide function without hiding charm.
- Clear stackable bins
- Slim cabinet pull-outs
- Magnetic utensil rails
Mixing Textures: Formica, Wood, Metal, and Tile
With a nod to both nostalgia and practicality, I love layering Formica, wood, metal, and tile so each surface plays off the others instead of competing.
I balance glossy Formica counters with warm butcher-block accents, matte tile backsplashes, and sleek brass pulls.
The mix feels intentional: tactile contrasts, easy upkeep, and a playful modernist rhythm that keeps vintage charm feeling fresh and edited.
Sourcing Vintage and Reproduction Pieces
Layering materials naturally leads to hunting for pieces that wear their history well, so I look for vintage and reproduction items that feel like they belong rather than shout period drama.
I mix authentic finds with faithful recreations, prioritizing patina, scale, and function. I source thoughtfully:
- Estate sales and flea markets for true character
- Reproduction shops for reliable hardware
- Local craftspeople for tailored, era-appropriate updates
Budgeting and Phasing a Period-Sensitive Remodel
I’ll always start by fixing the bones—roof, wiring, plumbing—so your vintage aesthetic won’t sit on shaky ground.
I break the budget into period-budget tiers, deciding where authentic pieces earn splurges and where smart reproductions keep costs sane.
Then I phase the work room by room so you get usable space sooner and can spread expenses without losing the 1960s soul.
Prioritize Structural Fixes
Because a 1960s kitchen wears its age in hidden ways, I start by hunting down the bones—roof lines, joists, wiring, and plumbing—before I fuss over finishes.
I prioritize safety and function, then phase work to keep surprises manageable.
Here’s my quick checklist:
- Structural repairs first
- Systems (electrical/plumbing) next
- Moisture and insulation last
Allocate Period-Budget Tiers
When I plan a period-sensitive remodel I break the budget into clear tiers so the vintage charm gets preserved without throwing money at every detail; this lets me decide where to invest for authenticity, where to mimic the look affordably, and where to save for future phases.
I assign high-dollar items (original fixtures), mid-tier updates (refinished cabinets), and low-cost accents (period-appropriate hardware) to balance impact.
Phase by Room
Although the overall budget sets the rules, I phase the remodel room by room so each space earns its period look without derailing the whole project; that means prioritizing the kitchen’s structural and mechanical needs first, then layering in visible vintage elements, and saving decorative touches for a final pass.
- Structural & systems first
- Cabinetry, counters, appliances next
- Styling, lighting, textiles last
I’ve loved revisiting a 1960s kitchen with an eye for what’s worth saving and what needs a gentle edit. Keep the soul, update the bones, and let vintage pieces wink at modern convenience so the space hums like a well-tuned radio.
Think playful but smart: retro colors, laminate that behaves like luxe stone, and clever storage that disappears. With phased budgeting and thoughtful sourcing, you’ll get a kitchen that’s timelessly chic and joyfully livable.