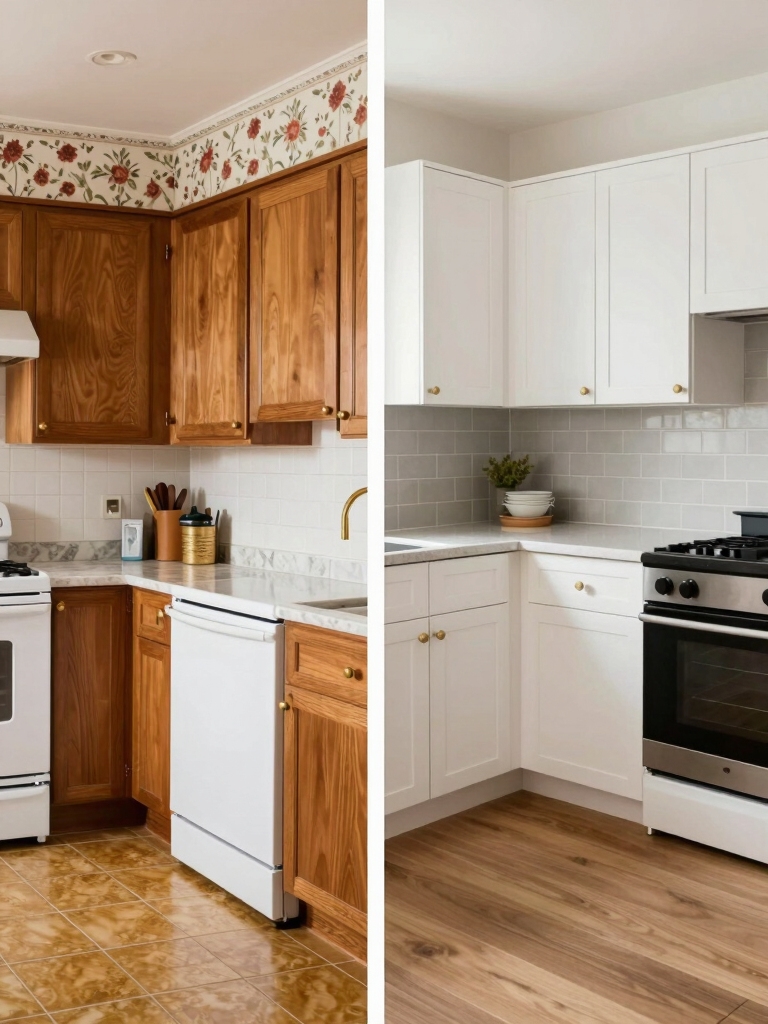
I’ve remodeled tight single‑wide kitchens on a dime by mapping fixed elements, prioritizing safety, and phasing work so essentials come first. I paint walls and cabinets in light neutrals, swap hardware, add peel‑and‑stick counters or butcher‑block tops, and install plug‑in under‑cabinet lights for task clarity.
I use slim appliances, vertical storage, and thrifted carts on casters to free counters. I track costs, keep a contingency, and choose cosmetic upgrades that read high‑end — keep going for step‑by‑step plans.
Assessing Your Single‑Wide Kitchen: Layout and Limitations

Let’s start by taking a hard look at what you’ve got: single-wide kitchens are compact, so I’ll help you map the layout, note fixed elements (like plumbing, electrical runs, and load-bearing walls), and identify real constraints versus things we can reconfigure.
I’ll measure clearances, catalog appliances and storage, flag ventilation and utility limits, and suggest practical layout tweaks that maximize flow and function.
I’ll also show how small upgrades and finishes can create a luxury kitchen feel without blowing your budget.
Setting a Realistic Budget and Priorities

I’ll start by listing the must-have items for your single-wide kitchen so we understand what can’t be compromised.
Then I’ll allocate funds by priority—appliances and plumbing first, finishes and extras after—and set aside a contingency.
As we go, I’ll track costs and adjustments so the plan stays realistic and you don’t get surprised.
Small galley layouts benefit from space-saving solutions like compact storage and careful planning to make the most of limited square footage.
Define Must-Have Items
Because every mobile home remodel has constraints, I start by listing the must-haves I won’t budge on—those items that affect daily function, safety, or long-term value.
I prioritize a reliable stove, safe electrical upgrades, durable flooring, leak-free plumbing, efficient storage, and good lighting.
These essentials keep the kitchen usable, code-compliant, and resale-friendly without blowing the budget. Contractors often rely on budget-friendly tricks designers use to stretch dollars further.
Allocate Funds by Priority
When I set a budget, I start by listing priorities in order—safety and function first, then durability, aesthetics, and finally extras—so every dollar has a purpose.
I allocate funds to essentials, reserve a contingency, and assign smaller amounts to upgrades I actually want.
Below are focused funding categories:
- Electrical/plumbing fixes
- Appliances that work reliably
- Durable cabinetry/surfaces
- Paint and lighting
- Small decorative touches
Contractors sometimes skip mentioning clever, low-cost strategies like using stock materials or cosmetic-only updates to save money, so consider inexpensive remodel moves that preserve function without full replacements.
Track Costs and Adjustments
Start tracking every expense as soon as you buy something or hire someone. I keep a simple spreadsheet and receipt folder, updating totals and categories weekly.
If a cost overruns, I reprioritize—delay nonessentials, swap materials, or DIY a task. Regular reviews let me spot savings, avoid surprises, and finish the remodel on budget without sacrificing the kitchen’s most important functions.
I also focus on budget-friendly upgrades like paint, hardware, and lighting to maximize impact for minimal cost.
Quick Paint Tricks That Open Up Space

I’ll usually start a remodel by painting the walls a light, neutral color to make the kitchen feel larger and more cohesive.
Then I brighten the trim and ceilings with a crisp white or soft contrast to reflect light and define the space.
Those two quick changes give the whole room an instant lift without a big budget or fuss.
Painting the cabinets can truly transform the kitchen with a fresh, modern look and improved brightness, especially when you choose durable, high-quality paint for freshly painted cabinets.
Light, Neutral Wall Colors
Although a fresh coat of paint seems small, I’ve found light, neutral walls transform a cramped mobile home kitchen into a bright, airy space without structural changes.
I pick warm whites, soft greys, or pale greiges to reflect light and hide imperfections. Pair with simple decor and functional storage to keep the feel open.
- Warm white
- Soft grey
- Pale greige
- Subtle taupe
- Low-sheen finish
A little paint can make a tiny kitchen feel twice as large by using light-reflecting colors and strategic placement.
Bright Trim and Ceilings
I often paint trim and ceilings a brighter white than the walls because that simple contrast instantly lifts a mobile home kitchen and makes the ceiling feel higher.
I choose a durable, low-sheen white for trim and a flat white for ceilings to hide flaws.
Crisp edges, quality tape, and a small brush make this affordable refresh look custom and spacious.
Affordable Cabinet Upgrades: Paint, Vinyl, and Hardware

Usually, I focus on changes that give the biggest visual impact for the least money, and cabinet updates are a perfect example.
I pick quick, durable tweaks: paint for color shifts, peel-and-stick vinyl for fronts, new knobs and pulls, hinge upgrades, and simple trim to suggest depth.
- Repaint doors
- Apply vinyl overlays
- Replace hardware
- Upgrade hinges
- Add trim accents
DIY Countertop Solutions That Look Expensive

I’ve found three budget-friendly ways to make cheap countertops look high-end: peel-and-stick laminate for quick coverage, faux concrete overlays for an industrial look, and refinishing butcher block for warmth.
Each option needs only basic tools and a bit of patience, and I’ll walk you through pros, prep, and common pitfalls.
If you want, we can start with the easiest method first.
Peel-And-Stick Laminate
Try peel-and-stick laminate when you want a dramatic countertop upgrade without hiring pros or breaking the bank.
I’ve used it in tight kitchens: it peels cleanly, adheres fast, and masks worn surfaces.
I’ll walk you through cuts, seams, and sealing edges to keep water out.
- Measure twice, cut once
- Use a straightedge
- Heat to conform curves
- Smooth bubbles outward
- Caulk edges
Faux Concrete Overlays
Give your counters a high-end, industrial look without the contractor price by using a faux concrete overlay—I’ve done it on a budget and it transforms everything.
I patched, skimmed, and layered thin cementitious overlay for texture, then sealed with a durable matte sealer. It resists stains, wipes clean, and keeps installation simple. Tools were minimal; the payoff felt luxe.
Butcher Block Refinish
If you liked the industrial look but want something warmer, I switched a few counters to butcher block and it instantly softened the space while still looking high-end.
I sanded, filled gaps, sealed with food-safe oil, and maintained edges for durability. It’s affordable, repairable, and surprisingly elegant—perfect for a single-wide refresh.
- Sand smooth
- Fill gaps
- Oil regularly
- Seal edges
- Repairable surface
Low‑Cost Backsplash Ideas Using Peel‑And‑Stick Materials
I often recommend peel-and-stick backsplashes when you’re remodeling a mobile home kitchen on a tight budget because they’re affordable, easy to install, and come in lots of stylish patterns that mimic tile, stone, or metal.
I suggest prepping surfaces, planning cuts, and choosing washable, heat-resistant options. Use accent strips, grout-look tiles, or mirrored panels to elevate the space without costly labor.
Smart Storage Hacks for Narrow Kitchens
Narrow kitchens can feel cramped, but I’ve learned that smart storage turns every inch into usable space without making the room feel cluttered.
I focus on vertical solutions, slim organizers, and multipurpose pieces to keep surfaces clear and workflow smooth.
- Magnetic knife strip and spice jars
- Narrow pull-out pantry
- Under-shelf baskets
- Over-the-door racks
- Fold-down prep table
Repurposed and Thrifted Furniture That Fits
When I look beyond built-ins and organizers, thrifted and repurposed furniture becomes my secret weapon for fitting function into tight kitchen footprints.
I hunt for narrow cabinets, slim baker’s racks, and vintage carts I can sand, paint, and add casters to.
Each piece gets curated storage, a durable top, and hooks—practical, budgetwise, and perfectly scaled for single wide kitchens.
Lighting Improvements on a Budget
Brightening up a small mobile home kitchen doesn’t have to break the bank — I focus on a few targeted swaps that multiply light and cut shadows.
I choose high-CRI LED bulbs, add under-cabinet strips, and reposition fixtures to improve task lighting without rewiring.
- Swap bulbs to daylight LEDs
- Install under-cabinet strips
- Use plug-in pendant lights
- Add mirror-like reflective backsplashes
- Paint trim in light tones
Flooring Options That Refresh Without Replacement
When a full floor replacement isn’t in the budget, I look for smart quick fixes that still lift the room.
Peel-and-stick vinyl tiles give you a fresh, waterproof surface, paint-over techniques can brighten worn linoleum, and well-placed area rugs or runners hide trouble spots while adding color and texture.
I’ll walk you through pros, prep, and when each option makes the most sense.
Peel-And-Stick Vinyl Tiles
Peel-and-stick vinyl tiles are a quick, budget-friendly way I recommend to refresh a mobile home’s kitchen floor without ripping anything out; they peel off easily if you change your mind.
I like them for easy installation, forgiving layouts, and low maintenance. Consider these points:
- simple peel-and-place
- water-resistant options
- realistic wood or stone looks
- minimal tools required
- replace single tiles as needed
Paint-Over Existing Floors
I often recommend painting over existing floors when you want a fresh look without the mess and cost of replacement; I use this method in mobile-home kitchens because it’s fast, affordable, and totally customizable.
I prep by cleaning, sanding glossy spots, and priming.
I choose durable floor paint and add stencils or simple stripes for personality.
It’s low-cost, quick, and surprisingly durable.
Area Rugs and Runners
After painting your floor, you can quickly soften the look and add warmth with area rugs and runners—these let you refresh style, protect high-traffic zones, and hide wear without ripping out flooring.
I pick durable, washable pieces, layer for interest, and anchor zones. Consider these options:
- Low-profile runner for narrow aisles
- Washable cotton rug
- Non-slip pad
- Jute for texture
- Pattern for disguise
Appliance Strategies for Small Budgets and Tight Fits
I usually start appliance decisions by measuring, because tight fits and small budgets leave no room for assumptions; I’ll show you practical choices that give you full function without overspending.
I recommend slimline fridges, countertop dishwashers, and combo microwave-vent units.
Buy reliable refurbished or scratch-and-dent models, prioritize energy efficiency, and plan clearances. Fit matters more than brand for compact kitchens.
Creative Use of Color and Patterns in Compact Spaces
Measuring and fitting your appliances taught you that scale and function matter — the same thinking applies to color and pattern, where proportion and placement make small kitchens feel larger and livelier.
I pick accents and repeats that guide the eye, balance brightness, and hide wear.
- Pale walls, bold trim
- Single patterned backsplash
- Narrow stripes for height
- Matte finishes to reduce glare
- Coordinated textiles for cohesion
Simple Plumbing and Electrical Fixes You Can DIY
When I started my remodel, I learned that a few straightforward plumbing and electrical fixes can save time and money while keeping safety front and center.
I tightened loose fittings, replaced worn faucet cartridges, swapped out a faulty outlet for a GFCI, and labeled circuits.
I used basic tools, shut off valves and power, tested with a multimeter, and called a pro for anything complex.
Styling Tips to Make a Small Kitchen Feel Homey
With a few thoughtful touches, I turned our tiny kitchen into a cozy, efficient space that feels like home.
I focused on texture, light, and purposeful accents so every item earns its place and adds warmth without clutter.
- Open shelving with curated dishes
- Warm under-cabinet lighting
- A small rug for softness
- Greenery in compact pots
- Coordinated, functional containers
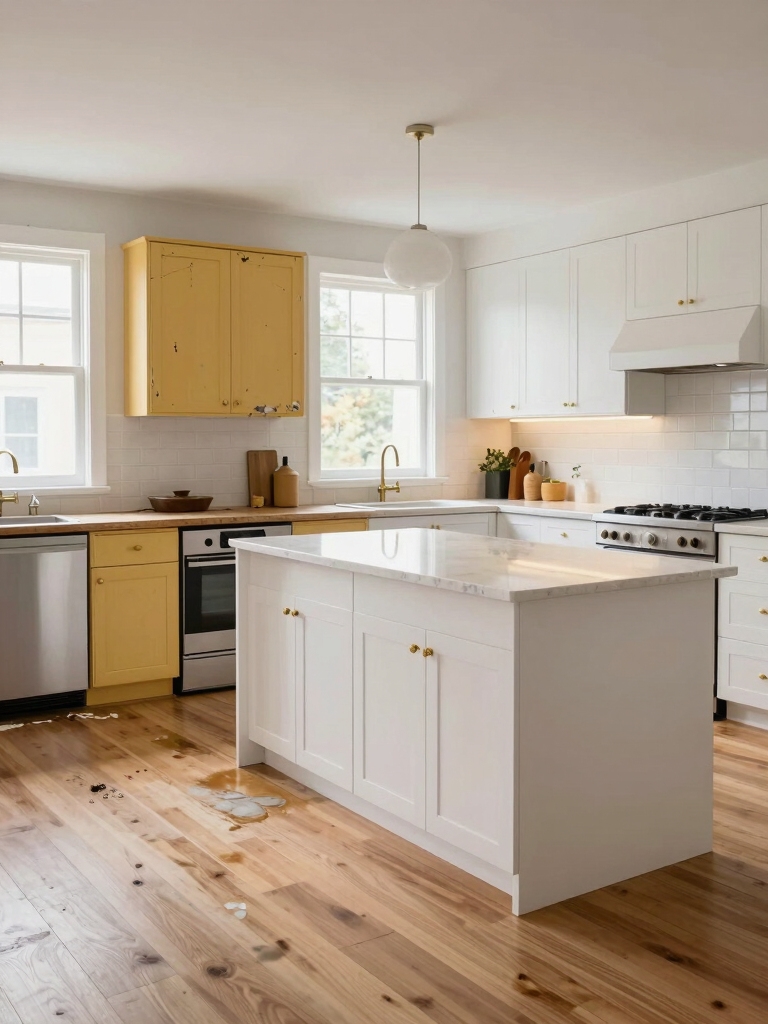
Phased Remodel Plans to Spread Out Costs
To keep this remodel affordable, I broke the project into clear phases so I could pay as I go and still make steady progress; you’ll get the biggest wins first and tackle cosmetic or less urgent updates later.
I prioritized essentials: plumbing, appliances, and durable surfaces. Next came cabinetry tweaks, lighting, and paint. Final phase handled decor and small upgrades when the budget allowed.
You can make a single‑wide kitchen feel twice as big without doubling your budget — studies show small updates can boost perceived space by up to 40%. I’ve walked you through practical, low‑cost choices: paint tricks, cabinet refreshes, DIY counters, and phased plans so you won’t break the bank.
Pick two priorities, tackle them this weekend, and enjoy a cozier, more functional kitchen that looks intentional and lived‑in without expensive contractors.