I’ve seen a simple coat of paint turn tired cabinets into a kitchen that feels brighter, cleaner, and intentionally styled. Paint reflects light, hides visual clutter, and makes hardware pop, so even small spaces look larger and more polished.
With proper prep, the finish can be durable and easy to maintain, and you can stretch your budget with two-tone or island accents. Keep going and I’ll show you colors, steps, and pro tips to get it right.
Why Painted Cabinets Transform Your Kitchen
When I first painted my kitchen cabinets, the whole room felt like it woke up — brighter, cleaner, and more purposeful.
I noticed how painted surfaces simplify visual clutter, reflect light, and make hardware pop. It’s an affordable, high-impact update that refreshes style, boosts perceived space, and lifts daily mood.
You get modern cohesion without a full remodel. Painting cabinets also benefits from professional techniques that ensure a durable, smooth finish.
Choosing the Right Color Palette

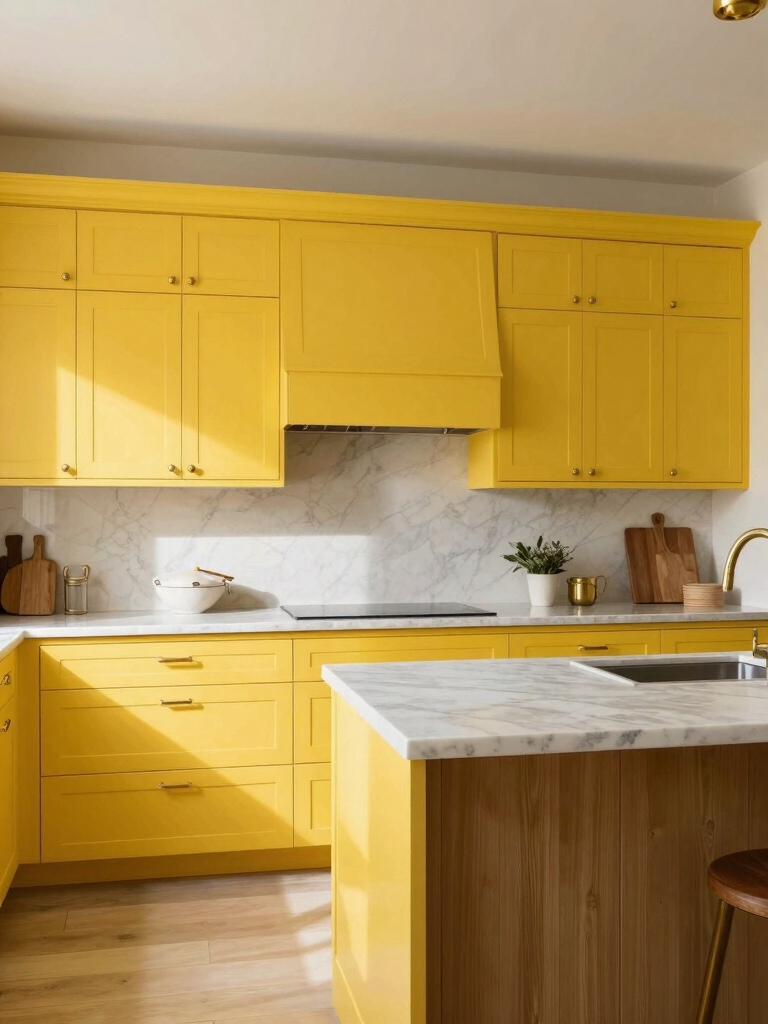
When I pick a palette for painted cabinets, I think about whether light or dark finishes will best open the room or add drama.
I’ll show you how a pale shade can make a small kitchen feel airy while a deep tone grounds a larger space.
Then we’ll look at coordinating accent shades so hardware, islands, and walls feel intentionally tied together.
You can even achieve professional-looking results without extensive prep by using specialized primers and no-sanding methods that bond well to existing finishes.
Light vs. Dark
If you’re torn between light and dark cabinets, I recommend starting with how you want the room to feel: airy and open, or cozy and dramatic.
I lean light to expand small spaces and reflect natural light; I choose deep hues to add warmth and anchor larger kitchens.
Consider countertops, hardware, and traffic patterns so the chosen tone complements daily life, not just trends.
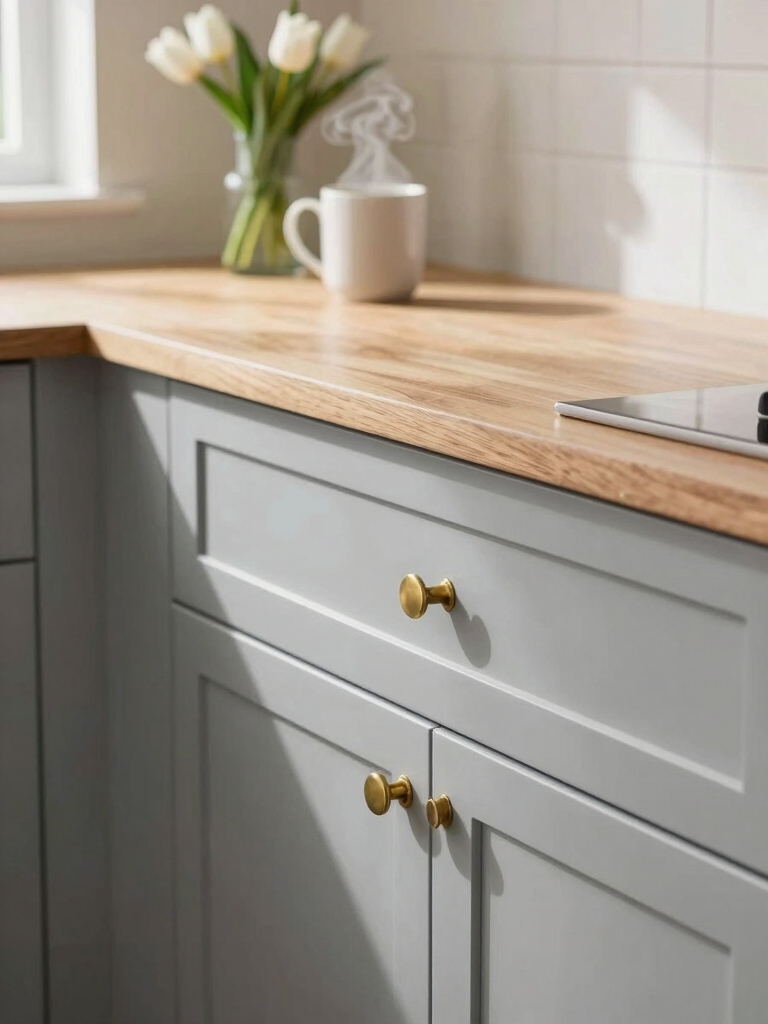
Light gray cabinets offer a subtle yet striking option that balances brightness with sophisticated depth.
Coordinating Accent Shades
Balance guides every great palette, and I start by picking one or two accent shades that echo the room’s mood without overpowering the cabinets. I consider undertones, nearby materials, and how natural light shifts color.
Then I test swatches on trim, hardware, or a single drawer. Small accents—backsplash, barstools, knobs—bring cohesion and personality without risking the whole scheme.
A simple, durable backsplash pairing can tie the look together and enhance the cabinets’ finish.
Understanding Paint Finishes and Durability
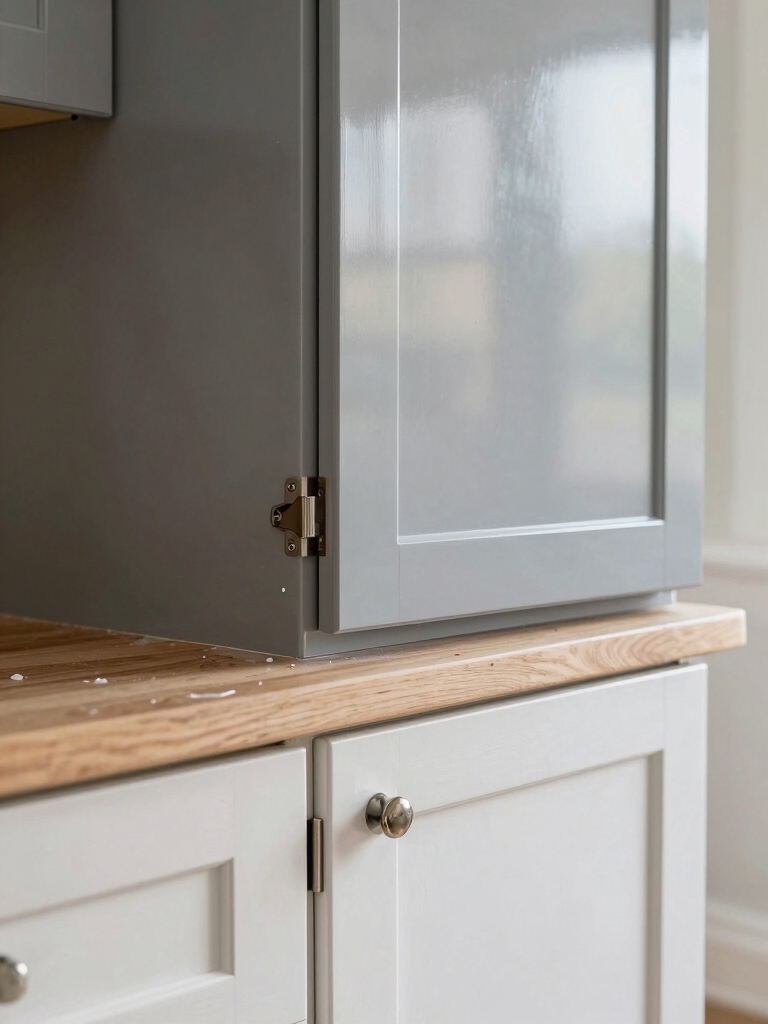
I usually start by thinking about how the finish will live in your daily life — I want you to picture the spills, fingerprints, and scrapes that kitchens get, because the right paint finish has to stand up to them while still looking great.
I recommend semi-gloss or satin for durability, easy cleaning, and subtle sheen; matte hides flaws but needs tougher maintenance.
Weekend projects can transform cabinets quickly with the right prep and products, including choosing finishes that suit durability needs and hardware updates.
When to Paint vs. Replace Cabinets

When a kitchen still has good bones, I’ll usually recommend paint over replacement because a fresh color and new hardware can modernize the whole room for a fraction of the cost.
- Paint when structure is solid and style needs updating.
- Replace when doors warped or cabinets rot.
- Paint to save time and money.
- Replace for layout changes or long-term value.
- Avoid common pitfalls like poor surface prep by following painting mistakes to avoid to ensure a durable, professional finish.
Preparing Cabinets for a Flawless Paint Job

Before you pick up a brush, I’ll walk you through the prep that makes a painted cabinet look professionally done — and last longer.
I strip hardware, clean grease with a degreaser, sand smooth for adhesion, and fill dents or gaps with wood filler.
I tape edges, remove dust, and label doors so reassembly is effortless.
Good prep saves time and yields a flawless finish.
Many homeowners are surprised by dramatic kitchen transformations after painted cabinets, with stunning before-and-after results that wow.
Tools and Materials You’ll Need
Because a great paint job starts with the right gear, I’ll run through the essentials you’ll want at hand before you begin: quality brushes and rollers, a durable primer and paint formulated for cabinets, sandpaper and a sanding block, a good degreaser, wood filler, painter’s tape, tack cloths, drop cloths, and replacement hardware or labels for reassembly.
- Brushes/rollers
- Primer/paint
- Prep supplies
- Hardware/labels
Step-by-Step Painting Process for Cabinets
Let’s get painting: I’ll walk you through each step so you don’t miss anything — from removing doors and hardware to the final topcoat — and explain the little tricks that make the finish look professional.
I start by cleaning, sanding, and priming; then I apply thin, even coats of paint, sanding lightly between layers.
I finish with a durable topcoat and careful reassembly.
Tackling Doors, Drawers, and Hardware
First, I take off every door and drawer and label them so nothing gets lost or mixed up.
Then I sand each piece until it’s smooth and ready for paint, paying special attention to edges and recessed panels.
Finally, I decide whether to clean and update the existing hardware or swap it for fresh pulls and knobs to finish the look.
Remove and Label Parts
I start by taking everything off the cabinets so I can work cleanly and avoid surprise headaches later: doors, drawer fronts, hinges, knobs, and any mounting plates all come off and get laid out in a logical order.
I label parts clearly and bag screws so reassembly is simple.
- Number doors
- Tag drawer fronts
- Bag hardware
- Photograph layouts
Sanding for Smooth Finish
With everything labeled and bagged, I move on to sanding so the paint will stick and the finish will look professional.
I lightly sand doors and drawer faces with 120–150 grit, then smooth edges and recessed panels carefully.
For hardware I’m keeping, I scuff mounting areas without removing items yet.
I wipe dust thoroughly, ensuring a clean, receptive surface for primer.
Update or Replace Hardware
Now that the surfaces are sanded and primed, I turn to the hardware—because new or refreshed knobs, pulls, and hinges can make painted cabinets feel finished and modern.
I pick pieces that match style and scale, test function, and coordinate finishes.
- Replace worn hinges
- Swap knobs for pulls
- Match finish to fixtures
- Tighten and align doors
Achieving Smooth, Professional-Looking Results
Let’s get your cabinets looking shop-finished: I’ll walk you through the key steps that turn ordinary painted doors into smooth, professional results—proper sanding and cleaning, choosing the right primer and paint, using the correct brushes or sprayer, and knowing how to apply and cure each coat.
I’ll show sanding grits, deglossing, thin even coats, light sanding between layers, and patience for full cure.
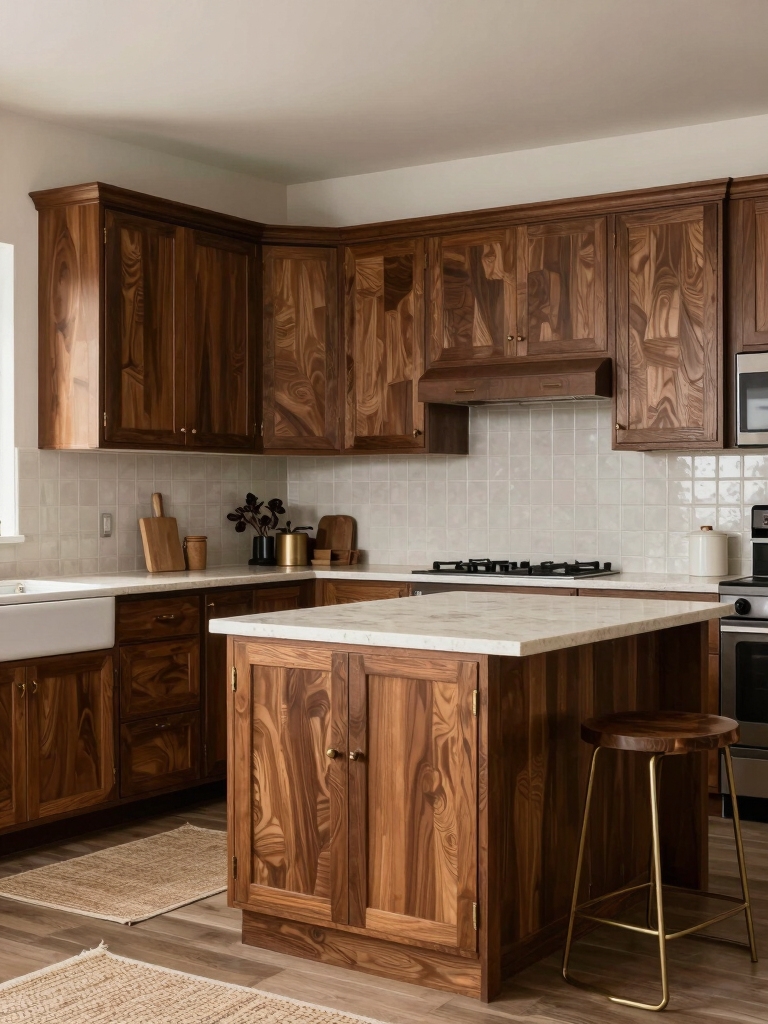
Creative Two-Tone and Accent Cabinet Ideas
If you want your kitchen to feel custom without a full remodel, I’ll show you how two-tone schemes and accent details can give cabinets high-end personality—think painted islands in a deep, grounding hue while upper cabinets stay light and airy, or soft grays paired with warm wood tones for contrast.
- Bold island, neutral perimeter.
- Two-tone uppers and lowers.
- Painted open shelving accents.
- Contrasting trims and mullions.
Pairing Cabinet Color With Countertops and Backsplash
To make your cabinets sing, I start by thinking about how color, material, and scale will play together across countertops and backsplash; when those three elements harmonize, the whole kitchen reads as intentional rather than patched-together.
I balance bold cabinet hues with neutral stone or subtle veins, echo backsplash patterns in cabinet accents, and test samples together under real light until the palette feels cohesive and confident.
Maintenance and Cleaning Tips for Painted Cabinets
I keep my painted cabinets looking fresh with a quick daily wipe using a soft cloth and mild cleaner.
Every few months I do a deeper clean to lift grease and grime without stripping the finish.
For busy spots like near the stove and handles, I use protective mats or a tougher topcoat to prevent wear.
Gentle Daily Wiping
Usually I wipe our painted cabinets once a day with a soft microfiber cloth and a gentle, pH-neutral cleaner so grime never has a chance to build up. I keep it simple and quick.
- Focus on high-touch areas.
- Use light pressure to protect the finish.
- Dry immediately to avoid streaks.
- Spot-treat splatters right away.
Deep Cleaning Routine
Deep-cleaning painted cabinets means going beyond my daily wipe-downs so I can tackle build-up without damaging the finish.
I mix mild dish soap with warm water, test a hidden spot, then gently scrub with a soft cloth or nonabrasive sponge.
For grease, I use a vinegar-water spritz.
I dry thoroughly, oil hinges lightly, and avoid harsh chemicals that dull paint.
Protecting High-Traffic Areas
Often I focus my attention on the spots that get handled the most—door edges, cabinet fronts near the stove, and lower corners—because protecting these high-traffic areas keeps painted cabinets looking fresh longer.
- Wipe spills immediately with damp microfiber.
- Use gentle, pH-neutral cleaner weekly.
- Add corner guards or felt bumpers.
- Reapply a clear protective wax or topcoat yearly to seal and renew.
Budget-Friendly Ways to Update Cabinetry
I’ll help you refresh your cabinets without blowing your budget, starting with small changes that deliver big impact.
Swap hardware for modern pulls, paint just the doors or island, add peel-and-stick backsplash, and refinish worn edges.
Installing under-cabinet lighting and shelf liners lifts function and style affordably.
These tweaks make your kitchen feel updated without a full remodel.
Hiring a Pro vs. DIY: What to Consider
When I’m weighing whether to hire a pro or tackle painted cabinets myself, I always compare the upfront cost and how much time I can realistically spend.
I also think about the skill level required — pros usually deliver a smoother, longer‑lasting finish while DIY can be great if you’re willing to practice.
Let’s walk through what matters most so you can choose the right option for your kitchen and budget.
Cost and Time Trade-offs
While you can save money by tackling cabinet painting yourself, I’ll warn you up front that time, stress, and finish quality are the usual trade-offs — and those matter more than raw dollars.
- Budget: pros cost more but include materials.
- Timeline: I’ll finish faster than you likely will.
- Disruption: DIY stretches into evenings and weekends.
- Contingencies: expect unexpected expenses or delays.
Skill and Finish Quality
Cost and time are only part of the story — skill and finish quality often decide whether your painted cabinets look like a pro job or a weekend attempt.
I weigh my patience, steady hand, and tools against a pro’s experience. If I want flawless layering, crisp edges, and durable topcoat, I hire help. For small runs or budget practice, I’ll tackle it myself.
Inspiring Color Schemes From Real Kitchens
I love flipping through real kitchens to see how people use paint to transform cabinets — and I want to show you the palettes that actually work in homes, not just on mood boards.
I pull inspiration from lived spaces and share combos you can copy.
- Soft gray with brass
- Navy lower, white upper
- Sage green, warm wood
- Black island, pale cabinets
You’ve seen how a fresh coat can lift a room, and now you’re standing at the edge of change—maybe nervous, maybe excited. Imagine opening your kitchen tomorrow to color that finally feels like you, cabinets that shine and withstand life’s messes.
Whether you DIY or call a pro, the transformation is closer than you think. Take a breath, pick a swatch, and let that first brushstroke be the start of something unexpectedly beautiful.