I’ve transformed cramped galley kitchens on a tight budget by mapping prep, cook, and clean zones, painting walls and cabinets in light neutrals, swapping hardware, and adding plug-in undercabinet lights for instant brightness.
I use peel-and-stick backsplashes, open shelving, slim rolling carts and vertical organizers to free counters, plus accent paint or a bold stripe for personality. Little changes—trim doors, magnetic knife strip, tension-rod storage—boost flow and function, and I’ll show how to prioritize projects under $1K.
Plan Your Layout Before You Spend
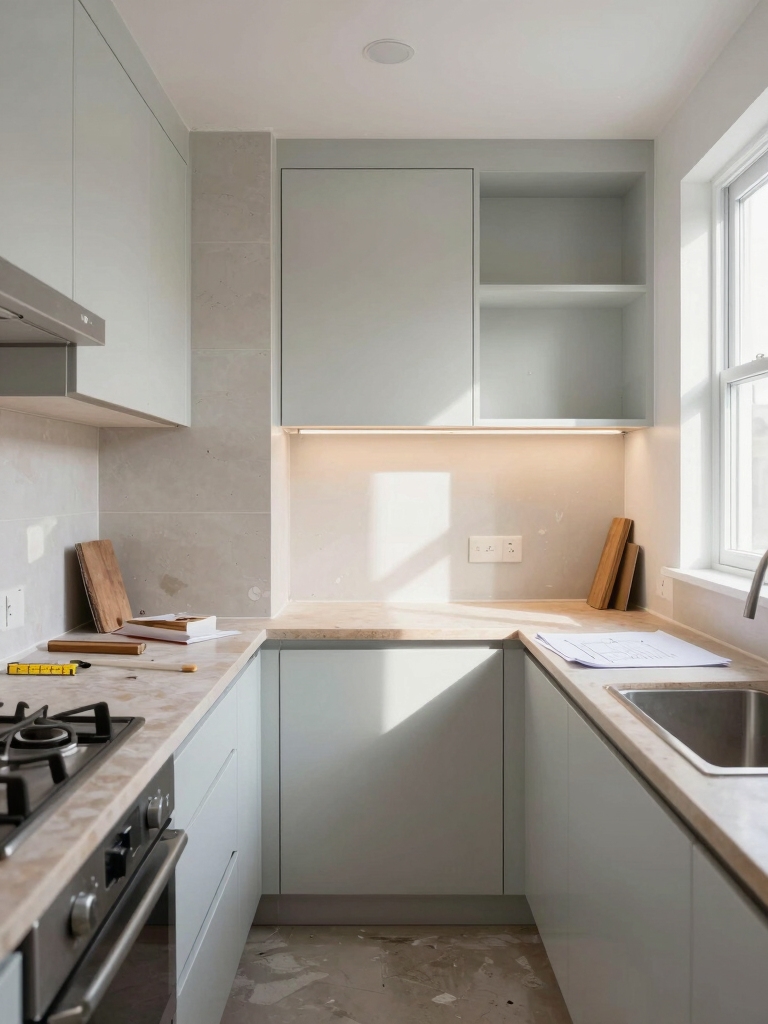
Before you buy paint or swap cabinet doors, I sketch the workflow and measure everything so I know the small galley will actually work for me — and you.
I map zones for prep, cook, and clean, then prioritize fixes that improve flow: repositioning appliances mentally, trimming doors that obstruct, adding task lighting where needed.
Thoughtful layout beats impulse buys every time. I also study open-feeling layouts to find small galley kitchen ideas that maximize space and create the illusion of openness.
Fresh Paint for a Brighter, Bigger Feel

I always start a galley refresh with light, neutral paint—soft whites, warm greiges, or pale greys instantly open the space and reflect more light.
Before I roll, I take time to properly clean, sand, and prime cabinets or trim so the finish lasts and looks professional.
A satin or eggshell sheen on walls and semi-gloss on trim gives an easy-to-clean, bright result without shouting for attention.
Designers often reconfigure appliances and storage in tight layouts to improve flow and functionality, especially using smart layouts that maximize every inch.
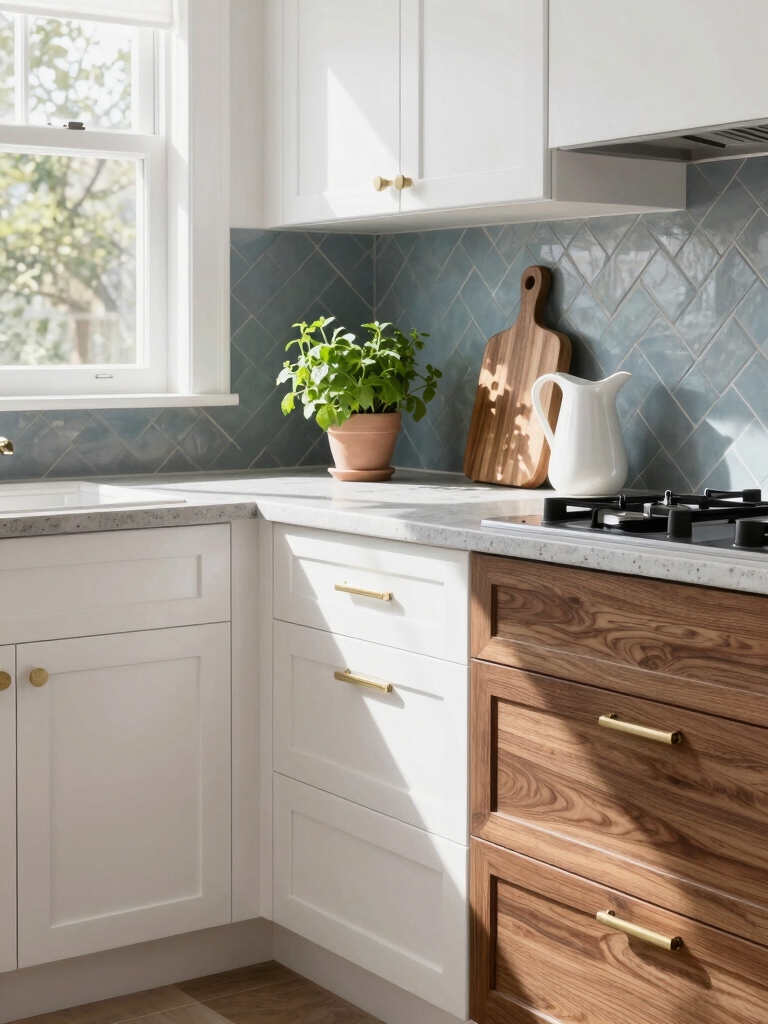
Light, Neutral Color Choices
Because even a coat of paint can transform how a galley kitchen feels, I lean toward light, neutral colors to open up tight spaces and reflect more light.
I pick warm whites, soft greiges, and pale taupes that feel timeless. They create a calm backdrop for wood tones and simple hardware, letting small accents—like a plant or a colorful dish—stand out without overwhelming.
Small white kitchens are timeless and versatile, often inspiring simple, airy designs with enduring appeal and lasting charm.
Prep and Finish Tips
When I tackle a galley kitchen refresh, good prep is what gives a few coats of paint the power to make the space feel brighter and bigger.
I sand glossy surfaces, fill dents, and clean grease thoroughly.
I use high-quality primer, choose satin for easy cleaning, and cut in carefully.
Finish with thin, even coats and proper drying time for a professional, airy result.
Avoid common mistakes like skipping sanding or using the wrong primer to ensure a long-lasting finish and proper adhesion.
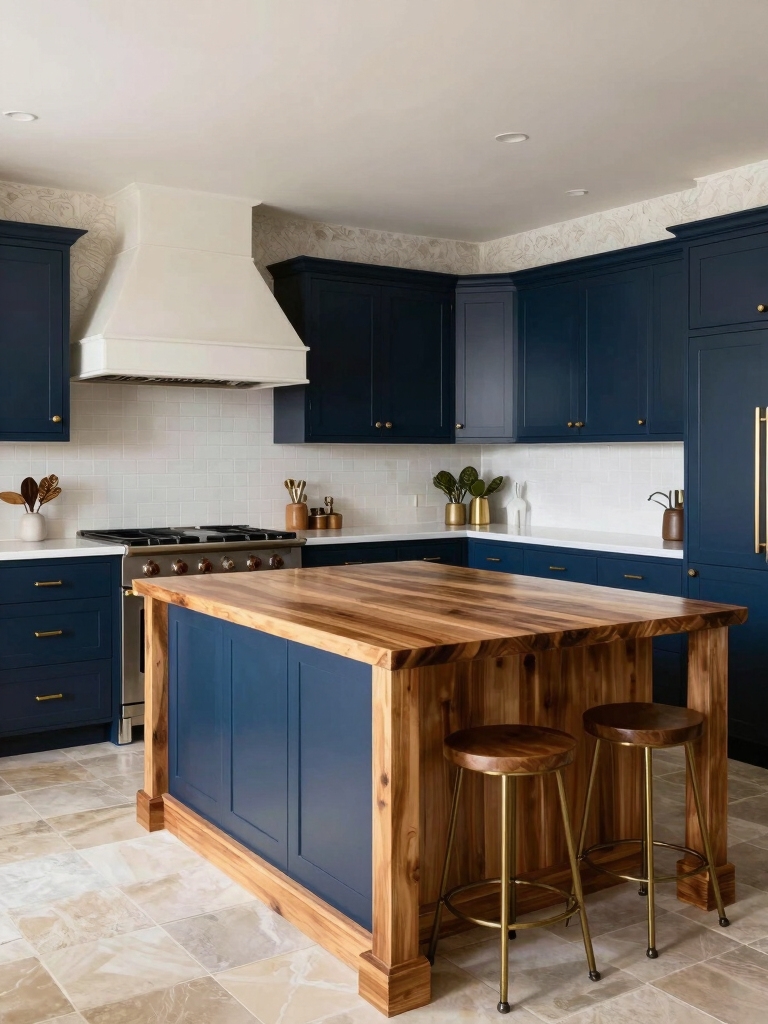
Swap Cabinet Hardware for Instant Style

Swap out old knobs and pulls and you’ll see your galley kitchen take on a whole new personality without blowing your budget.
I chose simple brass pulls and matte black knobs to mix warmth with contrast.
Swapping hardware takes minutes per door, refreshes style, and ties cabinets to fixtures.
I match finishes thoughtfully, keep a consistent scale, and save money while boosting charm.
Budget-friendly cabinet makeovers can transform the space with minor updates like hardware swaps and paint, making impressive changes under $500.
Upgrade Lighting Without Rewiring

I brighten up my galley kitchen without touching the wiring by choosing plug-in and battery-powered options that instantly lift task and ambient light.
I add under-cabinet puck lights, stick-on LED strips, and a stylish plug-in pendant to define zones.
Motion-sensor cabinet lights make mornings easier, and dimmable battery lamps create cozy evenings—budget-friendly, reversible, and thoughtfully layered for function and warmth.
A few well-placed fixtures can also prevent dark corners and make the space feel larger.
Peel-and-Stick Backsplash Ideas

I love how peel-and-stick backsplashes can instantly refresh a galley kitchen without breaking the bank.
I’ll walk you through quick product picks and practical installation tips and tricks so you can get a pro-looking result in an afternoon.
With a few simple tools and my step-by-step pointers, you’ll avoid common mistakes and finish with a backsplash you actually enjoy.
These options are great for making small kitchen walls pop with color and visual interest.
Quick Peel-And-Stick Options
Let’s plunge into peel-and-stick backsplashes — they’re the fastest way I’ve found to give a galley kitchen a fresh, polished look without tearing into walls or blowing the budget.
I favor geometric tiles, subway patterns, and metallic accents for instant personality. Pick waterproof, heat-resistant sheets with clear adhesive ratings.
Keep a small sample pack to test color and texture against your countertops and lighting.
Installation Tips and Tricks
When you’re ready to stick the backsplash, start by prepping the wall—clean, dry, and grease-free surfaces make the adhesive bond like a charm.
I measure twice, trim with a sharp blade, and use a level to keep lines straight. Peel slowly, smooth with a plastic squeegee, and press edges firmly. For seams, slightly overlap or butt edges for a seamless, professional look.
Open Shelving to Maximize Space
Open shelving can open up a small galley kitchen visually and give you quick access to everyday items, so I recommend it as a high-impact, low-cost change.
I swap bulky upper cabinets for a few sturdy shelves, arrange curated dishes and jars, and keep essentials within reach.
It brightens the space, encourages neatness, and lets your personality show without breaking the budget.
Budget-Friendly Countertop Refreshes
I’ve found a few simple countertop tricks that completely change the look without blowing the budget.
You can paint over laminate with the right primer and paint, add a peel-and-stick tile backsplash for instant style, and tidy up worn edges by installing trim.
If you want, I’ll walk you through supplies, techniques, and a realistic timeline.
Paint-Over Laminate Counters
I’d start by saying you can get a striking countertop update without ripping out your laminate—painting over it turns a tired surface into something fresh and chic on a shoestring budget.
I sand lightly, prime well, and choose durable countertop paint or faux-marble techniques. Seal with a clear, heat-resistant topcoat.
It’s affordable, fast, and surprisingly transformative for small galley kitchens.
Peel-And-Stick Tile Backsplashes
Often I reach for peel-and-stick tile when I want a fast, low-cost way to refresh a galley kitchen without mess or a contractor.
I pick simple patterns, measure carefully, and cut precisely to fit behind the sink and stove.
Installation feels meditative; grout lines can be simulated for realism. It brightens the space, protects the wall, and stays budget-friendly.
Replace Edges With Trim
Think of trim as the quick facelift your counters have been waiting for—I swap out worn, dated edges with simple bullnose or metal trim to give the whole surface a cleaner, more intentional look. It’s affordable, fast, and totally DIY-friendly.
I measure, cut, and glue or screw trim in place, then caulk and paint for a polished, cohesive result that refreshes the kitchen instantly.
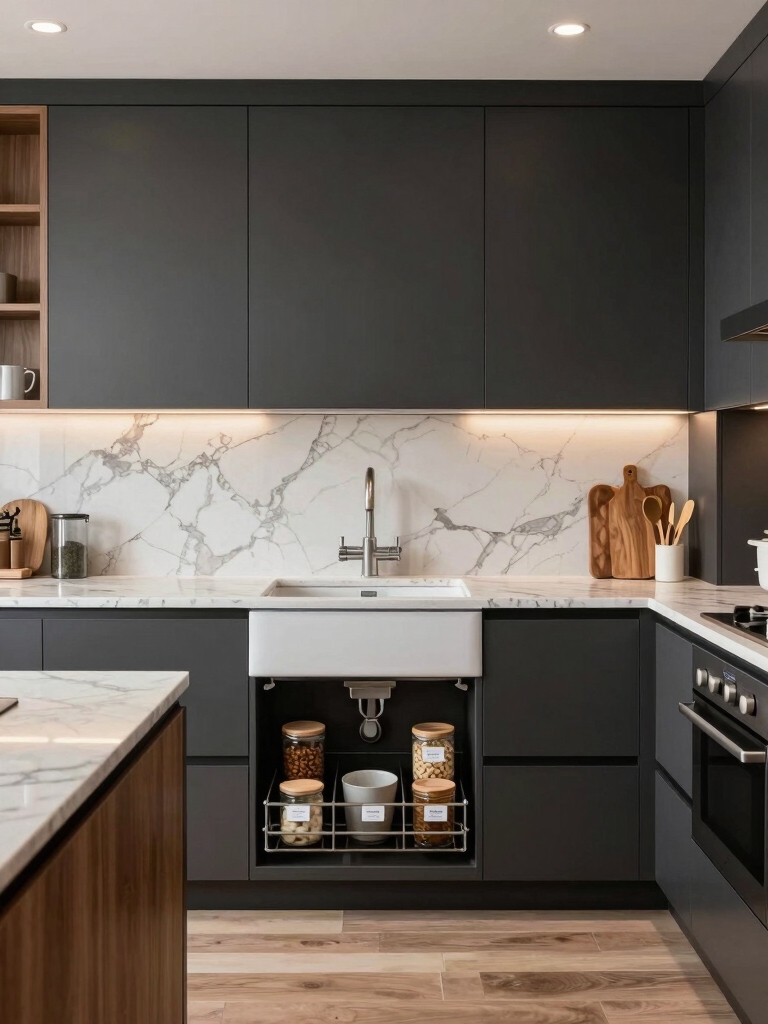
Smart Storage Solutions for Small Kitchens
Let’s dig into smart storage that actually fits a tiny galley without breaking the bank—I’ll show you practical swaps and setups that free up counter and cabinet space.
I’ve streamlined my space with clever, low-cost choices that keep essentials accessible and surfaces clear.
- Magnetic knife strip
- Tension rod under sink
- Vertical plate rack
- Over-cabinet hooks
- Slim rolling cart
Appliance Updates That Don’t Break the Bank
I usually start with the essentials—swapping out or upgrading one small appliance at a time so the kitchen stays usable and the cost stays low.
I focus on practical picks: a compact microwave, energy-efficient kettle, or streamlined toaster oven.
I hunt sales, refurb units, and pick neutral finishes so appliances blend, perform well, and refresh the space without overspending.
Flooring Options Under $500
After swapping a few small appliances, I like to turn my attention to the floor—it’s a quick way to change the kitchen’s feel without blowing the budget.
I choose durable, easy-to-install options that read stylish and practical.
Here are my favorites:
- Peel-and-stick luxury vinyl planks
- Vinyl sheet flooring
- Interlocking vinyl tiles
- Paintable plywood with sealant
- Budget-friendly laminate tiles
DIY Window Treatments for Light and Privacy
When morning sun hits my tiny galley, I want light that wakes the space without turning it into a fishbowl, so I pick treatments that balance brightness and privacy.
I install café curtains, translucent roller shades, or tension-rod panels—cheap, easy, and removable.
Each option softens glare, preserves views at eye level, and stays tidy in a narrow kitchen, all under $100.
Add Visual Interest With Accent Walls
A bold stripe or a painted nook can instantly give my narrow galley personality without crowding it, so I pick one wall to anchor the space and work from there.
I choose colors and simple patterns that complement cabinets and light.
- Matte navy stripe for depth
- Soft sage behind open shelves
- Chalkboard paint for notes
- Geometric stencil accent
- High-gloss panel for reflectivity
Reorganize for Better Workflow and Efficiency
That accent wall gave the galley instant personality, and now I focus on how the layout actually works for cooking and daily life.
I decluttered countertops, grouped tools by task, and moved frequently used items within reach.
Slim organizers, labeled bins, and a pegboard keep things tidy without crowding. Small changes speed prep, reduce steps, and make the kitchen feel calmer and more efficient.
Affordable DecorativeTouches to Personalize the Space
I like to use open shelving to show off pretty dishes and a few plants so the room feels lived-in without crowding a small galley.
Swapping out cabinet hardware is a quick, inexpensive change that instantly updates the kitchen’s personality. Together those touches make the space feel curated and uniquely yours.
Open Shelving Styling
Open shelving lets me add personality without breaking the bank, and I’ll show simple, budget-friendly ways to style those shelves so they feel curated rather than cluttered.
I mix function and beauty, rotate pieces seasonally, and keep a calm color palette for cohesion.
- Group by color or material
- Use matching jars for staples
- Add one plant
- Stack plates vertically
- Display one special piece
Decorative Hardware Swaps
Swap out dated knobs and pulls to instantly lift the whole kitchen — it’s one of the cheapest, most impactful updates you can make.
I pick finishes that echo lighting and faucets, mix knobs and cup pulls for interest, and choose durable, budget-friendly hardware.
Swapping is fast, needs only a screwdriver, and gives this narrow galley personality without a big spend or renovation hassle.
Prioritizing Projects to Stay Under $1,000
Because you’ll need to stretch every dollar, I start by listing what matters most to you — function, looks, or resale — and rank projects by impact per dollar.
I choose affordable wins first and cut larger plans into phases so you get visible change quickly.
- Replace hardware for instant polish
- Refresh paint for brightness
- Improve lighting for function
- Add open shelving for storage
- Update faucet for efficiency
You’ve seen how thoughtful choices—planning layout, fresh paint, new hardware, smarter lighting, peel-and-stick tile, an accent wall, and better organization—can transform a small galley kitchen without breaking the bank.
Remember, “measure twice, cut once”: a little planning saves time and money. Start with priorities, add affordable accents, and tweak as you go.
I’ll be here to help you refine ideas so your kitchen feels tidy, stylish, and truly yours.