I’ll help you refresh a 1970s kitchen so it keeps its retro charm while fixing safety and wear. I start by evaluating what’s structurally sound and what must be updated, then set a budget that protects signature details.
I favor repainting or refinishing cabinets, swapping hardware, and choosing quartz or matte porcelain counters that mimic vintage materials. I add period-appropriate lighting, efficient appliances, and small decorative accents. Keep going and you’ll find practical steps and sourcing tips.
Assessing What to Keep and What to Change

Before you swing a hammer, I start by walking through the kitchen with a clear eye and a notebook, noting what still works, what gives the room its 1970s charm, and what feels tired or unsafe.
I evaluate surfaces, hardware, and layout; keep distinctive tiles or colors if sound; replace failing appliances, worn cabinetry, and hazards. I list essentials to preserve character.
Many readers are drawn to dramatic reveal stories, so sharing a compelling before-and-after photo sequence can help document progress and inspire decisions.
Setting a Budget and Priorities

Balance is everything when I set a budget — I want a clear number that protects the house’s vintage soul while prioritizing safety and function.
I list essentials: structural fixes, updated wiring, reliable appliances, and preserving signature details.
Then I allocate a restoration fund for refinishes and a contingency for surprises.
Priorities guide choices so every dollar reinforces character and longevity.
Contractors sometimes omit easy, cost-saving updates like inexpensive refinishes that refresh surfaces without full replacements.
Honoring Original Color Palettes

With a nod to the past, I start by studying the kitchen’s original hues—those avocado greens, harvest golds, and burnt oranges that gave the room its soul—and I ask which tones I want to revive, refine, or soften.
I sample swatches, balance bold accents with neutral grounds, and choose finishes that honor vintage warmth while ensuring the palette feels intentional, calm, and livable for today.
I often take inspiration from mid-century updates that blend retro charm with contemporary functionality, highlighting period-appropriate accents to keep the look authentic.
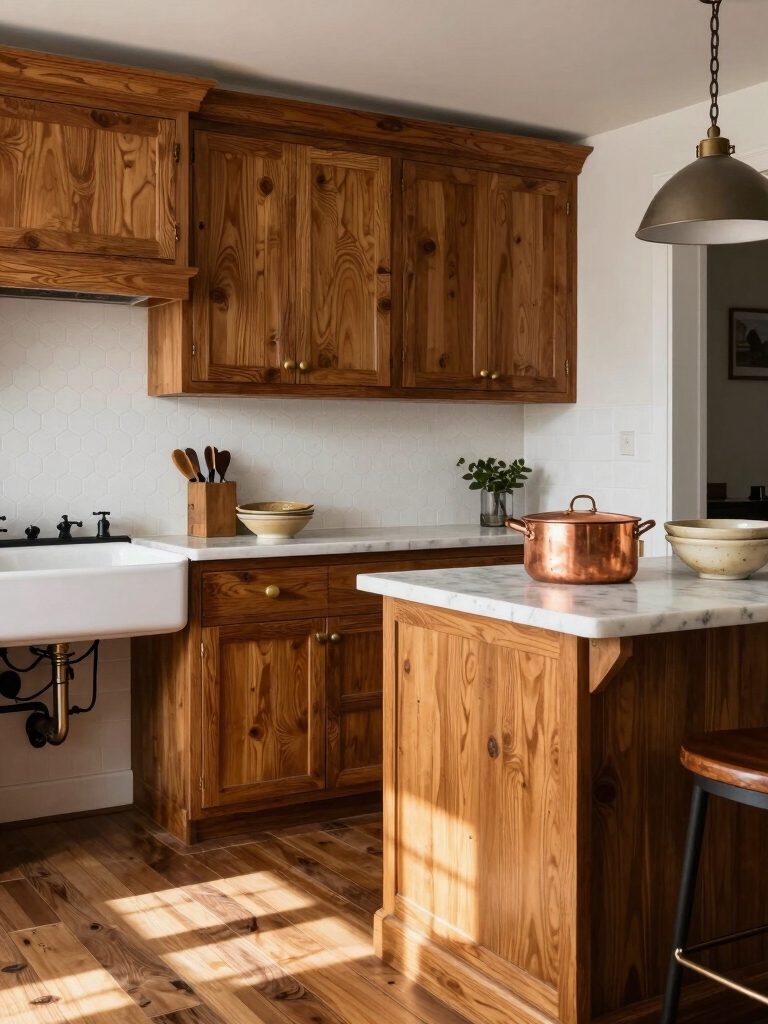
Updating Cabinetry Without a Full Tear-Out

I like to keep original cabinets when I can, so I start by painting or refinishing the fronts to refresh the look without replacing them.
Swapping hardware and modern soft-close hinges makes the doors function better while staying true to the era.
For a slightly more custom feel, I add trim or overlays to change profiles and introduce subtle midcentury detail.
Weekend projects like painting, hardware swaps, and small trim work can deliver big impact in a short time frame, especially when you focus on cabinet refinishing and similar updates.
Paint and Refinish Fronts
Start by stripping the doors and drawers and laying them out where you can work — I’ll walk you through the simple steps to refresh your 1970s cabinetry without gutting the kitchen.
I sand lightly, fill imperfections, and use primer suited for lacquered surfaces.
Then I apply thin, even coats of paint or a stain/clear finish, letting ample dry time for a professional, durable result.
You can also consider replacing hardware or adding simple trim to preserve the retro character while modernizing the look.
Update Hardware and Hinges
Swap the old pulls and squeaky hinges for fresh hardware and you’ll give 1970s cabinets an immediate lift without tearing anything out.
I choose durable, period-appropriate finishes—brass, matte black or brushed nickel—and upgrade to soft-close hinges.
I replace worn screws, guarantee alignment, and match styles across drawers and doors. Small details unify the look and make daily use feel modern and intentional.
Many homeowners complete these updates as part of budget-friendly cabinet makeovers that transform a kitchen for under $500.
Add Trim and Overlays
After revitalizing hardware and hinges, I often turn to trim and overlays to reshape 1970s cabinetry without ripping it out.
I add simple crown or beadboard trim, mix painted overlays with exposed wood, and inset small moldings to suggest shaker or midcentury profiles.
It’s budget-friendly, quick, and reversible, letting you refine character while keeping original bones intact.
Many beginners succeed by following basic DIY techniques when attaching trim and overlays.
Choosing Counters That Mimic Vintage Materials

I like picking counters that echo 1970s materials while giving you modern performance. We’ll look at durable laminate alternatives, crisp porcelain slabs that copy vintage patterns, and faux stone quartz that captures the look without the upkeep.
I’ll help you weigh appearance, durability, and budget so the countertop feels authentic and stands up to daily use.
Durable Laminate Alternatives
Let’s look at durable alternatives to laminate that’ll keep the vintage vibe without the maintenance headaches; I’ll walk you through options that mimic classic materials like laminate, stone, and butcher block while standing up to modern use.
I recommend engineered quartz for low upkeep, solid-surface acrylic for seamless edges, and matte porcelain-look tiles for heat resistance—each balances authenticity, durability, and easy care.
Porcelain Slab Options
A few porcelain slab options can give you the look of vintage laminate, butcher block, or encaustic tile while delivering modern durability and low upkeep.
I like thin, rectified slabs that replicate pattern and warmth without sealing. Choose subtle veining or matte wood visuals to respect the era; select a honed finish for authenticity and easy maintenance, and sample large pieces before committing.
Faux Stone Quartz Choices
Granite-look quartz gives you the aged heft of a 1970s countertop without the sealing and porosity issues, and I’ll help you pick colors and patterns that read vintage rather than just “modern stone.”
I favor soft, irregular veining, muted creams, olive-beiges, and smoky grays, plus a honed or low-sheen finish. I’ll guide you to mixes that read authentic, not glossy new.
Smart Appliance Swaps That Respect the Era
I’ll show you how to swap in modern, energy-efficient appliances without losing the kitchen’s 1970s soul.
I suggest stainless or muted-colored finishes, hidden smart features, and retro-inspired knobs.
Choose compact, connected ranges and refrigerators with classic silhouettes, energy-star ratings, and programmable simplicity.
Integrate discreet Wi-Fi controls and keep visible aesthetics authentic so convenience doesn’t erase charm.
Refreshing Hardware and Faucets With Period-Appropriate Choices
Since you’ve tucked modern appliances into period-friendly shells, next I’ll focus on the small details that make a 1970s kitchen feel authentic: hardware and faucets.
I choose finishes and shapes that nod to the era without feeling dated.
- Warm brass or muted chrome for cabinet pulls
- Rounded, single-handle faucet silhouettes
- Tactile, weighty knobs for authentic feel
I’ll swap thoughtfully, keeping scale and patina in mind.
Lighting Upgrades That Complement Retro Style
I’m a big fan of swapping in warm vintage bulbs to get that soft, golden glow that feels true to the 1970s.
Pairing them with period-appropriate fixtures—think brass pendants or milk-glass sconces—keeps the look authentic without feeling kitschy. I’ll show how small lighting choices can tie the whole retro kitchen together.
Warm Vintage Bulbs
I often reach for warm vintage bulbs when I want to make a 1970s kitchen feel welcoming without losing its authentic charm.
They soften surfaces, flatter wood tones, and reduce glare. I choose bulbs for color temperature and dimmability, balancing glow with function.
- Soft amber filaments for cozy ambiance
- Warm LED replicas for efficiency
- Dimmable options for task versus mood
Period-Appropriate Fixtures
When I pick period-appropriate fixtures, I look for pieces that honor the 1970s aesthetic while meeting today’s needs.
I choose warm metals, smoked glass, and simple geometric shapes that echo the era without feeling dated.
I prioritize dimmable LEDs, proper scale for pendants over islands, and reliable wiring so vintage-inspired fixtures perform beautifully and safely in a modern kitchen.
Working With Existing Layout Constraints
Although the footprint of a 1970s kitchen can feel limiting, I’ve learned to see those constraints as design cues rather than roadblocks. I prioritize function, keep sightlines open, and celebrate original quirks.
Small changes yield big impact:
- Reconfigure storage within existing walls.
- Choose compact, period-appropriate appliances.
- Add layered lighting to enhance zones.
You’ll preserve character while improving usability.
Wallpaper, Backsplashes, and Accent Walls
I’m excited to talk about how bold patterned wallpaper and retro tile backsplashes can give a 1970s kitchen real personality without feeling dated.
I’ll show ways to balance a busy print with solid colors and where to place a statement tile backsplash so it complements, not competes.
Together we’ll pick one focal wall or a contained splash area to keep the look curated and cohesive.
Bold Patterned Wallpaper
I’ll lean into the 1970s vibe by choosing bold patterned wallpaper that honors the era’s graphic energy without turning the kitchen into a time capsule.
I pick one focal wall, balance scale and color, and mix modern finishes to keep it fresh.
- Choose a single-wall focal point
- Use a restrained color palette
- Pair with matte contemporary fixtures
Retro Tile Backsplashes
After picking a single wallpapered focal wall, I turn my attention to retro tile backsplashes to keep that 1970s spirit while avoiding kitsch.
I choose matte subway or small hex tiles in avocado, mustard, or terracotta, pairing them with warm grout.
A simple geometric band or subtle floral motif nods to the era without overwhelming the space, keeping the kitchen curated and livable.
Flooring Options That Bridge Past and Present
Think about flooring as the thread that ties your 1970s kitchen’s retro soul to today’s needs—I’ll walk you through options that honor the original vibe while adding durability and ease.
I favor choices that feel authentic yet practical:
- Patterned vinyl that echoes ’70s motifs without trapping moisture.
- Warm engineered wood for vintage warmth with modern stability.
- Porcelain tile mimicking terrazzo for timeless flair.
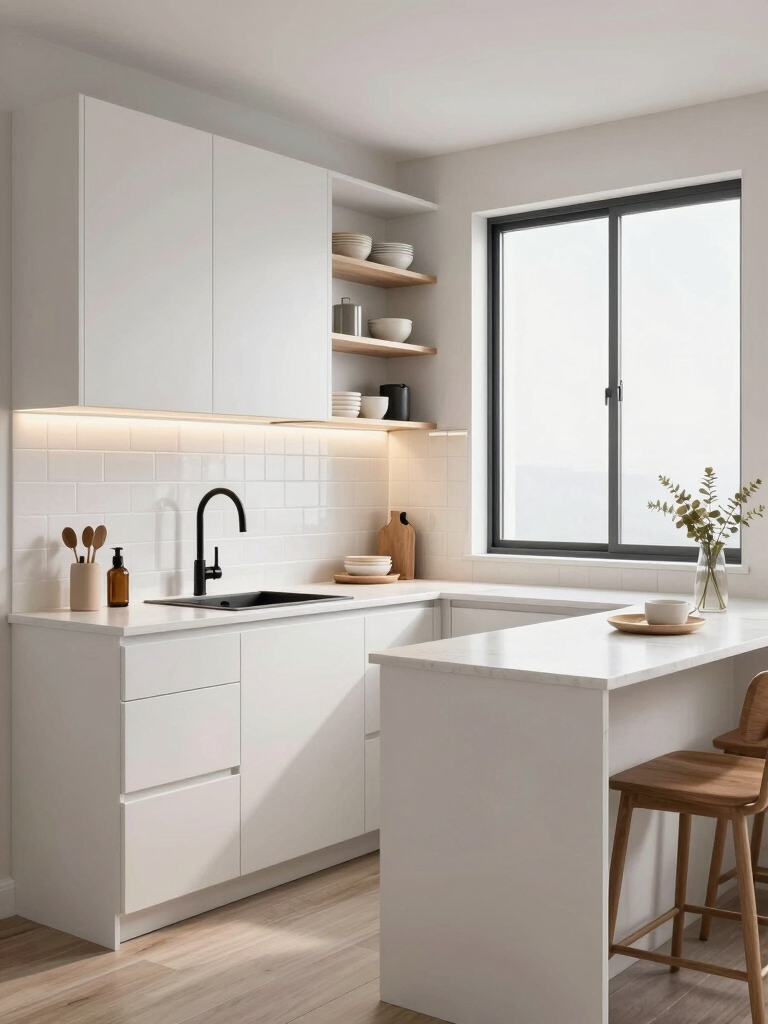
Incorporating Durable, Low-Maintenance Surfaces
Bringing those flooring choices into the rest of the kitchen means picking surfaces that can handle spills, heat, and daily wear without stealing the room’s retro charm.
I favor quartz countertops, matte-finish ceramic backsplashes, and washable paint on lower cabinets. They resist stains and scuffs, clean easily, and keep vintage colors authentic.
Practical finishes help the space feel lived-in but effortless to maintain.
Textiles, Accessories, and Small-Scale Styling
I often rely on textiles and small accessories to finish a 1970s kitchen without overwhelming its retro spirit; they’re the easiest way I tweak color, texture, and personality. I pick items that nod to the era but feel fresh.
- Bold patterned tea towels for instant warmth.
- Ceramic canisters as playful, functional accents.
- A vintage-inspired rug to ground the space.
Eco-Friendly and Energy-Efficient Retro Refreshes
After settling the look with textiles and small accents, I also want the kitchen to work well for the planet and my utility bill.
I choose LED vintage-style bulbs, Energy Star appliances with retro-friendly finishes, low-VOC paints, and recycled countertop materials.
Small changes—faucet aerators, smart strips, thicker insulation—keep the room authentic while cutting waste and monthly costs without sacrificing the 1970s vibe.
Hiring Tradespeople and Timing the Project
I’ll line up the pros and timeline so the remodel stays on track and my budget doesn’t get derailed.
I hire vetted trades, set clear milestones, and coordinate overlapping work to avoid downtime. I communicate schedule shifts and expect contingencies.
- Get three quotes and check references
- Build a realistic calendar with buffer days
- Agree payment terms tied to milestones
I’ve shown you how a 1970s kitchen can be refreshed without losing its soul — keep the best quirks, modernize the fuss, and prioritize what matters. With a sensible budget, thoughtful materials, and a few clever tradespeople, you’ll have a space that feels both lived-in and renewed.
Trust your instincts, mix original colors with durable surfaces, and don’t be afraid to make one bold, joyful choice that changes everything — like sunshine in a teacup.