I tackle awkward gaps above cabinets with practical, stylish solutions that boost both usability and calm. I start with slim profile shelving to fill narrow spaces, then group spices in coordinated jars for quick access. Pull-out pantry modules extend reach, while micro-display nooks and crown molding bridge gaps visually. I use aesthetic baskets and a cohesive color palette to hide edges and add charm. If you keep exploring, you’ll discover even more clever ideas coming up.
Fill Gaps With Slim Profile Shelving

Slim profile shelving is a simple, smart fix for gaps between cabinets.
I show you how to slide in slim shelves, not bulky add-ons, so it stays neat. You’ll gain extra space for spices, mugs, and small jars.
I keep it practical: measure, mount, and place items as you’d like to see them—accessible, tidy, and thoughtfully organized. Additionally, creative storage solutions can transform your small kitchen into a more functional space.
Display More With Coordinated Jars and Spices

I love keeping my spice cabinet orderly, and coordinated jars make it easy to spot what I’m after in a snap.
When the jars and labels match, my whole kitchen feels more intentional and calm.
Let’s talk about simple ways to showcase a cohesive jar display that highlights flavor and function. Additionally, using smart kitchen cabinet organization techniques can help maximize space and improve accessibility.
Coordinated Jar Display
A coordinated jar display pulls together every spice and pantry staple, turning a scattered shelf into a calm, usable centerpiece.
I group jars by function and size, label clearly, and keep lids tight for freshness.
You’ll notice easier cooking, less rummaging, and a neat horizon of color.
Practical, welcoming, and simple to maintain—your kitchen feels organized without effort. Additionally, small kitchen cabinet ideas can inspire creative storage solutions that maximize space while keeping your jars easily accessible.
Spiced Cabinet Styling
When you bring order to your spice cabinet, the effect goes beyond looks—everything feels faster and more intentional.
I align jars by size and label color, so I can grab what I need without hunting. I group spices by use, keep a few favorites front and center, and rotate jars weekly. Organizing kitchen cabinets not only improves accessibility but also enhances the overall aesthetics of your kitchen.
Practical, welcoming, and tidy—spiced styling boosts confidence and kitchen flow.
Extend Accessibility With Pull-Out Pantry Modules

Pull-out pantry modules make shortcuts to your staples almost effortless, especially for smaller kitchens.
I’ve seen how smooth glides and optimized shelving turn cramped corners into reliable storage, letting you reach what you need without bending or bending over.
You’ll save steps, reduce clutter, and enjoy cleaner counters. Clever small kitchen solutions can maximize your limited space even further.
It’s practical, approachable design that respects your space and rhythm.
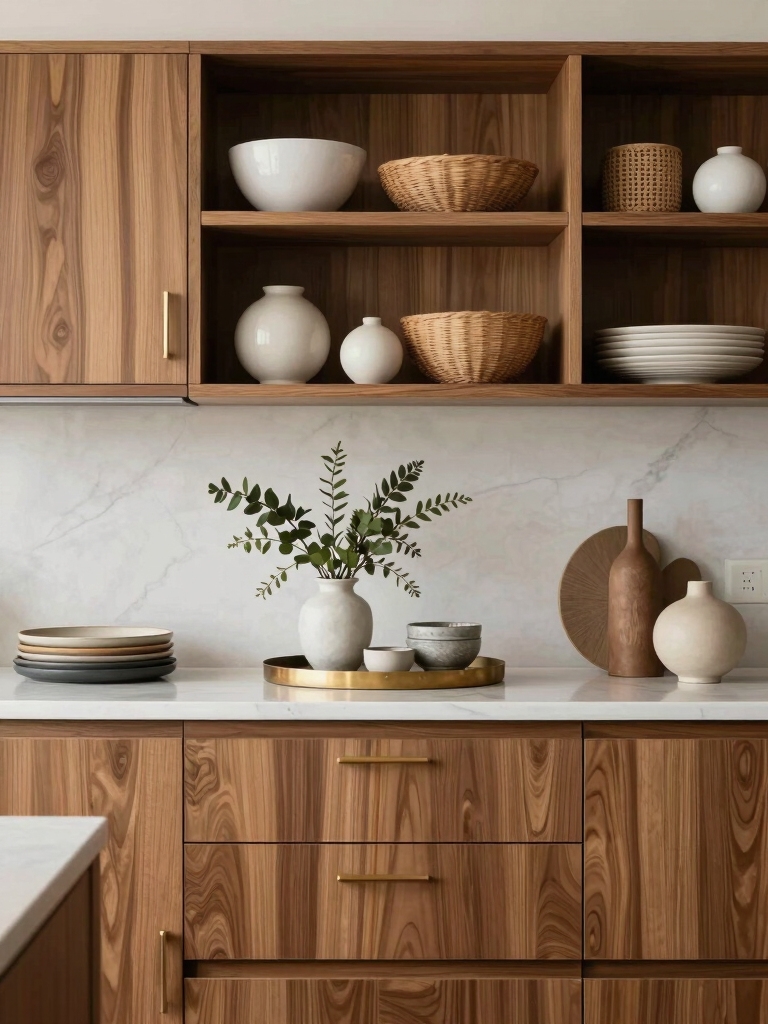
Create a Micro-Display Nook on Open Shelves

I love turning open shelves into a micro-display nook by mixing small collectibles, travel souvenirs, and a favorite mug with a clean backdrop.
I’ll share open shelf styling tricks that keep things cohesive, like using a unifying color palette and varied heights to create rhythm.
Incorporating kitchen shelves decor layouts can elevate the visual appeal of your display while ensuring organization.
Let’s cover the essentials of nook lighting, so your micro-display pops just enough without glare.
Micro-Display Nook Ideas
Want to create a micro-display nook on open shelves that adds charm without clutter?
I share simple ideas that work, quickly. Keep items small, purposeful, and grouped. Now, five-minute displays feel thoughtful, not messy.
- Rotate seasonal keepsakes for fresh texture
- Mix heirlooms with compact, modern pieces
- Use a single color accent for cohesion
- Add a softly lit, tiny focal object
Incorporating open shelving strategies can enhance the overall aesthetic while maintaining functionality.
Open Shelf Styling Tricks
Open shelves don’t have to look cluttered; with a few simple tricks, you can turn them into micro-display nooks that feel intentional.
I keep essentials within reach, group similar pieces, and add a focal item at eye level.
Balance color and texture, rotate items seasonally, and tuck away duplicates.
Praises practicality: form meets function without fuss, every shelf earns its keep. Additionally, consider incorporating open shelf styling to enhance the visual appeal while maintaining accessibility.
Nook Lighting Essentials
Lighting can make or break a micro-display nook on open shelves; with the right fixtures and placement, your shelves glow softly without casting harsh shadows.
I suggest practical angles, dimmable LEDs, and warm tones to keep colors true and inviting.
- Use spotlights above prized pieces
- Opt for dimmable warm LEDs
- Aim light from multiple heights
- Keep cords concealed for clean lines
Bridge Gaps Visually With Crown Molding

Crown molding can subtly bridge gaps between cabinets and walls, giving the kitchen a finished, cohesive look.
I’ll keep measurements simple and show you how a slim profile or decorative edge can soften edges without shouting. This approach preserves cabinet lines, hides seam irregularities, and adds warmth.
You’ll feel steadier, more organized, and motivated to finish the space confidently.
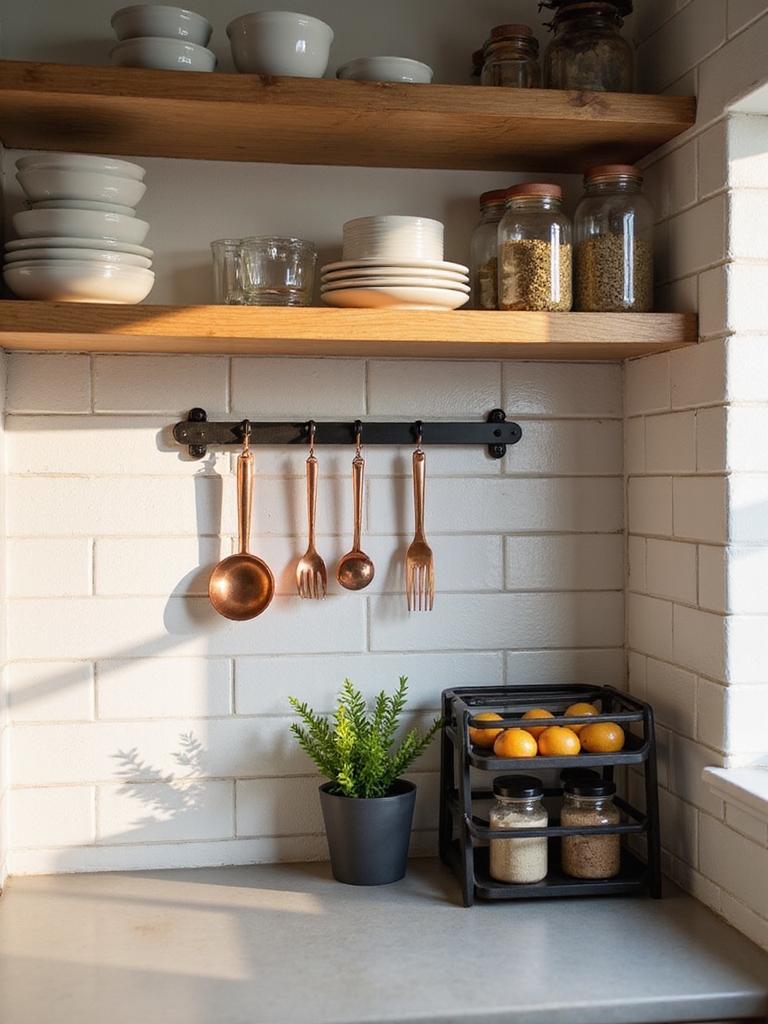
Grow Surface Space With Magnetic Knife Rails
Magnetic knife rails are a simple, space-saving upgrade that keeps your most-used tools within arm’s reach.
I’ve seen how this small change releases counter space and streamlines prep. No more digging through drawers or clattering around.
Let’s get practical and comfy with magnets that hold what you actually use.
- Free up drawer space
- Keep frequently used knives accessible
- Simplify workflow and timing
- Clean, modern look that blends in
Fill Gaps Quietly With Trim Strips and Fillers
If you’ve got gaps between cabinets or around appliances, trim strips and fillers are a quiet, practical fix that can make a big visual difference.
I choose lightweight, paintable options that blend with your finish, then cut to size and install with a minimal toolkit.
The result is seamless lines, less dust catching, and calmer, cohesive kitchen vibes.
Outfit Cabinets With Adjustable In-Cabinet Organizers
Today, I love adding adjustable in-cabinet organizers to turn wasted space into smart, reachable storage.
I’ll tailor shelves and pullouts to fit tall jars, lids, and utensils, keeping everything within easy reach and visible. You’ll notice less clutter, quicker grabs, and calmer mornings.
- Adjustable shelves adapt to item height
- Tension-based dividers corral lids and small items
- Sliding organizers maximize deep cabinet depth
- Removable trays simplify cleaning and reconfiguring
Add Floating Risers for Layered Displays
I love adding floating risers to create layered displays, because they instantly boost depth and interest.
With a few elevated platforms, I can spotlight favorite pieces while keeping the cabinet feeling organized and accessible.
If you’re aiming for a brighter, more inviting look, start with two different heights and build from there.
Layered Display Boost
Layered displays instantly elevate kitchen cabinets, and floating risers are the simplest way to achieve that effect.
I’ll show you practical boosts you can try today, no fluff, just clear steps.
- Use varied heights to create visual hierarchy
- Group items by color for cohesion
- Keep surfaces uncluttered, with essential pieces only
- Place focal pieces at eye level for impact
Elevate Visual Interest
Floating risers are a simple way to add depth to your cabinets, and they pair perfectly with the layered display idea you just read about.
I use them to create mixed heights, spotlight favorites, and avoid flat shelves. They’re affordable, easy to adjust, and keep every item visible.
Small changes, big impact, and a calmer, curated kitchen feel.
Conceal Gaps With Framed Tray Collections
If you’re trying to hide gaps between cabinets, framed tray collections can be a practical, stylish solution.
I group trays by color, size, and frame style, then frame them with a simple border to keep things cohesive. This turns spare space into a curated vignette, not clutter.
- Choose uniform frames
- Mix sizes for rhythm
- Use light, neutral tones
- Add a single, bold tray color
Build a Micro Herb Garden on the Top-Cabinet Edge
Here’s a practical way to add fresh greenery without sacrificing counter space:
I’ll show you how to build a micro herb garden along the top-cabinet edge so you can snip herbs as you cook without bending down.
I use lightweight, magnetic planters and a shallow drip tray.
Choose compact varieties, water sparingly, and label plants for quick, confident harvests.
Enjoy fresher meals daily.
Pair Canisters and Packaging for Cohesive Styling
Pairing canisters and packaging for cohesive styling becomes simpler when you pick a unifying look and carry it through.
I’ll guide you with practical steps that feel approachable, not fussy. Together, we’ll pair textures, colors, and shapes to keep counters calm and inviting.
- Choose a single finish for metal lids
- Limit label styles to one font
- Repeat color accents across jars and boxes
- Vary sizes, not themes, for balance
Install Pull-Out Drawers for Hard-to-Reach Spaces
A simple way to reclaim hard-to-reach cabinet space is by installing pull-out drawers that glide smoothly and reveal everything you keep inside.
I choose sturdy slides, measure carefully, and install level for reliability. Each drawer makes spices, lids, and small gadgets accessible without crawling.
I recommend labeling contents and keeping a shallow height to maximize visibility and ease. Practical, inviting, efficient.
Slim Pull-Out Trash/Recycling Combos for Tight Areas
Slim pull-out trash and recycling combos are a natural next step after adding pull-out drawers for small items, especially in tight kitchens.
I love how they hide waste discreetly and free up floor space.
Here are quick benefits:
- Fits narrow cabinets
- Dual compartments simplify sorting
- Easy to install
- Minimal maintenance and cleanup
Highlight Gaps With Subtle LED Strip Lighting
I like using subtle LED strip lighting to highlight those small gaps, adding a soft glow without glare.
It’s energy-efficient illumination that quietly enhances depth and function in my cabinet spaces.
If we keep it understated, the result feels both practical and warmly inviting.
Subtle Glow Effects
Subtle glow effects can make kitchen cabinets feel more unified and intentional, especially when you highlight small gaps with soft LED strip lighting.
I keep it simple: a gentle arc along the crown, tucked under shelves, minimal brightness, and no glare. It elevates atmosphere without shouting.
- Define the length precisely to fit gaps
- Use warm white for coziness
- Conceal power cords neatly
- Test brightness before final install
Energy-Efficient Illumination
Energy-efficient illumination starts with choosing LED strip lighting that’s dimmable and warm, so gaps glow without glare.
I recommend placing strips along cabinet edges and under shelves, keeping cords hidden.
Use a single temperature (2700–3000K) for consistency, and dimmers for mood or task tasks.
Your gaps will feel cohesive, bright, and welcoming without wasting energy or creating harsh reflections.
Create a Chalkboard Niche for Quick Notes
Have you ever wished for a quick-to-access place for reminders right in the kitchen?
I create a chalkboard niche that’s simple to update, wipe clean, and always visible, so notes stay useful, not clutter. Practical setup keeps priorities front and center.
- Pick a slim, durable frame
- Use chalk markers for crisp writing
- Mount at eye level for visibility
- Add magnets for quick reminders
Use Aesthetic Baskets to Fill Vertical Voids
I love using aesthetic baskets to tame vertical voids, turning empty space into organized charm.
Placing baskets thoughtfully—at varying heights and sizes—creates easy-access storage and a cohesive look.
I’ll show simple placement ideas that maximize every inch without clutter.
Vertical Void Solutions
Vertical voids in a kitchen can feel like wasted space, but I’ve found that using aesthetic baskets is a simple, stylish fix.
I place baskets at different heights, matching tones to cabinet hardware, so shelves feel cohesive, not cluttered.
Practical tips below:
- Choose a uniform color
- Use shallow baskets for lids
- Label contents lightly
- Stack thoughtfully to reveal keys
Basket Placement Ideas
Why not start with a simple placement plan that makes vertical voids feel intentional?
I grab a few aesthetic baskets and test heights, grouping by size. I stack shallow tins on top for light texture, deeper baskets below for storage.
I label or fold towels inside, then step back to guarantee balance. Practical, warm, and clutter-free—quickly achieved with intentional placement.
Mask Uneven Edges With Decorative Screens
Decorative screens are a simple, practical way to mask uneven cabinet edges without a full remodel. I share options that fit your style, budget, and timeline, so you feel confident choosing.
You’ll gain texture, color, and a crisp finish that looks intentional, not patched. Let me guide you toward screens that feel seamless and personal.
- Lightweight, install-friendly frames
- Screen patterns that echo your kitchen vibe
- Neutral tones for versatility
- Easy-care materials and hidden fasteners
Convert Gap Zones Into Micro-Storage Hooks
Gaps in cabinet spaces don’t have to go to waste.
I turn those slim zones into micro-storage hooks—simple, sturdy, and easy to reach. I hang lightweight tools, measuring tapes, and keys, freeing drawer space without clutter.
You’ll notice the flow improves instantly, with everything you need right at hand. Practical, inexpensive, and thoughtfully organized for daily use.
Tie It All Together With a Cohesive Color Palette
Color ties everything together, and I’ve found that a cohesive palette makes your kitchen feel calm and purposeful rather than busy.
I choose a base, accents, and a splash, then build around those tones to avoid chaos. Here are practical steps to align everything:
- Pick a dominant color and repeat it
- Contrast with a complementary accent
- Use texture to add depth
- Test in lighting before committing
Conclusion
Hey, you’ve got this gap game under control. When you add slim shelves, coordinated jars, and pull-out pantry modules, those empty slips become quiet, useful space. A micro-display nook and crown molding tie the room together, while baskets and decorative screens soften the edges. Stacking small fixes creates big harmony, and a cohesive color palette makes it feel intentional, not accidental. It’s like weaving a little rhythm into your kitchen—where function and warmth meet, you’ll feel right at home.