I’m sharing 20 quick, budget-friendly kitchen decor projects you can finish in one afternoon. From swapping knobs and repainting cabinet faces to peel-and-stick backsplashes and floor patterns, you’ll refresh with minimal fuss. I’ll show you open-shelf ideas, mason jar storage, chalkboard walls, and floating shelves, plus easy organization tweaks like liners and labeled hooks. Expect farmhouse touches, gallery art on a budget, and simple maintenance tips to keep things tidy tomorrow—plus more ideas you’ll love as you continue.
How to Transform Your Kitchen in One Afternoon: A Quick Start Plan

If you’re short on time but craving a refreshed kitchen, you can transform the space in one afternoon with a focused plan.
I map a simple sequence: clear clutter, choose a bold accent, swap hardware, and set up a quick vignette.
I pace the steps, explain timing, and celebrate small wins so you finish confident and inspired. Additionally, consider incorporating clever small kitchen storage solutions that hide clutter, making your newly refreshed kitchen both stylish and functional.
Tools and Materials That Truly Save Time

I’ll share the tools and materials that genuinely save time, so you can get projects done quicker without sacrificing results.
Think fast, reliable gadgets and smart material choices that cut fuss and improve consistency. Organizing kitchen cabinets effectively can also inspire your DIY decor projects, making your kitchen more functional and aesthetically pleasing.
Let’s zero in on what makes DIY kitchen decor both efficient and enjoyable.
Time-Saving Tools
Tools that actually save time in the kitchen aren’t flashy toys—they’re reliable workhorses. I reach for a sharp ceramic knife, a magnetic strip, and a compact vac-sealer—quick prep, tidy storage, fewer trips to the drawer. A cordless drill makes quick hangs, while a reversible grater speeds zest and cheese. Simple tools, steady results, less fuss, more finish. Incorporating kitchen ideas for small spaces can further enhance efficiency and organization in your cooking area.
Efficient Materials Choices
Switching from handy tools to smart materials, I’ll focus on things that actually shave minutes off tasks.
I choose pre-primed boards, peel-and-stick backsplash panels, and quick-dry finishes for certainty. No guesswork, just reliable options that cut steps.
I’ll show you how to pick durable, reusable fasteners and patch compounds that set fast, so projects stay clean and finish in one afternoon. Additionally, incorporating luxurious design elements on a budget can elevate the overall aesthetic of your small kitchen.
Budget-Friendly Makeovers Under $20 per Project
If you’re remodeling on a budget, these Budget-Friendly Makeovers Under $20 per Project show you how small, smart changes can make a big impact without breaking the bank.
I’m sharing quick, practical ideas I’ve used: swap knobs, repaint a cabinet face, coat hooks with spray paint, refresh lighting with affordable bulbs, and repurpose mason jars for storage. Additionally, consider kitchen remodel secrets that can help you achieve a fresh look without overspending.
You’ll finish fast, save money, feel accomplished.
Open-Shelf Makeover: Install Tiny Stacks in Minutes
I’m sharing how Tiny Stack Placement can transform your open shelves in minutes, starting with smart, balanced offsets that feel effortless.
I’ll show quick mount tips that keep things sturdy yet simple, so you can place a few stacks exactly where you want them.
Let’s discuss practical layouts and how these tiny pieces can add color and texture without crowding the space. Implementing balanced offsets can create a visually appealing arrangement that enhances the overall aesthetic of your kitchen.
Tiny Stack Placement
Tiny Stack placements are a quick, high-impact way to open up your open shelf and keep essentials at arm’s reach.
I declutter by grouping matching pieces and using uniform heights, so items read as a cohesive unit.
Place frequently used jars near the edge for easy grasp, then tuck backups behind.
Simple, intentional, and instantly practical for any busy kitchen. Additionally, incorporating open shelving strategies can enhance both functionality and aesthetics in your space.
Quick Mount Tips
I’ll walk you through quick mounting tricks that turn open shelves into tidy, grab-ready spaces.
First, locate studs and mark level lines. Use minimal hardware: small brackets and screws that fit your shelf thickness.
Pre-drill holes to prevent splitting. Attach shelves firmly, then space tiny stacks evenly.
Incorporating open shelving designs can enhance both style and storage in your kitchen.
Finish with a quick wipe, and test reach. You’re set for effortless organization.
Peel-and-Stick Backsplash Ideas on a Budget
Peel-and-stick backsplashes are a budget-friendly upgrade that you can tackle in a weekend, with less mess and more style than traditional tile.
I pick patterns that hide seams, swap tiling for faux stone, and choose backsplash sheets that trim easily.
You’ll measure twice, cut once, and enjoy a quick DIY that refreshes your kitchen without overspending.
Simple, practical, satisfying.
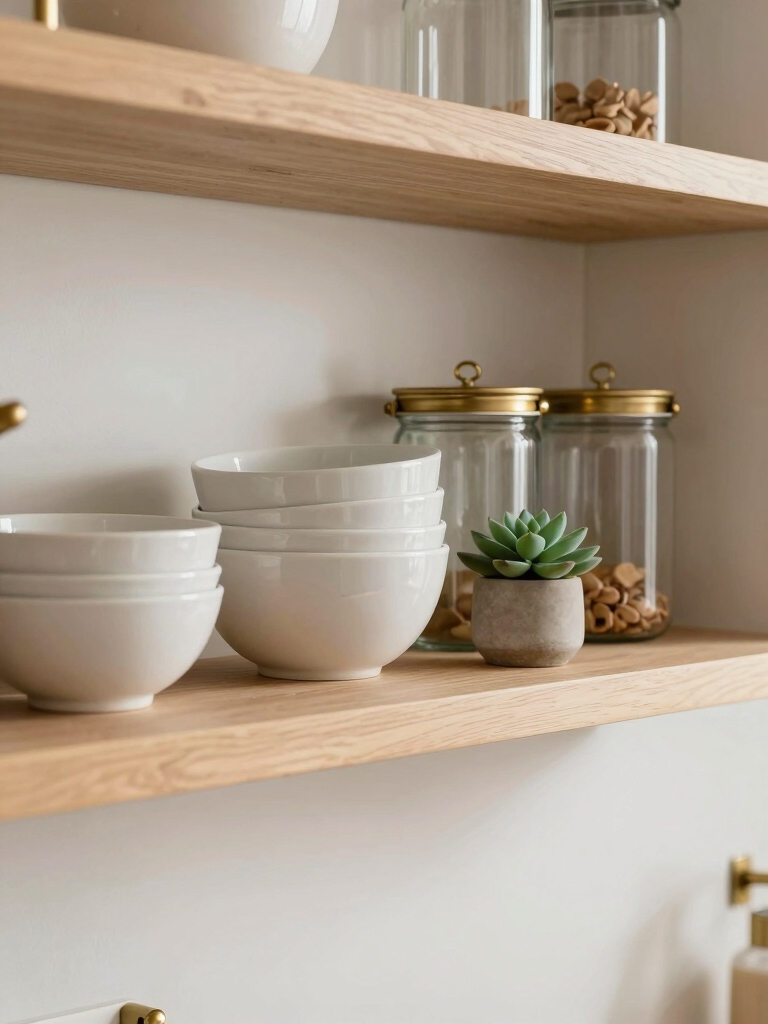
Mason Jar Storage: Instant, Visible Organization
Mason jar storage turns messy cabinet shelves into instant, visible organization you can actually use.
I keep dried spices, grains, and lids in uniform jars with labels facing out, so I spot what I need at a glance.
I install a shallow rack and a few dividers, freeing countertop space.
Simple, affordable, and surprisingly tidy, it stays put.
Chalkboard Wall for Daily Menu Planning
I’m setting up a chalkboard wall where I jot daily menus and quick ideas, so you can see how placement matters—easy to reach and read at a glance.
I’ll share practical daily menu ideas and simple finishing touches that keep it tidy and legible, with fast updates when plans change.
Let’s talk about the best spots, how to keep the board fresh, and how to swap in new ideas without the clutter.
Chalkboard Placement Tips
A chalkboard wall is a handy daily helper, so I’ll show you simple placement ideas that fit most kitchens.
Start with eye level for writing and viewing, then anchor beside the prep area. Keep it near the fridge for easy daily notes, but avoid high-traffic doors.
Use a narrow strip above counters to maximize writing space without crowding appliances.
Daily Menu Ideas
A chalkboard wall makes daily menu planning simple and motivating, turning weeknight decisions into a quick glance rather than a fuss.
I jot breakfast, lunch, and dinner options, keeping staples handy and swaps ready. We keep it printable for guests, too, so curious hands can suggest ideas without chaos.
This system saves time and reduces mealtime stress daily.
Finishing Touches Fast
A simple chalkboard wall can be the fastest way to keep daily menus organized, so I keep ours at a quick glance with a clean layout and clear categories.
I jot breakfast, lunch, and dinner ideas, plus snacks, then erase and adjust as plans change. It stays practical: readable, wipeable, and hard to ignore before the next grocery run.
Simplicity wins.
Floating Shelves: Simple Install, Big Style
Floating shelves are a simple upgrade that makes a room feel bigger and more put together.
I love how quick they install, no special tools required beyond level and screws. You pick sturdy brackets, mount, then display a few bowls, cookbooks, or plants.
They free counter space, add storage, and keep your kitchen feeling organized and inviting.
Give them a try.
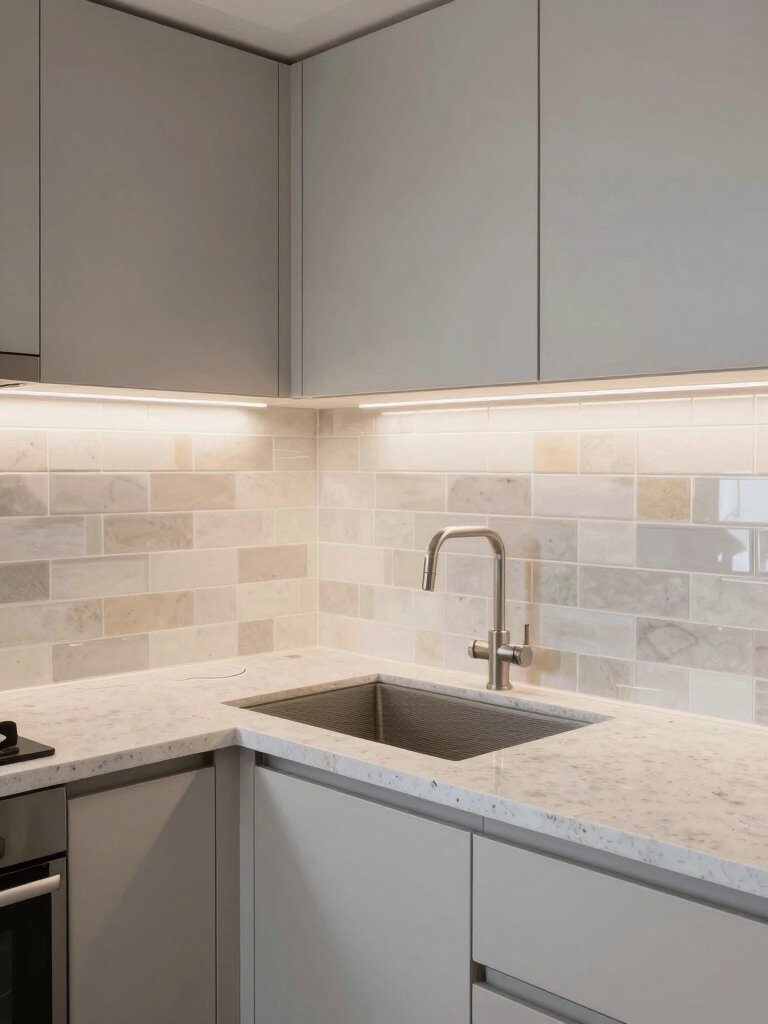
Under-Cabinet Lighting for Bright, Modern Kitchens
Under-cabinet lighting instantly brightens a kitchen, making tasks easier and spaces feel more modern.
I’ll walk you through quick options that fit a one-afternoon project: LED strip kits, puck lights, or tape measures to measure before you buy.
Choose dimmable LEDs for flexibility, and aim for even spacing.
Finish with clean cords, and enjoy clearer countertops and vibes.
Quick Cabinet Hardware Upgrades You Can Do Today
I’ve shown you quick lighting upgrades, and now we’ll turn to a fast, budget-friendly way to refresh the room: quick cabinet hardware upgrades you can tackle today.
- Swap pulls for brass or matte black for instant contrast
- Use same-size hardware to preserve feel, but swap finishes
- Add soft-close hinges to quietly modernize every cabinet
Try this, and watch the whole space transform.
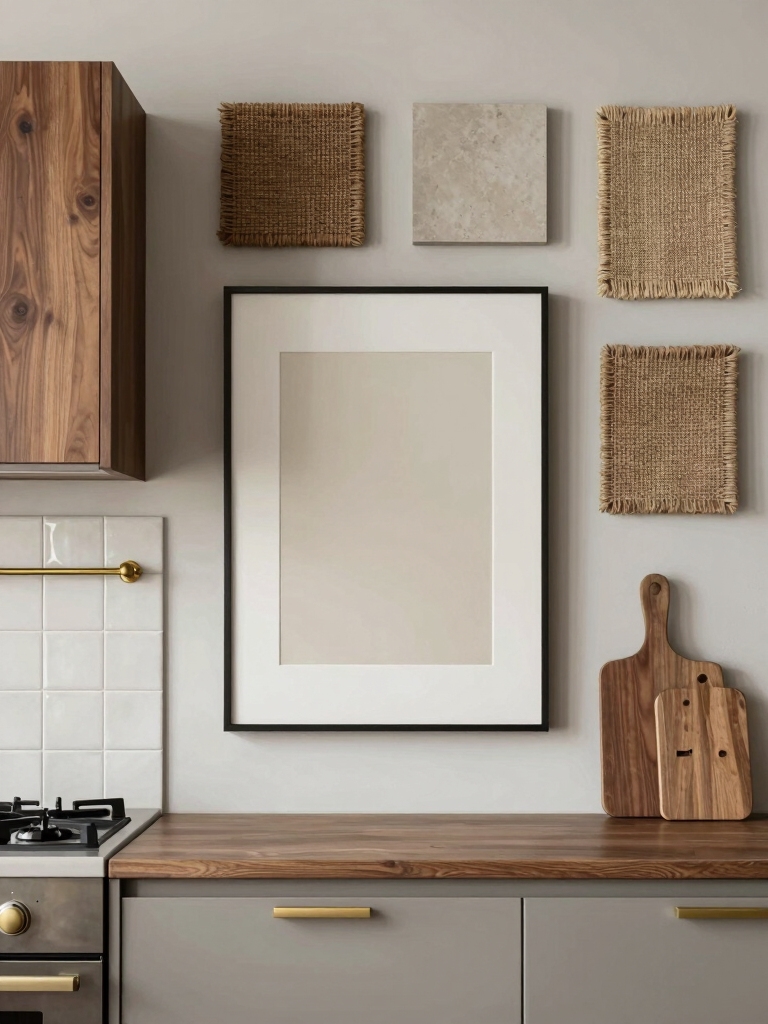
DIY Framed Mirror Makeover for a Fresher Look
A quick-framed mirror makeover can brighten your space in no time, and you don’t need to be a DIY pro to pull it off.
I’ll show simple steps: remove the glass, sand lightly, and seal the frame.
Add fresh paint or stain, reassemble, and hang securely.
This refresh costs little and feels instantly calibrated for your kitchen’s vibe.
Quick Color Pop With a Peel-And-Stick Accent Wall
If you want a quick kitchen facelift, a peel-and-stick accent wall is your easiest win—no mess, no tools beyond scissors and a level, and you can change it anytime.
I love color pops that sharpen mood and kitchen fares.
- Choose a bold stripe or panel for instant depth
- Smooth, press, and seal edges with a steady hand
- Reflect light with a brighter hue for openness
Dish Rack as Decor: Functional and Pretty
Dish racks aren’t just utilitarian; they’re clockwork for a cheerful kitchen, proof you can blend function with pretty.
ISpot clean, then layer style with a drab-proof mat, a few mug hooks, and a pop of color.
I keep items visible, dry dishes prominent, and let the rack shine as décor.
Practical, tidy, inviting—the kitchen feels brighter in minutes.
Pegboard Hack: Button-Tacked Organizer for Utensils
So I’m trying a Pegboard Hack that uses a Button-Tacked Utility Board to organize utensils right where I cook.
I’ll share pegboard organization tips as we set up quick-access spots for must-use tools.
If you’re curious about how to keep counters clear and everything reachable, this is a practical, effortless starting point for you.
Button-Tacked Utility Board
A pegboard hack makes quick work of organizing utensils, and my Button-Tacked Utility Board proves it.
I keep tools visible, reachable, and tidy, so I waste less time rummaging. This project is simple, affordable, and durable, with a playful touch that fits any kitchen vibe.
You’ll finish fast and use everything you grab most.
- Quick setup, zero fuss
- Clear visibility, easy access
- Reusable, magnetic simplicity
Pegboard Organization Tips
Whenever I want quick access to utensils, a pegboard with a Button-Tacked Organizer keeps everything in sight and within reach.
I arrange essentials by task: prep tools, measuring spoons, and frequently used gadgets. Use labeled hooks and varied heights to prevent crowding.
Update textures with colorful pins for quick recognition. Maintenance is simple: wipe, regroup, and rotate based on season needs.
Drawer Liners and Trays: Tidy Drawers in Minutes
Drawer liners and trays can transform a messy drawer into a calm, organized space in minutes.
I show you how simple swaps save time, reduce chaos, and protect items from dinging. You’ll feel confident with quick labels, non-slip mats, and modular trays that adapt to any drawer.
- Choose a breathable liner that’s easy to wipe clean
- Use adjustable trays for flexible layouts
- Label sections for quick finding and restocking
Bar Cart or Coffee Station Makeover: A Round of Style
Let’s start with size and scale: I’ll show you how to balance a cart or coffee station so it feels intentional without crowding the counter.
Then we’ll tackle accessory placement, choosing a few key pieces that spark function and style without clutter.
Finally, I’ll share color and texture tricks to pull the whole look together in a cohesive, easy-to-achieve way.
Size and Scale Refinement
When planning a bar cart or coffee station makeover, size and scale aren’t afterthoughts—they’re fundamentals.
I match item widths to surface space, balance tall pieces with low ones, and keep rhythm with repeat heights. This keeps the setup cohesive and easy to navigate.
- Match dimensions to available counter space
- Vary heights for visual rhythm
- Reserve breathing room around essentials
Accessory Placement Tips
Accessor placement is where the room comes together, so I start by grouping items by function and height then nudge them into easy reach.
I keep essentials near the main pull of the cart or counter, stray decor minimal, and cords tucked away.
I test flow—pour, serve, sip—without overloading surfaces, ensuring balance, clarity, and everyday usability.
Color and Texture Tricks
Color and texture are the secret sauce for a coffee station or bar cart that pops.
I mix bold colors with varied finishes, layer tactile elements, and keep surfaces tidy for instant impact.
You’ll see personality without clutter.
Try these:
- Pair matte metals with glossy accents for contrast
- Add woven textures to soften hard lines
- Use a limited palette to unify diverse pieces
Peel-and-Stick Floor Patterns: No Pro Needed
Peel-and-stick floor patterns are a quick, affordable way to refresh a space without professional help.
I love how simple it is: measure, align, and press, then walk away with a bold new look. Choose coordinating tones, and test a small area first.
Clean edges, countertop tape, and matching grout look will elevate without a pro. Done in hours.
Farmhouse Touches: Wreaths, Linens, and More
Farmhouse touches bring warmth and welcome to any kitchen, so I start with simple, practical ideas you can tackle this weekend—wreaths, linens, and small accents that feel cozy without clutter.
- DIY burlap wreaths that hang near the sink
- Linen napkins, pressed and tied with string
- Simple bead garlands for cabinets and shelves
Affordable Art Wall: Gallery Frames on a Budget
If you’re loving the cozy, design-forward touches from my farmhouse ideas but want a cleaner, more gallery-worthy look, an affordable art wall is the perfect next step.
I keep frames simple and swap in prints you already own or find affordable finds. Measure spacing, use uniform mats, and lean toward black or white for a cohesive, polished display—without overspending.
Final Check: Keeping Your Space Sparkling Tomorrow
We’ve got a simple plan to keep your space sparkling tomorrow: quick, practical steps you can tackle today so everything stays fresh and welcoming.
I’ll walk you through easy habits that protect your hard work, so you don’t backslide.
- Tidy zones briefly each evening for lasting order
- Wipe high-traffic surfaces after meals to prevent buildup
- Set a 5-minute cleanup timer to maintain momentum
Conclusion
You can tackle these quick projects and feel the room transform before your eyes. I learned that a little paint, clever organizers, and budget-friendly accents go a long way—fast, fun, and fearless. If you’re unsure, start with one small update and let momentum carry you. Think of your kitchen as a blank canvas, and you’re the artist; a single afternoon can spark a brighter, brighter everyday. Like a sparkler, your space can glow with simple, doable magic.