I built an affordable outdoor kitchen for under $1,000 and you can too. Start with a simple base of sturdy shelves and flat, durable surfaces, then add a budget-friendly grill station—palets or bricks work great. Use secondhand or repurposed materials, plus smart storage and compact sinks to maximize space. Add weatherproof lighting and modular bins to keep things tidy. It’s practical, durable, and easy to scale—stick with me, and you’ll learn more tricks for big impact on a small budget.
What an Affordable Outdoor Kitchen Looks Like and Why It Works

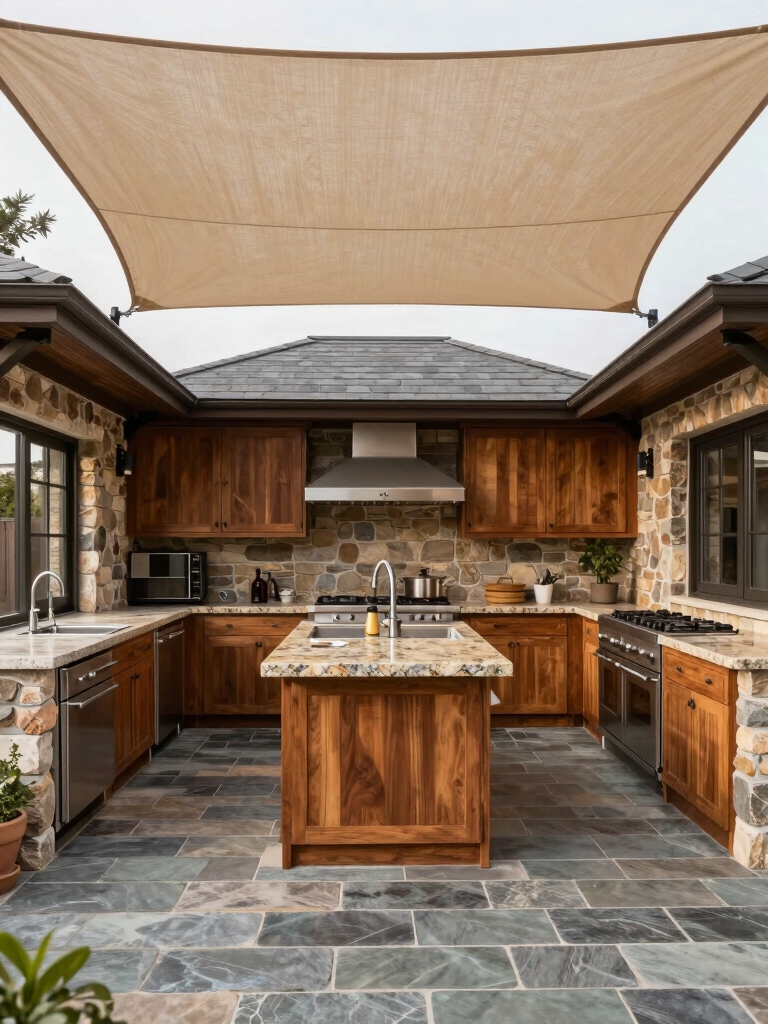
An affordable outdoor kitchen sticks to the basics: a sturdy grill, a simple countertop, and smart storage that keeps the space clutter-free.
I’ve built spaces that feel complete without excess, using durable materials and thoughtful layout. Outdoor kitchens can be designed to blend seamlessly with your home’s architecture, creating a harmonious outdoor space that enhances your backyard’s aesthetic.
You’ll see why a compact setup can handle daily meals, quick cleanup, and entertaining, delivering function, durability, and a welcoming vibe with minimal fuss.
Set Your Budget Under $1,000 Before You Start

Moving from the idea of a simple, affordable setup, I’ve learned the fastest way to make it work is to set a clear budget before you buy anything. In this case, aim under $1,000 and prioritize essentials: durable stove, weatherproof prep area, basic tools, and safe fuel storage. Track every purchase, compare prices, and avoid impulse buys that don’t add real value. Additionally, consider using outdoor kitchen design layout formulas to maximize your space and functionality while staying within budget.
Build a Simple Base: Shelves, Surfaces, and Storage

I’m building a simple base with sturdy shelves and a practical surface first, so everything has a reliable home. I’ll share quick tips on selecting durable materials and arranging storage zones for clean, easy access. Let’s keep it practical and focused on simplicity, so your outdoor kitchen stays organized and ready to cook. Adding features like stunning outdoor designs can enhance the functionality and beauty of your space.
Build Sturdy Shelves
Ready to get sturdy shelves built? I’ll keep it simple: choose a strong frame, add evenly spaced supports, and resist wobble with diagonal bracing.
Use inexpensive plywood for shelves, predrill, and screw in tightly. Space them for easy access and ventilation, then seal with exterior brush-on poly. Outdoor kitchens can enhance your home’s value and provide a great space for entertaining, so make sure to plan your layout accordingly.
Label zones for tools, dry goods, and utensils to stay organized.
Surface Practicality First
We’ve got sturdy shelves in place, so now we focus on something equally practical: a simple base that keeps surfaces steady and storage easy to reach.
I layer a flat, durable top, add non-slip feet, and frame open shelves for quick access.
Handles and hooks finish the setup, so every tool sits within arm’s reach without crowding.
Practical, affordable, and reliable. Adding a compact outdoor kitchen can maximize functionality without taking up too much space.
Create a Budget-Friendly Grill Station With Pallets or Bricks

A sturdy grill station doesn’t have to break the bank. I’ll show a simple build using pallets or bricks, focusing on safety and stability.
Choose heat-resistant surfaces, level ground, and ample airflow. I prefer easy assembly: stack bricks into a low enclosure or lay pallets flat as a base, then add a metal grate.
Keep tools handy and budget friendly. Consider using affordable materials that can be found at local hardware stores or reclaimed from previous projects to further reduce costs.
Source Secondhand Materials Without Sacrificing Quality

I’m all for using secondhand materials that still perform well, especially when I’m careful about size, condition, and age.
I look for solid construction, minimal wear, and proven performance to keep quality high without blowing the budget.
If we stay selective and verify condition, we can source smartly and still build a durable outdoor kitchen.
Secondhand Materials Quality
Secondhand materials can be a smart, budget-friendly option for an outdoor kitchen, as long as you assess quality before you buy.
I inspect for straightness, corrosion, and cracks, plus fit with existing plans. I ask for warranties or clear provenance, test hardware, and avoid hidden damage.
I prioritize durable finishes and non-porous surfaces, then compare costs against new equivalents for true value.
Budget-Smart Sourcing
Budget-smart sourcing means finding reliable secondhand materials without sacrificing quality.
I show you practical checks: inspect for cracks, rust, and moisture, test hardware, verify dimensions, and compare finishes.
I’d negotiate confidently, prioritize local buys, and repurpose usable components.
I also keep a running budget, document wear, and plan safe installs.
You can stretch dollars without sacrificing durability or style. Additionally, consider incorporating DIY friendly outdoor kitchen ideas that can enhance your space without breaking the bank.
DIY Countertops: Cheap, Durable, Easy to Install
When you’re building an outdoor kitchen on a budget, choosing a countertop that’s cheap, durable, and easy to install is a game changer.
I favor concrete or repurposed materials I can DIY, since they resist weather and forge a clean look without pricey slabs. Simple outdoor kitchens can be achieved with careful planning and creativity, allowing you to customize your space without breaking the bank.
Measure precisely, seal edges, and secure supports. Easy maintenance keeps this cost-saving choice practical and long-lasting.
Weather-Resistant Siding, Sealing, and Finishes for Outdoor Kitchens
Choosing weather-ready siding and finishes is step one for a durable outdoor kitchen, and I’ll show you practical, no-fuss options that hold up to sun, rain, and heat.
I favor cost-saving materials like fiber cement, sealed plywood, and powder-coated metals. Seal joints, use good caulk, and repaint or recoat every few years.
Prioritize ventilation and simple maintenance to keep it looking sharp.
Plan a Functional Prep Zone on a Shoestring
A shoestring prep zone can be smart, efficient, and surprisingly sturdy if you focus on basics first.
I map simple tools, clear steps, and durable surfaces for quick, clean prep without clutter. You’ll feel confident with smart layout, multi-use stations, and budget-friendly upgrades that last.
- Prioritize a flat, easy-clean work surface
- Use modular bins for scraps and tools
- Choose a compact, weatherproof cutting board
- Label containers for quick access
- Plan for easy cleanup and storage
Add a Sink and Water Access: On a Budget
I’ll walk you through water access options, from portable setups to simple plumbed lines, so you can pick what fits your budget.
I’ll share a budget-friendly sink setup and practical drainage tips that keep costs down without sacrificing usefulness.
We’ll cover quick supply ideas and how to avoid common hiccups, so you can get clean water where you cook and prep.
Water Access Options
When you’re adding a sink and water access on a budget, start with a realistic plan that fits your outdoor setup and how you’ll use it.
I share practical, affordable options that keep things simple and reliable, so you’ll stay energized rather than overwhelmed.
- I’ll map flow and waste basics to prevent surprises
- Portable riff on a prep station saves space
- Gravity-fed or pump options reduce mains dependence
- Snag compact fixtures for tight spots
- Hidden hoses reduce tripping risks
Budget Sink Setup
If you’re on a tight budget, start with a simple sink plan that fits your space and how you’ll use it.
I choose a compact basin, a basic faucet, and a cheap water container or reservoir.
Mount on a sturdy cart or cabinet, add food-safe tubing, and run a short line for easy access.
Keep connections simple, leak-free, and easy to maintain.
Drainage and Supply Tips
Drainage and supply don’t have to break the bank, and you can make a solid setup with a few simple choices.
I’ll share practical tips you can trust, keeping costs low while working with real spaces, hoses, and drains. You’ll gain reliable water access without overhauling your yard or wallet.
- Prioritize gravity drainage to avoid pumps
- Use a compact, portable hand basin
- Tap into existing outdoor spigots
- Flexible hoses for easy repositioning
- Seal connections to prevent leaks
Lighting and Ambiance for Outdoor Kitchens
Lighting isn’t just about visibility; it sets the mood and safety cues you’ll rely on when cooking outdoors.
I keep it simple: string lights soften edges, solar lanterns fill corners, and task lighting over prep zones stays bright but not harsh.
Dimmer switches let me shift ambiance, while weatherproof fixtures reduce fuss.
Practical, affordable, and mood-friendly illumination makes evenings welcoming.
Storage Solutions That Maximize Small Spaces
Maximize every inch with smart, modular storage that fits a small outdoor kitchen.
I share compact, accessible ideas that keep essentials ready. You’ll stay organized without clutter, and the space feels bigger when every item has a home.
Practical, budget-friendly solutions you can implement today.
- Fold-down work surface for quick prep
- Vertical racks that free counter space
- Under-counter bins for bulk buys
- Hooks and magnetic strips for tools
- Stackable containers with labeled lids
Weekend-Ready 3-Step Outdoor Kitchen Setup
Three simple steps to get your outdoor kitchen weekend-ready:
I map a quick setup—choose a compact grill, prep a prep station, and stash essentials in a weatherproof caddy.
I test airflow, line a cheap countertop, and position a small prep bin nearby.
I finish with quick cleanup basics, so you’re ready for spontaneous weekend meals.
You’ve got this.
Maintenance, Safety, and Longevity on a Budget
We’ve got the basics down for a weekend setup, and now we shift to keeping that outdoor kitchen humming for the long haul—on a budget.
I’ll guide you through simple maintenance, safety checks, and longevity habits that save money and stress. Stay proactive, clean regularly, and safeguard against weather and wear.
- Quick daily wipe-down to prevent buildup
- Inspect latches, hinges, and lids for tightness
- Cover and shelter seasonal gear, store safely
- Use affordable, food-safe cleaners and sealants
- Schedule quarterly checks for connections and fuel safety
Conclusion
Think of your budget as a seed. With patient care, it grows into a sturdy backyard kitchen. You don’t need a mansion to harvest flavor—just sunlight, a few salvaged boards, and a plan that fits your space. I built mine with pallets, bricks, and a splash of elbow grease, and watched it transform into a workbench of meals and memories. Start small, stay practical, and watch your outdoor kitchen flourish—steady, simple, and wonderfully yours.