I’ve pulled together 14 budget-smart outdoor kitchen wins that save you thousands by focusing on planning, durable yet affordable materials, and simple builds. I’ll guide you through clear scope, quick budget ranges, and practical choices like off-the-shelf cabinets with custom fronts, weatherproof countertops, and smart storage. You’ll learn how to protect surfaces, seal joints, and use durable, low-cost options like concrete pavers or reclaimed stone. Keep going and you’ll discover even more money-saving ideas.
Plan Your Budget Outdoor Kitchen: Framework and Milestones

Setting a realistic budget up front makes the outdoor kitchen project feel doable, not overwhelming. I start with a clear framework: identify must-haves, estimate costs, and set milestones. I track every expense, adjust as needed, and reserve a contingency. Additionally, implementing outdoor kitchen design layout formulas can optimize your space and functionality while keeping costs in check.
Define Scope: Size, Features, and How You’ll Use It

We’ve laid out a budget framework, so now I’ll map out the scope: how big it should be, which features matter most, and how you’ll actually use the space.
I’ll prioritize durable, easy-clean surfaces, a compact workflow, and weather-ready storage.
Think zones for prep, cooking, and cleanup, with flexible seating.
Concrete sizing, essential fixtures, and realistic usage patterns guide my plan. Additionally, incorporating year-round cooking capabilities ensures that your outdoor kitchen can be enjoyed in any season.
Set Your Budget: Quick Ranges and Tradeoffs

I’ll help you set a sensible budget by outlining quick ranges and the tradeoffs you’ll face at each level.
We’ll map core choices to practical costs, so you can pick one that fits your needs without overspending.
Let’s keep it clear: you’ll balance features, longevity, and upfront versus ongoing costs as you decide. Additionally, exploring budget-friendly DIY outdoor kitchen options can significantly enhance your savings while maximizing functionality.
Quick Budget Ranges
Choosing a budget for your outdoor kitchen doesn’t have to be guesswork: I’ll lay out quick ranges and tradeoffs so you can pick a practical starting point.
For a tight DIY setup, plan around $2,000–$5,000 for basics, $5,000–$12,000 for midrange cabinets and efficient appliances, and $12,000–$25,000+ for durable materials, full features, and extended outdoor living.
Prioritize essentials, upgrade gradually, avoid premium finishes upfront. Additionally, consider incorporating stunning outdoor kitchen ideas that can captivate your guests and enhance your entertaining space.
Core Tradeoff Highlights
Setting a budget means balancing wants with what you truly need, and the quick ranges here help you lock in a practical starting point.
I’ll highlight tradeoffs you’ll face as you decide where to invest.
- Material quality vs. upfront cost
- Built-in features vs. add-ons later
- Labor savings vs. DIY time and effort
Consider that investing in affordable outdoor kitchen ideas can significantly enhance your overall enjoyment and functionality without breaking the bank.
Practical Cost Scales
Practical cost scales give you a clear starting point: quick budget ranges and the tradeoffs you’ll face as you lock in a plan.
I’ll map simple tiers—basic, midrange, premium—so you know what to expect. You’ll balance quality and durability against future maintenance, plan for hookups and permits, and spot hidden fees upfront. Stylish outdoor kitchen designs can inspire your layout while staying within budget constraints.
Clear numbers keep decisions honest and attainable.
Choose Durable, Budget Materials That Last

If you want your outdoor kitchen to stand up to sun, rain, and heavy use without breaking the bank, pick materials that balance durability with price from the start.
I prioritize value, not hype, so you can trust these choices:
- Aluminum cabinets
- Powder-coated steel
- Weather-resistant hardwoods
Additionally, selecting durable outdoor kitchen cabinets ensures your investment lasts regardless of the weather conditions.
Build a Weatherproof Countertop on a Budget
I’m sharing practical, budget-smart ideas to weatherproof your countertop, starting with reliable Weatherproof Materials that won’t break the bank. I’ll show you budget-friendly Techniques to protect the surface and keep it looking good season after season. We’ll also compare Long-Lasting Sealant Choices so you can pick a durable option without overspending. Choosing the right materials is crucial for ensuring your countertops can withstand extreme weather conditions and maintain their integrity over time.
Weatherproof Materials Guide
When you’re choosing a weatherproof countertop on a budget, start with materials that resist moisture, heat, and UV exposure without breaking the bank.
I pick solid, cost-conscious options that perform.
- Concrete composite mixes for durability
- Recycled composite boards with water resistance
- Ceramic or porcelain tiles with sealed edges and UV stability
Budget-Friendly Countertop Techniques
Taking the weatherproof ideas from the last piece, I’ll show you affordable ways to build a durable countertop without breaking the bank.
I gravitate toward simple, ready-to-assemble surfaces like plywood bases with waterproof coatings or concrete mixes poured over a mold.
For durability, seal edges, use deburring keels, and choose lightweight, low-cost materials that tolerate outdoor use and temperature shifts.
Long-Lasting Sealant Choices
Choosing a durable sealant is key when you’re making a weatherproof countertop on a budget, so I’ll focus on options that perform well without breaking the bank.
- Silicone exterior sealants resist moisture and temperature changes.
- Polyurethane blends offer durability for high-traffic areas.
- Epoxy systems create a hard, stain-resistant surface with longer lifespans.
Create Smart Storage for Grill and Kitchen Needs
A simple rule makes outdoor cooking smoother: smart storage that keeps your grill tools, spices, and accessories within arm’s reach.
I keep basics organized in a weatherproof bin, a magnetic strip for stainless tools, and labeled jars for seasonings.
No fluff, just quick access, budget-friendly tweaks, and durable solutions that cut trips to the cabinet while protecting every essential.
Install a Built-In Grill Station That Feels Pro
When I build a built-in grill station, I focus on function first and style second, so it feels pro without breaking the bank.
- Plan clear dimensions and ventilation to prevent flare-ups while keeping costs in check.
- Choose durable, affordable materials and sealants for weather resistance.
- Conclude with a compact drawer or tucked-away storage for tools and propane.
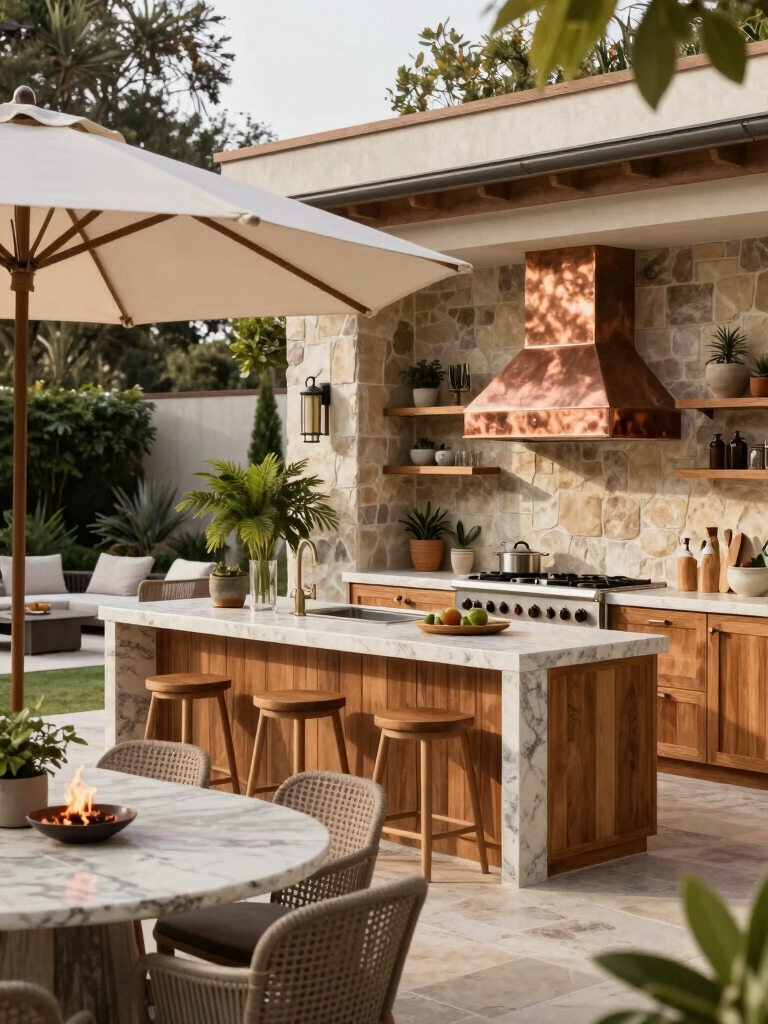
Design a Simple, Functional Outdoor Island
A simple, functional outdoor island starts with a compact footprint and clean lines, so you can prep, store, and serve without clutter.
I keep the design practical: fit essentials behind a slim cabinet, add a counter that’s easy to wipe, and choose affordable materials.
I concentrate on durability, simple assembly, and scalability to grow with your outdoor kitchen goals.
Light It Right: Weather-Resistant Lighting for Ambience
Lighting sets the mood and the workflow, so I start with weather-resistant options that stay reliable in sun, rain, and humidity.
I’ll share practical choices that won’t break the bank, keeping ambience simple and durable.
- Solar lanterns with sealed housings for dusk-to-dawn glow
- IP-rated string lights threaded under eaves or railings
- LED puck lights in weatherproof casings near prep zones
Fast-Fix Flooring: Concrete Pavers or Reclaimed Stone
When I’m choosing fast-fix flooring for the outdoor kitchen, concrete pavers offer simple, budget-friendly options with solid durability.
Reclaimed stone brings character and long-term value, though it can demand extra care and precise installation.
Let’s explore practical installation tips and compare the concrete pavers’ pros with the reclaimed stone benefits to find the best fit.
Concrete Pavers Pros
Concrete pavers are a practical, budget-friendly option for outdoor kitchens, and they’re quick to install, too.
I’ll share how they help you save time and cash without sacrificing durability or style.
- Quick installation keeps project costs down
- Wide range of colors and textures for custom looks
- Easy replacement if a panel gets damaged
Reclaimed Stone Benefits
Reclaimed stone brings a natural charm and durability that pairs perfectly with a practical outdoor kitchen.
I love its affordability and character, since I can reuse existing materials or source affordable slabs without compromising strength.
It resists weather, blends with plants, and ages gracefully.
If you want a low-cost, sturdy surface, reclaimed stone offers timeless practicality with real value.
Installation Tips Guide
If you’re weighing fast-install flooring options for an outdoor kitchen, concrete pavers and reclaimed stone both deliver solid value, durability, and a straightforward install.
I’ll guide you quickly through practical setup tips that save time and money.
- Prepare a level base with compacted gravel for drainage.
- Dry-fit pattern to minimize cuts and waste.
- Seal joints and edges to prevent shifting and weathering.
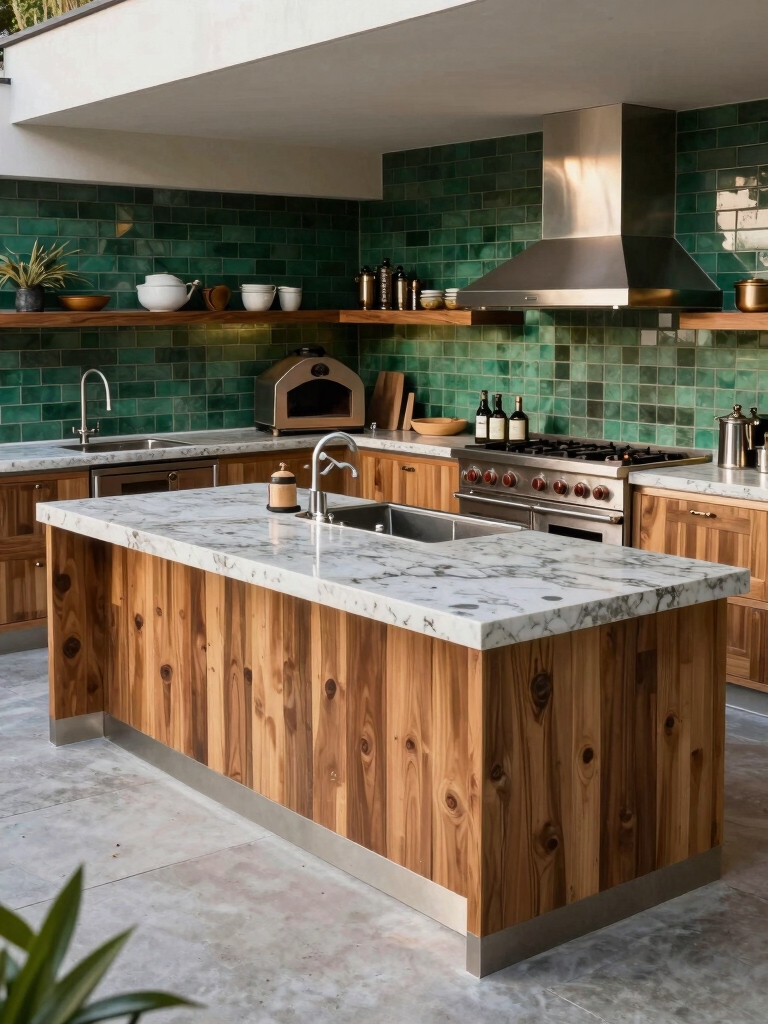
Off-The-Shelf Cabinets With Custom Fronts
Off-the-shelf cabinets with custom fronts are a smart, budget-friendly way to get a polished outdoor kitchen look without breaking the bank.
I choose sturdy, weatherproof boxes and pair them with veneer fronts or thermofoil options for a cohesive feel. I measure precisely, order samples, and skip costly customization.
Maintenance is simple: seal joints, wipe spills, and enjoy durable, affordable cabinets.
Pallet or Slat Wood for Outdoor Shelves
Pallets or slat wood can be a smart, budget-friendly choice for outdoor shelves, offering a rustic look and easy customization.
I’m sharing practical tips you can use today to keep costs down and uptime up.
- Source reclaimed pallets or refined slats from a hardware store’s discount rack.
- Sand thoroughly, seal with outdoor-grade finish, and elevate with sturdy brackets.
- Use slats for adjustable shelf heights to maximize space.
Protect Surfaces: Water-Resistant Backboards and Splash Zones
I’m thinking about water-resistant backboards and splash zone protectors as smart, budget-friendly basics for any outdoor kitchen.
Let’s chat about how surface sealants extend life and keep counters looking fresh, plus where to place splash guards for easy cleanup.
If we pick durable options now, we cut maintenance later and maximize the longevity of every dollar.
Water-Resistant Backboards
Water-resistant backboards are a simple, budget-friendly way to protect surfaces in wet areas of an outdoor kitchen.
I choose sturdy, affordable panels and seal edges to prevent moisture seepage, then mount them where splashes happen.
1) Pick moisture-resistant material (cement board or PVC)
2) Seal joints and fasteners with waterproof sealant
3) Maintain with periodic cleaning and resealing
Splash Zone Protectors
To keep every part of a DIY outdoor kitchen standing up to splashes, I add Splash Zone Protectors right where water hits hardest—around sinks, grills, and prep counters.
They’re simple, affordable upgrades that shield walls and backsplashes. I use peel-and-stick or inexpensive sheet panels, cut to fit, then wipe clean.
Less damage, fewer regrets, more usable space for years.
Surface Sealants Longevity
Surface sealants are the quiet workhorse behind durable outdoor surfaces, and I’ve found that choosing the right sealant is half the battle.
I’ll share simple, cost-conscious tips for longevity.
- Watch for UV-rated formulas to slow fading and cracking.
- Apply after clean, dry surfaces; skip overcoats that trap moisture.
- Re-seal every 1–3 years based on sun exposure and wear.
Seal, Coat, and Maintain for Longevity
Once you’ve picked the right sealant, you’ll want to apply it in a clean, dry space and stick to a simple routine that protects your outdoor kitchen long after the project wraps.
I’ll suggest regular inspections, prompt touch-ups, and seasonal cleaning. Choose budget-friendly, durable coatings, recoat when fading occurs, and store products correctly.
Consistency saves money and extends longevity without fuss.
Conclusion
You came for big savings and left with a blueprint you can actually afford. Surprised? Me too—that a weatherproof countertop, off-the-shelf cabinets, and pallet shelves can look purposeful without draining wallets feels like a small miracle. If I can pull this off on a shoestring, so can you. Plan, budget, and choose durable basics. The irony is that simplicity often outlasts extravagance, and a well-used outdoor kitchen proves it—practical, approachable, and delightfully inexpensive.