If you’re planning an outdoor kitchen, I’ve mapped 16 practical layouts you can copy today that optimize workflow, durability, and budget. I cover grid-based planning, zone priorities, and the kitchen triangle to keep prep, cooking, and cleaning efficient. You’ll see compact versus grand setups, material palettes that resist weather, and smart storage ideas to cut clutter. Each template is designed for easy adaptation and fast results, so you can start building soon—and there’s more to come beyond this overview.
Choose Your Outdoor Kitchen Grid: Which Layout Fits Your Space

Choosing the right outdoor kitchen grid starts with your space and how you cook.
I’ll help you pick a layout that matches flow, prep, and grill style. Start by measuring your footprint, noting doors, shade, and traffic.
I consider work zones, utensil access, and safety gaps. Pick a grid that minimizes steps and maximizes reach without crowding corners. Additionally, consider incorporating stunning outdoor kitchen ideas to elevate the aesthetic and functionality of your space.
Outdoor Kitchen Layouts: Four Grids to Copy

I’ll walk you through Grid Core Concepts and the Four-Grid layouts so you can spot what fits your space.
Think of practical layouts you can copy or tweak, with clear zones for prep, cooking, and gathering.
I’ll share concise templates you can adapt right away, keeping the focus on usability and flow. Additionally, consider the importance of outdoor kitchen layout options for enhancing efficiency in your design.
Grid Core Concepts
When planning outdoor kitchen layouts, the Grid Core Concepts help you map tasks, zones, and workflows efficiently, so you can cook, prep, and serve without crossing paths.
I break spaces into clear zones: prep, cooking, cleaning, and storage.
Each grid guides equipment placement, traffic flow, and safety spacing, ensuring smooth moves and minimal wasted steps.
Practical, concise framework for reliable layouts.
Four-Grid Layouts
In outdoor kitchen layouts, I often start with a four-grid approach because it keeps flows clear and tasks focused: prep, cook, clean, and store.
Each grid guides equipment placement, seating, and waste streams, reducing trips and clutter. I map zones to rhythm, not rigidity, so you can adapt as cooks brainstorm, measure, and finish confidently without backtracking or wasted steps. Additionally, incorporating smart outdoor kitchen designs can enhance functionality and efficiency in your outdoor cooking space.
Practical Copy Templates
Four-grid layouts keep outdoor kitchen planning simple, so I’ll share practical copy templates you can copy or customize for your own space.
I’ll describe concise prompts you can adapt: “Open-air prep area with sink,” “Seating zone adjacent to grill,” and “storage beneath counters.”
Use active voice, brief lines, and clear verbs to communicate layout choices to clients, friends, or teammates efficiently. Additionally, consider mess-free outdoor kitchen layouts that help maintain a tidy home environment.
Establish Your Workflow: Zone Priorities for Smooth Traffic
To move smoothly through outdoor kitchen tasks, I start by mapping zones for prep, cooking, cleaning, and storage so traffic stays clear and efficient. Then I assign clear shortcuts and logical paths, prioritizing frequent moves. I keep tools within reach, designate waste and recycling points, and plan for foot traffic during peak sessions. The result: steady, predictable flow, fewer trips, happier cooks. Additionally, incorporating designated prep areas can further enhance efficiency by ensuring all necessary tools and ingredients are close at hand.
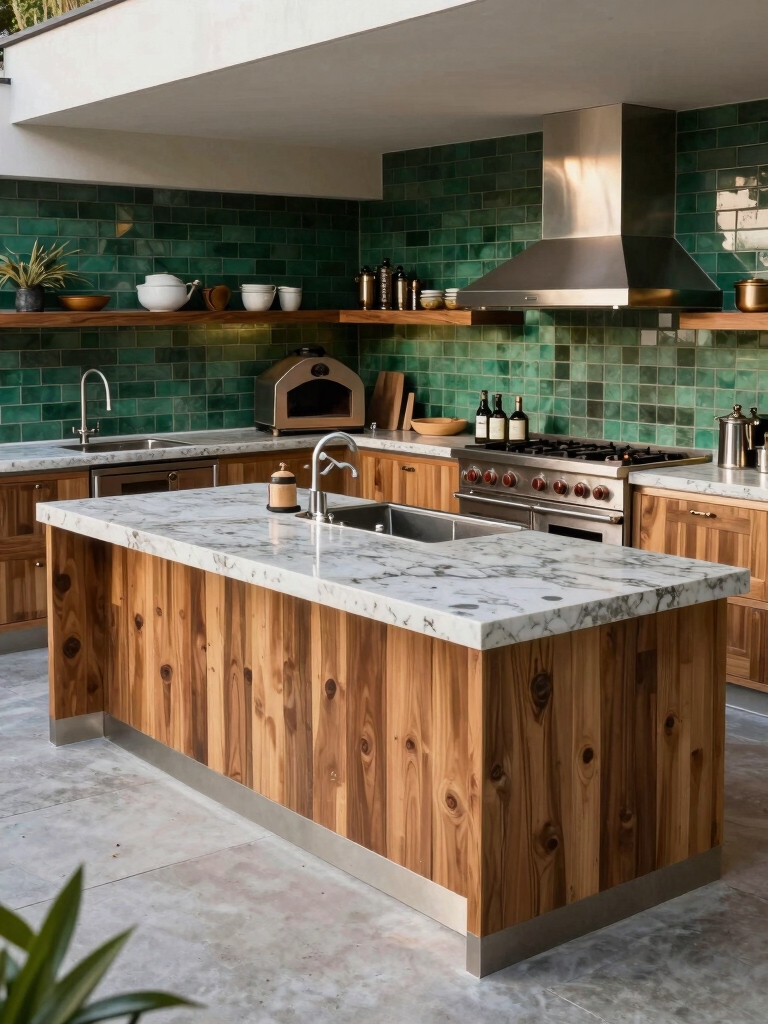
Outdoor Cooking Triangle: Place Grill, Prep, and Sink Efficiently
I’m looking at how the grill, prep area, and sink can form a practical triangle that speeds up cooking and cleanup. I’ll discuss keeping the grill close to the sink for easy handwashing, and making the prep area efficient so ingredients flow toward the cook space. I’ll also consider traffic flow to prevent bottlenecks, ensuring everyone can move comfortably without getting in the way. Additionally, incorporating indoor outdoor kitchen flows can enhance the overall efficiency and enjoyment of your cooking experience.
Grill-To-Sink Proximity
When planning your outdoor kitchen, keep the grill and sink close enough for easy fueling and cleanup, but far enough to avoid smoke drifting into the prep area.
I position the sink within a comfortable working triangle, minimizing steps between grilling and washing.
Allow a clear landing zone for utensils, pans, and marinades, ensuring safe, efficient shifts during cooking sessions. Additionally, incorporating a rustic outdoor kitchen can enhance the overall charm and character of your space without overspending.
Prep Area Efficiency
With the grill, prep area, and sink laid out in a tight, efficient triangle, prepping becomes smoother and faster.
I focus on workflow, not wasted steps, so you save trips and time.
- Keep cutting boards adjacent to the sink for quick rinsing.
- Place utensils within arm’s reach of the prep zone.
- Use a magnetic strip for frequently used knives.
- Group bowls near prep surfaces to streamline refills.
Additionally, consider incorporating budget-friendly DIY designs to maximize your outdoor kitchen’s functionality without breaking the bank.
Traffic Flow Optimization
A smooth outdoor cooking triangle hinges on clear traffic flow: the path between grill, prep area, and sink should feel natural, not forced.
I map routes that minimize steps, keep clutter away, and allow one-footwork clearance. I position trash, towels, and tools within arm’s reach, reducing back-and-forth, so you cook, garnish, and clean efficiently without bottlenecks or trips.
Prep Zone Layouts: Quick-Access Surfaces and Stations
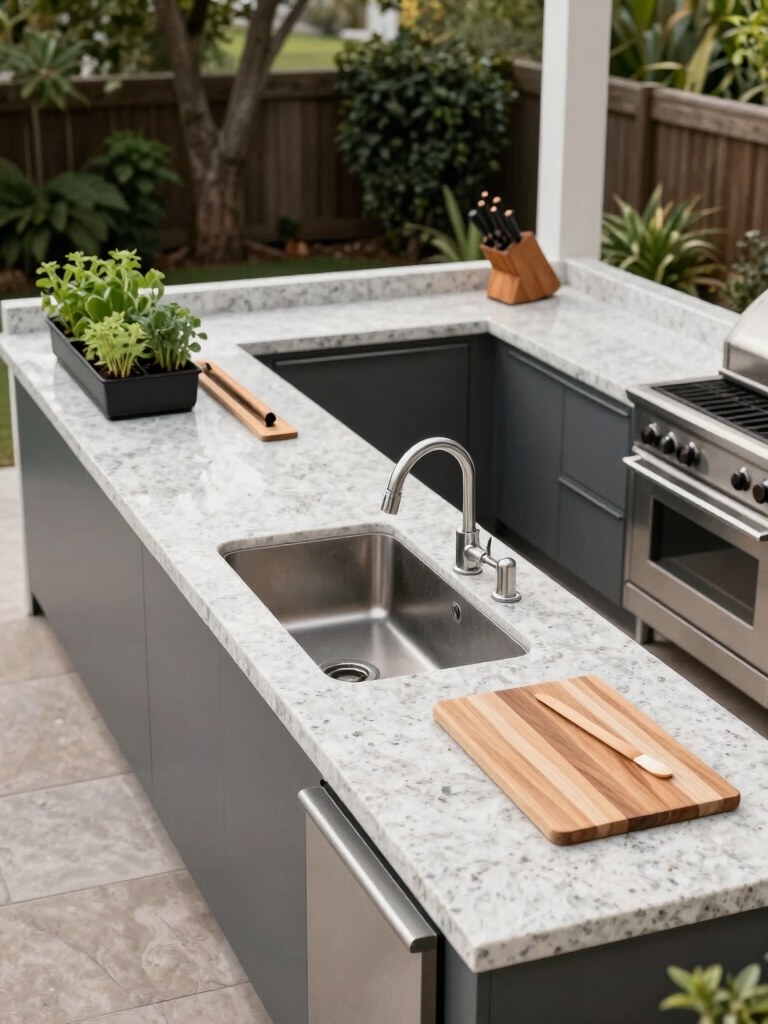
Think of the prep zone as the kitchen’s brain: compact, organized, and within arm’s reach of everything you’ll use most.
I prioritize quick-access surfaces and stations so prep flows smoothly.
- Clear counter tops for prep
- Amped-up cutting board area
- Knife and tool drawer within reach
- Waste bin and compost nearby, lid closed
Smart Pantry Storage for Outdoor Kitchens
Smart pantry storage for outdoor kitchens keeps essentials close without cluttering the workspace.
I design compact, weatherproof shelves and labeled bins that resist sun and rain. You’ll group spices, oils, and everyday tools near prep zones, with pullouts for tall cans.
I recommend clear fronts for quick checks, and a magnetic strip for knives to streamline prep and cleanup.
Clean-Up Corners That Stay Stylish and Practical
When space is tight, a dedicated clean-up corner should feel effortless and durable, so I design it to handle daily messes without looking chaotic.
1) Smart bin system that seals and stacks
2) Pull-out trash and recycling drawers
3) Water-resistant countertop and backsplash
4) Easily sanitize with accessible, clip-on tools
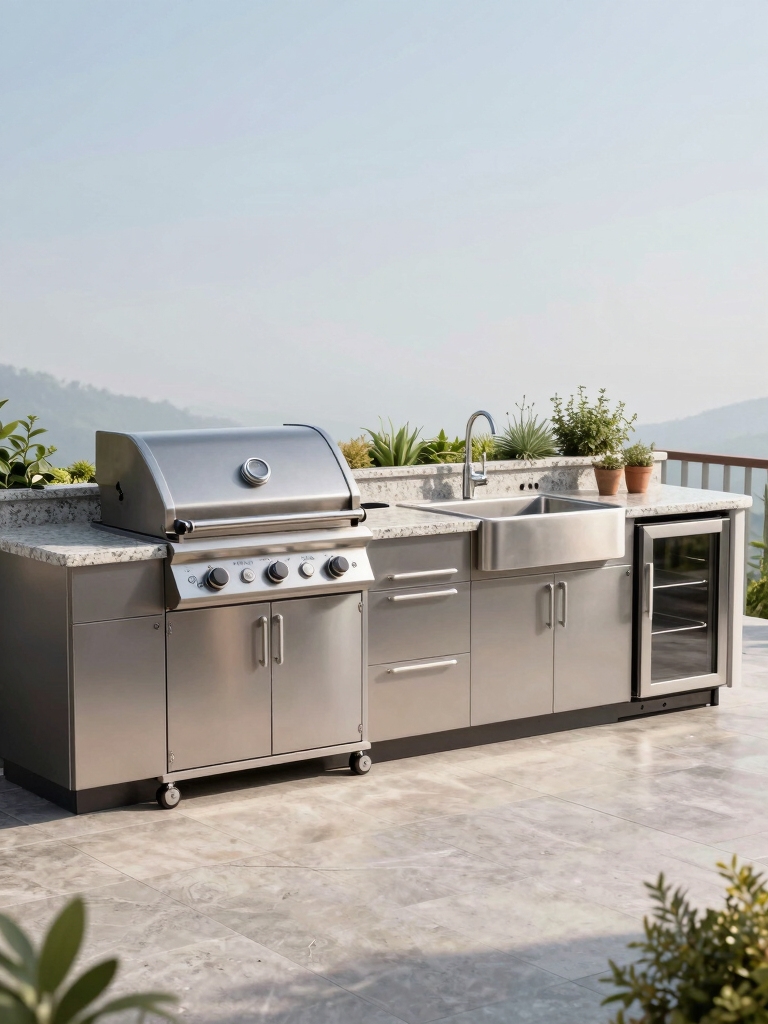
Grill Island Templates: Searing, Grilling, and Work Surfaces
I’ll walk you through the grill island layout, starting with solid Grill Layout Principles to keep traffic smooth and workflows efficient.
Then I’ll map a Searing Station Workflow that keeps high-heat zones focused and easy to monitor.
Finally, I’ll point to Work Surface Optimization so prep space stays clean, accessible, and ready for finishing touches.
Grill Layout Principles
A grill island isn’t just a place for cooking; it’s the workhorse of outdoor kitchens, so layout matters.
I design around workflow, safety, and accessibility to keep every task seamless. Here’s how I optimize:
- Place the grill and prep near a clear path
- Allocate dedicated searing, grilling, and work zones
- Guarantee adequate counter space and ventilation
- Include easy-to-reach storage and tools
Searing Station Workflow
Searing stations demand speed and precision, so I position the burners, prep area, and tool rack in a tight, logical loop that I can move through without interruption.
I keep a hot zone away from napkins, preheat early, and oil the grates just before searing.
I monitor flare-ups, wipe drips, and plate hot items quickly for consistent results.
Work Surface Optimization
Work surface optimization starts with a clear, efficient layout that keeps tools, ingredients, and waste within arm’s reach.
I design islands that separate tasks yet stay cohesive, prioritizing flow over clutter.
Here’s my approach:
- Centralize prep zones
- Separate raw and cooked areas
- Reserve a waste gap
- Integrate versatile surfaces for prep and plating
Bar and Seating Configurations for Entertaining
Creating a bar and seating layout that works for entertaining starts with a clear flow: guests should move smoothly from prep zones to the bar, then to seating, without crowding.
I place the bar at a convenient center, offset from prep work, with 24–28 inches of counter depth.
Seating mirrors traffic, offering lounge and counter options for varied conversations.
Durable, Weather-Ready Materials for Each Surface
Durable, weather-ready surfaces are non-negotiable for outdoor kitchens, so I start by choosing materials that stand up to sun, rain, and daily use.
I prioritize durability, maintenance, and compatibility with appliances.
- Weatherproof countertops
- Treated cabinetry
- Slip-resistant flooring
- Corrosion-resistant hardware
Lighting and Power Layouts: Safety Meets Style
Now that we’ve nailed weatherproof surfaces, it’s time to turn to lighting and power layouts that pairing safety with style.
I’ll map zones for task lighting, ambient glow, and switch-free access, narrating cord routes and outlet placement.
GFCI and weather-rated fixtures matter, along with exterior-rated cords.
I’ll keep circuits simple, weatherproof enclosures closing neatly, and every plug guarded against splashes.
Weatherproofing Your Outdoor Kitchen: Tips and Best Practices
Today I’ll walk you through our Weatherproofing Materials Guide and Proper Sealant Techniques, so your outdoor kitchen stays sturdy in all kinds of weather.
I’ll share practical choices for durable, outdoor-grade materials and show you simple sealant methods that keep rain and moisture out without adding complexity.
If you’re planning ahead, these tips help you balance protection, cost, and ease of maintenance from the start.
Weatherproofing Materials Guide
Weatherproofing an outdoor kitchen starts with choosing materials that stand up to sun, rain, and heat, and I’ll walk you through the essentials so you can make smart, lasting choices.
- Choose weather-resistant countertops
- Opt for moisture-proof cabinets
- Select UV-stable finishes
- Use corrosion-resistant fasteners for longevity
Proper Sealant Techniques
Sealants are the line of defense between your outdoor kitchen and the elements, so I’ll walk you through practical tips to get a tight, lasting seal.
First, choose a high-quality, outdoor-grade sealant appropriate for concrete, metal, and wood.
Clean surfaces thoroughly, dry completely, and apply in thin, even coats. Cure fully, then test joints for water intrusion and reapply as needed.
Budget-Friendly Luxe: Cost-Effective Layouts That Look Premium
A smart, budget-friendly outdoor kitchen starts with a layout that feels premium without breaking the bank.
I’ll guide you to optimize space, keep traffic clear, and use focal points that read luxe without cost.
Here are essentials:
1) Zoning for prep, cook, and serve
2) Symmetrical counters for balance
3) Hidden storage for a clean look
4) Integrated lighting for ambience and safety
Material Palettes for Easy-Clean Outdoor Kitchens
Choosing the right material palette makes outdoor kitchens easy to clean and maintain, and I’ll walk you through practical options you can mix-and-match without sacrificing style.
I prefer non-porous surfaces like quartz, porcelain, and glass tiles for countertops that resist stains.
Pair with sealed concrete, stainless steel, or soapstone for durability, simple upkeep, and cohesive, low-fuss finishes.
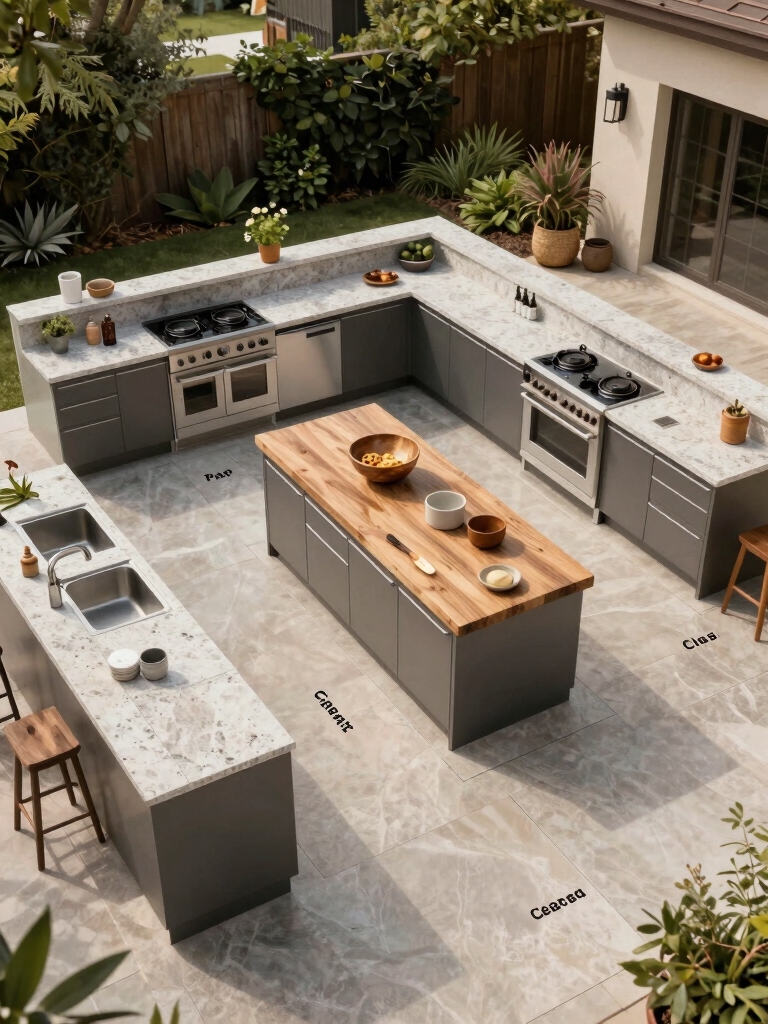
Compact Yards, Big Impact: Eight Efficient Templates
Eight compact yard templates can deliver big impact without clutter, and I’ll break down eight efficient layouts you can adapt to any small outdoor space.
I share practical picks you can copy today:
- Linear work zones
- Corner prep nooks
- U-shaped prep and grill
- Foldaway dining options
Grand-Scale Outdoor Entertaining: Four Large-Format Layouts
When you’re planning grand-scale outdoor entertaining, four large-format layouts can turn a spacious yard into a seamless, resort-like setting without feeling chaotic.
I break each design into clear zones: prep, cooking, dining, and lounge.
We prioritize circulation paths, sight lines, and weather protection, plus scalable features.
You’ll copy layouts, customize materials, and maintain flow while keeping your guests centered and comfortable.
Conclusion
I’ve walked through these layouts with you, and I’m excited about how your outdoor kitchen can come together. Pick the grid that fits your space, map the workflow, and place grill, sink, and prep where you’ll actually move. I’ll keep surfaces handy and budgets sensible, choosing easy-clean materials that look premium. Start small, then expand—because great entertaining grows with you. It’s a breeze to envision your backyard transforming, and I’m here cheering you on, every step of the way. Let’s cook up something fantastic.


