I’ve remodeled kitchens on a tight budget and I’ll show you how IKEA hacks can save thousands without looking cheap. Plan zones and a firm budget, use SEKTION frames for durability, and mix in one custom focal piece like an island or tall pantry.
Swap door fronts, use high-quality laminate or butcher block counters, and replace hardware for instant polish. Buy smart—bundle orders, watch sales—and I’ll walk you through measured tricks and maintenance tips next.
Planning Your IKEA Kitchen: Layout and Budget Basics

I’m going to walk you through the two things that make or break an IKEA kitchen: a smart layout and a clear budget.
I’ll help you map work zones, prioritize storage, and measure twice to avoid costly mistakes.
We’ll set realistic spending limits, choose where to invest, and plan for contingencies so your remodel delivers function and style without surprising overruns.
I’ll also share some lesser-known cabinet hacks that can stretch your budget and boost functionality.
Choosing the Right SEKTION Cabinets for Your Space

Now that we’ve nailed the layout and budget basics, it’s time to pick the SEKTION cabinets that’ll make that plan work.
I lean toward durable frames, sensible depths, and modular sizes that match appliances and traffic flow.
Choose door styles and finishes that age well, pick functional interiors—drawers, pull-outs, soft-close—and measure twice so installation is straightforward and costs stay low.
Island layouts often benefit from small island designs that steal the spotlight while maximizing workflow.
Mixing IKEA Cabinets With Custom or Semi-Custom Units

If you’re planning to mix IKEA SEKTIONs with custom or semi-custom pieces, I’ll show how to match heights so everything reads as one thoughtful kitchen instead of two competing systems.
We’ll cover practical frame and filler fixes that bridge gaps and align face frames, plus tips for pairing different door styles so the look feels curated rather than mismatched.
With a few measured adjustments you can get the economy of IKEA and the personality of custom without obvious seams.
Transform Your IKEA Kitchen Island Into Custom Style by exploring ways to make IKEA islands look bespoke, including adding trim, custom panels, and integrated seating to elevate the overall design and create a cohesive centerpiece with IKEA Kitchen Island Hacks That Don’t Look Like IKEA.
Seamless Height Matching
Because kitchens feel off when cabinet lines don’t match, I focus first on height alignment when mixing IKEA boxes with custom or semi‑custom units.
I measure toe kicks, counter thickness, and desired upper clearances, then plan shims or risers to level fronts.
I keep visible joins aligned, prioritize continuous sightlines, and test mockups so the final run reads like one cohesive, intentional system.
I also add period-appropriate hardware and trim to reinforce a unified vintage look and emphasize timeless character.
Frame and Filler Solutions
When blending IKEA boxes with custom or semi‑custom units, I treat frames and fillers as the quiet connectors that make everything feel intentional rather than cobbled together.
I size filler strips, frame faces, and small trim to hide gaps, align reveal widths, and support butcher block ends.
Thoughtful material choices and consistent finishes tie differing constructions into a single, polished kitchen narrative.
A well-planned trim strategy also improves longevity by protecting edges and preventing moisture intrusion in vulnerable joints.
Mixing Door Styles
Alongside frames and fillers, I treat mixing door styles as a design opportunity rather than a compromise: matching IKEA doors with custom or semi‑custom fronts lets you highlight focal zones, balance cost, and add character without making the kitchen feel disjointed.
I pair a durable, budget-friendly run with a statement island or tall pantry in a richer wood or textured lacquer, tying them with consistent hardware and trim.
Kitchen cabinets are redefining modern homes by combining functionality with clean, contemporary aesthetics and smart storage solutions, making them central to both form and function in today’s renovations — see Kitchen Cabinets Redefining for more context.
Upgrading Door Fronts: When to Use Custom Panels

If your kitchen’s footprint or style demands something outside Ikea’s standard range, I’ll often recommend custom door fronts to bridge the gap between function and the look you want.
Custom panels solve odd sizes, conceal appliances, or create period-accurate profiles. They cost more but let you mix materials, match trim, and achieve a tailored result without gutting the Ikea system—smart, focused investment.
Adding upgraded cabinetry can also be one of the most effective kitchen upgrades for boosting home value.
Countertop Options That Look Custom Without the Price Tag

I’ve found a few countertop tricks that give a custom look without the custom bill: high-quality laminate that mimics stone, warm butcher block, and an easy quartz-look DIY surface.
Each option hits a different tone—sleek and modern, cozy and organic, or polished and budget-friendly—so you can match the feel of your IKEA cabinets.
I’ll walk you through pros, installation tips, and what to watch for with each choice.
Laminate That Mimics Stone
I love how modern laminates can pass for real stone—watch closely and you’ll spot the veining and depth that used to cost a fortune.
I swapped expensive slabs for a textured laminate on IKEA counters and got marble vibes without the weight or price.
It’s durable, easy to cut, and forgiving during install.
Small hardware and edge choices finish the look beautifully.
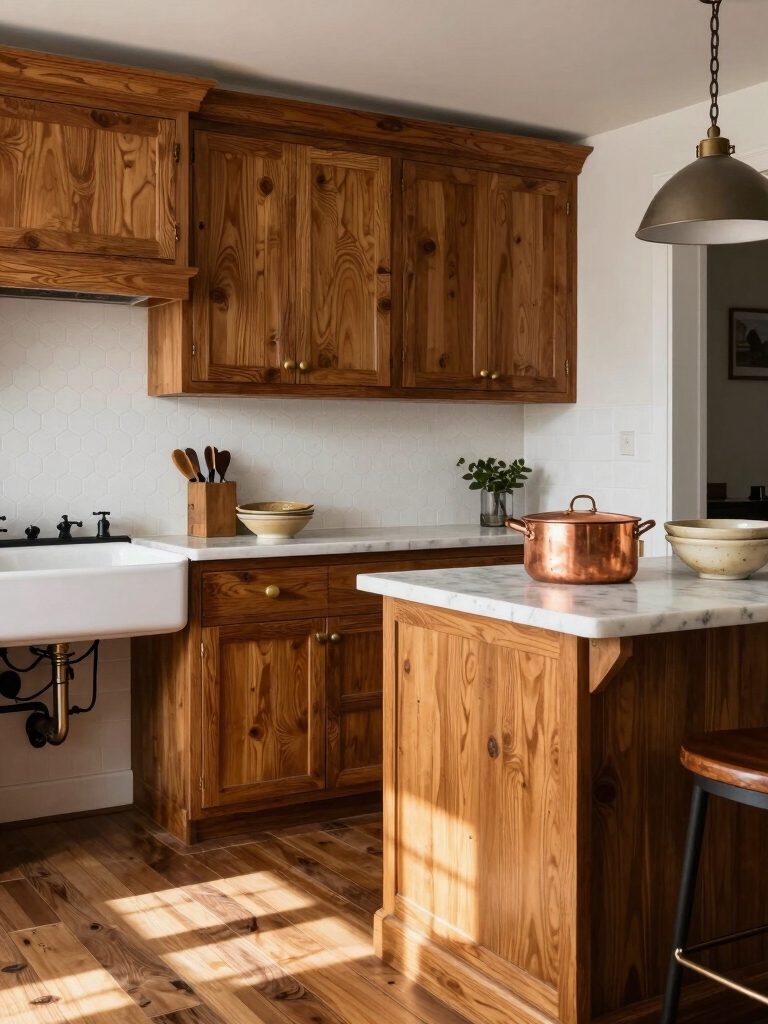
Butcher Block for Warmth
Moving from cool stone looks to something warmer felt natural in my kitchen refresh, so I chose butcher block to bring instant warmth and a custom feel without the sticker shock.
I sealed it for durability, sanded edges for a tailored look, and paired the wood with simple tile and brass pulls.
It’s inviting, repairable, and affordable—a small change that reads crafted.
Quartz-Look DIY Surface
Experimenting with quartz-look DIY surfaces turned out to be the smartest way I could get that luxe, custom vibe without blowing the budget.
I patched affordable plywood with thin quartz-effect sheets and seamless epoxy, then polished edges for a real-stone finish.
It resists stains, feels substantial, and installs faster than full slabs.
You’ll get high-end visuals while keeping costs—and stress—low.
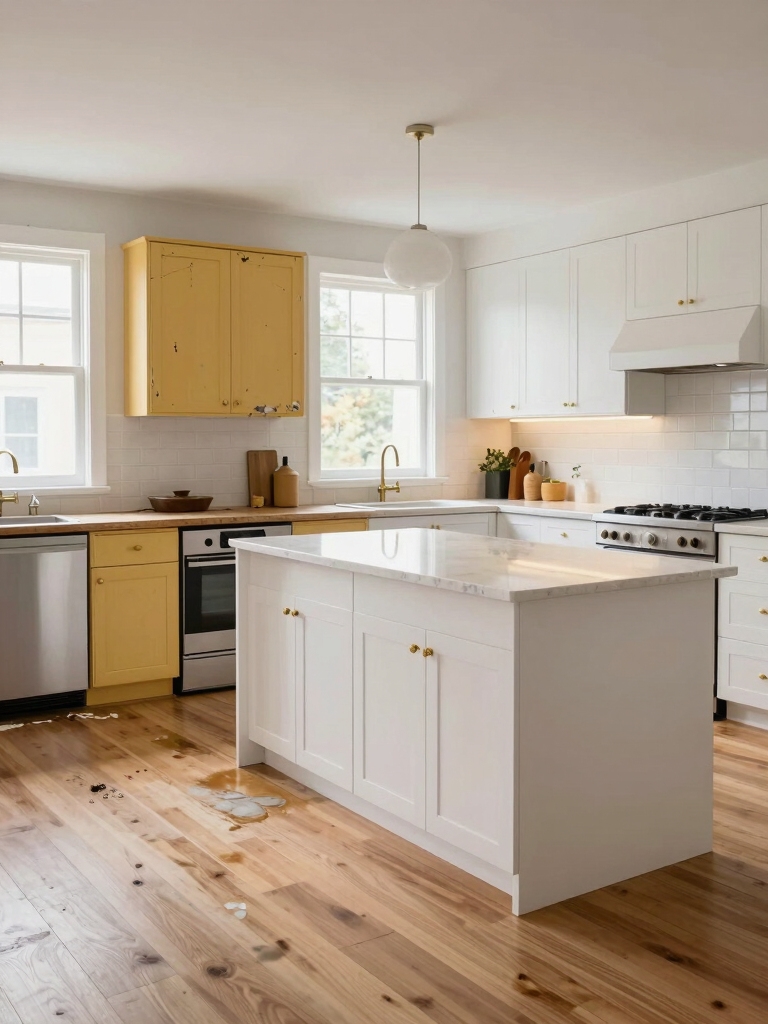
Backsplash Ideas That Elevate an IKEA Kitchen
Why not make the backsplash the star of your IKEA kitchen? I chose bold subway tile with dark grout to add contrast, then mixed in a glass mosaic panel behind the stove for shine.
Peel-and-stick options offer budget-friendly texture; a simple stainless sheet feels modern and easy to clean. Each choice lifted the whole room without overhauling cabinets.
Appliance Choices That Transform Function and Style
Once I started swapping out the stock appliances, the whole IKEA kitchen felt smarter and more intentional; a few strategic choices can lift both function and style without blowing your budget.
I chose a slim, quiet dishwasher, a convection oven for faster, even baking, and a matte-black fridge to anchor the palette. Each upgrade improved workflow and gave the room curated, cohesive charm.
Drawer and Pantry Organizers for Maximum Efficiency
I’ve learned that a few smart organizers can turn chaotic drawers into streamlined workhorses, so I’ll show how to maximize drawer space without gutting your budget.
I’ll also walk you through building custom pantry trays that fit awkward shelves and keep items visible and tidy.
Finally, I’ll suggest affordable pull-outs that install easily in IKEA bases to make reaching pots, pans, and pantry staples effortless.
Maximize Drawer Space
Start by looking into your drawers with the same curiosity you bring to a fresh project—I’ll show you how a few smart organizers can turn chaos into calm.
I swap mismatched trays for adjustable inserts, add shallow dividers for utensils, and use non-slip liners.
Labelled zones speed grabbing and prep.
Small containers corral odds and ends, maximizing every inch without custom builds.
Custom Pantry Trays
After tightening up the drawers, I look to the pantry and think in trays—custom-fit caddies, shallow pullouts, and tiered risers make everything reachable and visible.
I measure shelves, repurpose shallow IKEA inserts, and add non-slip liners. Group like items, label edges, and tilt jars slightly for easy grabs. Small investments yield calm mornings and fewer expired cans.
Affordable Pull-Outs
I pull open drawers and pantry doors and think about flow — not just what fits but how quickly I can grab it.
I swap fixed shelves for affordable pull-outs and modular organizers, turning chaos into reachable zones.
Slim spice racks, deep-drawer dividers, and sliding trays make prepping faster and restocking simple. Small investments deliver big daily time savings and a calmer kitchen rhythm.
Plumbing and Electrical Considerations for a Remodel
Because plumbing and electrical work determine both function and safety, I always tackle those systems early in an IKEA kitchen remodel—before cabinets go in and countertops are templated.
I map outlets, relocate lines for islands, and upgrade to dedicated circuits for heavy appliances.
I hire licensed pros for code-critical tasks, verify water shutoffs and venting, and keep clear access for future service.
Flooring and Trim Details That Tie the Room Together
I’ll show how small floor and trim choices make your IKEA kitchen feel intentional and finished.
Using continuous junction strips, matching baseboard heights, and concealed cabinet toe‑kicks keeps sightlines seamless and prevents awkward gaps.
These simple details pack a big visual punch without a huge budget or fuss.
Continuous Transition Strips
With a simple strip of material, I tie together mismatched floors and hide the tiny gaps that make a kitchen feel unfinished.
I choose continuous joining strips—metal, wood, or vinyl—that flow across thresholds, protect edges, and read like intentional design.
They’re inexpensive, easy to install, and instantly cohesive. A neat strip makes a remodel feel deliberate, polished, and built to last.
Coordinated Baseboard Heights
I usually pay close attention to baseboard height because it’s one of the quiet details that makes a kitchen feel intentionally finished; when floor levels and trim heights are coordinated, the room reads as cohesive rather than patched together.
I match baseboards to adjoining rooms, shim floors where needed, and pick profiles that echo cabinet lines—small adjustments that elevate the remodel without blowing the budget.
Concealed Cabinet Toe-Kicks
I often hide cabinet toe-kicks to make a kitchen feel cleaner and more intentional, and you’ll notice how much straighter the lines read when the base of your cabinets disappears into the floor.
I route flooring under a slim recessed profile, paint it to match cabinets, and seal edges. It’s subtle, durable, and visually unifies cabinetry with floors for a refined, cohesive result.
Professional Touches Worth Hiring For
Although you can handle a surprising number of IKEA kitchen upgrades yourself, there are a few professional touches I recommend hiring for to get a polished, lasting result.
I suggest pro help for plumbing reroutes, gas line work, electrical relocations, and precise countertop templating/installation.
Skilled carpentry for inset doors or complicated fill panels also saves time and guarantees gaps, weight loads, and finishes meet lasting standards.
DIY Finishing Techniques: Paint, Stain, and Hardware
Start by deciding the look you want—clean painted fronts, warm stained wood, or mixed finishes accented with thoughtful hardware—and I’ll walk you through the fastest ways to get there without sacrificing durability.
I sand, prime, and use thin, even coats for paint; choose gel stains for Ikea’s veneers; seal with a durable topcoat. Swap knobs and pulls last for instant personality.
Cost-Saving Shopping Strategies and Timing
Usually I track prices and timing before buying anything—it’s saved me hundreds on an IKEA kitchen.
I watch seasonal sales, clearance sections, and online stock drops, set alerts, and buy bulky items during delivery promotions.
I bundle orders to hit free shipping thresholds, compare third-party hardware, and snag open-box displays. Small timing choices add up to big savings without sacrificing design.
Real-World Before-and-After Case Studies
I’ve found that the timing tricks I mentioned really show up in the numbers when you look at real projects, so I want to share a few before-and-after case studies that prove small decisions make big differences.
I walked through three remodels: one saved $2,500 by reusing frames, another cut appliance costs via seasonal buys, and a third used paint and hardware swaps to mimic custom cabinetry affordably.
Maintenance Tips to Keep Your IKEA Kitchen Looking New
I regularly treat my IKEA kitchen like any other investment—quick, consistent maintenance keeps it looking fresh and functioning well for years.
I wipe spills immediately with a mild detergent, tighten hinges and drawer slides quarterly, and oil wooden countertops sparingly.
I replace worn seals, avoid abrasive cleaners, and keep ventilation clear.
Small, regular actions prevent big repairs and preserve resale value.
I bet your jaw will drop when you see what an IKEA kitchen can become — like finding a hidden penthouse in your laundry room.
I’ve walked through layout plans, SEKTION choices, mixing in custom pieces, swapping fronts, fake-but-fancy counters,
DIY finishes, smart shopping, and upkeep tips so you’ll save thousands without compromising style. Take these tricks, roll up your sleeves, and watch a modest cabinet turn into your polished, practical dream kitchen.