I’ve learned clever IKEA kitchen cabinet hacks that make frameless boxes sturdy and useful without a big budget. I reinforce boxes with plywood backs, internal cleats, and removable metal braces so stone counters won’t sag.
I convert bases into drawer-file hybrids, add toe-kick drawers and end-panel open shelves, and hide appliances in soft-close garages with cord channels. I even fit inset-style doors and under-cabinet outlet strips for a custom look — keep going and I’ll show how.
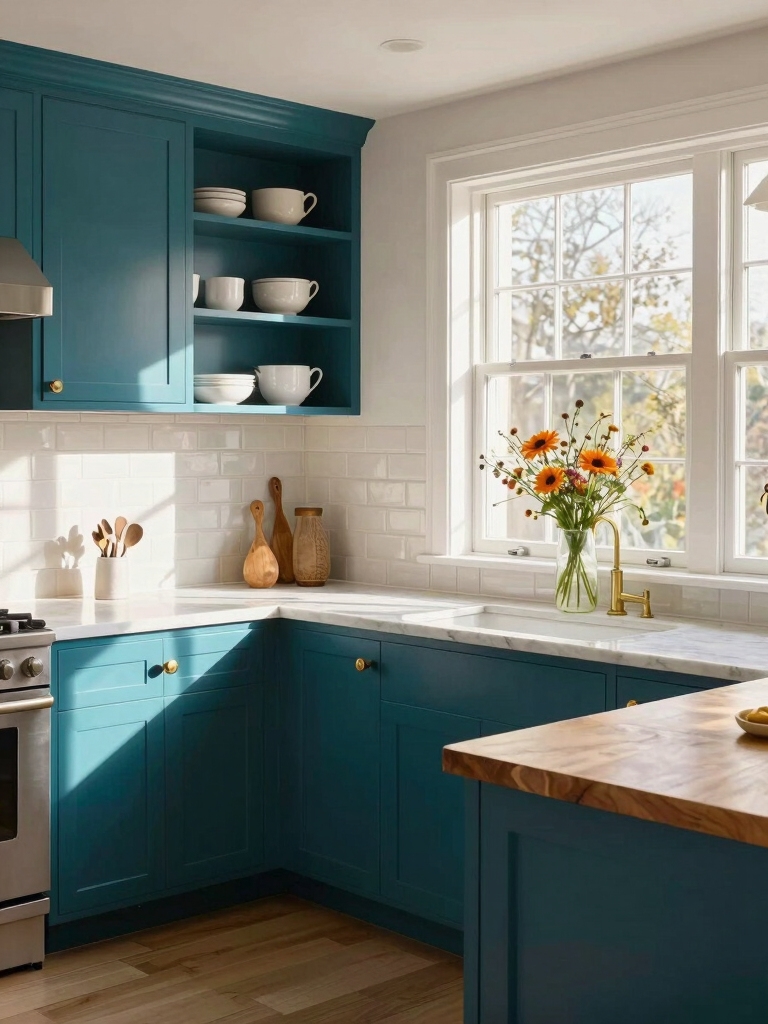
Reinforce Frameless Cabinets for Heavy Counters

Because frameless cabinets rely on their box for strength, I always reinforce them before installing heavy counters like stone or thick butcher block.
I add plywood backing, install horizontal cleats, and screw through the cabinet top into a ledger under the counter.
I also use metal corner brackets and adhesive where joints meet.
These pragmatic steps keep cabinets square, safe, and long-lasting.
For added stability, I often apply internal bracing to distribute weight and reduce stress on individual joints.
Convert a Base Cabinet Into a Drawer-File Hybrid

I’ll show you how to turn a plain base cabinet into a smart drawer-file hybrid by first measuring and planning the layout so folders and drawers coexist efficiently.
Before you cut or mount anything, reinforce the cabinet floor to support the weight of files and avoid sagging.
Then fit quality soft-close slides for smooth, durable operation every time you open a drawer.
Consider adding shallow upper drawers to maximize vertical space and create dedicated zones for small items like utensils or labels, which complements the idea of squeezing storage into tiny areas.
Measure and Plan Layout
When converting a base cabinet into a drawer-file hybrid, I start by measuring carefully so every drawer and file rail fits and functions smoothly.
I map internal dimensions, note obstruction points, and list desired drawer heights for utensils versus hanging files.
I sketch a scaled layout, confirm clearances for slides and cabinet doors, and order hardware sized to those precise measurements.
I also look for clever ways to maximize storage in tight spaces, like adapting small kitchen cabinet concepts to fit inside the cabinet.
Reinforce Cabinet Floor
Start by inspecting the cabinet floor for sagging, soft spots, or loose fasteners so you know exactly what needs reinforcing.
I’ll add a plywood subfloor cut to size, screw it into studs or cleats, and seal edges to prevent moisture.
For strength, I glue and screw 1×2 battens across the width.
This creates a rigid base for converting the base cabinet into a drawer-file hybrid.
A quick visual and tactile check can reveal common issues like warped panels or weakened corner joints that benefit from reinforcement, especially when converting for heavy use with drawer-file hybrids.
Install Soft-Close Slides
Next I’ll fit soft-close drawer slides so your new drawer-file moves smoothly and shuts without slamming.
I measure, mount rails flush, and use a spacer to keep alignment steady.
Soft-close transforms function: files glide, heavy folders don’t jar, and the cabinet feels bespoke.
Choose heavy-duty full-extension slides rated for drawer weight, then test and adjust until operation is perfectly quiet and even.
Good cabinet organization starts with a plan and clear zones so items stay useful and accessible.
Add Integrated Open Shelving to End Panels

For a sleek, functional tweak I like to add integrated open shelving to the exposed end panels of IKEA kitchen runs, which instantly turns wasted space into display and storage without reconfiguring cabinets.
I cut slim shelves to match panel thickness, secure them with hidden brackets, and finish edges to blend with doors.
It creates easy access for cookbooks, plants, and everyday items.
This approach embraces the open shelves trend to create an airy, open kitchen feel.
Build a Continuous Toe-Kick Drawer System

When I built a continuous toe-kick drawer system, I turned that overlooked strip of space into the slickest storage in the kitchen; by running a shallow drawer across the entire base of adjacent cabinets you get hidden, accessible storage for baking sheets, trays, and odd-sized tools without losing cabinet clearance.
I used sturdy shallow slides, trimmed fronts to match, and divided the interior for neat, easy access.
This approach is one of many smart ways to organize kitchen cabinets and maximize otherwise wasted space.
Create Hidden Appliance Garages With Lift Mechanisms

I tucked my countertop appliances out of sight by building appliance garages with lift mechanisms, and the result feels like magic every morning.
I designed them to match IKEA fronts, hid cords, and installed soft-close lifts for neat daily use.
It’s sleek, practical, and saves space without sacrificing access.
- Custom-fit doors
- Soft-close lift
- Cord management
- Ventilation planning
- Easy access maintenance
Use Filler Panels as Concealed Spice Racks
I’ve turned thin filler panels into tidy concealed spice racks that make seasoning the dinner rush effortless and keep counters uncluttered.
I slide magnetic strips and shallow wood shelves inside, mounting them on soft-close hinges so spices stay organized and hidden.
It’s a sleek, space-smart fix that uses existing gaps, keeps labels visible, and makes refills painless without sacrificing style or function.
Strengthen Wall Cabinets for Built-In Microwaves
Because a built-in microwave adds sleekness but also weight, I reinforce the wall cabinet before cutting in—adding a backer panel, cross-bracing, and a solid shelf support so the unit sits level and the cabinet won’t sag over time.
I also anchor to studs, use long screws, and test fit repeatedly.
- backer panel
- cross-brace
- reinforced shelf
- stud anchors
- heavy-duty screws
Retrofit Soft-Close on Existing Drawers and Doors
I’ve upgraded a bunch of IKEA doors and drawers with simple soft-close kits that make the whole kitchen feel more polished.
I’ll walk you through a compact installation checklist — what to measure, the tools you need, and the quick steps to fit the dampers.
I’ll also cover common fit issues and easy fixes so you don’t end up guessing at adjustments.
Simple Soft-Close Kits
I usually start with the easiest fixes, and retrofitting simple soft-close kits is one of those satisfying, low-effort upgrades that instantly makes your drawers and doors feel more refined.
I swap compact dampers onto existing runners or hinges, keeping hardware minimal and budget-friendly.
Results: quieter kitchen, smoother motion, longer life.
- Affordable
- Reversible
- Tool-light
- Neat finish
- Quick satisfaction
Installation Step Checklist
Once you’ve picked the right soft-close kit for your drawers and doors, I’ll walk you through a compact, step-by-step checklist so you can retrofit each piece cleanly and confidently.
Measure and mark mounting points, remove fronts/drawers, dry-fit brackets, drill pilot holes, screw parts securely, adjust tension, reattach and test motion, fine-tune alignment, wipe surfaces, and enjoy quieter, smoother cabinets.
Common Fit Issues
Although many soft-close kits are billed as “universal,” you’ll still run into fit quirks when retrofitting existing IKEA drawers and doors, and I’ll help you spot them fast.
I’ll check clearances, mounting surfaces, rail types, overlapping fronts, and hinge interference so the soft-close works reliably and looks clean.
- Clearance tightness
- Mounting surface depth
- Rail compatibility
- Face-frame overlap
- Hinge clash
Convert a Tall Unit Into Modular Pull-Out Pantry Towers
By removing the fixed shelves and adding slim, modular pull-out towers, I turn a bulky tall cabinet into a high-functioning pantry that saves space and keeps everything visible.
I pick adjustable-width units, soft-close sliders, and clear baskets so cans, jars, and spices stay organized.
Installation’s straightforward: anchor rails, test glide, tweak spacing.
It feels luxurious and makes daily cooking effortless.
Create Seamless Overlay With Custom Edge Trim
When I want my kitchen to look polished and custom, I add a slim edge trim that creates a seamless overlay between doors and frames.
I pick durable trim, match finish, and glue or screw it for a flush look. It hides gaps, simplifies alignment, and upgrades cheap cabinets into cohesive, high-end-looking fronts.
- Slim profile
- Color matched
- Solid attachment
- Gap coverage
- Easy touch-ups
Turn Blind Corners Into Full-Access Pullouts
I’ve learned that the easiest way to reclaim wasted space in an IKEA kitchen is to convert blind corners into full-access pullouts, so you can reach pots and pans without contorting yourself.
I swapped in custom sliding carousels and soft-close drawers, measuring clearances and reinforcing panels.
The result: effortless access, tidy storage, and a modern, functional corner that feels like a built-in upgrade.
Install Inset-Style Doors on IKEA Frameless Boxes
Swapping out that awkward corner made me think about another way to make an IKEA kitchen feel custom: installing inset-style doors on the frameless boxes.
I measured gaps precisely, chose shallow hinges, and used shims for perfect alignment. The result reads custom without rebuilding.
- Plan precise reveal widths
- Select soft-close inset hinges
- Shim for level faces
- Trim for clearance
- Paint edges to match
Add Under-Cabinet Outlet Strips and Wire Management
Because messy cords kill a clean kitchen look, I tuck power where you can reach it but not see it by mounting slim outlet strips under cabinets and running wires through channels and discrete clips.
I hide chargers, under-cabinet lighting feeds, and appliance cords neatly, labeling runs and using adhesive cable raceways.
It’s subtle, safe, and keeps countertops minimalist without sacrificing function.
Replace Particleboard Backs With Plywood Reinforcement
I’ve swapped out flimsy particleboard backs on my IKEA cabinets for thin plywood and immediately noticed stronger, straighter boxes that hold shelves and screws much better.
I’ll walk you through why it’s worth the effort, how to pick the right plywood grade and thickness, and a simple step-by-step reinforcement method that won’t need fancy tools.
Follow along and you’ll get cabinets that last and look cleaner inside.
Why Replace Backs
When I opened up my IKEA cabinet and saw the thin particleboard back bowing where the screws held, I knew it was time to replace it with a plywood panel; it’s a small change that dramatically boosts strength, stability, and longevity.
I’ll save future repairs and keep shelves square.
- Prevents bowing
- Improves screw holding
- Adds rigidity
- Resists moisture
- Simplifies mounting
Choosing the Right Plywood
If you want that new plywood back to actually perform, pick the right grade and thickness—I’ll walk you through what matters so you don’t end up with another flimsy board.
I recommend Baltic birch or cabinet-grade hardwood plywood, 1/4” for light shelves, 3/8″–1/2″ where you need rigidity.
Look for void-free plies, smooth faces for finishing, and moisture-resistant glue.
Step-By-Step Reinforcement
Because particleboard backs sag and rot over time, I replace them with plywood reinforcements to give the cabinet lasting rigidity and a clean surface to finish or mount to the wall.
I cut snug panels, screw and glue them, seal edges, and pre-drill for hanging strips so the cabinet stays square and solid for years.
- Measure twice
- Use 1/2″ plywood
- Glue + screws
- Seal edges
- Pre-drill mounting
Use Removable Metal Bracing for Extra Stiffness
Although cabinet frames can feel sturdy at first, I’ve learned that removable metal bracing is the trick that keeps them square and solid over time.
I slip slim steel braces into corners or along backs to prevent racking during heavy use and moving.
They’re invisible when finished, reusable if I change layout, and give professional rigidity without permanent modification—practical, neat, and totally reversible.
You’ve got a toolkit of clever IKEA cabinet hacks now — little structural tweaks and styling moves that make a big difference.
I’ve used these tricks to turn budget boxes into workhorse, beautiful kitchens, and you can too.
Tackle reinforcement, clever storage hybrids, hidden garages and tidy wiring one step at a time; think of it like upgrading from a coaster to a luxury ride. Try one tweak and watch your kitchen behave like new.