I’ll walk you through simple, high-impact cabinet hacks that actually work: measure every shelf, clear out expired food and unused gadgets, then group items by task and reach frequency so daily dishes live low and seldom-used gear goes high.
Swap mismatched jars for clear, labeled containers, add risers and pull-out shelves for visibility, and mount racks on doors for spices and lids. I’ll also show quick maintenance habits and affordable, durable tools to keep it easy if you want more.
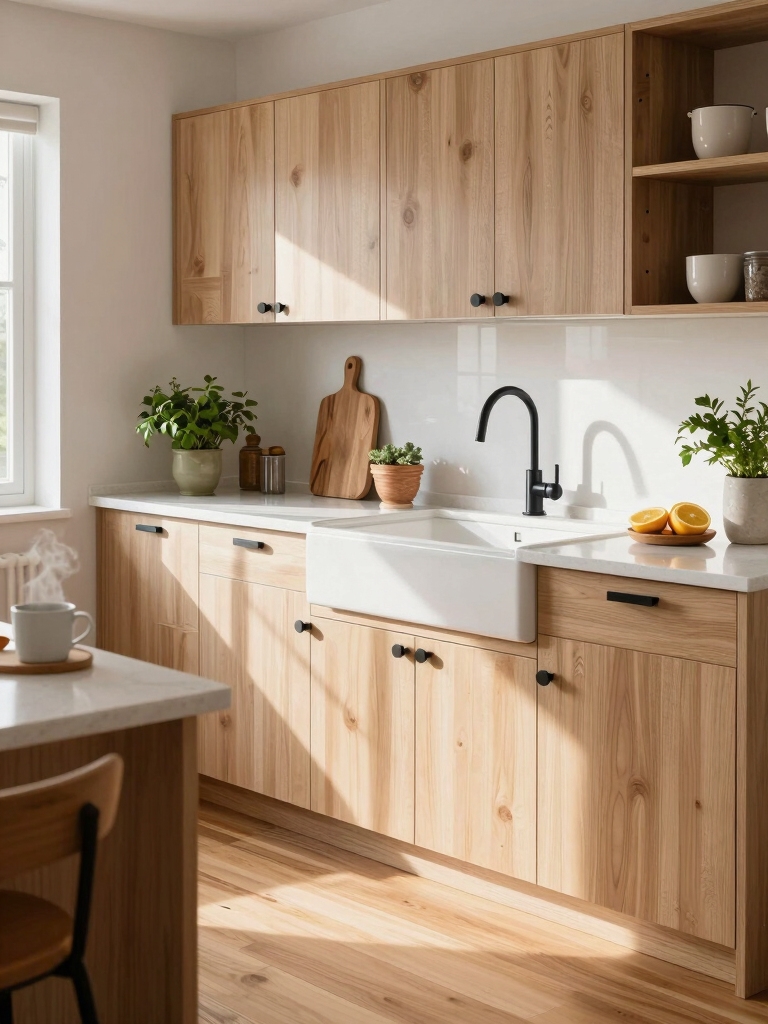
Assess Your Cabinet Space and Storage Needs

Before I start moving anything, I take a quick inventory of every cabinet and drawer so I know what I actually have to work with and what I use most often.
Then I map zones: daily dishes, cookware, pantry, and extras. I measure shelf heights, note awkward gaps, and list items needing vertical space.
That lets me choose organizers and place essentials within easy reach.
I also prioritize solutions that my future self will appreciate, like installing adjustable shelving for flexible storage.
Declutter Before You Organize

Before I start reorganizing, I clear out expired food and anything broken so I’m not moving clutter around.
I sort items into keep, donate, or toss piles and ask myself if I really use each thing. If something’s in good shape but rarely used, I’ll box it for donation right away. I also group similar items and use smart storage solutions to maximize cabinet space.
Remove Expired Items
While I’m sorting through the cabinets, I toss anything past its date or that looks questionable—expired pantry staples, old condiments, and mystery jars—so I’m left with only safe, usable items to organize.
I check dates, sniff for off smells, and discard bulging cans or rancid oils.
Then I wipe shelves, group remaining items by use, and label zones for quick restocking.
I also use clever small kitchen storage solutions to hide clutter and make the space feel larger, like using pull-out drawers to keep items accessible and out of sight.
Keep Vs Donate
I’ll sort what stays and what goes by asking three quick questions: have I used it in the past year, does it have a clear purpose in my kitchen, and would someone else get more use from it?
I’ll keep essentials, toss trashed items, and box donations immediately. I label donation boxes, schedule drop-offs, and resist sentimental clutter—practical, fast, and decisive.
Effective makeovers often start with basic prep like cleaning and measuring before rearranging.
Group Items by Function and Frequency of Use

Start by grouping items based on what you use them for and how often you reach for them; I’ll sort cookware, prep tools, and daily dishes into distinct zones and keep everyday essentials within easy reach.
I assign infrequent gadgets higher or deeper, place baking and serving near each other, and label zones mentally so I grab the right thing fast.
Many clever small kitchen cabinet ideas focus on maximizing vertical space with pull-out shelves and tiered organizers to make every inch accessible.
Use Clear Containers for Visibility

I like using clear containers because I can see contents at a glance, so I stop rummaging and wasting time.
Choose stackable, space-saving shapes to maximize shelf room and keep everything neat.
Swap mismatched jars for uniform clear bins and you’ll notice how much easier it’s to find and refill staples.
Small kitchens benefit from clever cabinet organization and space-saving cabinet solutions like pull-out shelves, vertical dividers, and corner carousels to squeeze more storage into tiny areas.
See Contents at a Glance
When I organize my cabinets with clear containers, I instantly see what I’ve and what I need, which saves time and prevents overbuying.
I label lids and fronts, group ingredients by use, and keep frequently used items front and center.
Rotate older items forward, toss expired goods, and maintain a simple refill routine so visibility stays reliable and stress-free.
Many budget-friendly makeovers use paint and hardware to renew cabinet appearance without a full replacement.
Stackable Space-Saving Containers
I stack clear, space-saving containers so I can spot supplies at a glance and reclaim awkward shelf real estate.
I group like with like—grains, snacks, baking ingredients—label tops and fronts, and choose uniform sizes to maximize vertical space.
Nest lids nearby, keep frequently used items at eye level, and rotate stock forward.
Quick, visible organization saves time and prevents clutter.
Install Pull-Out Drawers and Shelves

Because I want your cabinets to work as hard as you do, I’ll walk you through installing pull-out drawers and shelves that make items easy to see, reach, and retrieve.
Measure cabinet depth, choose full-extension slides, and pick sturdy, easy-clean shelves.
Remove doors if needed, mount rails level, and test glide.
Arrange frequently used items forward for quick access and tidy visibility.
Use Tension Rods and Shelf Dividers
You’ve made cabinet contents easier to reach with pull-out drawers; now let’s keep them orderly with tension rods and shelf dividers.
I use tension rods to corral baking sheets, cutting boards, lids, and trays vertically. Shelf dividers create neat zones for plates and pantry bins.
Install adjustable dividers, space rods to match items, and label zones so retrieval stays fast and tidy.
Create a Dedicated Baking Zone
When I set up a dedicated baking zone, I keep everything I need — measuring cups, mixing bowls, pans, spatulas, and frequently used ingredients — within arm’s reach so baking flows without detours.
I organize by task, label containers, and clear counter space for prep.
- Stack bowls by size
- Hang frequently used tools
- Group dry ingredients
- Reserve a drawer for liners
Store Pots and Pans Efficiently
I keep my baking zone uncluttered so cookware doesn’t compete for space, and the same principles help me store pots and pans efficiently: group like items together, use vertical or hanging solutions for easy access, and protect surfaces to prevent scratches.
I stack lids separately, nest pots by size, install pull-out racks or pegboards, and label zones so grabbing the right pan is quick and tidy.
Organize Plates, Bowls, and Glassware Safely
I keep plates stacked by size so they’re easy to grab and won’t wobble the shelf.
I store bowls nested but not too tight to prevent chipping, and I secure glassware upright in a stable rack or with shelf liners.
Follow these simple swaps and you’ll cut breakage and make everyday use faster.
Stack Plates by Size
Start by grouping your plates by size so you can reach for the right one without rifling through stacks. I stack plates from largest to smallest, leaving a little space to grab.
Use these quick tips:
- Keep frequently used sizes front
- Limit stack height for safety
- Add soft liners between fragile pieces
- Reassess monthly for wear and usage
Secure Glassware Vertically
Let’s lean glassware upright so I can grab a stem or tumbler without juggling stacks; storing glasses vertically keeps them visible and far less likely to chip.
I use adjustable dividers, non-slip liners, and tiered racks to separate types—wine, tumblers, delicate stemware.
Label zones, keep heavier pieces low, and reserve high shelves for rarely used items.
This prevents breakage and speeds up retrieval.
Maximize Vertical Space With Risers
Maximizing vertical space with risers makes your cabinets feel instantly more organized and accessible. I add risers to double shelf capacity, group like items, and keep everyday dishes within reach.
Try these fast wins:
- Use clear risers for visibility
- Match riser height to items
- Stack lightweight plates safely
- Reserve top shelves for seldom-used gear
You’ll gain order and easy access.
Keep Spices Accessible and Visible
I keep my spices where I can see and grab them quickly, using tiered spice racks to keep labels and jars at eye level.
I transfer loose spices into clear containers and label the lids so I don’t fumble when I’m cooking.
Try arranging racks by frequency of use or cuisine to make finding the right spice instant.
Use Tiered Spice Racks
I often keep my spices on tiered racks because they make everything easy to find and grab while I’m cooking.
I position racks at eye level, group by cuisine, and rotate older jars forward. Try these quick tips:
- Use slim tiers to save depth
- Arrange by frequency of use
- Keep caps facing out for fast ID
- Stack adjustable tiers for flexibility
Label Clear Containers
Grab clear containers and label them so you can spot the spice you need in a second; I keep mine front-and-center on a shallow shelf to cut down on rummaging.
I use uniform jars, bold printed labels, and arrange spices alphabetically or by frequency. Refill promptly, group similar flavors together, and keep a small marker nearby for quick updates—simple, visible, efficient.
Use Door and Wall-Mounted Storage
Think of door and wall-mounted storage as the quick wins of cabinet organization—I’ll show you how to reclaim wasted space without ripping out shelves.
I install racks and hooks, keep daily items accessible, and avoid clutter.
Try these simple mounts:
- Adhesive spice racks for lids
- Overdoor trays for snacks
- Magnetic strips for knives
- Small hooks for measuring cups
Label Everything for Quick Retrieval
When you can find what you need in seconds, cooking and cleanup happen faster, so I label everything in my cabinets to cut guesswork and keep things tidy.
I use clear, consistent labels for shelves, containers and spice jars, include expiration dates, and pick waterproof, removable tags.
Labeling saves time, prevents duplicate purchases, and makes it simple for guests or helpers to put things back correctly.
Maintain a Weekly Tidy Routine
Labeling makes finding and replacing items effortless, but a weekly tidy routine keeps that system working.
I check shelves, toss expired foods, straighten containers, and wipe spills quickly. Do this in 10–15 minutes to stay ahead.
- Scan for expired items
- Reposition shifted containers
- Wipe crumbs and spills
- Refill low supplies
Stick to it; you’ll thank yourself.
Choose Affordable Tools That Last
Pick tools that work hard without costing a fortune—I look for durable basics that solve everyday kitchen tasks so I don’t waste money replacing flimsy gear.
I choose sturdy storage bins, reliable drawer dividers, and versatile hooks that fit my layout.
Buy well-reviewed essentials, avoid trends, and match sizes to cabinets.
Small investments now save time, clutter, and future expense.
So there you have it — your kitchen cabinets can go from chaotic to “I know exactly where that mystic spatula lives.” Declutter like a minimalist on a mission, group like a tiny logistical general, and slap labels on everything like you’re running a tiny, efficient empire.
Install smart pulls, clear bins, and a weekly tidy ritual — or lie to yourself until it sticks. Do this, and your future self will high-five you every time you open a cabinet.