Here’s how I’d upgrade your undersink storage fast and affordably: I’ll install slim Inserts to fill narrow gaps, add stackable bins for cleaning essentials, and use moisture-resistant organizers for damp spots. I’ll choose transparent front panels for quick visibility and soft-close or pull-out drawers to protect plumbing. Quick-release racks and labeled compartments keep pots and cleaners accessible. A few budget upgrades now pay back in easy, clutter-free space—stick around, and you’ll uncover more practical fixes.
Why Undersink Drawers Make Your Kitchen Work

Under sinks, space is precious, and an undersink drawer makes every inch count.
I’m sharing why it helps my workflow: quicker access, fewer trips, and neater basics—boom, fewer frantically rummaging moments.
I organize by need, not habit, so cleaning becomes simpler and safer.
You’ll reduce clutter, improve visibility, and gain confidence to use every corner efficiently. Additionally, smart organization tips can help you maximize the functionality of your undersink area.
How to Size Your Undersink Drawer Inset

When sizing an undersink drawer inset, start with the space you actually have, not the ideal you wish you had.
I’ll guide you to precise, practical steps so your drawer fits.
- Measure width, height, and depth at the deepest point.
- Subtract clearance for smooth sliding and plumbing access.
- Choose a box size that sits within those limits, with room to spare. Additionally, consider using space-saving solutions to maximize your storage potential.
Slim Inserts That Fill Narrow Gaps

Slim inserts can make a big difference in narrow gaps under the sink.
I test a few slim options that slide in without bulk, filling dead space so hoses and cords stay organized.
Look for adjustable widths, soft edges, and bite-size compartments.
You’ll gain quick access, fewer snagged items, and a cleaner look—without crowding the drawer or complicating cleanup.
Stackable Bins for Cleaning Essentials

Stackable bins make cleaning supplies easy to grab and reset.
I stack my basics by size, label the fronts, and place frequent items within arm’s reach. This keeps the under-sink tidy and fast to grab.
- Easy access for everyday cleaners
- Clear visibility to spot empties
- Durable, nesting for compact storage
Incorporating stackable bins for organization can greatly enhance your kitchen cupboard setup.
Moisture-Resistant Organizers for Damp Areas

Moisture-resistant organizers keep under-sink chaos from turning into moldy messes. I choose trays, baskets, and liners made of plastic or coated metal that wipe clean easy. Place them on the bottom and against the sides to airflow-stay. Use absorbent pads under leaks, and label compartments. Regularly dry surfaces, replace damp mats, and keep a quick-reach roll of towels handy. Additionally, consider investing in moisture-resistant organizers that are specifically designed for damp areas to enhance longevity and efficiency.
Flat-Lid System for Lids and Pan Covers
If you’re organizing lids and pan covers, a flat-lid system keeps everything visible and easy to grab. I’ll show you practical lid organization benefits and simple storage methods that prevent stacking chaos. Let’s explore how flat-lid racks and labeled compartments can streamline your under-sink drawer. Additionally, implementing smart cabinet organization techniques can enhance your kitchen’s efficiency even further.
Lid Organization Benefits
Adopting a flat-lid system for lids and pan covers makes cabinet space easier to use and keeps everything visible at a glance.
I’ve found the benefits extend beyond order: fewer tumbles, faster retrieval, and calmer countertops.
Here’s how it helps you:
- Neater stacks
- Quicker access
- Less damage and digging
Pan Cover Storage Methods
A flat-lid system keeps pan covers organized and easy to grab, so I group lids by size and slide them into a shallow bin or a slim file holder that sits near the pans.
I prefer vertical stacking for quick access, labeling sections, and keeping the stack lightweight. This method reduces rummaging and speeds stove prep. Simple, practical, reliable. Additionally, utilizing kitchen pantry cabinets can further enhance your organization by maximizing every single inch of space available.
Dividers and Trays for Utensils, Sponges, Scrubbers
Dividers and trays for utensils, sponges, and scrubbers keep your undersink chaos under control and make every tool easy to grab. I’ll show simple fixes that fit any drawer, prevent clumps, and speed cleanup. You’ll waste less time searching and more time cooking.
- Use slim, adjustable dividers
- Place a shallow tray for sponges and scrubbers
- Label sections for quick returns and tidy stacks
Incorporating counter organization accessories can also enhance your overall kitchen efficiency.
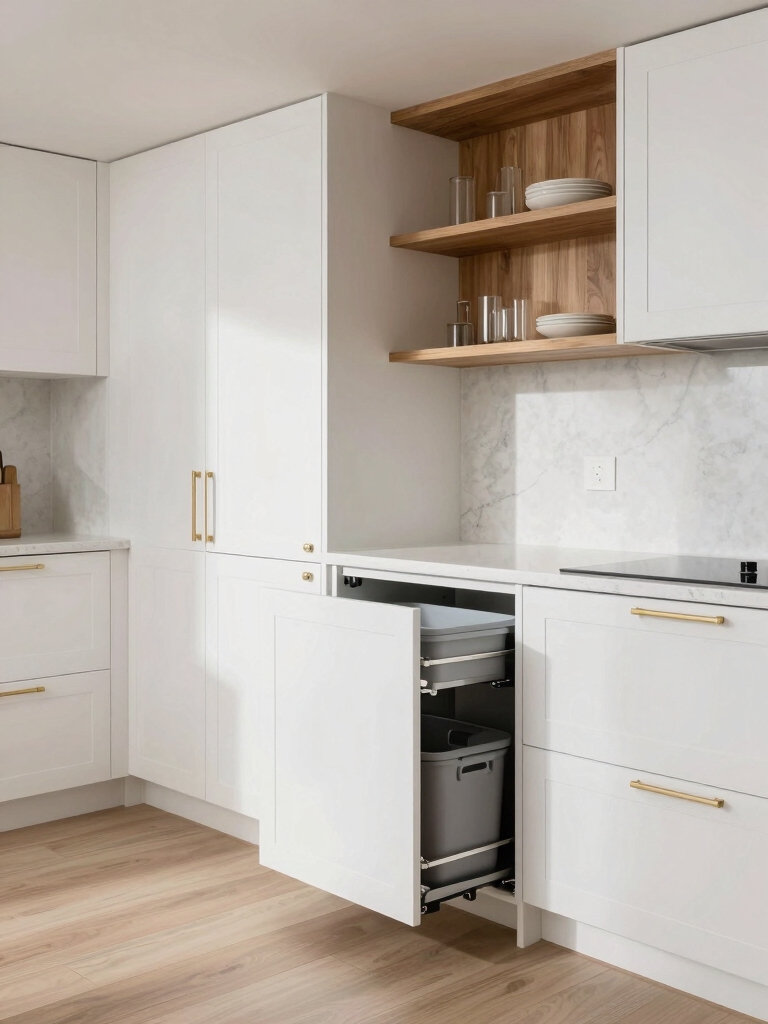
Hidden Pull-Outs for Easy Access
Hidden pull-outs make it easy to reach every item without rooting around.
I’ll show you how these hidden shelves free up space and cut clutter, so you grab what you need in seconds.
Together, we’ll explore space-saving layouts that keep the sink area tidy and efficient.
Hidden Pull-Outs Benefits
Hidden pull-outs make it easy to grab what you need without digging through clutter. I’ll share the practical benefits I’ve noticed, keeping things simple and efficient for everyday use.
- Faster access to frequently used items, saving time at busy moments.
- Better organization with clearly visible contents, reducing rummaging.
- Safer handling with sturdy slides that hold heavy bottles securely.
- Additionally, hidden pull-outs can create more storage solutions in otherwise unused spaces, maximizing your kitchen’s potential.
Access With Ease
Access with ease is all about making every item you reach feel effortless.
I designed hidden pull-outs to keep essentials within arm’s reach, so bending and digging aren’t required. With smooth slides and labeled compartments, you locate what you need instantly, then return it neatly.
It’s practical, approachable, and saves time for everyday tasks.
Space-Saving Solutions
With just a few smart moves, you’ll reclaim stubborn cabinet space by installing hidden pull-outs that slide in and out effortlessly.
I compare options, measure clearance, and pick sturdy slides that handle daily use. You’ll gain instant access without digging.
- Slim, full-extension pulls
- Adjustable width guides
- durable, powder-coated frames
Labeling That Sticks (No Peeling)
Labeling that sticks (no peeling) starts with choosing labels and materials you can trust.
I pick vinyl or polyester labels paired with a water‑resistant adhesive, and I test them on a small spot first.
Keep fonts legible, avoid tiny text, and use clear, high-contrast colors.
Replace worn labels promptly to prevent misreads and keep your workflow smooth.
Rounded Corners to Prevent Scrapes
Rounded corners on cabinet edges and drawers dramatically cut down on scrapes and bumps in tight under-sink spaces.
I’ll show practical tweaks you can rely on daily, without the fuss.
- Opt for soft-close drawers with rounded fronts to cushion contact.
- Choose edge profiles with gentle radii to minimize sharp nicks.
- Use corner guards or molding for immediate, affordable protection.
Quick-Release Racks for Heavy Pots
I’m curious how a quick-release rack could handle my heaviest pots without slowing me down.
When I grab a pot, I want you to feel the strength of the rack and how fast I can get it out for use, or put it away with one hand.
Let’s talk about how the release mechanism and placement affect quick access and overall heavy-pot usability.
Quick-Release Rack Strength
If you’re using quick-release racks to hold heavy pots, the key is strength and security—so you can grab what you need without worry.
I focus on robust latching, metal-to-metal fit, and smooth release.
- Inspect latches monthly for dulling
- Choose rated weight per shelf
- Test full loads before relying on them
Heavy-Pot Accessibility
When you’re using quick-release racks to hold heavy pots, accessibility is king: you need to reach, grab, and return without wrestling the load.
I’ve found these racks cut drama from daily cooking by placing the heaviest pots at an easy elbow height. Quick-release levers save time, reduce strain, and keep the cabinet tidy, with tool-free, confident access.
Transparent Front Panels for Quick Visibility
Transparent front panels make it easy to see what’s inside the under-sink drawer at a glance, so you don’t waste time digging.
I’m sharing quick, practical tweaks you can trust.
1) Choose clear acrylic or glass for durability and visibility
2) Use labeled bins to maintain order and quick access
3) Install panel frames that align with your cabinet for a clean look
Budget-Friendly Upgrades That Pay Back Fast
I’m looking at budget-friendly wins that pay back fast, so you can see results without breaking the bank.
I’ll focus on payback-driven upgrades that streamline access and reduce clutter right away.
Let’s zero in on practical, low-cost moves you can implement this week that deliver noticeable value.
Budget-Friendly Quick Wins
If you’re aiming for quick, noticeable gains in your undersink drawer setup, start with a few simple upgrades that pay you back fast.
I’ll share Budget-Friendly Quick Wins that fit this goal, with practical, actionable steps you can take today.
- Use adjustable dividers for flexible organization
- Add a slim retractable tray for easy access
- Label containers and cords for instant clarity
Payback-Driven Upgrades
Think about what you’re really after: faster, cost-effective improvements that actually stick.
I’m looking for payback-driven upgrades that earn their keep without wasting space or money. I’ll swap in simple organizers, labeled bins, and sturdy trays, designed to speed daily tasks.
Quick installs, low cost, clear results. You’ll feel the payoff as clutter shrinks and efficiency rises, fast.
Maintenance Habits to Keep Undersink Organized
To keep an undersink setup tidy, establish simple daily habits that prevent clutter from creeping in and stains from setting.
I share practical cues you can trust.
- Wipe surfaces after spills and dry quickly to deter mold.
- Return tools to their designated spots, keeping drawers uncluttered.
- Do a 60-second weekly sweep, discard expired items, and rehouse cleaners neatly.
Real-Life Weekend Makeovers: Before and After
Weekend makeovers happen fast, and I’ve learned that the best results come from practical, no-fuss changes you can actually finish by Sunday.
I’ll share quick real-life before-and-after examples—from cramped drawers to labeled, reachable essentials.
You’ll see simple swaps, smart organizers, and a reset mindset that keeps momentum.
Expect honest, actionable tweaks you can replicate this weekend.
Conclusion
I learned a few tricks, and you can too. Think of your undersink as a hidden stage where simple upgrades—slim inserts, stackable bins, moisture-resistant organizers—let you reclaim space without fuss. Like a quiet old friend who keeps secrets, these tweaks keep everything in reach, tidy, and ready. If you stumble, remember: small, steady changes compound—one drawer, one bin, one habit. Your kitchen will feel lighter, more honest, and infinitely more usable. Your turn to upgrade begins now.