
Here are 13 small tweaks I use to turn any cabinet into hidden, instantly accessible storage. Think slim pull-outs for tricky gaps, stackable shelf dividers for narrow spaces, and under-shelf baskets to add micro-storage. I also add door-mounted organizers, adjustable tiers, and magnetic strips for metal tools. Caddies and pull-out bins keep spices reachable, while uniform containers and wind-wrap solutions simplify lids and packets. Measure, plan, and install, and you’ll reveal hidden space you didn’t know existed. You’ll see even more soon.
How to Add Slim Pull-Outs for Hidden Kitchen Storage
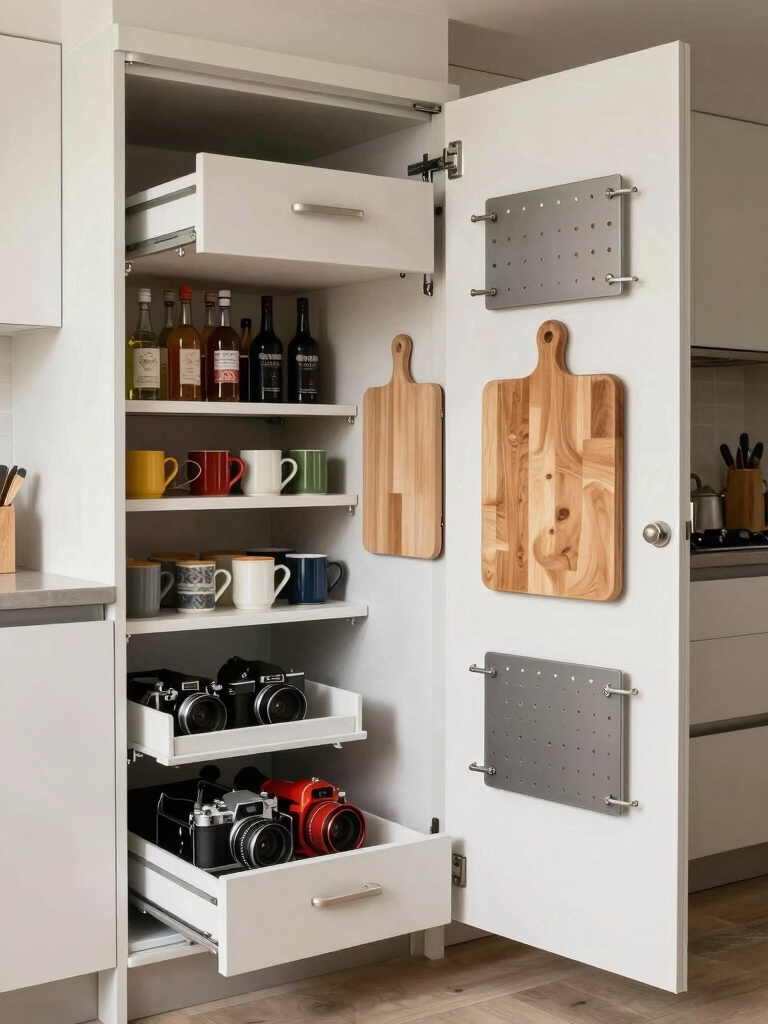
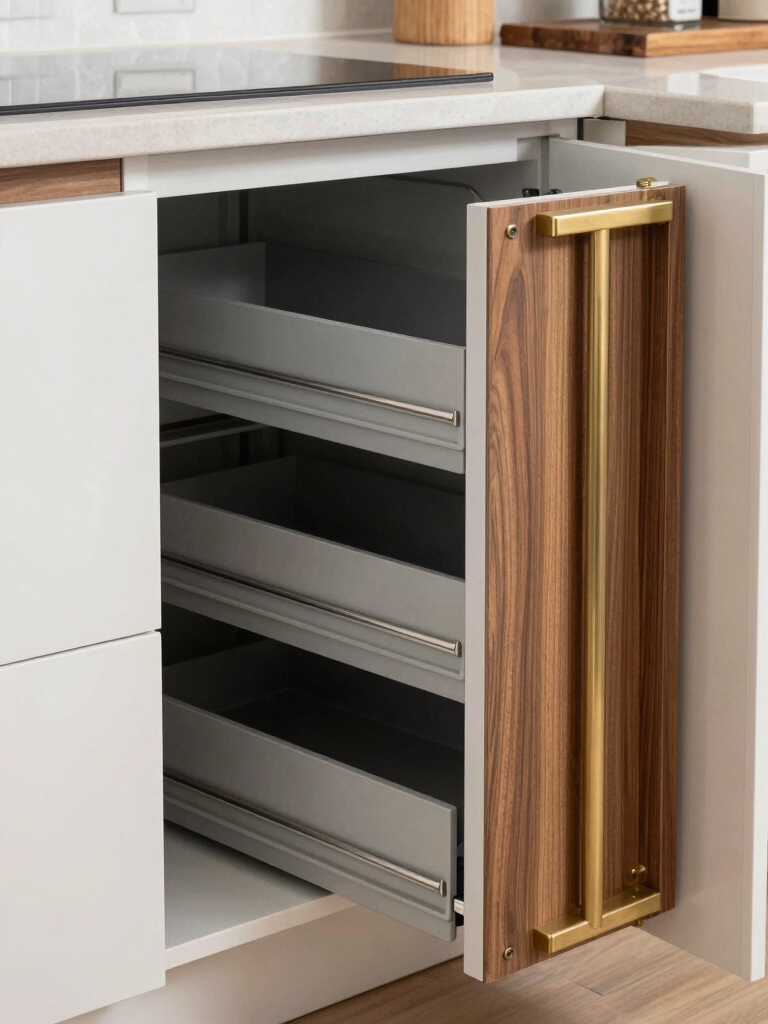
Want more hidden storage without sacrificing cabinet space?
I’m showing you slim pull-outs that fit tight spots and glide smoothly. Measure, choose shallow depths, and install with rails that anchor to existing shelves.
Use the right width for your cans and spices, then label front edges. Pull-outs stay organized, items visible, and you regain cabinet space without clutter or compromises. Creative ways to organize your kitchen can truly maximize your storage potential.
Stackable Shelf Dividers for Narrow Cabinets

I’m exploring stackable shelf dividers for narrow cabinets to boost access and organization.
By using dividers, you can maximize depth space while keeping items easy to reach and view.
Let’s discuss how stacking options (and sensible placement) reveals tighter shelves without clutter.
Stackability Benefits For Narrow
Stackable shelf dividers for narrow cabinets are a game changer, letting you double or triple the usable space without a full remodel.
I’ll show you how to choose slim, durable dividers and plan vertical tiers.
We’ll map zones, label shelves, and test stability with weekly checks.
Implement these tweaks today, and revel in neater, more efficient storage every meal prep. Additionally, using smart tips for organizing can further enhance your space utilization and efficiency in small kitchens.
Easy Access With Dividers
When you’re juggling a tight cabinet, stackable shelf dividers are a game changer for easy access. I place them to create crisp tiers, letting tall bottles breathe and short jars stay reachable. I shift them as needed, label sections, and keep frequently used items up front. It minimizes digging, speeds grabbing, and preserves hidden corners for future organization. Additionally, incorporating smart cabinet organization can maximize the functionality of your kitchen space.
Maximizing Cabinet Depth Space
To maximize depth in narrow cabinets, I use stackable shelf dividers that tug the space forward and create tidy tiers you can actually reach without crawling in.
These dividers carve room for tall jars and awkward cans, letting me stack smartly instead of piling. I label, adjust, and remove as needed, keeping access quick, organized, and clutter-free with minimal effort. Additionally, incorporating smart ways to organize can further enhance your kitchen’s efficiency and aesthetic appeal.
Under-Shelf Baskets to Create Micro-Storage

I’ll show you how under-shelf baskets reveal micro-storage by turning empty space into a dedicated spot for small items.
Think of them as a shelf within a shelf, giving you extra layers of organization without crowding your cabinets.
With these baskets, accessibility improves and each item finds a clear home. Additionally, smart under-sink organization can further enhance your kitchen’s functionality by maximizing every inch of space.
Micro-Storage Potential
Under-shelf baskets are a simple, smart way to squeeze more micro-storage out of any cabinet.
I keep a small, labeled bin for packets, then stack shallow lids on a second tier to free shelf space.
Your turn: group items by frequency, slide in grab-and-go essentials, and adjust heights as you add new gadgets.
Less clutter, faster finds. Additionally, utilizing smart storage ideas can maximize your kitchen’s potential even further.
Shelf Within A Shelf
If you’ve been stacking things and feeling the squeeze, try adding an under-shelf basket to carve out a new micro-storage tier.
I’ll show you how to measure, slide it in, and assign categories so everyday items stay visible.
Use one basket for lids, another for snacks, and rotate monthly.
Small changes, big gains, cleaner counters, calmer drawers.
By implementing smart organization tips, you can maximize every inch of your small kitchen space.
You’ve got this.
Enhanced Item Accessibility
When you add under-shelf baskets, you instantly boost item accessibility by turning empty space into a ready-to-grab micro-storage zone. I suggest grouping similar items, labeling baskets, and placing frequently used items at the front. This setup reduces digging, speeds prep, and keeps countertops clear. Regularly reassess height and contents to maintain quick access and tidy organization. Additionally, consider using multi-functional storage solutions to maximize every inch of available space.
Door-Mounted Organizers That Free Up Space
Door-mounted organizers are a simple, efficient way to reclaim cabinet real estate without adding clutter.
I flip through options, pick slim profiles, and measure before mounting.
I place lids, spices, and small tins vertically for instant visibility.
With it, you free shelf space, reduce rummaging, and keep essentials reachable.
Ready to transform a cramped cabinet with a simple install?
Adjustable Tiers to Grow Your Storage Capacity

Adjustable tiers are a game changer when you need to grow cabinet capacity without a full rehaul.
I stack them to tailor heights, keeping bulky items reachable yet out of the way. You’ll swap inserts quickly, and the space above can breathe.
Use labels for quick grabs, and test load limits to protect shelves. Simple, clear tweaks, efficient results.
Hollow-Interior Containers for Deep Cabinet Corners
Hollow-interior containers slide right into those deep cabinet corners, turning wasted space into a tidy, accessible nook.
I guide you to pick slim, rigid options that won’t wobble. You’ll gain instant visibility and grab-and-go access.
- Measure clearance before buying
- Choose stackable, non-slip bases
- Label lids for quick retrieval
Vertical Stacking for Deep Cabinets With Pillar and Tier Systems
Vertical stacking with pillar and tier systems transforms deep cabinets from dead space into a simple, sight-line-driven setup.
I keep items reachable by level, swap in slim risers, and use sturdy pillars to create defined zones.
You’ll navigate efficiently, remove clutter, and add visible structure at a glance.
I’ll guide you through installation steps and practical placement tips.
Clear Labels for Quick Access and Easy Sorting
I’ll show you how clear label placement makes quick access a breeze and keeps every shelf tidy.
Think simple, high-contrast labels at eye level and on the front of each bin or jar so you know what’s inside at a glance.
Use short, consistent naming and a few universal color codes as your Quick-Access Sorting Keys to speed up your routine.
Clear Label Placement
Clear labels make quick access a real possibility.
I place labels where I grab items most—front row, eye level, and near the hinge. This setup minimizes rummaging and keeps shelves tidy.
- Align text toward you for readability
- Use consistent fonts and sizes
- Place labels on the container front for instant recognition
Quick-Access Sorting Keys
Need quick access? I label each shelf bin with a bright, clear tag, then group items by use and frequency.
I keep the keys visible, matching labels to containers, so I grab what I need in one glance.
When I sort, I test practicality, rotate outdated labels, and adjust positions for speed.
Simple, consistent, and forever reusable.
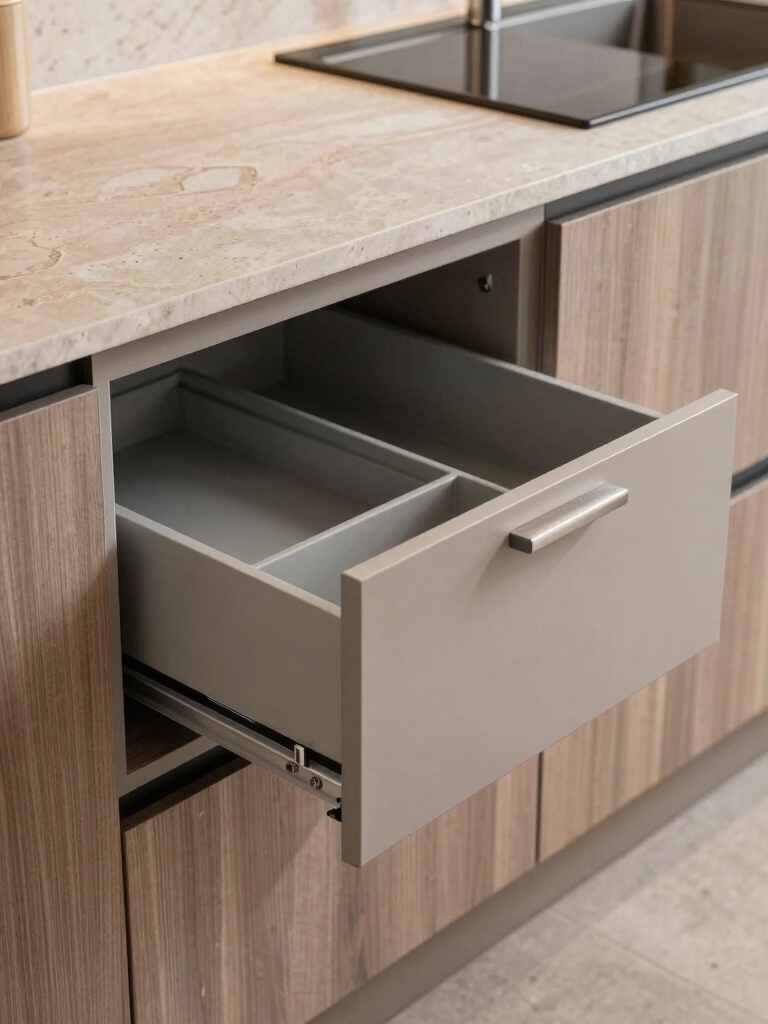
Partitioned Drawer Inserts for Small Essentials
Partitioned drawer inserts are a game changer for small kitchen essentials.
I favor simple dividers that corral tools, foils, and widgets, so I can grab exactly what I need fast.
Keep inserts shallow and labeled for quick returns.
- Clear labels
- Slim dividers
- Zone by frequency
Magnetic Strips and Rails for Metal Tools
Magnetic strips and rails are a natural next step after partitioned inserts, because they free up drawer space and keep metal tools within easy reach.
I attach a slim rail inside the cabinet, then arrange wrenches, screwdrivers, and pliers by size. I label sections for quick grabs, and test clearance to avoid crowding.
Simple, tidy, efficient organization.
Caddies and Pull-Out Bins for On-Door Convenience
Caddies and pull-out bins on the inside of the cabinet door make grab-and-go accessibility a breeze.
I install slim caddies for spices and sleeves; I label sections so I grab the right item fast. This keeps shelves clear and cleanup simple.
- Easy-access spice caddies
- Pull-out bin for packets
- On-door labeling for quick finds
Uniform Containers: Clear Jars and Wind-Wrap Solutions
Clear jars keep everything visible, which makes it easy to spot when you’re running low and to grab the right item fast;
I’ll show you how to pick uniform containers and use wind-wrap solutions to keep lids and packets tucked away.
I organize by size, label consistently, and group by use, so your pantry stays neat, quick to navigate, and efficient.
Quick-Install Cabinet Redesign: Measure, Plan, Install
You’ve seen how uniform containers and wind-wrap solutions keep the pantry orderly, so now it’s time to apply that mindset to a quick cabinet redesign.
I measure, plan, install with purpose, sharing simple steps you can mirror. This approach minimizes disruption and maximizes space.
- Measure openings precisely
- Sketch a plan, label zones
- Install dividers, adjust shelves quickly
Conclusion
You can totally transform a cramped cabinet into a useful, hidden-hiding spot for stuff you actually use. Start small with slim pull-outs, then layer in stackable dividers and under-shelf baskets. If you worry it’ll feel cluttered, keep containers uniform and labels simple. Measure twice, install once, and adjust as you go. Not sure it’ll work? Give it a week. You’ll be amazed how much easier daily tasks become when tidy, accessible storage is within reach.


