I’ll show you how island lighting can lift function and style at once: start with layered light—bright, focused task fixtures over prep zones, soft ambient recessed or pendant glow for atmosphere, and small accents to highlight texture.
Match color temperature and CRI so materials look true, pick a signature finish, and place fixtures 30–36″ above the counter with even spacing. Dimmable LEDs and thoughtful wiring seal the deal, and I’ll guide you through the specifics next.
Why Kitchen Island Lighting Matters
Because the island usually sits at the heart of the kitchen, I treat its lighting as both a practical tool and a design statement.
I focus on layered illumination: task light for prep, ambient glow for atmosphere, and accents to highlight texture.
Good island lighting anchors workflow, defines zones, and elevates materials—small choices that make the space feel intentional, welcoming, and effortlessly functional.
Avoid These Common Kitchen Island Lighting Errors by addressing issues like inadequate task light and improper fixture placement; start with layered illumination to get it right.
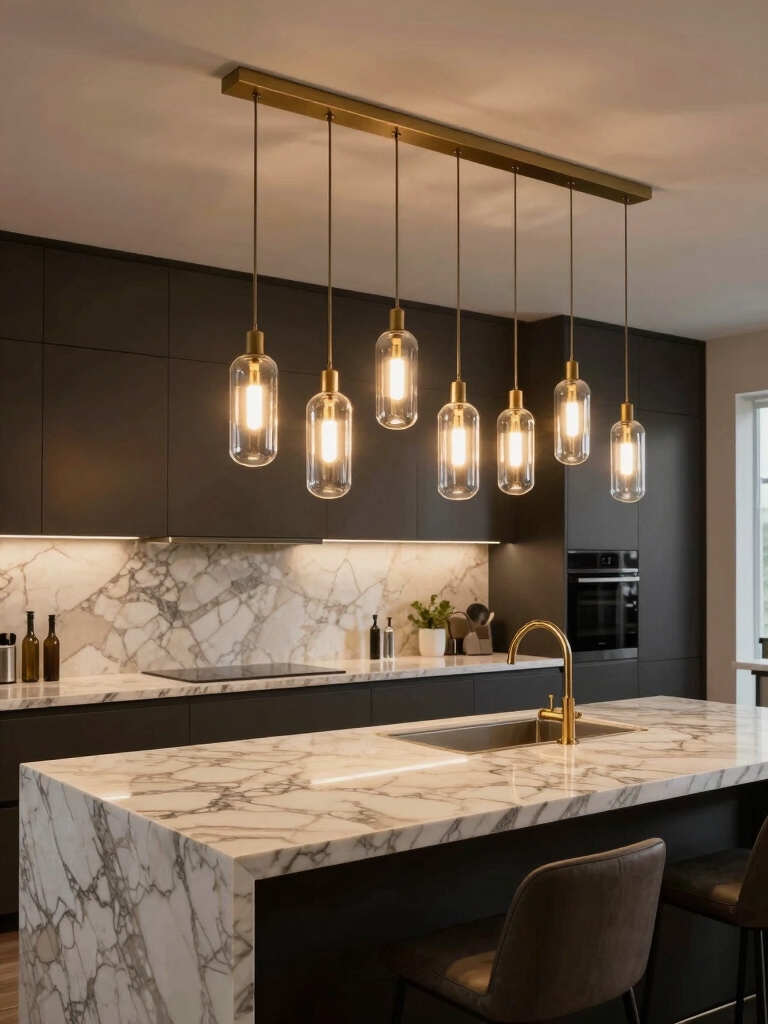
Choosing the Right Fixture Style
When I choose a fixture style for an island, I think about how it will connect the room’s function and look—will it read as focal jewelry, quiet background, or a mix of both?
I favor shapes and materials that echo cabinetry and countertops, balancing scale and texture. Mix metals sparingly, pick a signature silhouette, and let the fixture feel intentional rather than accidental.
Lighting that draws attention can make an island the room’s main character and elevate the overall design.
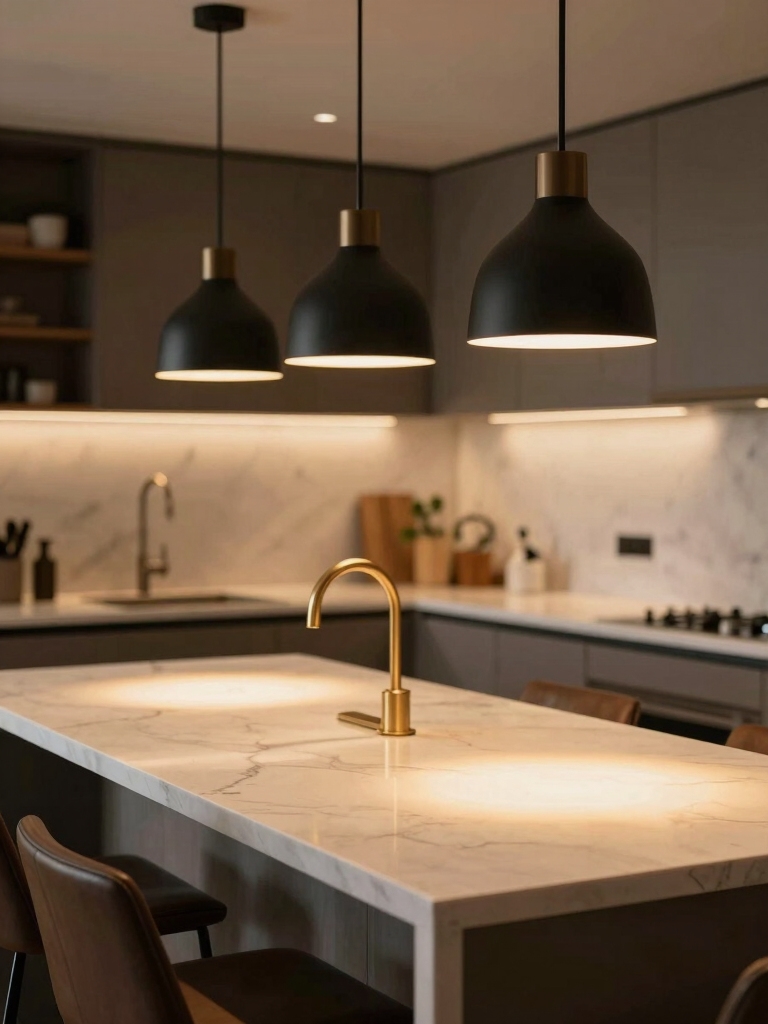
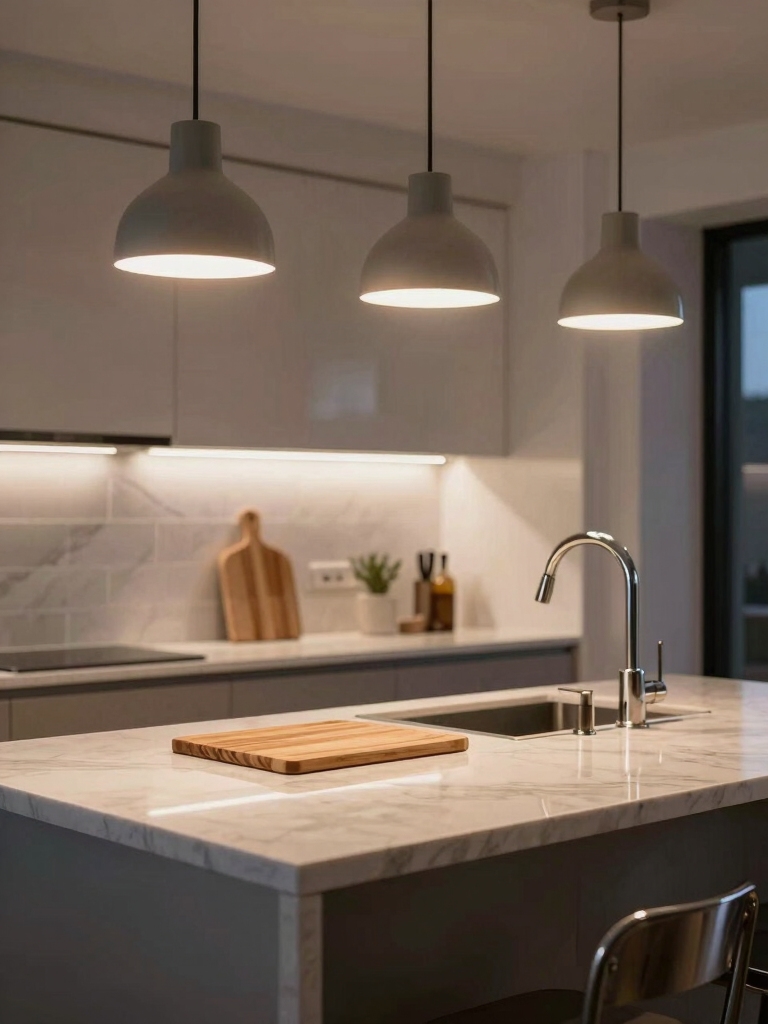
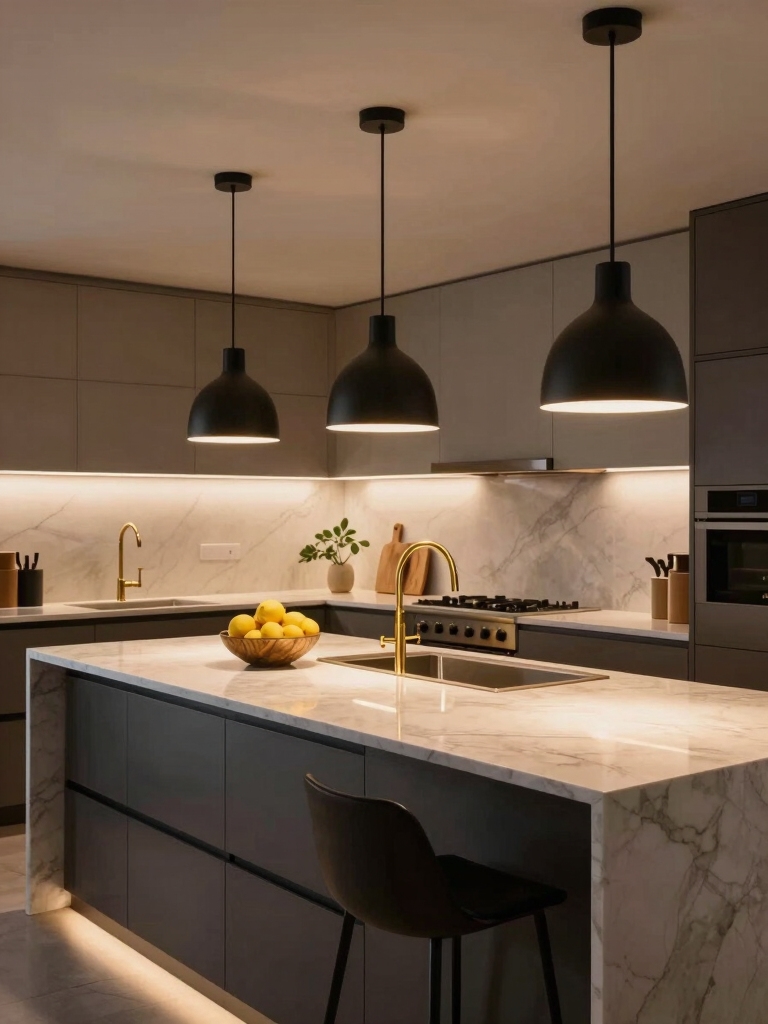
Determining Proper Fixture Height
If I want my island lighting to feel both useful and graceful, I focus first on height—low enough to illuminate prep and conversation, high enough to keep sightlines open. I measure, test, and refine until balance feels right.
- Hang 30–36 inches above counter for standard ceilings.
- Raise 3–6 inches for taller fixtures or multiple pendants.
- Adjust by eye for traffic and sightlines.
Stylish lighting choices can make a big impact, especially when drawn from real remodels that show how fixture height and style work together.
Selecting Optimal Beam Angles
Having settled the height so the fixtures light the work surface without cutting off sightlines, I turn next to beam angles to shape how that light falls.
I favor narrower beams for focused prep zones and wider spreads for even coverage across the island. Adjustable heads let me fine-tune overlap, minimize glare, and highlight materials.
Choose lenses that match your task and aesthetic. For larger islands, layering with multiple fixtures or task-and-ambient combinations ensures actual brightness where you need it most.
Layering Ambient, Task, and Accent Lighting
Because good lighting relies on more than a single source, I layer ambient, task, and accent fixtures to create a kitchen island that’s both practical and inviting.
I balance general illumination, focused work lights, and subtle highlights to define zones and mood.
- Ambient for overall comfort.
- Task for chopping and prep.
- Accent to showcase texture and objects.
Pendant alternatives like linear bars or clustered fixtures can provide flexible styling and coverage, often serving as effective island lighting options that go beyond basic pendants.
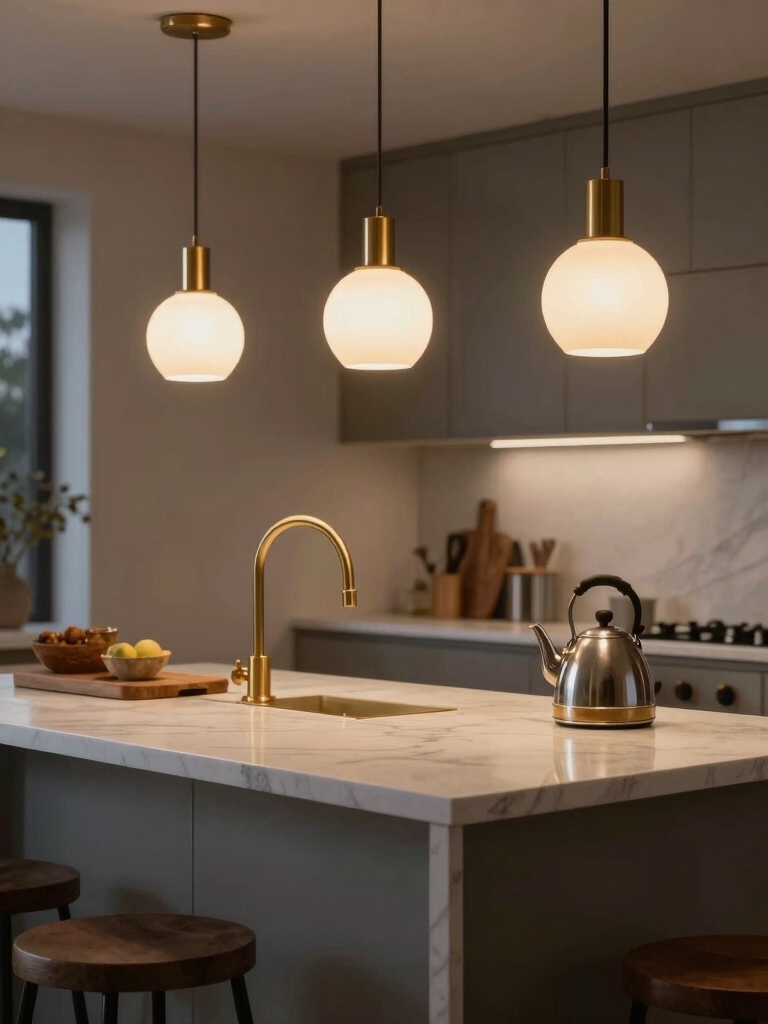
Matching Color Temperature to Your Kitchen
How warm or cool should your island feel when you walk into the kitchen? I pick color temperature to support mood and function: warm (2700–3000K) for cozy gatherings, neutral (3000–3500K) for versatility, cooler (3500–4000K) for crisp prep.
Match fixtures to cabinetry and finishes; test samples at night and day. Subtle contrast between task and ambient temperatures adds depth without clashing.
Picture-perfect island pendants photograph beautifully and can elevate both style and lighting performance.
Dimming Options and Controls
I’ll walk you through dimming options and controls so your island lighting does what you need—set mood, boost tasks, and save energy—without fuss. I’ll recommend practical, layered choices that suit routines and tech comfort.
- Soft-start dimmers for smooth shifts and bulb compatibility.
- Zoned controls to separate prep and ambient light.
- Smart switches for schedules, voice, and energy tracking.
Photographers often prefer specific pendant arrangements for kitchen islands, so consider grouping fixtures to match hanging lights and composition.
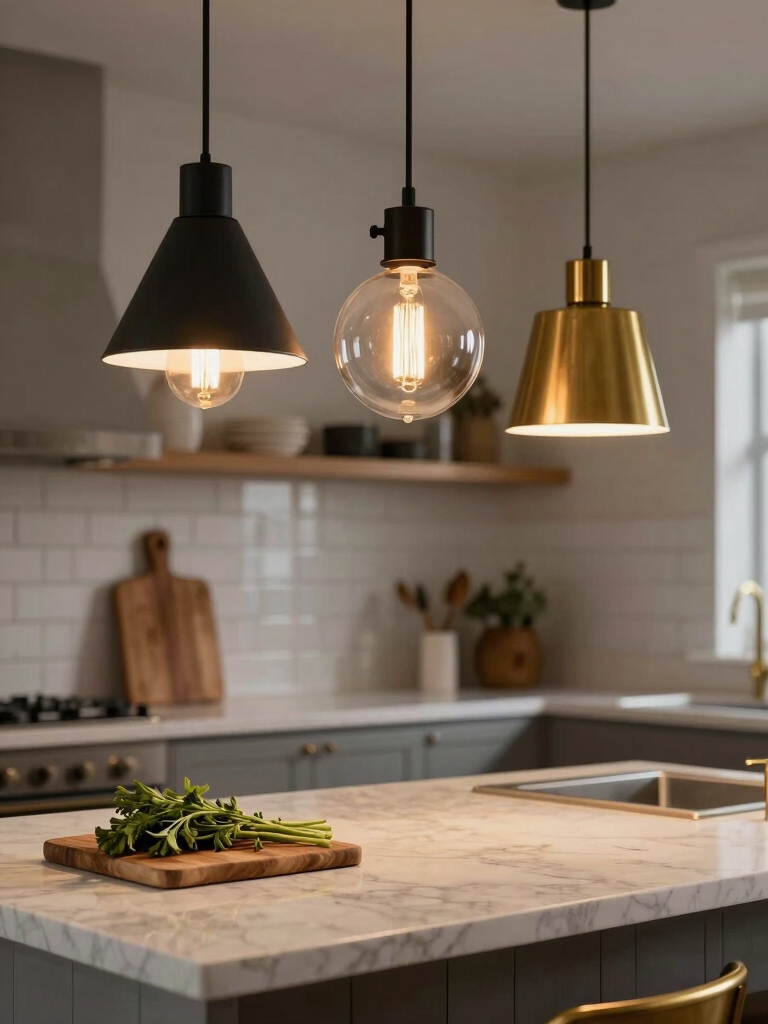
Pendant vs. Chandelier: Which to Pick
When I weigh pendant versus chandelier for an island, I look at scale, sightlines, and the room’s rhythm—pendants bring focused task light and modular spacing, while a chandelier makes a singular visual statement and spreads more ambient glow.
I prefer pendants when I want precise work lighting and flexibility; I choose a chandelier when I aim for drama and cohesive ambient warmth.
Spacing Multiple Fixtures Correctly
Spacing multiple fixtures correctly can make or break an island’s function and feel, so I start by dialing in three things: the total length of the island, the visual rhythm you want, and the lighting zones you need for prep versus socializing.
I then apply a simple rule of thirds and adjust for furniture and sightlines.
- Equal spacing
- Anchor at thirds
- Fine-tune for task areas
Integrating Recessed and Under-Cabinet Lights
I like to think of recessed and under-cabinet lights as partners in a layered plan that balances bright task zones with softer ambient glow.
When I place them, I aim for seamless integration so fixtures disappear visually while their light changes cleanly from prep surfaces to the island.
That careful task-to-ambient shift keeps the kitchen functional for work and comfortable for lingering.
Layered Lighting Balance
Balancing recessed and under-cabinet lights means creating a layered scheme that makes your island useful and welcoming at once.
I aim for contrast: general recessed light, task-focused under-cabinet illumination, and mood accents.
Here’s how I curate that balance:
- Recessed for even ambient coverage.
- Under-cabinet for prep clarity.
- Accent strips for warmth and depth.
Seamless Fixture Integration
When I integrate recessed and under-cabinet lights, I focus on making the fixtures feel like parts of the same system rather than separate elements competing for attention.
I match color temperature, align beam spread, and use consistent dimming so shifts stay subtle.
Placement respects sightlines and task zones, while hidden wiring and low-profile trims keep the look curated, cohesive, and quietly intentional.
Task-To-Ambient Transition
Although task lights need to deliver crisp, focused illumination, I treat them as the opening act for the room’s ambient story, smoothing shifts so the eye moves naturally from concentrated work zones to the overall glow.
I blend recessed and under‑cabinet layers for coherence:
- Match color temps and dim curves.
- Stage brightness levels for prep versus lounging.
- Conceal fixtures for seamless warmth.
Energy-Efficient Bulb Choices
Now that we’ve tied recessed and under-cabinet lights together, I’ll talk about the bulb choices that save energy and perform well.
I prefer LEDs for their long life and efficiency, but I’ll compare them briefly to CFLs so you can weigh upfront cost versus overall savings.
Then we’ll cover color temperature options so your island gets the warm or crisp light that suits cooking and ambiance.
LED vs. CFL
I usually recommend starting with LEDs over CFLs for kitchen islands because they give you better light quality, run cooler, and use less energy over time.
I prefer LEDs for longevity and instant brightness, and I’ll note practical trade-offs so you choose confidently.
- Efficiency: LEDs consume less power.
- Heat: LEDs stay cooler.
- Maintenance: LEDs last longer.
Color Temperature Choices
Having chosen LEDs for your kitchen island, the next decision is what color temperature will make the space both functional and welcoming.
I prefer warm whites (2700–3000K) for cozy dining and cooler whites (3500–4000K) for prep zones. Layer dimmable fixtures so you can shift mood and task clarity.
Choose CRI 90+ for true colors and energy-efficient bulbs that last.
Wiring and Electrical Considerations
Because good lighting depends on safe, code-compliant wiring, I start by mapping power sources, switch locations, and fixture loads before picking fixtures or wiring routes.
I plan circuits, choose proper gauge and breakers, and consider lighting control options.
Clear labeling and access make future changes easier.
- Circuit layout and load calculations
- Wire gauge, conduit, and protection
- Switches, dimmers, and junction access
Coordinating Finishes With Kitchen Design
Once the circuits and switch locations are set, I turn to how finishes will tie the island into the rest of the kitchen.
I balance metal tones with cabinet hardware, pick fixture finishes that echo trim or faucets, and layer textures—matte pendants with glossy counters, warm wood with cool stone.
The result feels intentional, curated, and ready to age gracefully.
Lighting for Different Island Uses
When I plan island lighting I start by thinking about how you actually use the space—meal prep, casual dining, homework, or serving drinks all demand different light qualities.
I choose layered fixtures: bright task, soft ambient, and focused accent so each activity feels intentional.
- Task: concentrated, cool light for chopping.
- Dining: dimmable, warm pendants.
- Homework/reading: adjustable directional lamps.
Maintenance and Bulb Replacement Tips
I routinely check my island lights as part of a quick monthly walk-through, since small issues—flickering bulbs, loose connections, or dusty shades—are easy to fix before they become hazards or affect your task lighting.
I keep spare bulbs matching color temperature and CRI, tighten fittings, clean shades gently, and test dimmers.
Replace bulbs hands-on, power off, and note lamp life to plan replacements.
I started this guide thinking lights were just practical, but I’ve seen them become punctuation — bright work for chopping, soft glow for lingering, bold fixtures that whisper style.
You’ll want precision where you prep and poetry where you dine; the right height, beam, and finish can do both.
Layering isn’t extra, it’s essential. Treat wiring and upkeep like insurance, and you’ll get a kitchen island that’s useful and unexpectedly beautiful.