
I’ll show you how to turn a cramped island into a multiuse hub without breaking the bank. I start by mapping prep, seating and traffic, then add clip‑on butcher block or a drop‑leaf for extra prep and serving.
I tuck stools under sliding benches, fit pull‑out drawers and vertical dividers, and swap paint, knobs and peel‑and‑stick counters for a fresh look. Add pendant lights, vinyl plank floors and thrifted coastal accents, and you’ve got big impact on a small budget — keep going and I’ll share step‑by‑step hacks.
Assessing Your Island Kitchen Layout and Needs

How will your island actually get used—cooking, dining, homework, or all of the above? I picture you moving through tight space: prep zones, seating, plug access, and traffic flow.
I ask about appliances, storage needs, and who’ll sit where.
We’ll prioritize comfort and function, balancing standing work with casual eating. Tell me your routines so I can suggest smart layout moves.
Small islands can be scaled and arranged to maximize space in compact kitchens without overwhelming traffic paths.
Budget-Friendly Island Design Principles

I like to start small but smart: choose island tops that pull double duty as prep space, dining spot, and a place to stash a cutting board or hot pan.
I also prioritize clever compact storage—think pull-out bins, under-counter drawers, and vertical dividers—so nothing clutters the surface.
With a few multifunctional choices you’ll stretch every inch without blowing your budget.
Consider adding features inspired by small kitchen island ideas that maximize space, such as compact storage solutions that tuck away utensils and appliances while keeping the surface clear.
Maximize Multifunctional Surfaces
When I design on a budget, I treat the island as a Swiss Army knife: it needs to prep, serve, store, and sometimes double as a homework station without costing a fortune.
I layer functions—extendable butcher block, flip-up bar, and recessed appliance garages—so one surface does many jobs.
Clever materials and clear zones keep it tidy, flexible, and fun without expensive custom work.
For extra guests, consider adding table extensions to your island so seating can expand only when needed.
Prioritize Compact Storage Solutions
You’ve seen the island pull double duty as prep station and homework table, so now let’s make sure it hides and organizes as smartly as it works.
I focus on compact storage that feels intentional, not cramped.
- Pull-out drawers for lids and linens.
- Vertical dividers for trays and cutting boards.
- Hidden cubbies for small appliances and chargers.
Clever Kitchen Island Storage Tricks You’ll Love highlights simple, budget-friendly techniques like these to maximize utility and style, including ideas for island storage hacks that you’ll wish you knew sooner.
Maximizing Vertical Storage Around the Island

Let’s dig into vertical storage around the island—I’ve found it’s the secret to making small kitchens feel roomy without losing function.
I add open shelves, hanging racks, and pegboards on the island’s sides to free counter space.
Tall, narrow cabinets tuck baking sheets upright.
Lighting and a few plants keep it airy.
It’s smart, cheap, and surprisingly playful.
Open shelving and compact racks are key to space-saving island layouts that maximize function without crowding the room.
Space-Saving Seating Solutions for Small Islands
A few clever seating tweaks can make a tiny island feel like the roomiest spot in the kitchen, and I love finding ones that tuck away when not in use.
I pick stools that fold, slide, or nest so traffic flows and clutter vanishes.
Try these:
- Fold-flat stools under overhangs.
- Sliding bench on a concealed track.
- Nesting stools that stack out of sight.
Narrow islands can benefit from space-saving seating that maximizes usability without crowding the kitchen.
Affordable Countertop Refresh Ideas

I like to keep countertop makeovers simple and wallet-friendly, so I start by looking for small swaps that punch above their price.
I suggest peel-and-stick stone-look film, inexpensive butcher-block overlays, or painting laminate with bond primer and stone-effect glaze.
Add trim edging, new faucet hardware, or a few decorative trays to camouflage wear—clever details that refresh the surface without replacing it.
Many successful projects use DIY-friendly materials like butcher-block overlays to stay under budget and achieve a high-impact look.
Low-Cost Cabinet Upgrades and Paint Tricks
Start by imagining your cabinets as a fresh canvas—I’ll show you how small, cheap moves can make them look custom.
I’ll walk you through quick paint choices, smart hardware swaps, and tiny decorative tweaks that feel luxe without the price tag.
- Sand, prime, and pick a durable color.
- Swap knobs for cohesive contrast.
- Add trim or open shelving accents.
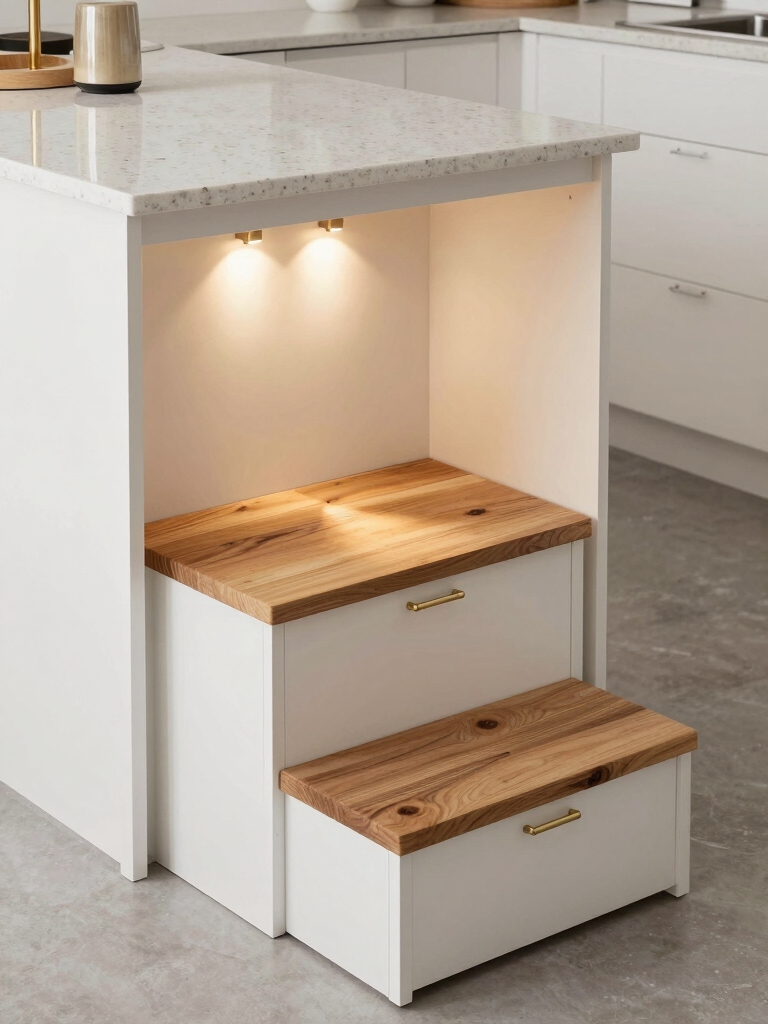
Smart Lighting to Make the Island Feel Larger
I love how a few strips of under-cabinet LED can lift the island visually and brighten shadowy corners without fuss.
Pair those with thoughtfully spaced pendant lights—hung a touch higher or staggered—to stretch the island’s presence and add personality.
Let me show you how simple tweaks in placement and glow can make a small island feel unmistakably bigger.
Under-Cabinet LED Strips
Think of under-cabinet LED strips as a tiny theatrical crew that boosts your island’s presence without stealing the show—I often use them to subtly widen the visual plane between counters and cabinets.
I pick warm tones, hide channels, and layer dimming for depth.
- Warm white for coziness
- Hidden mounting for clean lines
- Dimming to control depth and mood
Pendant Light Placement
Once you’ve wrapped the island in that soft, warm glow under the cabinets, pendant lights become the show’s framing devices—I use them to stretch the room vertically and trick the eye into thinking the island breathes more space.
I hang two or three slim pendants at staggered heights, center over work zones, and choose translucent shades so light spills sideways, creating airy layers without crowding sightlines.
Multipurpose Appliances and Compact Fixtures
Small kitchens demand clever gear, so I focus on multipurpose appliances and compact fixtures that do double — and sometimes triple — duty.
I pick tools that save counter space, speed prep, and add charm without fuss.
- Combination oven-microwave that browns and steams.
- Fold-down faucet with spray function.
- Drawer dishwasher that fits under narrow counters.
Open Shelving and Display Strategies
Because open shelving puts every dish and spice on display, I treat it like a mini gallery where function meets personality — I mix frequently used plates and glassware with a few decorative pieces, group items by color or purpose, and leave breathing room so the shelves don’t feel cluttered.
I rotate accents seasonally, tuck baskets for hidden mess, and keep labels minimal for a curated, casual look.
Clever Under-Island Storage Options
I love digging into under-island storage because it’s where practicality gets a little bit playful — pull-out drawers, sliding shelves, and hidden cubbies let you stash everything from baking sheets to recycling bins without the clutter.
I’ll show simple tweaks that amplify function and charm.
- Pull-out spice and tray racks
- Tiered sliding shelves
- Concealed recycling bins
Installing a Portable or Fold-Down Prep Surface
After you’ve tamed the chaos under the island, adding a portable or fold-down prep surface brings that newfound order up to the countertop level — literally. I like lightweight butcher block that clips on or a drop-leaf mounted on hidden hinges; both fold away when guests arrive.
They boost prep space, double as serving trays, and keep sightlines open—small moves, big kitchen smiles.
Durable, Cheap Flooring Options for Tight Budgets
I often tell readers that you don’t need to empty your savings to give a kitchen floor new life—durable, budget-friendly options are closer than you think.
I’ve tested smart, low-cost surfaces that survive spills, salt air, and heavy foot traffic without drama.
- Vinyl plank — waterproof, peel-and-stick ease.
- Laminate — scratch-resistant, budget chic.
- Painted plywood — crafty, cheap, surprisingly tough.
Coastal and Cottage Styling on a Shoestring
I love how a coat of paint can instantly give a tiny kitchen fresh coastal charm, so I’ll show you which hues punch above their weight.
Combine thrifted driftwood frames or glass floats with breezy cotton curtains and a low-cost rug, and you’ve got cottage warmth without breaking the bank.
Let me walk you through quick, budget-friendly swaps that layer color, texture, and found pieces for maximum seaside feel.
Paint for Fresh Charm
I often reach for a paintbrush first when I want to refresh a small island kitchen, because a new color instantly shifts mood without wrecking your budget or layout.
I pick coastal pastels or crisp white, then layer texture with simple strokes—playful, practical, brightening tiny nooks.
- Cabinet faces: soft seafoam
- Trim: warm white
- Accent wall: weathered blue
Thrifted Coastal Accents
You can snag a seaside vibe without splurging by hunting for thrifted pieces that bring texture and story to a small island kitchen.
I love mixing weathered glass bottles, chipped ceramic bowls, and brass utensils with faded frames and driftwood hooks.
Layering unexpected finds creates charm and history.
Hunt with patience, imagine new uses, and let imperfect pieces tell your cottage-by-the-sea story.
Breezy Textiles and Rugs
Layering light linens and weathered rugs can instantly lend a breezy, cottage feel to a small island kitchen without blowing your budget.
I mix faded napkins, a sisal runner, and a sun-bleached tablecloth to soften corners and add texture.
Try simple swaps and thrift finds — they transform space fast.
- Linen napkins
- Woven runner
- Vintage tablecloth
Simple DIY Hardware and Accessory Swaps
Start by swapping small things that make a big difference — I’ll show you how a few simple hardware and accessory changes can lift the whole room.
I swap knobs, pull handles, and faucet finishes for instant style boosts.
I add woven baskets, magnetic knife strips, and open shelving accents.
These quick, cheap swaps refresh function and island charm without a full renovation.
Planning a Phased, Budget-Conscious Makeover
Although we won’t gut the kitchen overnight, I’ll map out a phased makeover that keeps your island looking fresh while protecting your wallet; by breaking the project into bite-size steps—cosmetic swaps first, surface repairs next, then any structural changes—you’ll get usable improvements and quick wins without the chaos of a full remodel.
- Paint and hardware refresh.
- Countertop patching and sealing.
- Layout tweaks and electrical upgrades.
You can make a small island feel bigger, work harder, and look fresher without blowing your budget.
I’ll choose clever layouts, add vertical storage, and pick space-saving seating. I’ll refresh counters affordably, lay down durable flooring, and lean into coastal or cottage charm.
I’ll swap hardware and accessories myself and phase the work to spread costs. Little changes, smart choices, consistent style — big impact, less stress, more joy.


