I swapped cluttered counters for a single island-table and now it’s my prep station, homework spot, and weekend dining hub rolled into one stylish piece. It’s compact but roomy, with drawers for sheet pans, a hidden mixer nook, and seating that tucks neatly to keep traffic flowing.
I chose durable quartz and rounded corners for kids and pets, plus plug strips for quick charging. Keep going and I’ll show sizing, styles, storage, and budget-friendly options.
Why Kitchen Island Table Hybrids Are Trending Now

Because we’re cooking, working, and socializing at home more, I’ve noticed kitchen island table hybrids booming in popularity—they blend prep space, dining, and a casual workstation into one smart piece.
I love how they streamline clutter, invite conversation, and adapt to kids’ homework or a quick meeting. They feel intentional, flexible, and surprisingly stylish—small design wins with big daily impact.
Many homeowners now prefer designs that serve as both a kitchen island table combo and a dedicated dining area to maximize small spaces.
Choosing the Right Size for Your Space

I’ll help you pick an island that actually fits your kitchen by starting with accurate floor-plan measurements so nothing feels cramped.
We’ll factor in at least 36 inches of clear walkway on busy sides and a bit more where drawers or appliances open.
Finally, I’ll match the island’s footprint to its role—extra prep space, casual dining, or both—so you get the right size for how you live.
Small islands can still be powerful multitaskers, often proving that size doesn’t matter when designed to maximize storage and function.
Measure Your Floor Plan
Before you pick a size, I’ll walk you through measuring your floor plan so the island fits and flows with the room. I measure deliberately, playful but precise, so your hybrid feels intentional.
- Sketch room dimensions and note doors/windows.
- Mark appliance locations and counter edges.
- Measure ceiling height for scale.
- Sketch the island to scale and adjust until it breathes.
Also consider standard island proportions and clearances to ensure proper traffic flow and usability.
Consider Walkway Clearance
When I size your island, the first thing I check is walkway clearance — it’s the invisible handshake between your island and the rest of the room.
I aim for comfortable flow: at least 36 inches for single-sided traffic, 42–48 inches for busy zones.
That gap keeps cooks moving, guests circulating, and chairs from butting into counters—practical, polished, and pleasantly uncramped.
Different kitchen island layouts are chosen based on room size, so I match island type to the square footage to ensure the best fit and function.
Match Island Function
Walkway clearances set the stage, but function dictates the form—what you want the island to do will drive its size and layout. I think about needs first, then dimensions. Match form to use:
- Prep-heavy: deeper, durable surface.
- Dining-focused: overhangs for seating.
- Storage-centric: taller base, pullouts.
- Social hub: open sightlines, flexible length.
Choose the size that fits how you live. Small kitchens can still include islands if you prioritize unexpected small layouts and smart circulation planning.
Styles That Complement Any Kitchen Aesthetic

I love mixing timeless transformative pieces with bolder mixed-material pairings to keep a kitchen island table feeling both classic and fresh.
I’ll show how wood, metal, and stone can play together so your hybrid works with modern, farmhouse, or minimalist kitchens.
Let’s pick combinations that look intentional, not accidental.
Japandi Kitchen Islands blend minimalist Japanese and Scandinavian design principles to create serene, functional spaces with natural materials and clean lines, known for emphasizing harmonious minimalism and practical craftsmanship.
Timeless Transitional Designs
Although trends come and go, I favor transitional kitchen island tables because they bridge classic and contemporary without fuss, so you get a piece that works in almost any space.
I pick elements that feel familiar yet fresh:
- Clean lines with gentle curves
- Neutral palettes with subtle contrast
- Functional storage that doesn’t shout
- Durable finishes that age gracefully
They adapt, calm, and charm. A few standout layouts are worth saving immediately for their blend of form and function, like those featured in Kitchen Island Designs Worth Saving Immediately.
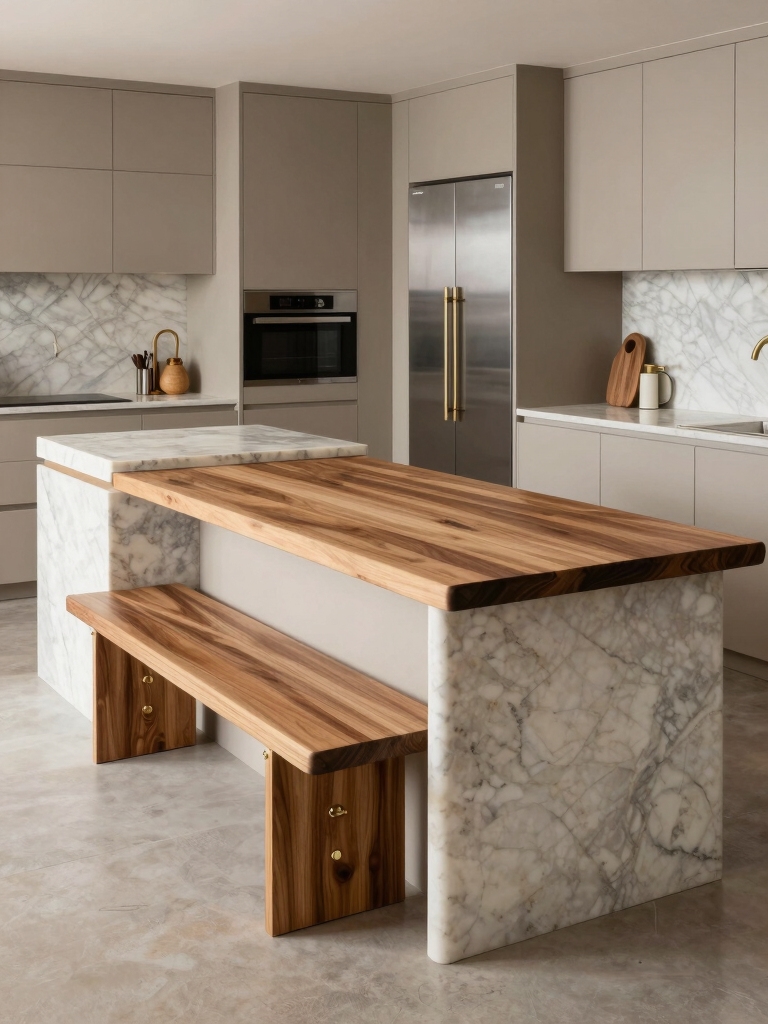
Mixed-Material Pairings
Moving from those calm, adaptable silhouettes, I like to mix materials to give an island real personality without shouting for attention.
I pair warm wood tops with matte metal bases, or marble slabs with sculpted oak legs, so texture and tone play together.
These combos feel curated yet casual, adaptable to modern, rustic, or minimalist kitchens, inviting touch and lasting visual interest.
Materials and Finishes to Consider

Because your kitchen island will serve as table, prep station, and focal point, I like to start by choosing materials that balance durability with personality—think quartz or butcher block tops for daily use, paired with painted or stained bases to set the tone.
- Quartz: low-maintenance, modern
- Butcher block: warm, re-sandable
- Marble accents: luxe, careful care
- Matte paint: hides wear, adds charm
Built-In Storage Solutions That Work

I love when an island hides clever storage, so I favor deep pull-out drawers for pots, hidden appliance compartments for a clutter-free counter, and open shelves with cute bins for everyday items.
Each option keeps things accessible while letting you style the island to your taste. Tell me which one you’re dreaming of and we’ll map it to your kitchen’s workflow.
Deep, Pull-Out Drawers
When I pull open a deep, pull-out drawer on a kitchen island, it feels like uncovering a mini pantry designed just for me; everything’s organized, accessible, and out of sight until I need it.
I love how they:
- stash sheet pans and platters neatly
- hide snack stashes for quick grabs
- hold tidy bins for recyclables
- cradle bulky appliances without chaos
They make cooking effortless.
Hidden Appliance Compartments
Tucked into an island’s footprint, hidden appliance compartments make kitchens feel like clever stage sets where bulky gear slips offstage until showtime.
I love how a lift-up mixer nook or sliding toaster drawer keeps counters serene yet accessible.
They’re curated, efficient solutions—hide the wire tangle, reveal what you need with a touch—and they make everyday cooking feel delightfully intentional.
Open Shelves With Bins
After you tuck away appliances, open shelves with bins bring a friendly, organized face to your island — and I love how they strike a balance between display and order. I use labeled baskets for quick reach and tidy looks.
Consider mixing textures and colors to keep it playful:
- Woven baskets for warmth
- Wire bins for visibility
- Labeled bins for speed
- Ceramic tubs for utensils
Integrating Appliances and Sinks Seamlessly
Though I love a dramatic island, I also want my appliances and sink to feel like they belong there—integrated, accessible, and a little bit sneaky.
I tuck a slim dishwasher behind matching cabinetry, hide a pop-up faucet for clean lines, and pull out a trash drawer beside prep zones.
It’s about rhythm: functional magic without shouting, effortless and curated.
Seating Options for Comfort and Function
I’m thinking about how seating really shapes the way we use an island—stools bring casual ease, chairs add formality, and built-in benches maximize cozy family time.
I’ll compare those options and toss in adjustable-height solutions for flexibility between dining, prepping, and working. Tell me which vibe you’re after and I’ll help match comfort with function.
Stools vs. Chairs
Let’s talk seating: when I’m choosing between stools and chairs for a kitchen island, I think about how people actually use the space — quick breakfasts, homework sprawls, or long dinners.
I lean practical but playful:
- Stools: compact, casual, easy tuck-away
- Chairs: comfy, supportive, better for lingering
- Mix: visual interest, flexible use
- Height: match counter for comfort
Built-in Bench Seating
When I picture built-in bench seating at a kitchen island, I see a cozy, custom nook that pulls people in—perfect for breakfast routines, homework zones, or stretched-out brunches.
I love how benches maximize seating, hide storage, and create a connected, informal vibe. Add cushions, a durable finish, and varied lengths to suit traffic flow; it’s convivial design that feels effortlessly intentional.
Adjustable Height Options
Because people and activities change by the day (and sometimes by the hour), I lean toward adjustable-height seating at a kitchen island so everyone can find their sweet spot.
- Swivel stools for quick turns and chats
- Gas-lift chairs for effortless shifts
- Footrests that adapt with height
- Fold-away options for flexible space
I love mixing finishes so function feels curated, lively, and welcoming.
Multiuse Features for Work and Play
Although I often use our island as a prep station, I also flip it into a mini office, homework zone, and game table without a second thought — and you can too.
I stash slim organizers, a laptop mat, and clip-on cup holders, then swap in a board game or craft tray.
It’s effortless, compact, and keeps family routines delightfully flexible.
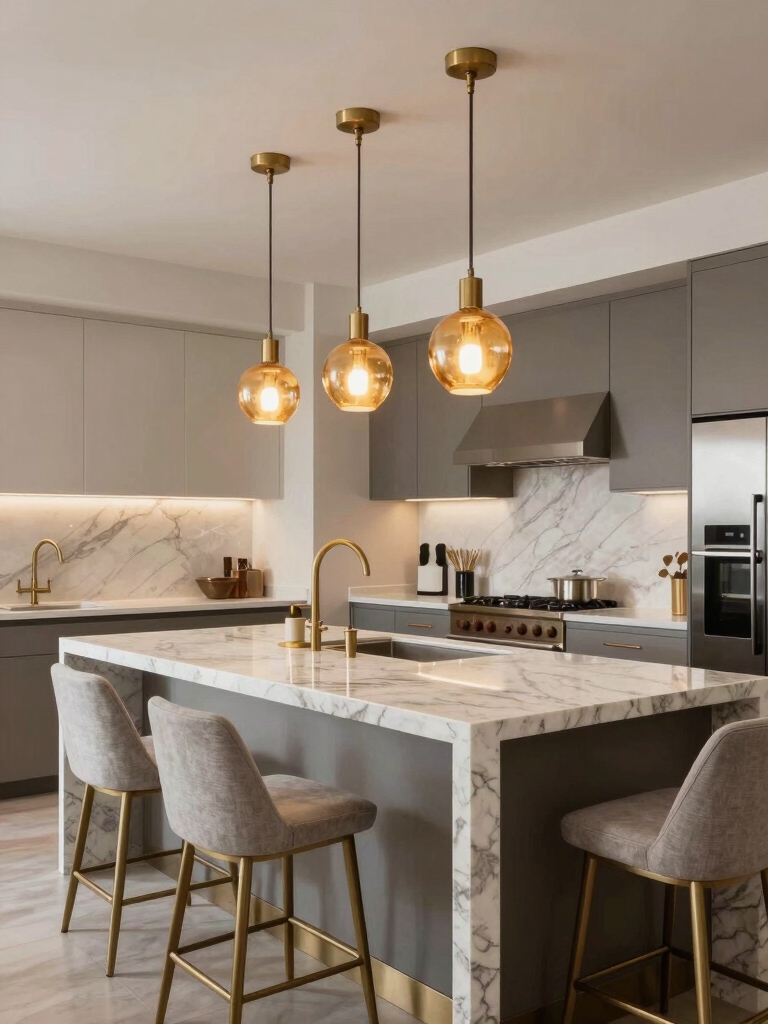
Smart Lighting and Power Integration
I often plug my life into the island—literally—so smart lighting and built-in power feel like must-haves rather than luxuries. I love how mood presets, task lights, and hidden outlets keep the space tidy and intuitive.
Consider:
- Dimmable overhead zones for cooking and dining
- Integrated USB and plug strips
- Motion-activated toe kicks
- App-controlled schedules for effortless ambiance
Tips for Creating a Durable Prep Surface
Think practically: I pick materials that stand up to knives, spills, and heavy pots without fuss. I favor quartz or honed granite for resilience, and butcher block where warmth and easy repairs matter.
Seal porous stones, choose tight-grain woods, and add a removable cutting board for tough jobs. Keep edges rounded and finishes matte to hide wear—functional, stylish, low-drama.
Child-Friendly and Pet-Friendly Designs
When I design a kitchen island with kids and pets in mind, I pick details that keep life livable without sacrificing style.
I choose rounded edges, easy-clean surfaces, and practical storage so messes disappear fast.
Consider these essentials:
- Rounded corners and soft finishes
- Stain-resistant countertop material
- Hidden storage for toys and bowls
- Durable, washable upholstery on seating
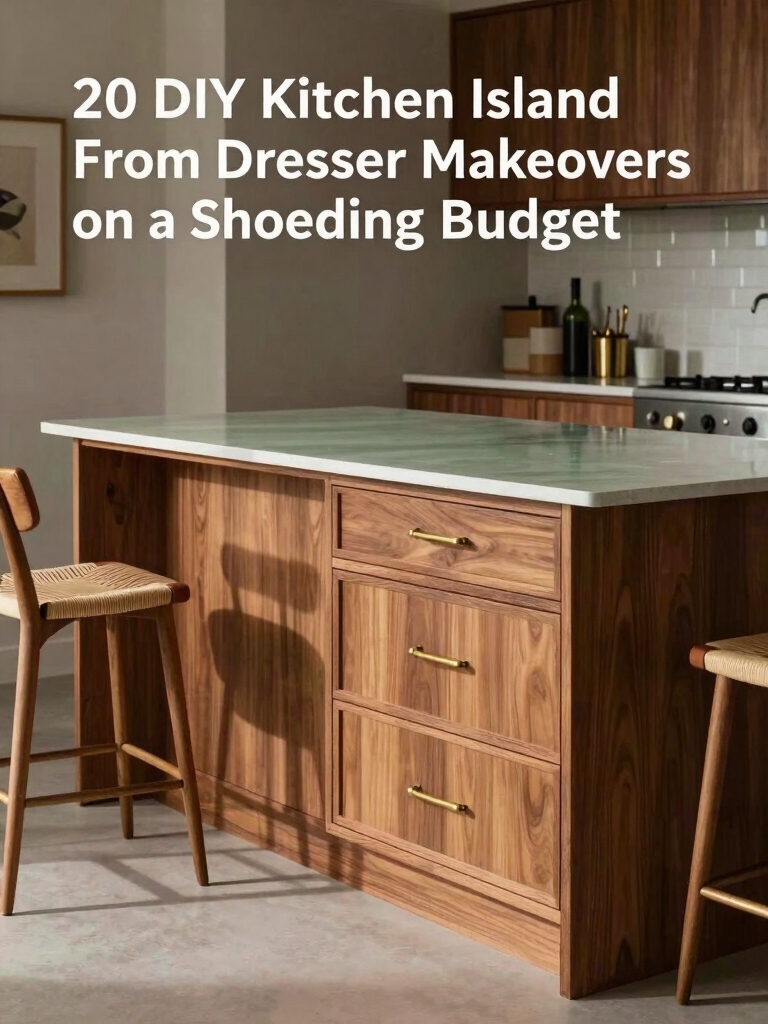
Budget-Friendly Alternatives and DIY Ideas
Keeping kids and pets in mind doesn’t mean you have to spend a fortune—I’ll show you smart, stylish ways to keep costs down while getting the look and function you want.
I patch together salvaged wood, paint it high-contrast, and swap expensive hardware for thrifted finds.
Modular carts, removable butcher-block tops, and simple pegboard storage make flexible, durable islands that feel custom without the price tag.
How to Plan Traffic Flow Around an Island Table
With a little foresight, I plan traffic around an island table so people move naturally instead of bumping into each other or the cabinetry. I think in paths, not just pieces.
- Keep 36–48 inches clear around work zones.
- Anchor walkways with lighting or rugs.
- Position seating to avoid main circulation.
- Allow a clear route between sink, stove, fridge.
This keeps flow effortless and fun.
Mixing Form and Function in Open-Plan Homes
Because open-plan living asks rooms to pull double duty, I balance beauty and utility so every island table feels intentional rather than tacked-on.
I pick silhouettes that read like furniture and hide storage, mix warm woods with sleek metals, and layer lighting to define zones.
Guests can linger, meals happen, and cleanup stays tidy—form and function flirt without stealing each other’s spotlight.
Maintenance and Care for Long-Lasting Beauty
Now that the island blends beauty and function, I want to make sure it stays handsome for years—not just the first Instagram-worthy week.
I follow simple rituals and invite you to try them too:
- Wipe spills immediately with a soft cloth and gentle cleaner.
- Oil or seal wood periodically, following the maker’s guide.
- Use trivets and cutting boards to prevent nicks.
- Tighten hardware and check joints seasonally.
I’ve walked you through the why, the what and the how, so now it’s time to lean into the little luxury of an island table—your kitchen’s secret handshake.
Pick the size that breathes, the materials that smile through spills, and storage that keeps the chaos politely out of sight.
Whether you DIY or splurge, plan for traffic that actually moves, and tend to surfaces like you would a favorite plant. Do it your way; it’ll reward you.