I keep a clean splash zone by doing a quick 10-minute countertop audit each day and grouping items by how often I use them. I curve clutter, place essential tools within arm’s reach, and assign a dry zone for utensils while keeping a wet zone near the faucet. I use barriers, labels, and slim racks to maximize space, then reset everything each day. Stick with me and you’ll see how simple tweaks reveal a consistently tidy setup.
See Why a Clean Splash Zone Makes Your Kitchen Work

A clean splash zone isn’t just about looks—it keeps your workflow smooth.
I’ve learned that a tidy area reduces distractive clutter, speeds cleanup, and protects surfaces from stains. When I keep soap, sponge, and towels within reach, tasks flow without searching.
A defined zone translates to fewer slips, less cross-contamination, and a calmer kitchen rhythm you can trust every day. Additionally, essential tips for an organized kitchen sink area can further enhance your efficiency and cleanliness in this busy space.
Do a 10‑Minute Countertop Audit

If the splash zone is clean and reachable, the next step is a focused 10-minute countertop audit.
I scan for clutter, mismatched tools, and frequently used items that deserve a home. I note surfaces needing wipe-downs, then group essentials together.
- Declutter quick grab-and-go items
- Centralize daily-use tools
- Clear underutilized containers
- Schedule routine wipe-downs and resets
In addition, consider incorporating budget-friendly DIY kitchen organization solutions to maximize your space without breaking the bank.
Pick Durable Materials for the Sink Zone

When I pick materials for the sink zone, I look for durability that holds up to daily use and moisture. A sealed surface reduces staining, makes spills easier to wipe away, and keeps cleaning simple. Additionally, incorporating under sink organization can further enhance functionality and maintain a tidy space. Let’s compare sturdy options and choose finishes that maximize longevity without sacrificing readability and style.
Durable Material Choices
Durable materials in the sink zone aren’t an afterthought—they’re the foundation of a practical, long-lasting kitchen setup.
I choose surfaces that resist scratches and stains, balance cost, and simplify maintenance. Here are my picks:
- Stainless steel or composite sinks for longevity
- Quartz or solid-surface countertops for ease of cleaning
- High-grade seals to prevent water damage
- Scratch-resistant, non-porous backsplashes for quick wipedowns
Additionally, investing in kitchen cabinet organizing ideas can enhance the overall efficiency of your kitchen space while keeping it looking tidy.
Sealed Surface Benefits
Sealed surfaces in the sink zone keep spills and stains from becoming lasting problems, so I opt for materials that give me a tight, non-porous seal. This choice saves time, reduces maintenance, and minimizes damage from hot or acidic foods. I prioritize consistent cleaning, smooth joints, and durable finishes, ensuring a calm, organized workspace that stays clean with minimal effort. Additionally, using space saving solutions can enhance the overall functionality of your small kitchen.
Establish Daily Habits to Keep Surfaces Clear

To keep surfaces clear, I start my day by doing a quick reset: wipe down any crumbs, put away items that linger, and return tools to their designated spots.
- Set a 2-minute sweep and wipe after each use
- Put away utensils and gadgets immediately
- Clear counters before starting new tasks
- Tackle small clutter before it grows into a habit
Establishing a routine for deep kitchen drawer organization can also help streamline your kitchen tasks.
Zone the Sink Area for Quick Access

I’ll set up quick access zones by frequency, so you can grab what you need without reaching or searching.
I’ll map the sink perimeter into a simple script: keep the essentials within arm’s reach and group items by task. This keeps the workflow smooth and the area tidy from the moment you start washing up. Additionally, consider utilizing under kitchen sink organization techniques to maximize your storage space and reduce clutter.
Quick Access Zones
When you zone your sink area for quick access, you’ll save steps and keep essentials in reach during busy tasks.
I’ll share practical tweaks you can implement now, avoiding clutter while boosting efficiency.
Focus on placement, labeling, and accessibility so tools stay visible, not buried.
- Clear, dedicated jars for sponges and scrubbers
- A compact tray for detergents and pads
- Scissors, tape, and small tools within arm’s reach
- A magnet or hook for utensils and clips
Additionally, consider using kitchen gadgets organization techniques to further streamline your sink area for optimal functionality.
Zone By Frequency
Typically, I arrange the sink by how often I reach for items, placing daily essentials within easy reach and rarer tools a touch farther away.
I keep mugs, sponges, and dish soap close, while specialty brushes live in a labeled bin.
This frequency-based setup reduces clutter, speeds chores, and keeps the splash zone calm, clean, and highly functional for everyday use.
Sink Perimeter Script
The Sink Perimeter Script focuses on zoning the sink area for quick access, so everything you reach for during cleanup is within a step or two.
I share practical steps to keep tools handy and clutter at bay, improving flow and speed.
- Keep soap, sponge, and towels nearby
- Stash a bin for waste and scraps
- Store brushes by the faucet
- Group cleaners by task type
Install a Reach-Access Cleaning Station Under the Sink
Under the sink, a reach-access cleaning station keeps my supplies tidy and within arm’s reach, so I don’t fumble through drawers or stumble over clutter.
I mount small trays and a compact caddy on a minimal rack, then label each section.
This setup speeds cleanup, reduces mess, and preserves cabinet space without compromising accessibility or safety around water and cleaners.
Choose Compact, Double-Duty Tools
I’m all about compact, double-duty tools that keep the sink area tidy and ready for anything.
When you choose gear that pulls double duty, you save space and boost how often you actually use it.
Let’s explore practical picks that stay organized and maximize every square inch.
Compact, Dual-Use Gear
If you’re short on cabinet space, choosing compact, dual-use gear can save both inches and effort: a good multitool, collapsible measuring cups, and a magnetic strip that holds knives and scissors keep essentials within reach without clutter.
- Multitool with knife, bottle opener, and screwdriver
- Collapsible measuring cups with nesting lids
- Magnetic strip for knives, scissors, and peels
- Folding dish rack that doubles as a drying mat
Save Space, Boost Use
When space is tight, choosing compact, double-duty tools makes every inch count and every task simpler.
I favor nested spatulas, foldaway brushes, and a magnetic strip that holds essentials. Multi-use containers keep counters clear, while a small, stackable rack doubles as a rail for towels.
Less clutter, faster routines, cleaner counters—smart gear that genuinely boosts use.
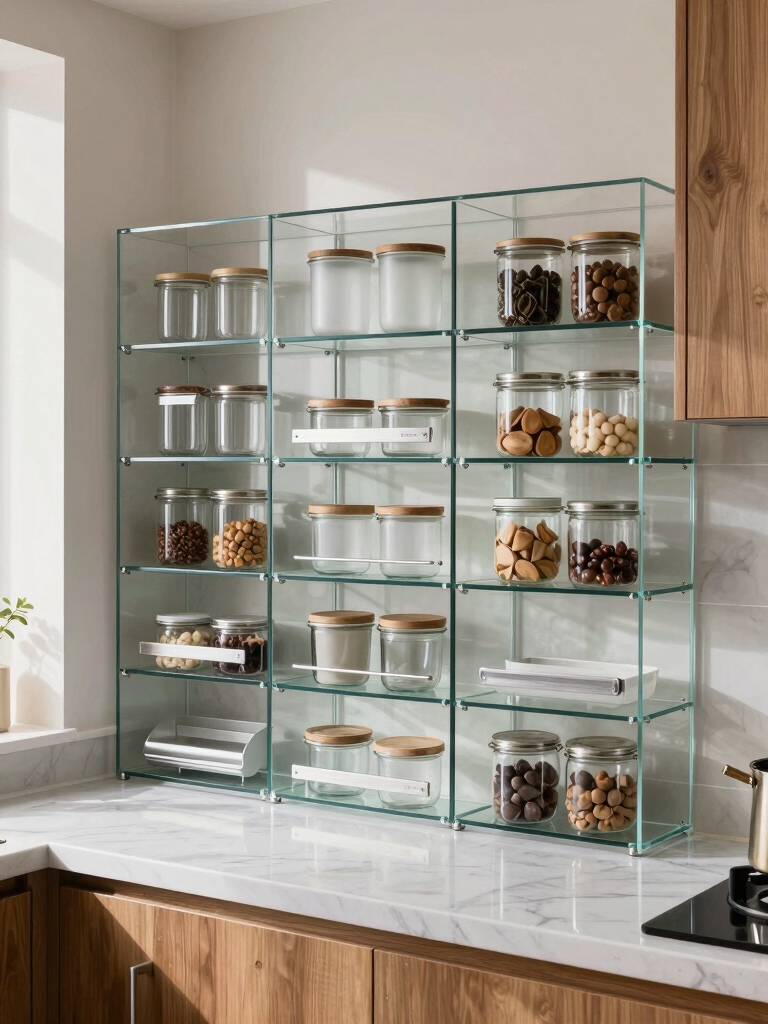
Use Vertical Storage to Free Counter Space
Vertical storage is a game changer for a busy kitchen: it frees counter space by stacking and corralling items you use every day.
I suggest practical options that stay tidy, simple to install, and accessible.
- Open shelves for mugs and bowls
- Tiered racks over the sink
- Magnetic jars on the backsplash
- Over-the-door hooks for towels and tools
Hidden Storage for Daily Essentials
Hidden storage is a smart way to keep daily essentials within reach without crowding counters.
I place a slim pullout under the sink for sponges and brushes, plus labeled bins on a shallow shelf for quick grabs like soap and scrubbers.
Consistent spots reduce clutter, save time, and keep the splash zone tidy, organized, and practical for everyday use.
Separate Wet and Dry Zones to Prevent Messes
Separating wet and dry zones keeps spills from turning into chores.
I design with distinct areas for damp tools and dry items, reducing cross-mess. You’ll notice quicker cleanup and calmer countertops. Labeling zones helps everyone pitch in, too.
Keep a small dry tray for towels, and a wet bin away from dry surfaces.
- Define wet zone near faucet
- Use dry zone for utensils and sponges
- Place a barrier mat between zones
- Remove clutter daily
Smart Drainage and Splash-Mitigation Techniques
I’m sharing practical ideas on Smart Drain Layouts, Splash-Guard Surfaces, and Water Flow Management to keep your sink area tidy.
I’ll show how thoughtful drain placement, easy-to-clean splash guards, and controlled water paths reduce spills and messes.
Let’s walk through simple tweaks you can implement today to smooth every cleanup and protect your counters.
Smart Drain Layouts
Smart drain layouts help you keep a kitchen sink area clean and efficient by guiding water flow and splash control right where you need it.
I design paths to minimize spills, reduce backsplash spray, and simplify cleanup. A thoughtful layout saves steps and prevents pooling, keeping your zone dry and organized.
- Contain splash with angled drain routing
- Align disposal and secondary outlet for balance
- Use slope-aware piping to optimize flow
- Label connections for quick maintenance
Splash-Guard Surfaces
Splash-guard surfaces are my go-to for preventing puddles and keeping counters clean.
I choose materials that rinse quickly, resist staining, and stay flat to minimize splash zones. I place seams away from the sink and use quick-dry finishes.
I test drainage paths, keep edges sealed, and wipe spills promptly to maintain a tidy, low-maintenance workspace.
Water Flow Management
Water flow management is all about moving water away from work areas quickly and predictably.
I’ll share practical, concise steps you can apply now to reduce splashes and redirects. Focus on layout, drainage, and containment.
- Position outlets for minimal cross-flow
- Use a drain cover to channel spills
- Install splash guards where possible
- Maintain seals and caulking for reliability
Backsplash-Integrated Accessories for Simplicity
Backsplash-integrated accessories streamline my kitchen setup by keeping essentials within arm’s reach and reducing countertop clutter.
I design with durability in mind, choosing magnetic holders, built-in soap dispensers, and slim racks that fit tight spaces.
This approach minimizes motions, boosts efficiency, and preserves a clean sightline.
Daily use remains intuitive, organized, and visually calm for a stress-free prep zone.
Implement a Simple Daily Reset Routine
I’ve found that a simple daily reset keeps the kitchen calm and ready for the next task.
I guide you to a quick, consistent routine that stops clutter before it starts, so every morning feels fresh and efficient.
- Clear counters and put items back in their spots
- Dry sink and dry surfaces before closing drawers
- Wipe spills and deal with dishes
- Reset tools to their designated homes
Color, Texture, and Material Rules for Easy Maintenance
Choosing the right colors, textures, and materials makes maintenance easier because they hide messes and wear while keeping the space calm.
I pick durable, matte finishes on countertops to resist fingerprints, and I balance smooth with subtle textures for depth.
I stick to easy-clean surfaces, seal grout, and store items by function to reduce clutter and simplify daily upkeep.
Seasonal Adjustments to Sustain Your System
As seasons shift, I adjust my kitchen system to stay tidy and functional without extra effort.
I tailor routines to weather, humidity, and daylight, keeping essentials accessible and sensible year-round.
- Simplified inventory checks
- Seasonal swap of organizers
- Quick drain and seal routines
- Minimal, reusable solutions for clutter
Quick Fixes for Common Countertop Clutter Scenarios
Ever notice how countertop clutter seems to appear out of nowhere and disrupt the workflow?
I’ve got quick fixes that actually work. Start with a dedicated tray for daily essentials, then clear surfaces by night with a five-minute reset.
Use labeled bins for cables, sponges, and receipts. Keep a compact, magnetic hook for utensils.
Repeat daily to prevent buildup.
Measurable Benchmarks to Track Progress
Measuring progress doesn’t have to be a mystery—we’ll set clear, achievable benchmarks you can actually hit.
I’ll share practical targets you can track weekly to stay motivated and on course.
- Surface clarity: free of nonessential items each day
- Cleaning cadence: wipe for 2 minutes every evening
- Stain checks: address spills within 6 hours
- Storage efficiency: 20% fewer items on countertops
Conclusion
If you commit to a clean splash zone, your kitchen will feel calmer and work faster. I know you might think quick clutter will slide back in, but a 10-minute audit and simple routines keep it in check. Picture a counter that stays clear for meal prep, with durable materials and a zoned sink area making it effortless. Stick to daily habits, and seasonal tweaks, and you’ll see steady progress rather than weekly resets.