I’ve learned that the sink is the hidden command center of a smooth kitchen, so I organize with 13 practical tricks you don’t usually hear about. Think smart zones, vertical stacking, pull-out bins, and labeled, near-counter shortcuts that cut steps. I measure is the backbone—width, depth, cabinet height—so everything fits without clutter. I’ll show you quick, budget-friendly upgrades that feel like a mini remodel. Keep going to uncover more ideas you can start today.
Why Kitchen Sink Organization Matters (And How To Do It)

Keeping the sink area organized saves me time and stress every day. I keep essentials where I use them most, so dishes slide into the right spot and scrubbing stays quick. A defined system reduces chaos, boosts efficiency, and lowers frustration. I group tools by task, label containers, and stick to a routine, turning a cluttered chore into predictable, calm maintenance. Additionally, implementing smart organization tips can maximize the functionality of your kitchen sink space.
What To Measure Before You Start

Before you start reorganizing, I’ll map out what to measure so the setup sticks.
I’ll keep it simple and practical, focusing on fit and flow, not clutter. Measure these essentials to guide decisions:
1) Sink width and depth
2) Cabinet opening heights and widths
3) Counter clearance and reachable reach range
Drawer Dividers That Fit Small Spaces (No Remodel Needed)

If you’re short on drawer real estate, you can still add organization fast with small, adjustable dividers that don’t require a remodel.
I choose slim, flexible options that lock into place and keep小 items tidy without crowding. Measure where gaps exist, stagger segments, and label sections.
Lightweight plastics or bamboo blend, cleaning simple, and adjustments are quick if you reconfigure. Incorporating counter organization accessories can further enhance the efficiency of your kitchen space.
Under-Sink Hacks For Disposables And Cleaning Bottles
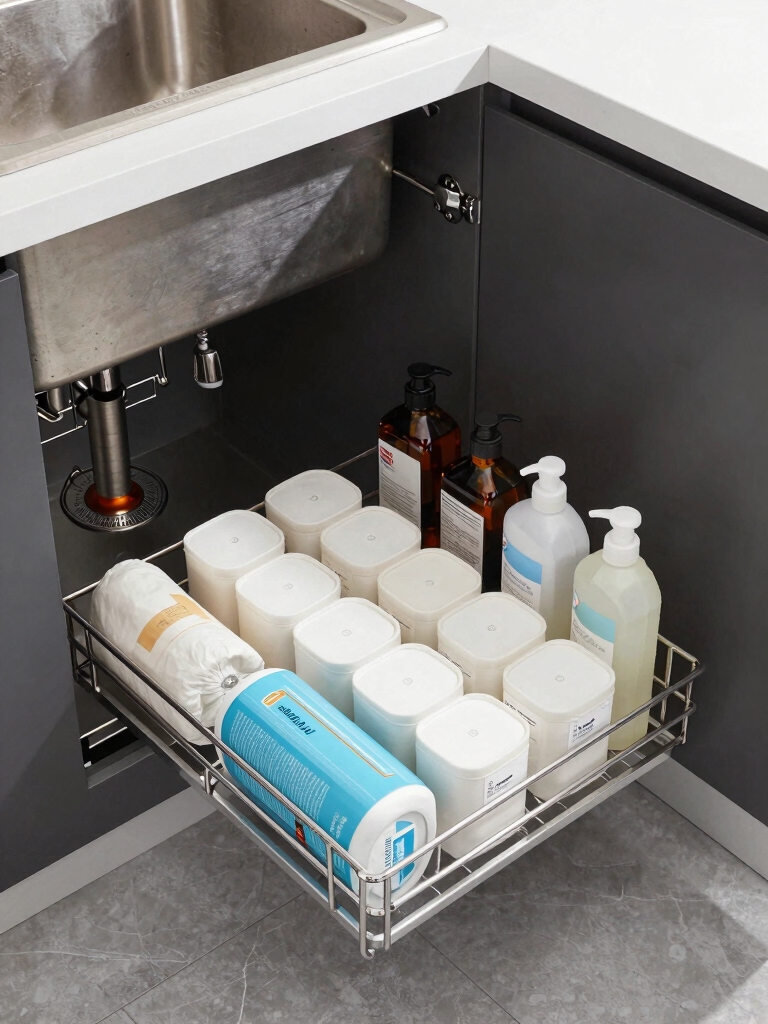
I’m sharing quick, practical under-sink hacks to keep disposables and cleaning bottles tidy and accessible.
We’ll use simple organizers and clear containers to separate items, so everything has its place.
If you’re ready, I’ll walk you through a minimal setup that cuts clutter and saves time. Additionally, consider using under kitchen sink organization swaps to maximize your cabinet space and enhance efficiency.
Under-Sink Disposables Hacks
Under-sink hacks for disposables and cleaning bottles help you reclaim cabinet space and speed up everyday chores.
I map out quick wins you can try tomorrow, keeping things simple and accessible.
- Install tiered organizer with labeled zones for bags, wraps, and lids.
- Use a pull-out bin for recyclables and a small bin for used bottles.
- Stack collapsible containers and keep a dedicated tray for sponges, gloves, and scrubs.
Additionally, consider implementing kitchen sink organization strategies to enhance your overall cleaning efficiency.
Cleaning Bottles Organization
To keep cleaning bottles tidy and easy to grab, I set up a simple under-sink system with labeled zones and quick-access bins.
I separate brushes, spray bottles, and rags, then rotate empties to a dedicated trash bin.
I wipe caps before stacking, keep measuring cups nearby, and maintain a small, clear inventory.
This setup minimizes clutter and speeds cleanup. Additionally, restaurant kitchen organization principles can be adapted to create even more efficient storage solutions in your home.
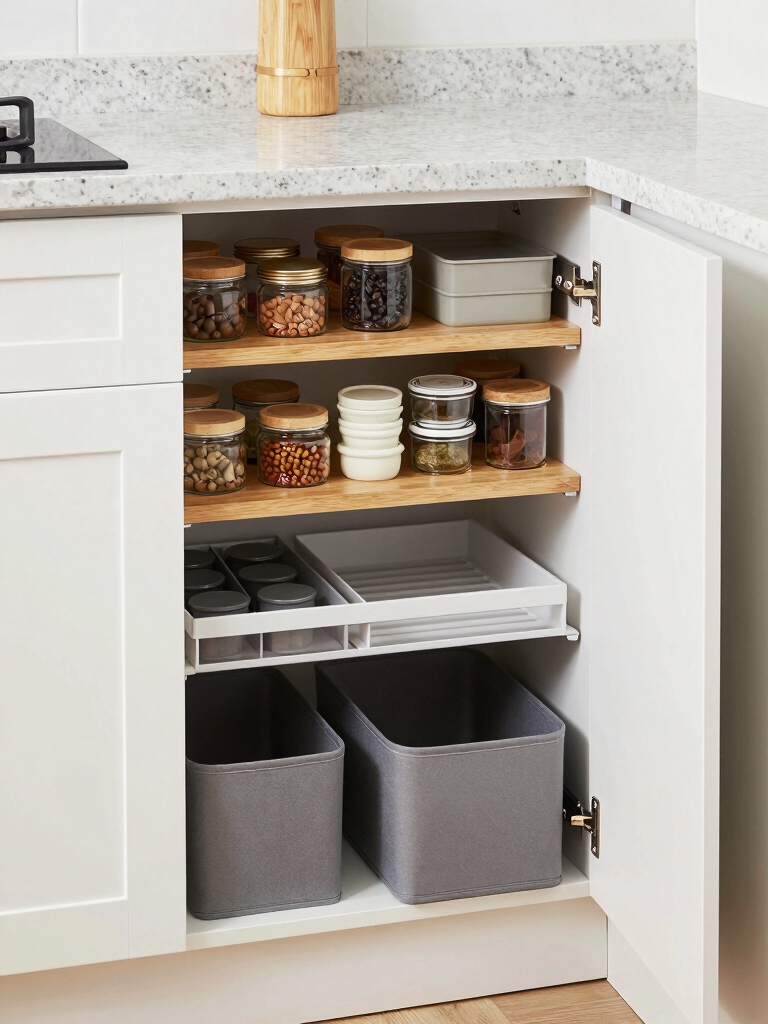
Vertical Stacking: Reclaim Cabinet Height

Maximizing cabinet height is all about smart vertical stacking, so I start by evaluating what you already have and what you can add without clutter.
I’ll show you how accessible shelving and labeled bins make the most of each level, keeping items easy to reach.
With vertical storage, we reclaim space for everyday use while keeping your sink area organized and efficient. Additionally, utilizing smart storage solutions can further enhance your kitchen’s functionality and appearance.
Maximize Cabinet Height
Vertical stacking is all about reclaiming wasted cabinet height so you can store more without expanding the footprint.
I’ll show you practical steps to maximize height without chaos.
1) Use adjustable shelving to create tiers that fit tall canisters and bottles.
2) Add slim, stackable bins for appliances and lids.
3) Install magnetic or hook racks inside doors for lightweight items.
Additionally, consider incorporating smart cabinet organization strategies to streamline your kitchen space.
Shelving For Accessibility
Shelving for accessibility isn’t just about stacking higher; it’s about making every item easy to grab and return.
I use vertical stacking to reclaim cabinet height, placing frequently used tools at eye level and lighter items on lower shelves.
Clear labeling, consistent bin sizes, and a simple, predictable order reduce rummaging.
Incorporating smart storage solutions can further enhance your kitchen efficiency by maximizing space utilization.
You’ll save time, cut clutter, and cook with confidence.
Stacking Vertical Storage
I reclaim cabinet height with smart vertical stacking, using tall organizers and stacking bins to double the usable space.
I guide you through practical, simple setups that keep items reachable and tidy, without clutter. Start small, measure shelves, and group by use. Your cabinet breathes when you use vertical space efficiently.
- Place tallest bins on the back for depth-aware access
- Stack by frequency: daily items top, rarely used bottom
- Label fronts for quick, confident retrieval
The One-Bucket Rule: Simple Sorting That Reduces Chaos
The One-Bucket Rule simplifies sorting by pulling everything you touch into a single, designated bucket, then deciding its home right away.
I walk you through it: grab, assess, place, and proceed. This keeps the counter clear and tasks predictable.
With practice, you’ll speed up routines, cut wasted motion, and maintain calm, organized kitchen flow without overthinking every item.
Hidden Organizers For Daily Cords, Brushes, And Tools
Hidden organizers hide in plain sight, turning daily cords, brushes, and tools into an unobtrusive, single glance away from chaos.
I keep essentials reachable, neat, and labeled, so clutter becomes a non-issue.
- Under-shelf magnetic strips for cords
- Small pull-out bins for brushes
- Decked-in pegboard hooks for tools
A Quiet, Efficient Cleaning Caddy: Where It Belongs
A quiet, efficient cleaning caddy belongs in a spot that’s both reachable and unobtrusive, so daily tasks stay calm rather than chaotic.
I place it near the sink, within easy reach of brushes, sponges, and cleaners. This keeps essentials organized, minimizes rummaging, and speeds routines.
I prefer a dedicated, simple setup that reduces clutter and supports steady, predictable cleaning flow.
Labeling That Actually Sticks (And Why It Works)
Labeling that actually sticks comes down to clarity, consistency, and a little psychology. I’m talking practical, friendly cues you’ll actually remember and trust.
You’ll see labels that promise durability, fast recognition, and calm organization.
- Use simple words and bold fonts
- Align labels with your routine shelves
- Relabel when adjust habits or containers
Quick-Access Zones For Your Most-Used Items
I’ll start by outlining Quick-Access Zones Setup so you can place your most-used items where they’re fastest to grab.
I’ll keep Most-Used Item Principles front and center, so you can design zones that reduce clutter and save time.
We’ll map a simple Zone-Layout Optimization approach you can apply right away for a cleaner, more efficient sink area.
Quick-Access Zones Setup
We’ll start by carving out quick-access zones near the counter and the fridge, so your most-used items are within arm’s reach and easy to grab on the fly.
I’ll map simple placements that reduce steps and clutter, keeping essentials organized.
- Sponges, soap, towels
- Dish brushes, scrubbers, cleaners
- Everyday utensils, bottle openers, scoring tool
Most-Used Item Principles
When I map out quick-access zones for your most-used items, I start by anchoring the spots near the counter and fridge you already set up, so grabbing what you need is fast, not fussy.
These principles keep essentials visible, grouped by use, and stored with reliable reach. Consistency minimizes searching, and labeled containers reinforce quick picks and smooth routines.
Zone-Layout Optimization
To optimize zones for your most-used items, start with a quick-access map that mirrors your counter and fridge setup, then position each item where it’s grabbed most often.
I’ll share a practical layout you can copy:
- Utensils
- Dish soap and sponge
- Everyday cups and lids
Seasonal And Weekly Reset Routines
Seasonal and weekly reset routines are my practical toolkit for keeping a kitchen that runs smoothly, no matter the season.
I schedule a short weekly sweep: purge expired items, rotate stock, and adjust the trash and recycling cadence.
Seasonal tweaks shift pantry labels and tool storage.
I document changes, review goals, and maintain a calm, efficient workflow you can mirror.
Spill-Proof, Spill-Easy: Managing Damp Environments
I keep damp areas in check by choosing containers and trays that seal well, wipeable surfaces, and a routine that dries after use.
Then I add practical tools to prevent messes and mold, keeping things visible and orderly.
- Sealable lids and snug trays
- Wipeable, non-porous surfaces
- Quick-dry towels and a daily wipe-down routine
Budget-Friendly Upgrades That Look Like A Mini Remodel
A few budget-friendly upgrades can make a big impact without a full remodel, and you don’t need to break the bank to get a fresh look.
I choose practical changes: swap hardware, add a slim backsplash panel, and install modular organizers that resemble built-ins.
Clean lines, neutral tones, and intentional lighting transform the sink zone without major disruption or carpentry.
You’ll notice the upgrade, not the cost.
Conclusion
I’ve shown you practical, affordable ways to tame the sink chaos, and you’ve got the blueprint to start now. I’ll use every inch of space, from drawer dividers to under-sink hacks, and you can too. Picture a calmer, more organized daily routine—because small, deliberate moves compound into big wins. If you stay consistent, your kitchen sinks will finally feel like allies, not obstacles. And yes, I’m rooting for you—let’s make it happen, one tidy step at a time.