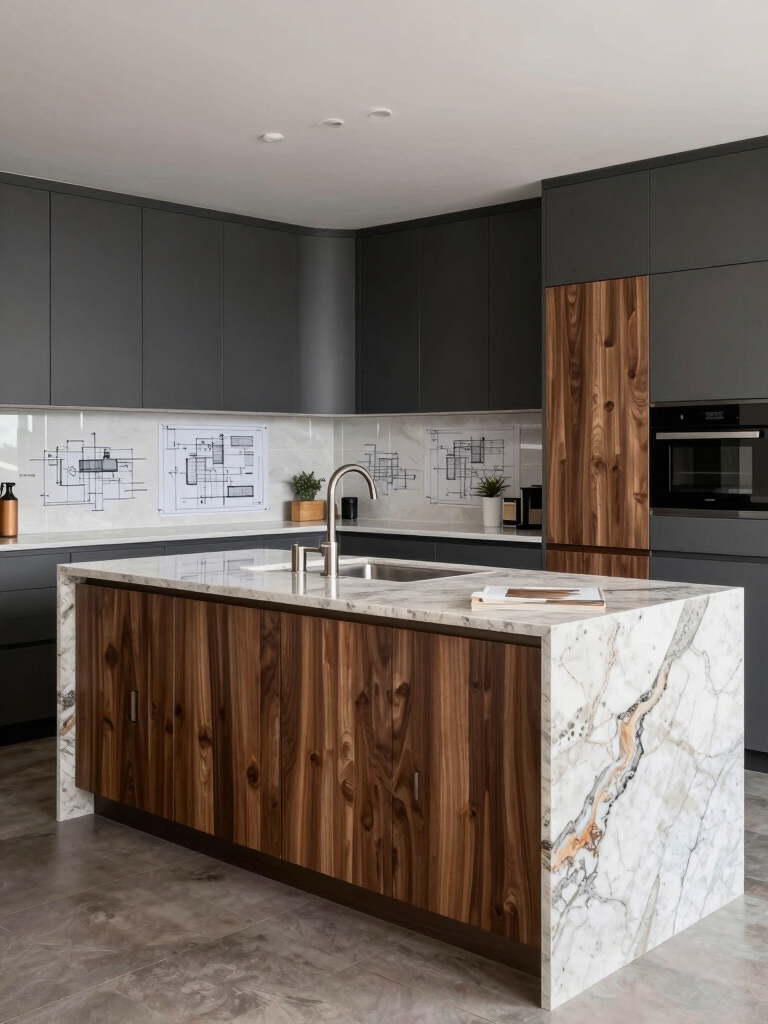
I size a long island to feel deliberate — not lost or overpowering — so I keep length proportional to the room, depth 36–48” for real prep space, and 36–48″ clearances around it (42″ behind cooks).
I allow 24–30” per stool and a 12–15″ overhang for comfy seating, balance finishes to match sightlines, and soften edges where people linger. Keep these rules and you’ll see how function and form fall into place if you want to know more.
Why Island Proportions Matter in Long Kitchens

Because a long kitchen changes how people move and live in the space, I always pay close attention to island proportions before anything else.
I consider flow, seating, and prep zones so the island anchors the room without blocking paths.
I balance scale and storage, choosing proportions that feel intentional and inviting—practical for cooking, cozy for conversation, and timelessly charming.
Designers often plan islands to improve overall flow in the kitchen, creating a seamless connection between work and social areas.
Ideal Island Length Relative to Room Size

I like to size an island so it feels at home in the room—big enough to be useful, small enough to keep the kitchen balanced.
I’ll walk you through how the island’s length should relate to the overall room proportions and why maintaining proper walkway clearance (usually 36–48 inches) matters.
With a few simple measurements, we can pick a length that looks intentional and lets traffic flow smoothly.
Good lighting is essential to avoid common mistakes like uneven illumination and improper fixture placement, especially when planning for island lighting in relation to island size.
Proportion to Room
When I size an island to a room, I aim for a balance that feels intentional but not crowded. I consider room proportions, sightlines, and usable surfaces, choosing an island length that echoes the kitchen’s scale.
Too small feels lost; too long overwhelms. I favor measured restraint: a strong presence that reads as natural, useful, and comfortably integrated into the whole.
I also check common island dimensions to ensure the chosen length fits standard room sizes and circulation paths.
Walkway Clearance Standards
Although tight clearances can sneak up on a design, I always start by mapping out walkway widths before finalizing island length—keeping 36–48 inches between counters and island for single cooks and 42–48 inches where two people work side-by-side.
I then scale island length to room size so traffic flows, seating fits, and sightlines stay pleasing—practical, cozy, and never cramped.
Top designers also consider standard island proportions to ensure the island feels balanced within the overall kitchen.
Optimal Island Width for Prep and Seating

When I plan an island, I think first about a comfortable prep surface that gives you room to chop, roll dough, and set out ingredients without crowding.
I also factor in seating clearance so stools tuck under and guests can slide in and out easily.
Let’s look at the sweet spot widths that balance those two needs.
Clever storage solutions like island organization keep clutter off the prep surface so both prep and seating work smoothly.
Comfortable Prep Surface
I recommend keeping your island between 36 and 48 inches deep for the sweet spot where prepping and seating coexist happily;
I’ve found that anything narrower crams cutting and appliance space, while anything much deeper turns the back prep area into a reach-in chore.
Practical tips I use:
- Keep clear front workspace.
- Reserve back for small appliances.
- Leave room for chopping.
- Plan task zones.
A long, narrow layout often works best in small kitchens because it maintains traffic flow and provides usable prep surfaces while aligning with small kitchen island constraints.
Seating Clearance Needs
Because people linger at the island as much as they work, I make seating clearance a priority when deciding island width—enough room for knees, stools, and moving behind seated guests keeps the kitchen functional and sociable.
I aim for 15–18 inches per stool and 42–48 inches behind seated people. That balance lets prep and conversation coexist without cramped elbows or awkward traffic.
Many clever layouts show how a compact footprint can still provide full functionality with space-saving features and multipurpose surfaces.
Clearance Distances Around a Long Island

Around a long island, I lean on practical rules of thumb to keep movement smooth and conversations easy: aim for at least 42 inches of clearance on the cooking side and 36 inches on the prep or seating side.
I recommend these clearances:
- Walkway behind cooks: 42″
- Prep and serving aisle: 36″
- Appliance doors swing: add 24″
- Guest circulation: 36″
Countertop Overhangs: Seating and Comfort

I want to talk about how much your countertop should hang over the island so people can sit comfortably—typical depths, how much knee and toe room you actually need, and why the edge profile changes the feel.
A 12–15 inch overhang is common for bar-height seating, while 10–12 inches works for standard counters, and I’ll explain how to measure for knee and toe clearance so stools don’t fight the island.
Finally, I’ll show how a beveled or eased edge can make shorter clearances feel roomier and more inviting.
Standard Overhang Depths
When you pull up a stool, the countertop overhang is what makes sitting at your island feel natural instead of awkward, so I focus on getting that depth just right.
I prefer clear, functional ranges:
- 10–12″ for casual seating
- 12–15″ for comfortable elbows
- 15–18″ for deep comfort
- 8–9″ for bar-height stools with narrow seats
Knee and Toe Clearance
Balancing knee and toe clearances keeps seating at your island comfortable and usable, so I always check both the height and the recessed depth before committing to an overhang.
I aim for about 9–12 inches of knee space and a 3–6 inch toe kick, matching stool seat height so knees clear comfortably while feet nest under the counter without awkward leaning.
Edge Profile Effects
Interested in how a countertop edge feels as much as it looks, I pay close attention to edge profiles because they change how people sit, eat, and interact at an island.
Rounded edges invite lingering; sharp edges demand posture.
Consider:
- Comfort
- Clearance
- Durability
- Style
Choose an overhang and profile that balances cozy seating with practical cleanup.
Kitchen Work Triangle Considerations With a Long Island
Although a long island can anchor a kitchen beautifully, I always check how it affects the work triangle so you don’t end up circling the room to cook.
I measure clearances, sightlines, and walking distances between stove, sink, and fridge, keeping them efficient yet cozy.
A long island should streamline prep, not obstruct flow—think breezy passageways and reachable zones that feel intentionally laid out.
Placing Appliances and Sinks on an Island
Since a long island affects how you move between cooktop, sink, and fridge, I also think carefully about which appliances and sinks belong on the island itself. I prioritize flow, cleanup, and social cooking.
Consider these placement rules:
- Prep sink near workspace
- Main sink slightly offset
- Cooktop with ventilation
- Dishdrawer or dishwasher adjacent
These choices keep chores tidy and gatherings easy.
Seating Capacity: How Many Stools Fit Comfortably
I like to think of island seating as choreography—how people move, chat, and reach for plates—and I plan stool spacing the same way I’d arrange chairs around a table.
I give each person 24–30 inches of width for comfort, allow 12–15 inches knee clearance, and keep 36–42 inches behind stools for traffic. That math gives a cozy, functional lineup.
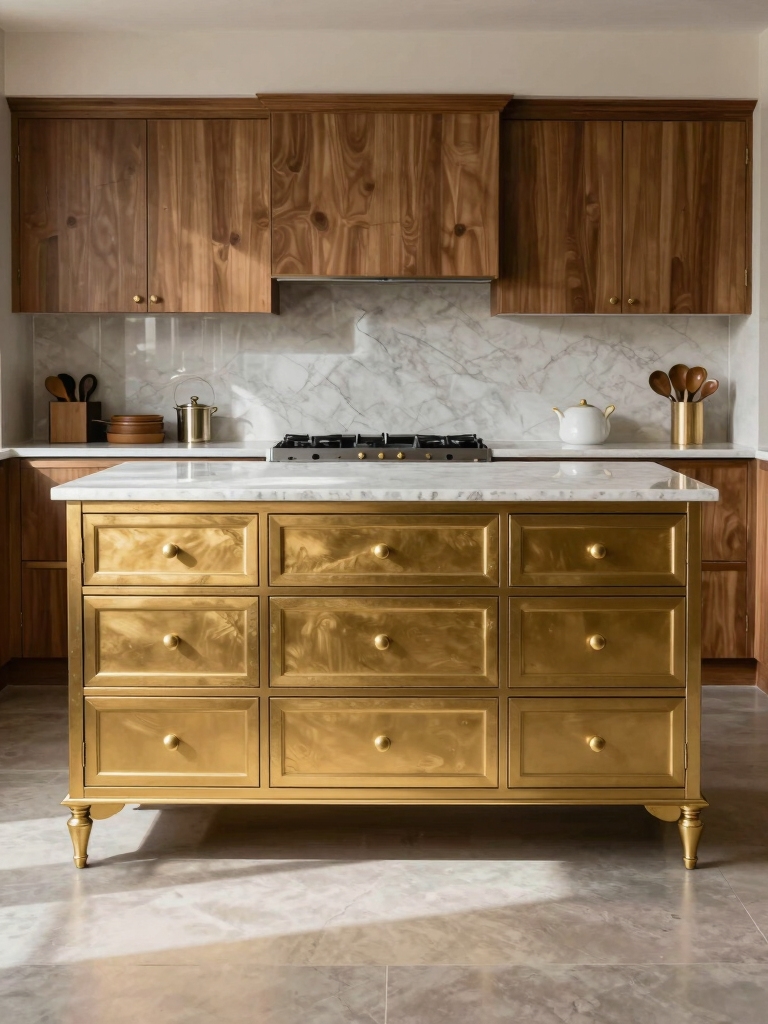
Visual Balance: Island-to-Cabinetry Ratios
When I’m sizing an island against the surrounding cabinetry, I think of it like pairing a statement jacket with a well-tailored suit—too big and it overwhelms, too small and it looks lost.
I aim for harmony: scale, sightlines, material contrast, and function. Consider these quick rules:
- Keep proportional width.
- Respect visual negative space.
- Match focal heights.
- Balance finishes.
Traffic Flow and Walkways in Open Plans
Pairing an island with surrounding cabinetry sets the visual rhythm, but you also have to think about how people actually move around it.
I suggest keeping clear walkways—36–48 inches for single or two-way traffic—so strollers, guests, and delivery boxes glide through.
I favor unobstructed sightlines, gentle corners, and seating that tucks under to preserve flow without sacrificing warmth or charm.
Appliance and Door Swing Conflicts to Avoid
While you might be thinking the island just looks pretty, I watch kitchens fail when appliance doors and island edges compete for the same real estate.
I check clearances, hinge directions, and traffic lines, then tweak layout.
Consider these fixes:
- Offset dishwasher from island
- guarantee oven door clearance
- Allow fridge swing room
- Leave space for trash pull-out
Adjusting Proportions for Small or Narrow Kitchens
Because space is scarce in a small or narrow kitchen, I focus on scaling the island down so it feels intentional rather than cramped—think slim profiles, lighter materials, and clear sightlines that keep traffic flowing.
I prefer narrow islands with open shelving, cantilevered counters for seating, and multiuse storage that won’t block movement.
Proportion choices should make the room feel airy, efficient, and delightfully measured.
Proportions for Entertaining Versus Everyday Use
When I plan an island for entertaining versus everyday use, I think in zones—one side optimized for prep and service, the other for lingering and socializing—so the proportions support both flow and function without feeling like a compromise.
I prefer clear ratios:
- 60/40 prep/social
- Seating depth 15–18″
- Prep clearance 42–48″
- Walkway 36–44″
Materials and Edge Profiles That Influence Perception
Drawing from years of kitchen projects, I pick materials and edge profiles that nudge how people use and feel about an island—rounded bullnose or eased edges invite leaning and lingering, while sharp mitered edges read formal and authoritative.
I pair warm honed stone or hardwood with softer profiles for hospitality, reserve polished marble and crisp miters when I want structure, and balance texture to guide touch and traffic.
Lighting and Fixture Placement for Long Islands
I lean into lighting as the island’s punctuation—placing fixtures and faucets so the long surface reads clearly and feels right for work, socializing, and flow.
I balance task, ambient, and accent lights, and center faucets for prep zones. Consider:
- Pendant spacing
- Layered task lamps
- Under-cabinet strips
- Damp-rated fixtures
These choices keep proportions honest and cozy.
I’ve loved guiding you through long island proportions—because perfect placement powers peaceful, practical kitchens.
Pick proportions that balance beauty and usefulness: longer for lively entertaining, narrower for neat everyday flow.
Keep clearances comfortable, overhangs cozy, and materials meaningful; mix matte wood warmth with a cool stone counter for classic-meets-current charm. With thoughtful lighting and friendly fixtures, your long island becomes a soothing, social centerpiece—smart, soulful, and simply satisfying.