I’ll help you pick wood and finishes that age beautifully: choose walnut or oak for grain and color that mellow into rich patina, and prefer oils or hardwax oils for warm depth and easy spot repairs; waxes add a soft glow and lacquer gives clear, reworkable satin clarity.
Match finish to how you use the island—heavy prep needs tougher protection, casual kitchens suit oils—and follow simple maintenance to nurture character. Keep going and I’ll show how to make wear look intentional.
Why Some Wood Finishes Get Better With Time

Because finishes interact with light, air, and daily use, some wood surfaces actually improve as they age, and I find that insight reassuring when choosing a kitchen island finish.
I watch patina deepen, highlights mellow, and small marks tell stories. I prefer finishes that develop character—those that soften color, reveal grain, and invite touch—so islands feel lived-in, elegant, and thoughtfully designed over time.
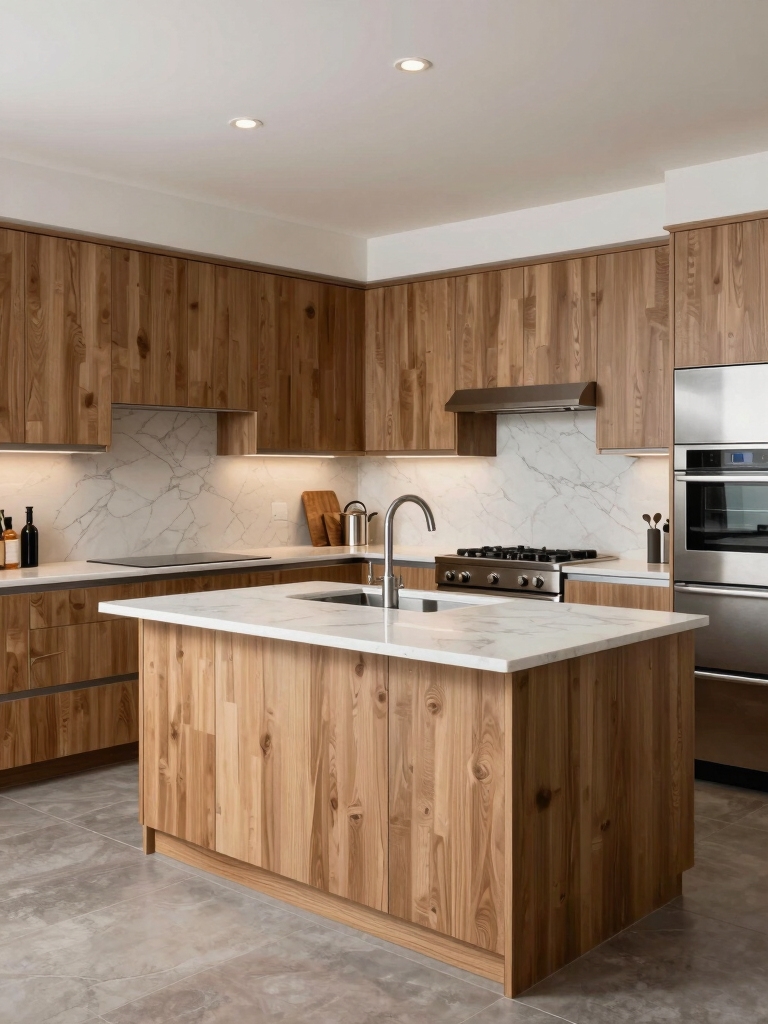
Oak cabinets, in particular, often display a timeless patina that enhances their appeal, connecting timeless oak to enduring kitchen design.
Choosing the Right Wood Species for Aging Gracefully

When I pick a wood species for a kitchen island, I look first at grain and durability to make sure the surface will wear attractively instead of showing every nick.
I also consider how the natural color will evolve—warm reds, honeyed oak, or silvery gray each age differently and change the room’s mood.
Choosing wood with the right character up front means the island becomes more beautiful and more practical as years pass.
Walnut is a standout choice because its rich tones and tight grain help it anchor any design while aging gracefully.
Grain and Durability
If we want a kitchen island that settles into its home and still looks purposeful years from now, choosing the right wood species matters as much as the finish.
I favor open, pronounced grains like oak for resilience and character, tight-grained maple for smooth durability, or walnut for striking contrast.
Consider grain direction, hardness, and how texture conceals wear when selecting wood.
Warm wood kitchen cabinets are making a massive comeback this year, so pairing your island with warm wood can help it age with both trend and timelessness.
Natural Color Evolution
I often look for woods that tell a story as they age, since natural color changes can be one of a kitchen island’s most compelling features.
I recommend walnut for deepening richness, cherry for warm, glowing patina, and white oak for subtle mellowing.
Consider grain, tannin content, and light exposure—these shape hue shifts. Choose species that match your future aesthetic, not just today’s.
I also find that pairing the island’s finish with warm wooden tones in surrounding cabinetry helps create a cohesive, cozy space.
Oil Finishes: Natural Patina and Ease of Repair

I love how oil finishes let a kitchen island develop a warm, lived-in patina that actually improves with time.
When scratches or stains appear you can usually spot-repair them with a little sanding and reapplication, so the surface stays coherent without a full refinish.
With occasional cleaning and periodic oiling the wood stays nourished and easy to rejuvenate, keeping the design intentional rather than precious.
Natural wood cabinets often showcase this untouched beauty that celebrates the material’s character.
Natural Patina Development
When you live with an oil-finished kitchen island, you’ll watch a warm patina bloom over months and years as oils darken the wood and tiny scratches mellow into character; I find that process one of the most rewarding parts of choosing an oil finish.
I notice subtle depth changes, richer grain contrast, and a soft luster that feels lived-in but intentionally curated—timeless, tactile, and deeply personal.
I’ve even seen the transformation when you turn a dresser into a kitchen island, repurposing old furniture into something both functional and beautiful.
Simple Spot Repairs
Living with an oil-finished island means small marks become part of its story, and the great thing is you can fix most of them yourself without upsetting that patina.
I gently rub a soft cloth and a drop of matching oil into dents or scratches, blend edges, and let it settle.
The result reads intentional, not patched—subtle repairs that honor the island’s evolving character.
Rustic wood and clean lines can coexist, creating a kitchen where warmth and modernity complement each other—see how warm wood and modern details pair together.
Maintenance and Rejuvenation
Though oil finishes mellow over time and pick up marks, I love how that natural patina makes the island feel lived-in rather than worn out.
I refresh surfaces easily: clean, sand lightly, then reapply oil to deepen tone and repair scratches.
Regular oiling preserves water resistance and warmth, letting the piece evolve gracefully. It’s a simple, design-forward ritual that keeps the island resilient and beautiful.
Wax Finishes: Soft Glow and Gentle Wear

I often reach for wax finishes when I want a kitchen island that reads warm and lived-in without feeling fussy.
I like how beeswax or paste buffs to a soft, low-sheen glow that highlights grain and patina. Touch-ups are simple — a quick rub restores depth.
Wax invites gentle wear: scuffs become character, not damage, keeping surfaces intimate and approachable.
Hardwax Oils: Balance of Protection and Character

If you like the soft, lived-in warmth wax gives, you’ll appreciate hardwax oils when you want more protection without losing character.
I choose them for islands because they penetrate, build a resilient surface, and accentuate grain without plastic shine.
They handle spills and gentle abrasion, age into a richer patina, and let me refresh focused areas instead of refinishing the whole top—practical, tactile, and elegant.
Shellac: Warmth That Deepens Over Years
I love how shellac builds a natural amber patina that gently warms maple and oak over time, giving a kitchen island quiet depth and personality.
It’s also forgiving—small scuffs and dull spots can be spot-repaired or refreshed without stripping the whole surface.
If you want an age-worthy sheen that ages gracefully and is easy to maintain, shellac deserves a close look.
Natural Amber Patina
Think of shellac as the quiet timekeeper of a kitchen island: I love how its natural amber patina warms wood tones and keeps getting richer as years pass.
I watch finishes mellow from golden honey to deeper cognac, revealing grain and softening contrasts.
It adds a luminous, intimate depth that complements minimalist lines and artisanal joins, quietly anchoring a room’s evolving personality.
Repairable Surface Sheen
Because shellac’s surface is both delicate and forgiving, I can renew a kitchen island’s sheen without stripping away its history.
I lightly sand or burnish spots, then recoat with thin shellac layers that warm over years.
It blends repairs invisibly, preserves brushstrokes and nicks, and invites patina.
The result feels curated, lived-in, and design-forward—elegant aging you can maintain yourself.
Traditional Varnishes and Their Long-Term Appeal
While many modern finishes promise quick results, I still reach for traditional varnishes when I want a kitchen island that ages with grace and character.
I appreciate their deepening patina, durable protection, and ability to reveal wood grain over time.
They layer beautifully, respond well to maintenance, and lend a timeless, design-forward warmth that feels intentional rather than trendy.
Milk Paint and Distressed Finishes That Mature Beautifully
I often choose milk paint when I want a finish that feels lived-in from day one, because its matte, slightly uneven coverage and propensity to craze or chip can be guided into a graceful, intentional patina.
I pair layered colors, sanding highlights, and selective distressing to reveal underlying tones.
The result reads curated, warm, and durable — a kitchen island that gains character rather than losing it.
Stains That Enhance Grain and Develop Richness
Think of a stain as the way I coax a wood island to show off its personality—deepening grain, warming tones, and unifying disparate boards into a cohesive whole.
I choose transparent or semi-transparent stains to celebrate figure, or richer pigments to create age without hiding texture.
Layering tones and wiping back edges gives dimension; a satin finish seals color while keeping tactile warmth and lived-in elegance.
Lacquer: Smooth Aging and Periodic Renewal
After coaxing out grain and building warmth with stain, I turn to lacquer for a finish that wears gracefully and can be refreshed without losing its soul.
It gives a satin clarity, resists daily scuffs, and accepts light buffing or recoat work.
I pick tones and sheen deliberately so the island mellows predictably, staying modern yet richly lived as years and kitchen stories accumulate.
Techniques to Encourage Attractive Wear Patterns
When I want an island to tell a story, I plan wear into the finish from day one—selecting contact points, pairing finishes, and steering traffic so patina develops where it flatters.
I emphasize edges, stool areas, and prep zones with subtly softer finishes, add protective hard wax in high-impact spots, and use contrasting rub-through techniques so wear reads intentional and refined, not accidental.
Maintenance Routines to Preserve Beauty Through Decades
Regularly caring for an island keeps its story clear and intentional rather than letting time blur the details, so I set a simple, seasonable routine you can follow:
Weekly dusting with a microfiber cloth, monthly gentle cleaning with a pH-neutral wood cleaner, quarterly inspection for wear or moisture intrusion, and an annual refresh—light sanding and oil or wax touch-ups—tailored to the original finish.
I track dates, use breathable mats, rotate accessories, and gently reapply finish where traffic shows, preserving patina while preventing damage.
Repairing and Refreshing an Aged Finish Without Losing Character
If you want to refresh an aged finish without erasing its history, start by listening to the surface—looking for worn spots, checking whether stains are surface-deep or structural, and feeling the texture with a light touch—then decide whether repair, refresh, or a combination will keep the piece’s character intact.
I pick targeted touch-ups, gentle sanding, and matched oils or waxes to mend flaws while preserving patina.
Matching Finish Choice to Kitchen Lifestyle and Use
I always start by asking how the island will actually be used—heavy prep, kid-friendly meals, or mostly serving and display—because that steers the finish toward either hard-wearing protection or softer, repairable patina.
Think about how much time you want to spend on upkeep: some oils need regular reapplication while modern polyurethanes largely protect hands-off.
Matching daily wear patterns to the maintenance you’ll keep makes the finish a practical design choice, not just a look.
Daily Wear Considerations
Because kitchens see so much action, I think your finish should match how you actually live—whether that means nightly family dinners, weekend baking marathons, or a tidy single-person routine.
I choose finishes for function and beauty: durable matte for crumbs, warm oil for patina, lacquer for splash zones, or soft wax for subtle sheen.
- toddler fingerprints
- flour-dusted countertops
- steaming pots
- late-night snacks
Maintenance Time Commitment
You’ll want to match the finish you pick to the time you’re willing to spend on upkeep—what looks great on day one can feel like a burden if you don’t have the hours to care for it.
I prefer finishes that balance beauty with realistic routines: oil needs regular rubs, lacquer wipes clean fast, and polyurethane is low-effort. Choose based on your cooking habits and tolerance for touch-ups.
Styling and Hardware That Complement an Aged Finish
When I style an aged wood island, I look for hardware and accents that echo its lived-in charm without turning the space into a period piece.
I choose finishes that whisper history and modern function:
- Patinated brass pulls that gleam softly
- Oil-rubbed iron apron sink fixtures
- Woven linen stools with worn leather straps
- Matte black task lighting for contrast and edge
I’ve seen kitchen islands mellow into true showstoppers — they don’t just age, they earn their stripes.
Choose woods and finishes that welcome wear (and easy fixes), and your island will gather patina like a well-traveled passport. With simple maintenance and thoughtful hardware, wear becomes charm, not damage.
Let function guide the finish, and you’ll have a centerpiece that feels like home and tells a story for decades to come.