I’ll help you maximize a narrow open galley by prioritizing durable, smart storage, precise flow, and light-reflective surfaces. I start by evaluating whether your layout is vertical, horizontal, or curved, then tighten the workflow with pocket doors or hidden zones. I’ll choose light colors, layered lighting, and window strategies to boost brightness, while zoning for cooking, cleanup, and dining. I’ll show you quick wins for decluttering and accessible, shallow storage—and I’ve got more tips to share as you continue.
Understanding the Challenge: What Narrow Galleys Need

When space is tight, every inch counts, and understanding the core needs of a narrow galley makes all the difference.
I focus on clear workflow, durable storage, and accessible prep zones. We tighten traffic flow, minimize overhead clutter, and favor smart, shallow cabinets. Incorporating smart remodel ideas can enhance functionality and create a more inviting atmosphere.
I’ll share practical steps, tool placement, and balanced lighting to keep the galley functional and inviting.
Assess Your Galley Layout: Vertical, Horizontal, or Curved
I’ll walk you through spotting vertical space opportunities, from tall pantry zones to shelf depth that keeps counters clear.
Then I’ll compare layout types—vertical, horizontal, and curved—and how each affects flow, storage, and work zones.
We’ll zero in on practical tweaks that maximize efficiency, given your galley’s constraints and your cooking style. Additionally, incorporating small kitchen ideas can significantly enhance the functionality of your space.
Vertical Space Strategies
Curious how much vertical space your galley can actually hold? I map shelves, hooks, and rails to maximize every inch without crowding prep zones.
I test clearances, profile depth, and accessibility, then tailor storage to your workflow. Small tweaks yield big gains, especially with tall pantry transects and concealed organizers.
- Install adjustable wall rails for seasonal items
- Use slim, stacked containers on narrow shelving
- Mount magnetic strips and hooks for utensils and lids
In addition, consider integrating clever small kitchen storage solutions that effectively hide clutter while enhancing functionality.
Layout Type Impacts
Choosing the right galley layout starts with a clear assessment of vertical, horizontal, and curved options, because each shape shapes workflow, traffic flow, and how you access prep zones.
I compare how each layout positions work zones, doorways, and appliances, then note tradeoffs. Vertical channels compact tasks; horizontal boosts sightlines; curved softens congestion and widens reach.
Your choice hinges on daily rhythm, clearance, and pantry access. Additionally, understanding small kitchen design strategies can further enhance your space efficiency and functionality.
Decide on Flow: Pocket Doors and Hidden Zones

To improve the kitchen’s flow, I’m leaning into pocket doors and hidden zones that vanish when you don’t need them.
I’ll prioritize seamless changes, keeping circulation clear and spending on hardware that lasts. Hidden zones hide clutter while doors control noise and scent.
Think practical, not flashy, with precise measurements and easy maintenance.
- Pocket door alignment and track durability
- Hidden zones for small appliances and utensils
- Clearances that prevent jamming and guarantee smooth operation
Incorporating semi open kitchen designs can enhance the overall functionality and visual appeal of your space.
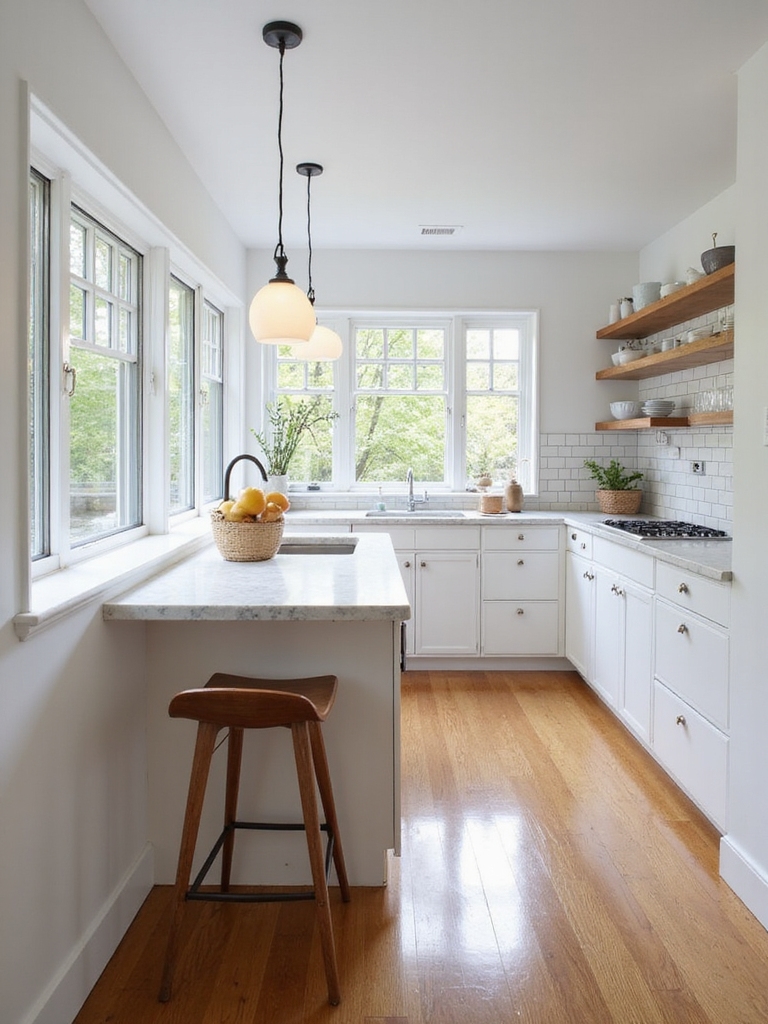
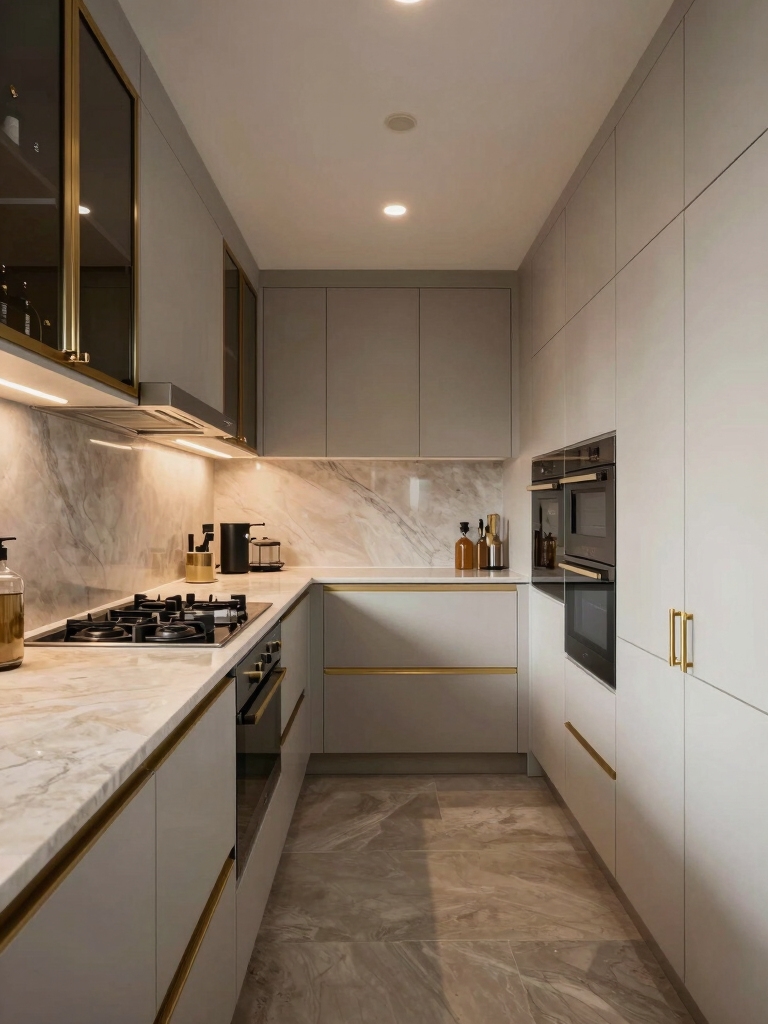
Pick Light Colors to Make It Feel Bigger

Choosing light colors can instantly make a galley feel bigger, and I’ll show you how that brightness travels through every inch.
I look at reflectivity, ceiling height perception, and space perception to pick shades that bounce light and read as more open. Incorporating an island kitchen design can further enhance the spacious feel by providing additional functionality without crowding the area.
Let’s map practical swatch picks and finish choices that maximize the Bigger Feel without washing out detail.
Light Colors, Bigger Feel
Light colors do more than brighten a space—they visually stretch it, making a compact galley feel bigger without a full remodel.
I choose pale whites, soft beiges, and cool grays for walls and cabinets, keeping lines clean. Light reflects off surfaces, enhancing perceived depth and airflow. Additionally, using reflective surfaces can amplify the effect of light colors, further contributing to a spacious atmosphere.
- Use matte neutrals for walls
- Pair with bright, understated hardware
- Keep countertops light and unpatterned
Reflective Surfaces Advantage
Reflective surfaces amplify the impact of light colors, making a galley feel larger without adding bulk.
I choose matte whites and glassy backsplashes to bounce daylight across counters, reducing shadows.
I keep appliances streamlined, and I wipe fingerprints daily to preserve shine.
Mirrors or glossy cabinet fronts visually extend depth, while subtle metallic accents add warmth without clutter.
Incorporating small galley kitchen ideas allows for creative solutions that enhance functionality while maintaining an open feel.
Practical, precise, doable.
Ceiling Height Perception
Ceiling height can feel instantly bigger when I use light colors from top to bottom. I guide you to pick airy whites, soft beiges, or pale blues, then carry them across walls, cabinets, and ceilings for seamless vertical flow.
Subtle contrast, matte finishes, and minimal trim keep the eye moving upward without heaviness.
- Use a single light hue across surfaces
- Choose matte or satin finishes to reduce glare
- Keep crown molding minimal and paint it same color
Maximize Natural Light With Window Strategy
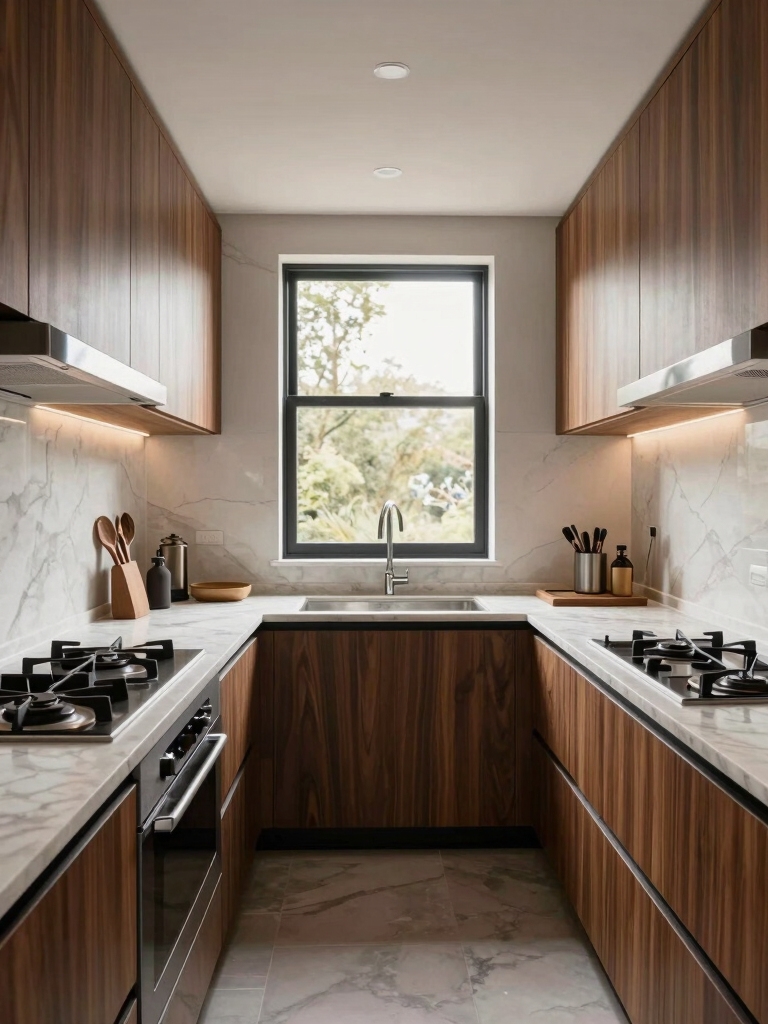
When you’re aiming to brighten a galley kitchen, the window strategy should start with maximizing daylight without sacrificing workflow.
I focus on placement, glare control, and proportions—large, unobstructed panes paired with transoms or sidelights.
Use light-colored frames, minimal muntins, and sheer treatments.
I suggest aligning windows with prep zones and sit-down spots to boost function while letting fresh light circulate.
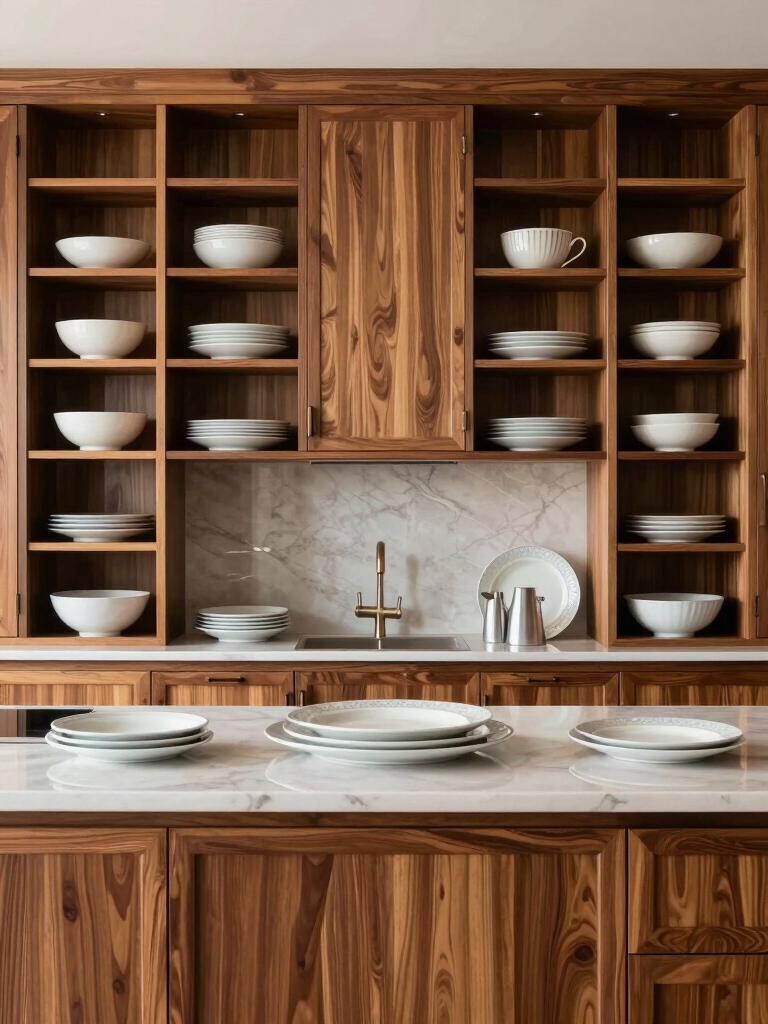
Smart Storage: Tall Cabinets and Integrated Platforms
Smart storage starts with making tall cabinets feel like smart furniture rather than wall clutter, especially when I pair them with integrated platforms.
I design drawers and shelves that glide, hide cords, and align with work zones. Practical layouts save steps, while durable finishes keep cleaning easy and spaces calm.
- Maximize interior dividers for quick access
- Align fronts to the counter line for cohesion
- Choose integrated lighting to reduce glare
Declutter the Counter: Five Quick Wins
I’m sharing quick wins to clear the counter and release airier surface potential, starting with a daily curb of clutter.
We’ll tighten routine items to a single cup, a small utensil tray, and a slim plant or decor that does more with less.
If we keep it precise and consistent, your galley stays open, functional, and ready for real prep.
Quick Counter Clearance
Decluttering the counter doesn’t have to take all day; start with a simple, practical plan.
I’ll guide you through quick wins that clear space without chaos, so your galley feels bigger and more usable.
- Remove nonessentials and relocate them to a tray or cabinet
- Put daily-use items in a single accessible zone
- Wipe surfaces and return items with intent
Airy Surface Potential
One quick win to release an airy counter is to group daily-use items into a single, clearly defined zone and keep everything else off the surface.
I favor shallow storage, labeled drawers, and a slim tray for odds and ends.
When items return, place them back immediately.
Minimal clutter invites light, improves workflow, and creates perceived room.
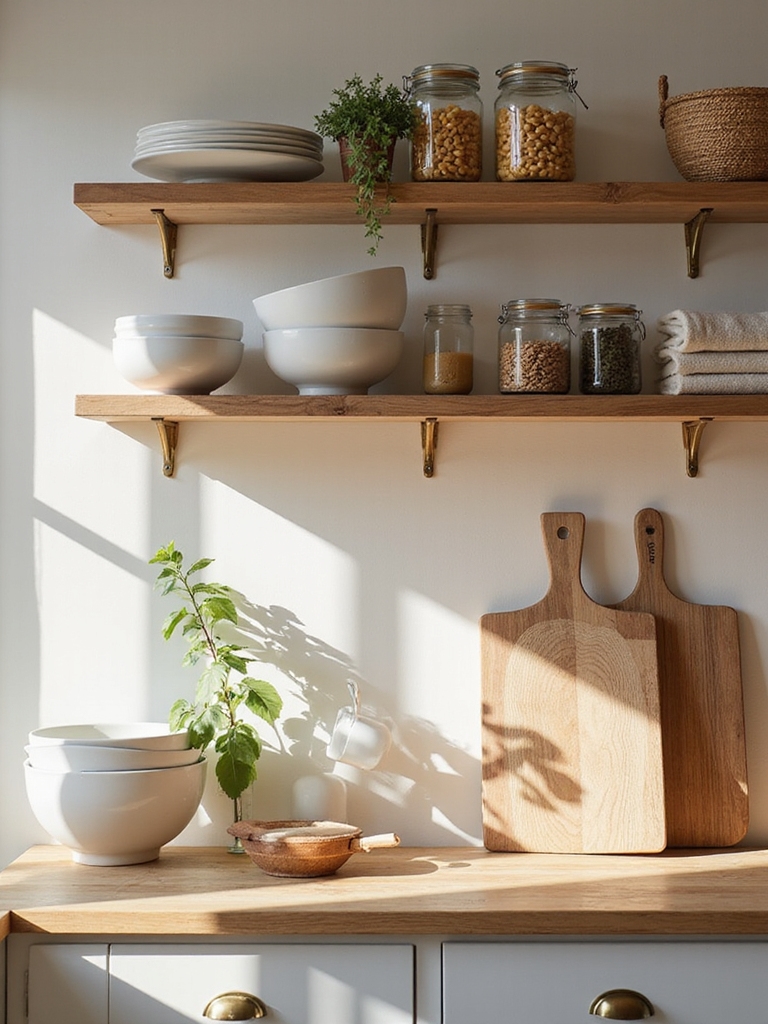
Floating Shelves for Airy Walls
Floating shelves can transform an airy wall into usable, eye-catching storage without crowding the space.
I frame them to hold often-used dishes, spices, and small plants, keeping counters clear and flow intact.
Install depth to avoid bumping, anchors into studs for weight, and choose brackets that vanish.
- Choose slim brackets for visual lightness
- Vary heights to create utility and rhythm
- Add labeled jars for quick access
Reflective Surfaces: Materials That Brighten and Endure
I’ll start by sharing how Brightening Reflective Surfaces can make a galley feel larger and lighter without cramping work zones.
I’ll cover Durable Mirror Finishes that hold up to fingerprints and steam, plus Light-Enhancing Materials that bounce ambient light around the room.
Let’s walk through practical picks and placement tips so you can choose options that stay bright and endure daily use.
Brightening Reflective Surfaces
Brightening reflective surfaces is a practical way to make a galley feel more open and airy, and I’ll show you how to choose materials that stay bright over time.
- Choose tempered glass or acrylic with a high gloss and non-yellowing finish.
- Opt for stainless steel or quartz backsplashes that resist smudges and fingerprints.
- Use light, neutral tones to amplify reflected daylight.
Durable Mirror Finishes
Durable mirror finishes keep the brightness you’ve built with reflective surfaces without constant upkeep.
I choose coatings with abrasion resistance and low porosity, so fingerprints disappear quickly and cleaning is simple.
I favor tempered glass or laminated panels for durability, plus aluminum-backed mirrors to resist moisture.
Install tight seams, seal edges, and avoid harsh cleaners to preserve shine year after year.
Light-Enhancing Materials
When selecting light-enhancing materials, I look for reflective surfaces that both brighten a space and stand up to daily use.
I favor practical choices that resist fingerprints and scratches, while keeping the galley feeling open. Here are reliable options:
- Matte or satin metal accents for durability
- High-gloss, scuff-resistant cabinet fronts
- Glass or acrylic backsplashes with easy-clean surfaces
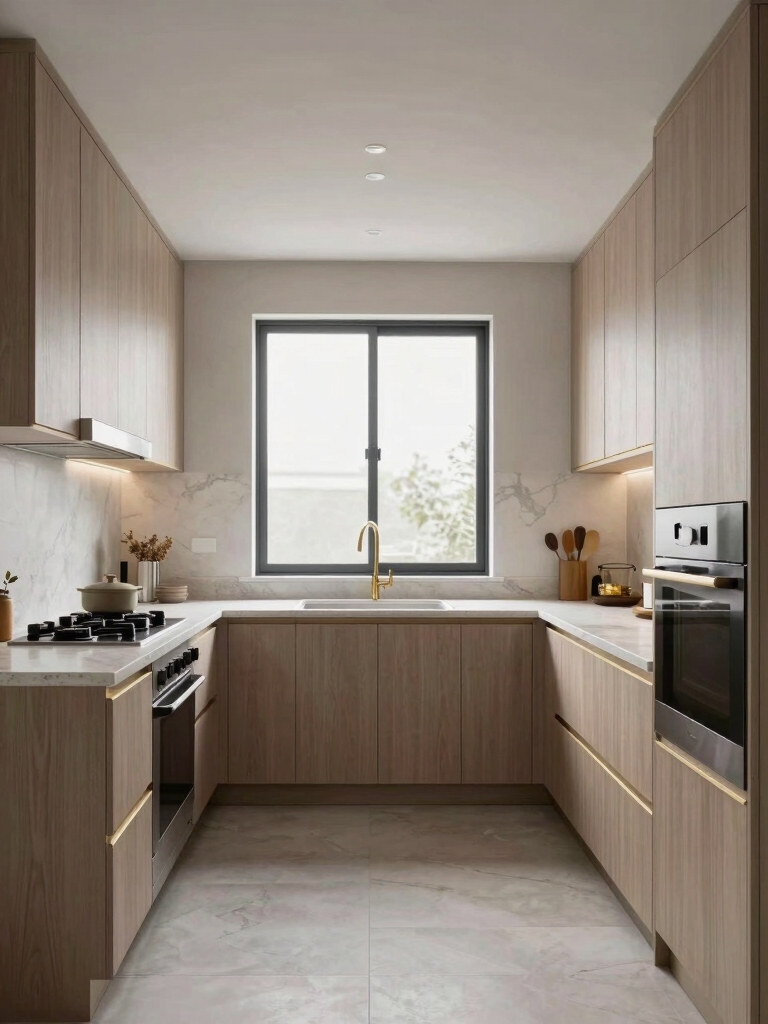
Placement Tricks for Appliances in a Narrow Hall
In a narrow hall, every inch counts, so I start by prioritizing the fridge, stove, and sink along the same wall to keep workflow efficient.
I space outlets and vents carefully, align appliance doors for clearance, and use shallow depths where possible.
I label position markers, plan services behind panels, and choose matching panels for a seamless, practical, low-variance look.
Multi-Functional Islands and Compact Workstations
Multi-functional islands and compact workstations are game changers in tight kitchens; they let you prep, cook, and clean without stepping all over the floor plan.
I’ll share practical layouts that maximize flow, storage, and counter space.
- Prioritize integrated outlets and collapsible surfaces for versatility
- Use downdraft or vented cabinets to reduce clutter
- Pair movable islands with wall-mounted accessories for efficiency
Lighting Plan: Brighten and Elongate the Space
Brighten and elongate a galley by layering light sources that work with the line of sight and exposed surfaces.
I balance overhead fixtures with under-cabinet LEDs to minimize shadows, then add warm task lighting near counters.
I choose dimmable options, color temperature around 2700–3000K, and distribute lighting along the length for even illumination while keeping glare at bay.
Mirrors and Glossy Finishes for Depth
Mirrors and glossy finishes can dramatically add depth to a galley by bouncing light along the narrow corridor and visually expanding the space.
I share practical tips you can apply today to maximize this effect without clutter.
- Choose full-height mirror panels to reflect ceiling light
- Use high-sheen cabinetry and backsplashes for a cohesive glow
- Place glossy hardware to catch and redirect ambient rays
Zone the Galley: Cooking, Cleanup, and Dining Workflows
To zone the galley effectively, I start by mapping the space into three distinct workflows: cooking, cleanup, and dining.
I position appliances, prep zones, and waste stations to minimize steps, using counter-height surfaces for prep and a dedicated sweep path for cleanup.
I foreground sightlines, lighting, and reach, ensuring fluid shifts between tasks without crowding.
Practical, precise, achievable.
Texture in Small Details: Accessorizing Without Crowding
Texture in small details matters, and I’ll show you how to add tactile interest without crowding the galley.
I choose compact, purposeful accents that feel intentional rather than cluttered, guiding the eye along clean lines.
- Opt for slim, high-contrast hardware that reads as a feature
- Use micro-shelving with a single, tactile element per zone
- Choose textural, lightweight textiles in small doses
Case Study: Before and After, With Lessons Learned
We’ve tracked the transformation from a cluttered, inefficient galley to a calm, functional space, and I’ll walk you through the key before-and-after changes and what I learned along the way.
First, I minimized wasted footprints by reconfiguring appliances and margins, then opened sightlines with a slim ledger and magnetic storage.
Lessons: plan, measure, declutter, and test accessibility before committing to finishes.
Quick-Start Checklist to Plan Your Open Galley Makeover
Here’s a quick-start checklist to plan your open galley makeover: start by mapping the space and listing must-haves, then rank needs by frequency of use and accessibility.
I’ll guide you through practical steps, avoiding fluff, so you act with focus and precision.
- Map zones and traffic flow
- Prioritize storage and workflow
- Budget with phased milestones
Conclusion
I’ve learned that a narrow galley isn’t a choke point but a frontier to master. Small shifts—bright colors, smart light, clever zones—transform it from a hallway into a heartbeat. Think of every inch as a measured breath, not a cramped sigh. When flow, light, and layout dance in harmony, clutter dissolves and intention shines. So plan boldly, choose restraint over clutter, and let your galley become a compact stage where cooking and conversation happily share the spotlight.