I design outdoor kitchens to keep cook, prep, and social areas in a smooth, easy flow. Start by zoning: cooking near the grill and fridge, prep beside it, cleaning behind the sink, and a social nook with clear sightlines. Choose a layout that fits your space—linear for tight spots, L or U for efficient task zones. Use movable carts and labeled storage, plus layered lighting. If you keep going, you’ll uncover practical layouts you can apply right away.
Set Your Outdoor Kitchen Flow Goals

Setting outdoor kitchen flow goals starts with understanding how you’ll move through the space. I map paths, noting frequent routes and bottlenecks.
I prioritize clear zones for prep, cooking, serving, and seating, then align appliance placement with these movements.
I’ll measure distances, guarantee unobstructed traffic, and plan for versatile use, so gatherings feel seamless and efficient. Incorporating stunning outdoor kitchen ideas can further enhance the functionality and aesthetics of your space.
Your feedback shapes the final layout.
Zone the Space: Cooking, Prep, Cleaning, and Social Areas

Now that we’ve mapped the flow, it’s time to clearly zone the space into cooking, prep, cleaning, and social areas.
I place the primary work zone near the grill and fridge, with prep adjacent.
I tuck cleaning behind the sink, and I reserve a social nook for prep-table chats.
Clear sightlines, accessible shortcuts, and deliberate spacing keep routines smooth. Additionally, incorporating stunning outdoor kitchen ideas can enhance the overall aesthetic and functionality of your space.
How to Choose Your Layout: Which Shape Fits Your Space?
Choosing the right layout means balancing the shape options with how you move through the space, so I’ll map out how the plan feels in real use. I’ll consider space and flow first, then align function to style so your cooking, prep, and social zones connect smoothly. Let’s explore how each shape supports your daily routines and scale it to your site. Additionally, incorporating efficient outdoor designs can enhance both functionality and aesthetics, ensuring a seamless experience in your outdoor kitchen and laundry area.
Layout Shape Options
When planning an outdoor kitchen, your layout shape should reflect how you cook, socialize, and flow between zones. I suggest keeping a compact, work-triangle approach for essentials, or a linear line if you rarely entertain. Curved arrangements invite conversation, while U- or L-shapes maximize prep space and seating. Additionally, consider incorporating affordable outdoor kitchen ideas to enhance your design without breaking the bank. Pick a form that minimizes steps and supports natural movement.
Space and Flow
Space and flow start with how you move through the space and how often you’ll cook for guests.
I choose a layout that minimizes steps between prep, cooking, and serving. Think closed- or open-loop shapes that fit your site, traffic patterns, and outdoor dining habits.
Prioritize task zones, easy cleaning access, and clear sightlines for smooth gatherings. Additionally, incorporating task zone prioritization can significantly enhance the efficiency of your outdoor kitchen layout.
Function-To-Style Balance
To balance function and style, I start by matching your layout shape to how you’ll actually use the space.
A practical, evidence-based approach helps: consider task zones, traffic flow, and equipment needs before choosing a form.
Circle encourages social gathering; a straight line fits narrow spaces. U-shapes balance prep and service.
Pick what supports daily rhythm, not trends. Additionally, incorporating elements like a Big Green Egg can elevate your outdoor cooking experience, making it more versatile and enjoyable.
Layout Gallery: Linear Pass-Through for Tight Areas

A linear pass-through layout keeps tight spaces functional by prioritizing a space-efficient flow that guides you from prep to service without backtracking.
I’ll show how a corridor work triangle preserves smooth, accessible use, even when widths are limited.
We’ll compare access-driven tweaks that balance reach, storage, and movement across the Space-Efficient Flow, Corridor Work Triangle, and Access-Driven Layout concepts.
Space-Efficient Flow
When space is limited, a linear pass-through layout keeps the outdoor kitchen flowing smoothly while you move between cooking, cleaning, and dining areas.
I design for efficiency by aligning work zones in a single line, minimizing walking. I prioritize accessible counter space, compact storage, and clear sightlines. This setup maximizes usability without clutter or dead areas. Additionally, incorporating mess-free outdoor kitchen ideas can further enhance the tidiness of your outdoor cooking space.
Corridor Work Triangle
Corridor Work Triangle fits neatly into a linear pass-through by placing the three core tasks—food prep, cleaning, and serving—along a single corridor.
I design this layout to minimize travel, keep tools at hand, and reduce clutter. I favor clear zoning, durable surfaces, and direct sightlines. Additionally, incorporating kitchen ideas for small spaces can enhance functionality without sacrificing style.
With careful spacing, workflow stays smooth, efficient, and easy to maintain every day.
Access-Driven Layout
Access-driven layouts shine in tight spaces because they maximize every inch of a linear pass-through.
I design the kitchen with a clear flow: countertops align along a single line, peripherals stay out of the center path, and stations are accessible from both ends.
This practical arrangement minimizes steps, enhances safety, and keeps guests engaged without clutter.
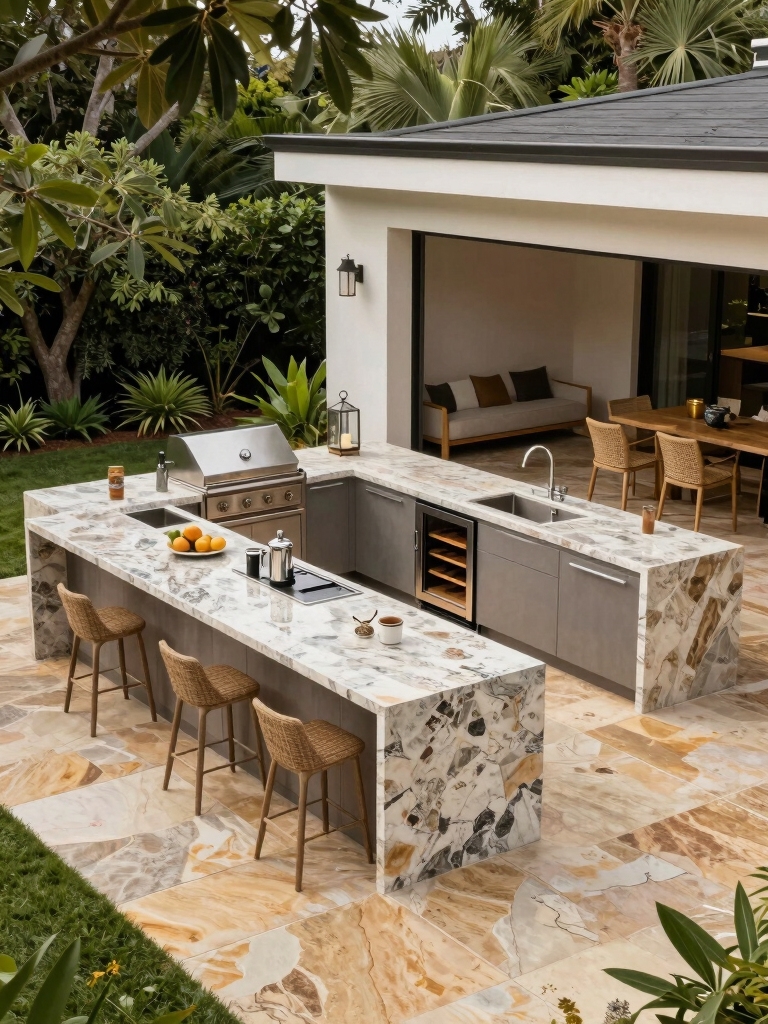
Layout Gallery: L-Shaped for Corner Efficiency

A practical corner layout maximizes space and flow, so an L-shaped outdoor kitchen fits naturally against two walls while keeping a clear work triangle.
I guide you through efficient corners, focusing on accessibility, motion, and tidy prep zones.
- Maximize corner reach with dual counters
- Centralize the sink for quick cleanup
- Align grill and prep zone for seamless passes
Layout Gallery: U-Shaped for All-Around Prep
A U-shaped outdoor kitchen wraps around you for all-around prep, so you can reach everything without stepping far.
I design this layout to keep workflow smooth—from sink to prep to grill—without backtracking. Work zones stay close, appliances align for sequential use, and storage nests under counters.
Clean lines, clear paths, and intentional utility make outdoor prep feel natural and efficient.
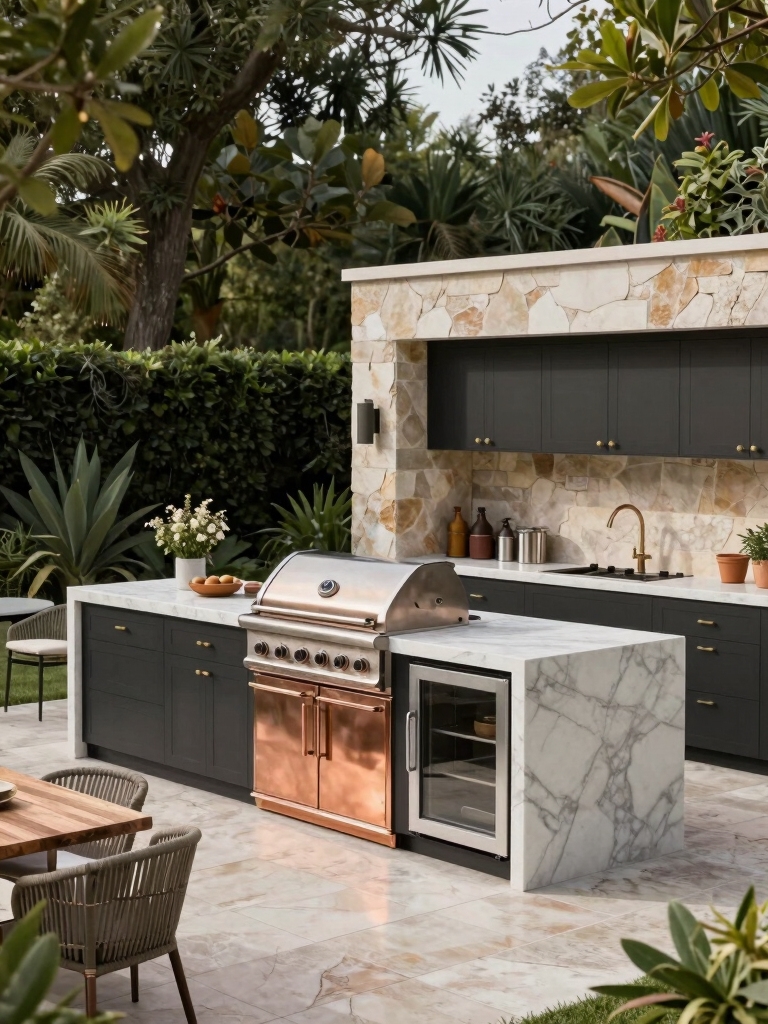
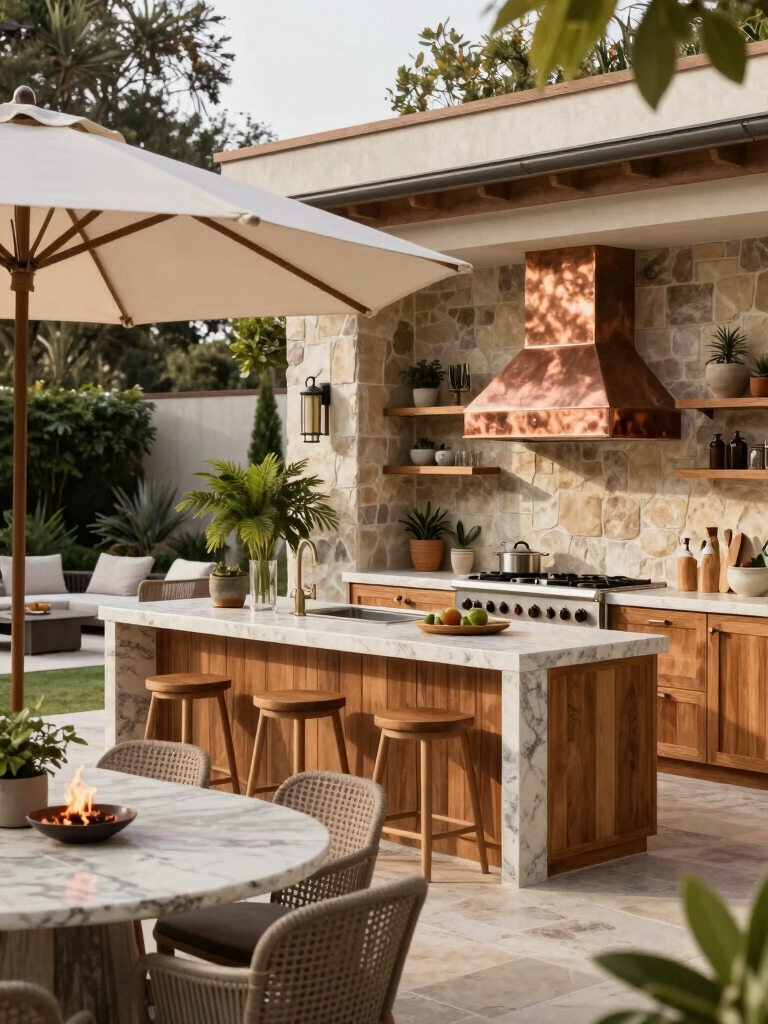
Layout Gallery: Island-Centric for Central Gathering
An island-centric layout centers the action, keeping grills, prep, and serving steps within easy reach for everyone at the gathering.
I’ll walk you through how this setup supports a smooth flow and a clear focus on the core activity: hosting and socializing around the central island.
Let’s explore practical placements and routines that keep conversations and tasks moving in sync.
Island-Centric Flow
Island-centric layouts put the action at the heart of the space, guiding traffic around a central island where prep, seating, and socializing all meet.
I design with flow in mind, keeping paths clear and stations connected for quick access.
- Centralizes tasks around the island
- Encourages open conversation while cooking
- Simplifies shifts between prep, dining, and cleanup
Central Gathering Focus
Even centered around a single gathering hub, this island-centric layout keeps the focus on people as much as on tasks, so conversations flow naturally while meals are prepped.
I design with clear sightlines, nearby seating, and accessible storage to encourage collaboration.
You’ll find intuitive zones, practical workflows, and minimal steps between prep, plating, and service, all fostering effortless sociability.
Moveable Elements That Boost Flexibility
Flexible layouts make outdoor kitchens work harder for you.
I design moveable elements that boost flexibility so you can reconfigure on the fly.
Here are practical tweaks that stay simple and sturdy:
- Rolling carts with locking wheels
- Foldaway prep surfaces
- Removable seating clusters for variable seating
These tips keep workflows smooth and spaces adaptable without clutter.
Tucked Storage and Weather-Resistant Surfaces
Tucked storage and weather-resistant surfaces keep your outdoor kitchen clean and ready, no matter the weather or project at hand.
I keep essentials tucked in containers and shallow bins, so quick changes don’t disrupt flow.
Use covered cabinets and resin composites for durability, easy cleanup, and minimal maintenance.
Plan zones, label organizers, and wipe surfaces after use to preserve longevity.
Lighting to Guide Flow and Extend Use
Lighting guides the flow and extends usability in my outdoor kitchen. I explain how lighting shapes paths, highlights work zones, and invites nighttime use without glare or fuss.
Here are quick, practical tips:
1) Layered lighting for tasks, ambient glow, and safety
2) Dimmer switches to adjust mood and function
3) Zone lighting that follows movement and activity
Weather-Resistant Materials and Finish Choices
Weather-resistant materials and finishes are the backbone of a durable outdoor kitchen, so I focus on choices that stand up to sun, rain, and daily use.
I recommend corrosion-resistant metals, sealed countertops, and weatherproof cabinetry. Choose non-slip surfaces, UV-stable paints, and simple maintenance routines.
Prioritize seam care and drainage, and match textures for cohesive, lasting durability with minimal upkeep.
Siting Grills, Sinks, and Refrigeration for Ergonomics
To plan an ergonomic outdoor kitchen layout, start by positioning grills, sinks, and refrigeration in a logical triangle that minimizes movement and maximizes workflow.
I like keeping zones tight yet flexible for changes.
- Place the grill downwind from prep.
- Align the sink and fridge for quick refills.
- Ascertain clear paths and elbow room between zones.
Real-World Case Studies You Can Replicate
Real-world case studies give you clear, replicable layouts you can adapt.
I walk you through real setups I’ve seen, pointing out how zones flow, who uses what, and where details matter.
You’ll notice common patterns—worktriangle efficiency, prep-to-cook proximity, and durable materials.
I’ll help you translate these examples into a realistic, personalized outdoor kitchen plan you can try.
Conclusion
I’ve shown you how to map an outdoor kitchen that flows—from goals to zones to smart layouts. Picture your space like a well-tuned workflow, where grill, prep, and fridge move in easy, natural arcs. Think of it as a answers-to-questions toolkit, not a rigid blueprint. And if ideas feel scattered, imagine a vintage typewriter hammering out the plan—click, clack, then satisfied sigh. With the right rhythm, your outdoor kitchen becomes effortless, inviting, and endlessly usable.