I turn morning chaos into a smooth routine with 20 sturdy drawer dividers designed for quick, predictable access. I start by identifying what slows us down, then choose dividers suited to actual use—flexible grids, slotted trays, and slim panels. I measure carefully, skip clutter, and group items by frequency. I optimize vertical space with stacking options and keep kids’ stations safe with durable, easy‑clean materials. Want more setup moves to boost efficiency tomorrow? Keep going and you’ll learn exactly how.
Identify Your Morning Chaos and Define Drawer Goals

Morning chaos is a real thing, and it usually starts with a cluttered drawer.
I identify your morning chaos by watching patterns: what you grab first, what slows you down, what’s missing.
Then I define clear goals: simpler access, fewer duplicates, a predictable routine.
We’ll map priorities, set measures, and test quickly, adjusting until your drawer supports smooth, fast starts. Implementing budget-friendly DIY projects can further enhance your kitchen organization without breaking the bank.
Choose the Right Drawer Divider Type for Your Kitchen

When choosing drawer dividers, start by matching them to how you actually use your kitchen.
I pick types that grant visibility, ease, and durability, so everyday items stay organized with minimal effort.
- Flexible, adjustable grids for changing needs
- Slotted, stackable trays for utensils and tools
- Slim, glide-on panels for shallow drawers and quick access
Additionally, consider using dividers that provide smart utensil organization to maximize your drawer space efficiently.
Measure Your Drawers for a Perfect Fit

I start by measuring your drawer depth so the dividers sit securely without sticking out.
I’ll factor in handles and choose sturdy dividers that won’t flex under pressure.
With precise measurements for depth, sturdy pieces, and any protruding hardware in mind, your setup will fit cleanly and stay put.
Measure Drawer Depth
To get a perfect fit, start by measuring your drawer depth from the inside front to the back wall, then subtract a little for clearance.
I share practical steps you can trust:
- Measure at multiple points for consistency.
- Note the deepest dimension for dividers.
- Record your final depth for quick reference.
Additionally, consider utilizing smart cabinet organization techniques to maximize your kitchen space effectively.
Use Sturdy Dividers
Sturdy dividers make drawer organization stick, so I’ll show you how to pick ones that stay put and fit exactly.
I measure depth, width, and contour before buying, avoiding flimsy options. Choose durable materials, reinforced joints, and snag-free edges.
Install with clear labeling and a tight grip, then test full range of motion. Precision saves mornings and minimizes rearranges. Under kitchen sink organization can also greatly enhance overall kitchen efficiency.
Account For Handles
When planning your drawer setup, account for handles to guarantee a perfect fit. I measure depth, width, and clearance, then choose dividers that won’t snag. This saves time in mornings and keeps essentials reachable.
- Measure handle protrusion and drawer lips
- Verify spacer compatibility with drawer depth
- Test full extension before final placement
Expandable vs. Fixed Dividers: Pros and Cons

Expandable dividers adapt to whatever you’re storing, but fixed dividers offer steadier structure; both have their place, so here’s how to choose.
I weigh flexibility against durability: choose expandable when you regularly change items or widths, and fixed when you value consistent organization and easier maintenance.
Consider drawer height, ease of cleaning, and budget to decide the right balance for mornings.
Sort and Declutter: Prepare Items Before Placing Dividers

I’m guiding you to start with a quick sort and declutter so you know what truly belongs in this drawer.
We’ll group like items, remove duplicates, and set aside what you no longer use, so everything that stays has a purpose.
This prep makes placing dividers easier and guarantees your space stays tidy and functional. Additionally, consider space-saving solutions that can maximize your drawer’s efficiency and keep your kitchen organized.
Sort and Declutter Steps
To sort and declutter effectively, start by clearing a workspace and gathering two baskets: keep and remove.
I guide you through quick, practical steps that streamline what you own and what belongs elsewhere.
- Sort items by category and frequency of use.
- Remove duplicates, expired, or damaged pieces.
- Place essential tools in accessible spots, noting items for future review. Additionally, consider utilizing smart organization tips to maximize storage space in your small kitchen.
Prep Items Before Dividers
Before placing dividers, I start by prepping every item you plan to sort.
I group similar tools, then set aside essentials and duplicates. I check for breaks, labels, and usability, discarding what won’t get used.
Next, I group by frequency of use, note dimensions, and capture a quick mental map for efficient placement.
Ready to divvy up, thoughtfully.
Utensil Drawer Setup With Rigid Slots for Tidy Cutlery
A utensil drawer with rigid slots keeps cutlery orderly and easy to grab.
I tailor rigid compartments to daily needs, so you can find forks, knives, and spoons in a glance without rummaging. This setup minimizes chaos and speeds prep. Additionally, kitchen drawer organization can enhance overall kitchen efficiency.
- Assign each slot by utensil type
- Use insulated edges to protect fingers
- Label lightly for quick recall
Flatware Organization: Separate Each Item for Quick Grabs
I’m all about easy grab organization, so I separate each flatware item for quick access.
When every piece is easy to lift, I save time and avoid rummaging.
Let’s explore practical setups that keep utensils visible, reachable, and ready for the next meal. Incorporating smart organization tips can significantly enhance your kitchen’s efficiency and streamline your morning routine.
Easy Grab Organization
Sure, I organize utensils for instant access by grouping like pieces in separate compartments.
This simplifies grabbing what I need in a rush and keeps mornings efficient.
- Separate each item for quick grabs, so you can grab a fork without digging.
- Use shallow dividers to minimize movement and noise.
- Label or color-code sections for fast recognition and smooth shifts.
Separate Each Item
Separating each utensil into its own spot speeds up mealtime.
I place forks, knives, and spoons in dedicated sections, so hands grab what’s needed without hunting. This setup reduces cross-contact and keeps the drawer tidy.
I tilt items for visibility, label zones if helpful, and adjust spacing after testing. Practical, steady organization makes quick meals calmer and more predictable.
Quick Access Essentials
I keep flatware in clearly defined, easy-reach sections so I can grab what I need in one smooth motion.
Quick access means each item has its place, so mornings stay calm and efficient.
- Separate each piece for fast selection
- Use labeled, shallow slots to prevent digging
- Group daily needs near the front for instant grab-and-go
Snack Drawer Zones: Create Quick-Access Bites
Snack drawer zones keep quick bites within arm’s reach, so you’ll grab what you need without rifling through clutter.
I organize with labeled compartments and predictable placements, so mornings flow smoothly. I choose grab-and-go options—protein packs, nuts, fruit—and time-saving hybrids.
I rotate staples weekly, maintain balanced choices, and keep portions consistent. Your drawer, your momentum, your smoother routine.
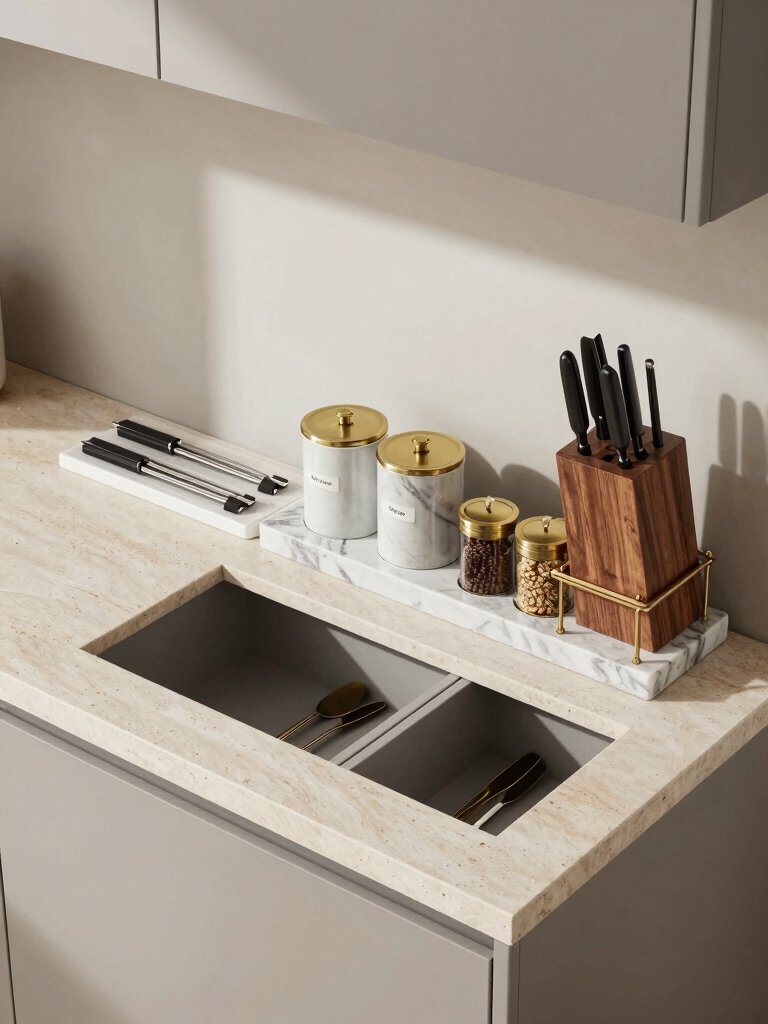
Spice and Small Item Trays: Stop Bottles From Tip-Over
I’ll start with sturdy tray placement to keep spices and small items stable, because a solid base prevents spillover at the count.
I’ll share practical anti-tip design tips that make bottles resist tipping, even when drawers are opened or closed abruptly.
Finally, I’ll show how to label and align items for quick access and clear organization.
Sturdy Tray Placement
Sturdy tray placement keeps spice jars and small items from tipping over, especially in tight drawer spaces.
I position trays with non-slip bases and aligned dividers, ensuring every item has a defined slot. This simple setup speeds mornings and reduces spills.
- Use non-slip liners under trays
- Align edges with drawer walls
- Label sections for quick access
Anti-Tip Design Tips
Anti-tip design keeps your spice and small-item trays steady, even in crowded drawers.
I prioritize low-profile dividers and non-slip mats, so bottles stay upright during opening and closing.
I suggest staggered rows, deeper pockets for tall jars, and anchored rails to prevent shifting.
This approach minimizes spills, saves time morning prep, and keeps your essentials within easy reach.
Label And Align Items
Labeling and aligning items is the fastest way to keep spice trays stable and easy to navigate.
I map each bottle to a labeled spot, so you know where it lives at a glance. You’ll waste less time searching and pouring.
1) Label shelves clearly
2) Align bottles upright
3) Group by usage frequency
Layering for Everyday Essentials: Zone by Use
Layering for everyday essentials means organizing by zone so you can grab what you need without digging.
I assign zones by use—daily tools, quick-grab snacks, and prep shortcuts—so you can move smoothly from coffee to cleanup.
I vary sizes, keep frequently used items reachable, and maintain a clear path.
This creates predictable routines, minimizing rummaging and mornings-chaos.
Longevity and Hygiene: Reusable vs. Adjustable Dividers
I’m weighing reusable versus adjustable dividers for longevity and hygiene, considering how long they last and how easy they’re to clean.
I’ll compare materials for hygiene, like plastic, silicone, and metal, and outline how durability and ease of sanitation affect daily use.
I’ll also flag the trade-offs between reusable longevity and adjustment reliability so you can pick what fits your drawer rhythm.
Reusable vs Disposable Longevity
Reusable dividers win on sustainability, but longevity hinges on material quality and care.
I’ll share practical notes so you choose wisely and avoid waste.
- Compare plastics, silicone, and fabric; bake in heat tests and washability to project lifespan.
- Schedule routine checks for tears, warping, or fraying; replace before failure disrupts drawers.
- Consider multi-use designs that adapt with you, extending service life and reducing replacement frequency.
Hygiene Through Materials
Materials matter for hygiene and longevity, and the choice between reusable and adjustable dividers should start with what they’re made of.
I assess plastics, silicone, and stainless options for easy cleanups, nonabsorbent surfaces, and odor resistance. Reusables win on longevity, while adjustables save space.
Pick materials that tolerate daily wash, resist staining, and support quick rearrangements for smoother mornings.
Adjustment Longevity Trade-offs
Adjustment longevity hinges on how you balance reuse and adjustability, especially since every extra move risks wear.
I’m guiding you to choose wisely, prioritizing stability without stalling customization.
- Favor durable materials for long-term reuse
- Prefer fewer, well-spaced adjustments for hygiene
- Opt for modular designs that snap in and out smoothly
Non-Slip Surfaces: Prevent Drawer Shuffle During Use
If you’ve ever watched a drawer shuffle as you pull it out, you know how frustrating it can be.
I prioritize non-slip surfaces that grip internal trays and liners when needed, not everything sticks. Choose rubberized mats or shelf liners, and guarantee edges stay flat.
This keeps contents steady, speeds mornings, and reduces tugging, without sacrificing access.
Color-Coding and Labeling for Fast Access
Color-coding and labeling streamline your drawer checks so you grab what you need in seconds.
I show you practical cues that cut search time and reduce decision fatigue, without overthinking. You can trust quick categories to stay consistent.
- Use color codes for broad groups
- Label subcategories clearly
- Rotate labels during swaps for consistency
Keep It Clean: Easy Cleaning Tips for Dividers
Cleaning is quick and doable: with a simple routine, you can keep each divider looking fresh and functioning well.
I suggest a weekly wipe with a microfiber cloth, mild soap, and warm water, then a quick dry to prevent residue.
Avoid harsh cleaners; wipe spills immediately.
Regular surface checks help spot sticky spots before they become problems.
Consistency saves time.
Budget-Friendly Wins for a Clean Look
We can keep things tidy without breaking the bank by picking deliberate, budget-friendly moves that still yield a clean, organized look.
I share practical choices you can implement today, prioritizing function over flair and avoiding clutter.
- Reuse jars and small bins for divider compartments to reduce waste.
- Label fronts with simple, legible stickers for quick access.
- Swap bulky organizers for slim, modular trays that fit varied items.
Morning Routine Walkthrough: Practical Setup
Morning routines set the tone for a smooth day, so I’ll walk you through a practical setup you can implement now.
I choose a few essentials, label clearly, and group by frequency. I’ll place daily tools together, then reserve a zone for backups.
Minimal touches, predictable paths, and quick-reach items—no clutter. This streamlined flow speeds mornings and reduces decision fatigue.
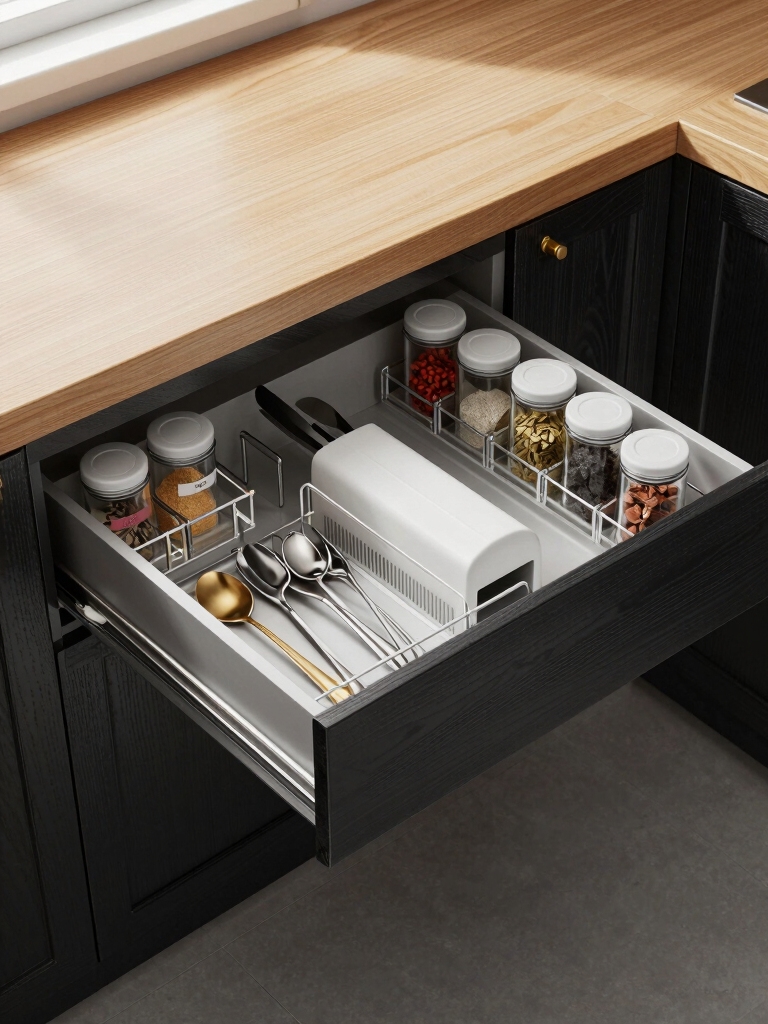
Maximize Vertical Space With Stacking Dividers
Maximizing vertical space starts with stacking dividers that fit your cabinet depth and drawer height.
I’ll guide you to optimize height steps without clutter, so every item has a smart home.
Trust the process, adjust as you go, and measure first.
- Measure precise depths and heights before buying
- Use shallow and tall dividers to create tiers
- Label sections for quick, confident access
Safe, Durable Divider Solutions for Kids’ Stations
Safe, durable divider solutions for kids’ stations require materials and designs you can trust day in and day out.
I choose BPA-free plastics, rounded edges, and sturdy joints for long-lasting use.
Sanitation matters—pick easy-to-clean finishes.
I’ll favor adjustable widths and non-slip bases so setups adapt as needs shift.
Practical, economical choices keep morning routines calm and organized.
Maintenance and Reconfiguration: When to Replace
When should you replace drawer dividers and organizers? If they crack, warp, or snag regularly, it’s time to swap.
Failing grip or misalignment wrecks efficiency, so reconfigure promptly. Inspect materials for mold or odor, and note lost dividers that never stay in place.
Consistency matters; upgrade to durable options that restore smooth mornings.
- Inspect for cracks, warping, and fit
- Replace when grip or alignment deteriorates
- Choose durable, easy-clean materials
Quick-Start 15-Minute Drawer Reset Plan
If you’re short on time, you can reset your drawer in 15 minutes by focusing on three steps: clear out, measure, and align.
I’m guiding you to remove unused items, quickly sort by frequency, and map widths to your dividers.
Then, measure gaps, trim excess, and place essentials.
This plan keeps mornings smooth, purposeful, and predictable.
Conclusion
I speak in a kitchen, where drawers are quiet rivers. You are the captain, and dividers are the bridges you plant across them. Each item finds its harbor, tiles align, and morning noise becomes a steady, click-click rhythm. When you reset, you plant a seed of order that grows with every grab-and-go moment. The symbols—labels, spacers, stacks—aren’t clutter; they’re compass points guiding you back to calm, efficiency, and a smoother dawn.