Here’s a practical weekend plan you can actually follow: I’ll map your tools, budget, and a tight two-day timeline so you don’t get overwhelmed. Swap hardware for an instant upgrade, add a quick paint accent, and open shelves for visual relief. Create a cohesive cabinet color story, then introduce seasonal decor without clutter. I’ll cover DIY hardware finishes and simple gaps tricks, plus a quick maintenance makeover to seal and protect. If you keep going, you’ll gain even more tips.
Plan Your Weekend Cabinet Refresh: Tools, Budget, and Timeline
Kicking off a weekend cabinet refresh is all about smart planning.
I map tools, budget, and timeline so nothing derails the project. I list essential gear, reserve extra cash for screws and touch-up paint, and set a realistic sequence.
I allocate time blocks, anticipate pitfalls, and celebrate milestones. You’ll get a clear, actionable plan you can follow without overthinking. Additionally, be mindful of common kitchen cabinet painting mistakes that can hinder your progress and result in a less-than-perfect finish.
Swap Hardware for an Instant Update
If you’re ready for a quick lift, swapping out cabinet hardware is my go-to move for an instant update.
I’ll show you how fresh hardware can dramatically change the look with minimal effort and cost. Stylish secrets for decorating your kitchen cabinets can inspire your choices as you explore various options.
Let’s focus on choosing pieces that fit your style and budget to maximize impact fast.
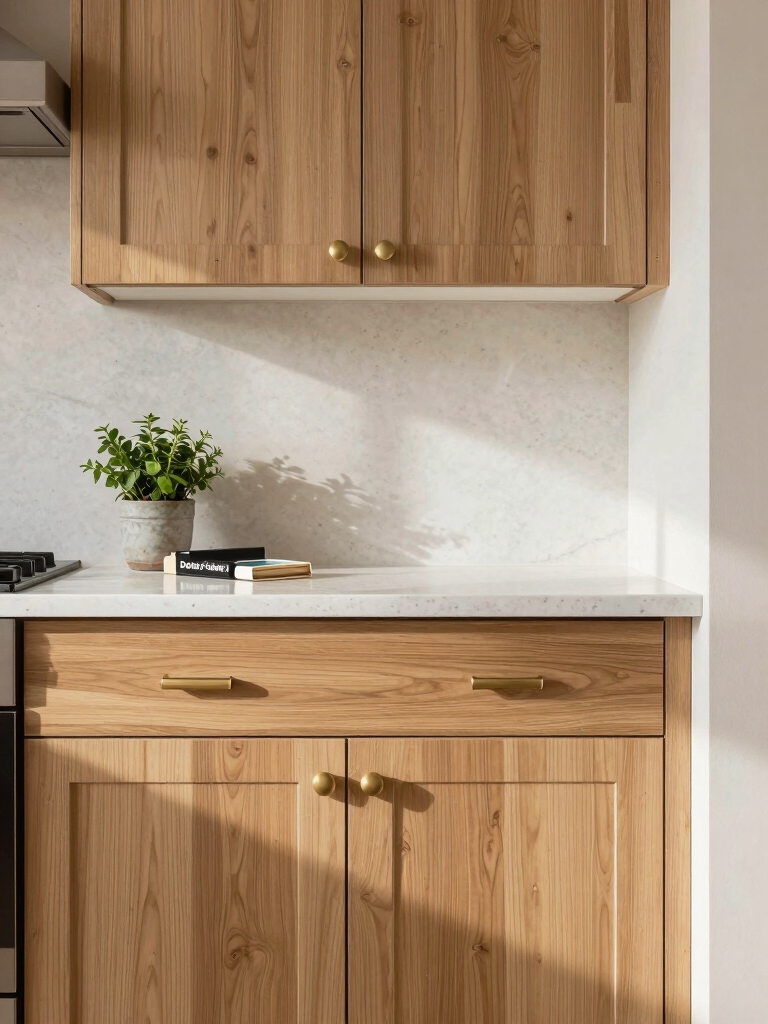
Swap Hardware Quickly
Switching out cabinet hardware is one of the fastest, most affordable updates you can make.
I walk you through a quick plan: measure holes, choose uniform mounts, and test alignment before tightening.
Keep screws handy, label drawers, and work in daylight.
Swap handles or knobs in minutes, then wipe spills.
This simple swap refreshes cabinets with minimal disruption. Additionally, consider exploring Clever Small Kitchen Cabinet Ideas to enhance your overall kitchen design.
Fresh Hardware Impact
Fresh hardware makes an instant impact you can feel the moment you swap in new finishes.
I guide you to pick cohesive pulls and knobs that mirror your style, then install them with standard screws. Measure evenly, keep gaps tidy, and test grip comfort.
This quick upgrade freshens doors, boosts function, and stays within a weekend plan—clear, simple, and affordable. Additionally, consider enhancing the space above your cabinets with decorative elements that reflect your personal style and add character to the kitchen.
Freshen Cabinets With a Quick Paint Accent
A quick paint accent can instantly refresh your kitchen without a full makeover. I choose a small area—upper cabinets or a single panel—to test color and finish. Then I prep surfaces, patch flaws, and sand lightly for grip. I apply two thin coats, seal with a durable topcoat, and wipe away drips. Minimal disruption, maximum impact. Freshly painted cabinets can transform your kitchen’s aesthetic and breathe new life into the space.
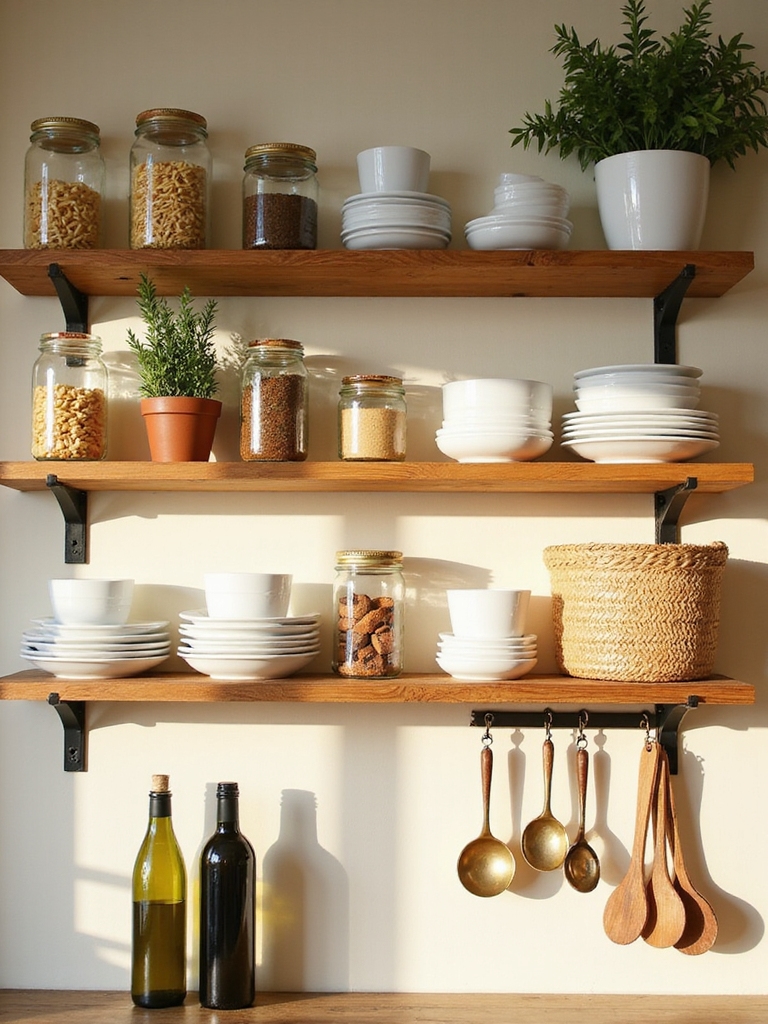
Add Open Shelving for Visual Breathing Room

Open shelving can instantly create a sense of space and airiness in a kitchen.
I’ll keep it practical: measure wall height, pick open units that match your cabinet lines, and group items by use.
Skip clutter; display a few favorites, not everything.
Use uniform brackets or simple tracks for tidy support, and add light fixtures for bright, breathable shelves. Additionally, consider incorporating kitchen styling secrets to enhance the overall aesthetic and functionality of your open shelves.
Create a Cohesive Cabinet Color Story
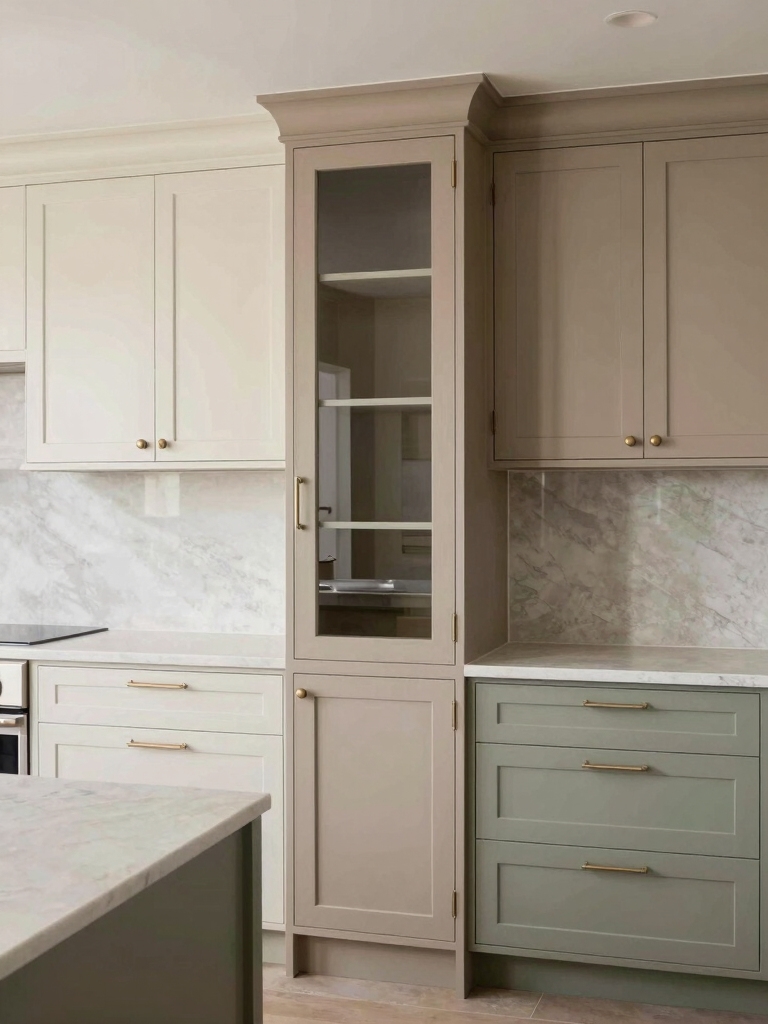
I start by choosing a color family that fits your kitchen’s lighting and style, then map how each cabinet door, drawer front, and backsplash tie into that palette.
I’ll share simple palette harmony tips to keep tones balanced without overcomplicating the look.
Finally, I’ll note finishing touches that create coherence across the whole space, from hardware to accents. Additionally, consider how kitchen cabinets can serve as a focal point that enhances your overall design aesthetic.
Color Family Planning
To create a cohesive cabinet color story, start by choosing a main color family and anchoring it with one or two neutrals.
I outline it simply: pick a dominant hue, assign complementary neutrals for balance, and map how accents will appear in hardware, backsplashes, and textiles. Incorporating elegant grey kitchen cabinets can add a sophisticated touch to your design.
Keep the palette flexible for finishes, lighting, and seasonal updates.
Then refine, test, and finalize.
Palette Harmony Tips
Palette harmony starts with a clear plan: define a main color family, anchor it with one or two neutrals, and map where the color appears in hardware, backsplashes, and textiles.
- Choose a dominant hue for cabinets
- Balance with neutral accents
- Repeat color in small hardware details
- Tie textiles to the palette for cohesion
Finishing Touch Coherence
Now that you’ve landed on a cohesive color story with your palette, the finishing touch is to weave coherence through every tiny detail.
I guide you to align finishes, hardware, and textiles, so nothing flouts the theme. Keep notes, compare swatches, and test lighting.
Tie gaps with subtle contrasts, and celebrate a calm, unified cabinet look you can maintain weekly.
Upgrade Cabinet Interiors With Pop-Top Liners
When you’re upgrading cabinet interiors, pop-top liners offer a simple, affordable way to protect shelves and keep things organized.
I chose a lightweight, durable material, trimmed to fit, and the grip keeps liners in place.
Here are four benefits:
1) Quiet protection
2) Easy cleanup
3) Customizable fit
4) Budget-friendly upgrade
Install Simple Under-Cabinet Lighting
Installing simple under-cabinet lighting is a quick, practical upgrade that brightens work areas without adding bulk.
I choose low-profile LEDs, measure where task light helps most, and mount with self-adhesive strips or slim aluminum channels.
I wire safely, conceal cords, and test until consistent shine.
This setup costs little, installs fast, and makes prep work easier for everyone in the kitchen.
Frame Cabinets With Peel-And-Stick Backsplash Panels
Framing cabinets with peel-and-stick backsplash panels is a fast way to refresh their look without a full remodel.
I’ll walk you through a simple, practical process that keeps us organized and confident.
- Prep surfaces, clean edges, and measure twice for accuracy
- Choose heat-, steam-, and water-resistant panels you love
- Align panels carefully for seamless flow
- Press firmly, trim, and enjoy the refreshed vibe
Arrange Decorative Cabinet Hardware for a Cohesive Look
Decorative cabinet hardware can define the whole look, so I start by outlining a plan that keeps everything cohesive.
I group pulls and knobs by finish, scale, and placement, then map a simple template for drawer vs. door handles.
I verify alignment, tighten consistently, and test opening ease.
Final check: uniform gaps, clean screws, and balanced visual weight across the kitchen.
Slim Storage Solutions for Cabinet Doors
Slim storage solutions for cabinet doors can free up valuable space without bulk or clutter.
I suggest simple, practical tweaks you can implement this weekend. You’ll gain organization without adding clutter, and you’ll feel accomplished.
- Slim racks that hug the door
- Clear, labeled pockets for small items
- Tension-mounted organizers
- Fold-flat bins for lids and wraps
Add Magnetic or Pegboard Accessory Zones
If you’re aiming for quick, flexible access in the kitchen, adding magnetic or pegboard zones is a smart move.
I organize a dedicated wall or cabinet side with lightweight tools, magnetic tins, and peg hooks, so frequently used items are in reach.
No wasted motion—just clear labels, minimal clutter, and easy swap-outs for changing tasks.
Add Floating Shelves for Display Nooks
Floating shelves can turn unused wall space into quick, visual pockets of charm.
I’ll show how to add display nooks without clutter, keeping alignment and balance in mind.
Here’s a simple plan:
- Measure key wall zones precisely
- Choose light, versatile brackets
- Layer items for depth
- Rotate accents seasonally to refresh mood
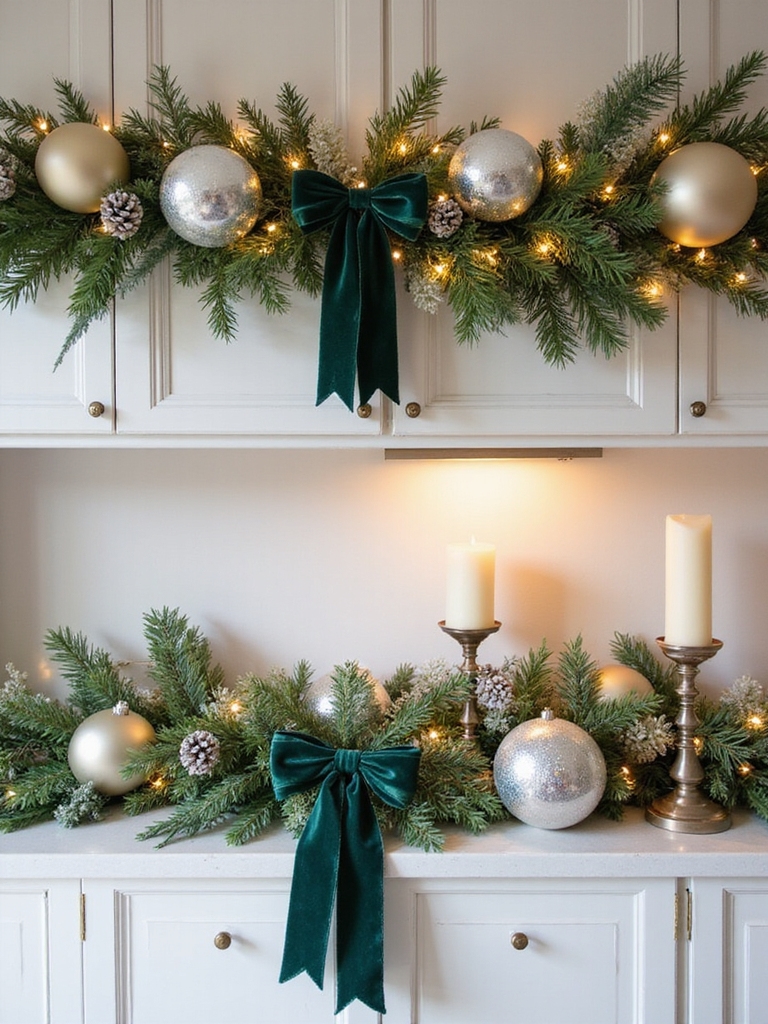
Incorporate Seasonal Decor Without Clutter
I’ll keep seasonal touches simple with silhouettes that read seasonally without shouting.
I’ll mix in subtle seasonal accessories that stay clutter-free and easy to swap out.
If you’re unsure where to start, I’ll suggest practical spots and quick swaps to maintain an organized, inviting look.
Seasonal Silhouettes, Clutter-Free
Seasonal silhouettes can refresh your kitchen without crowding the counters—start by choosing a single focal piece and coordinating a few small accents around it.
I keep it simple, practical, and tidy, so you can enjoy the vibe without clutter.
- Pick a centerpiece that feels seasonal yet timeless
- Add 2–3 understated accents
- Use matching containers for cohesion
- Swap pieces seasonally to stay fresh
Subtle Seasonal Accessories
Subtle seasonal accessories can refresh your kitchen without adding clutter, so I keep the changes small and intentional.
I choose a single focal piece, like a calendar or a petite seasonal planter, and place it where it’s visible but unobtrusive.
I swap accents weekly, group items neatly, and store extras out of sight, preserving a calm, organized cabinet feel.
DIY Hardware Finishes: Brass, Matte Black, Bronze-Pros, Cons, and How-To
When choosing hardware finishes for your cabinets, brass, matte black, and bronze each bring a distinct vibe and practical trade-offs.
I’ll guide you simply, so you can decide confidently and finish fast.
- Brass: warm glow, shows fingerprints, timeless appeal.
- Matte Black: modern edge, durable, hides smudges.
- Bronze: rich depth, patina develops, complements wood.
- How-To: plan, measure, test finishes, install with care.
Tackle Visible Gaps With Casing and Trim Tricks
If you’ve decided on hardware finishes, you might still notice gaps or misalignments around casings and trim.
I’ll walk you through quick fixes I’ve used: adjust with thin shims, caulk with paintable silicone, and skim excess where gaps appear.
Measure twice, cut once, then test fit.
Finish by sealing seams, wiping excess, and admiring a clean, cohesive frame.
Quick Maintenance Makeover: Reseal and Protect Surfaces
Resealing and protecting our cabinet surfaces is a quick, practical upgrade that keeps finishes looking fresh longer.
I’ll walk you through a simple maintenance routine you can tackle this weekend, with clear steps and results you can feel.
- Gather sealant, applicator, and cloths to feel prepared
- Clean and dry surfaces for precise sealing
- Apply thin, even coats to avoid streaks
- Cure time, then buff for lasting shine
Conclusion
Hey friend, imagine this weekend—your cabinets transformed, like a magic trick you can boast about at brunch. I’m not kidding: swapping hardware, a paint accent, or a dash of open shelving can make your whole kitchen feel twice as big, twice as calm, and half the effort. It’s practical, it’s doable, and it sticks to your budget. You’ll finish with brag-worthy results and a confidence you’ll rent out to future projects. Ready to start? Let’s go.