I know awkward kitchen corners can waste space, so I start by decluttering, then map zones like prep, tools, and display to keep traffic smooth. I love slim corner cabinets and pull-out shelves to reach every inch, plus wall rails and door-back solutions for vertical and hidden storage. I’ll mix textures with bowls and plants, color-code bins, and label fronts for instant finds. If you keep going, you’ll uncover even smarter fixes that fit your space.
How to Maximize Every Corner: Quick Wins for Small Kitchens
Small kitchens often waste valuable corners, but you can turn every inch into usable space with a few smart tweaks.
I share quick wins that fit busy lives: a sliding pantry, corner lazy Susans, and stacked shelves.
Measure first, pick compact tools, and keep a running inventory.
I guide you to plan around traffic flow, so corners stay inviting, not cluttered. Additionally, consider incorporating tiny kitchen solutions that can enhance functionality without sacrificing style.
Declutter First, Zone Second: Set Up a Working Corner Map
Decluttering first clears the space, and then I map out zones so every corner has a clear job.
I start by listing what lives there, then assign tasks: prep, tools, or display. I keep pathways open and minimize duplications.
This working corner map guides decisions, prevents clutter creep, and makes daily routines faster, calmer, and more reliable. Incorporating small kitchen storage ideas can maximize functionality and keep surfaces clutter-free.
Slim Corner Cabinets: Doubly Efficient Storage for Dead Angles
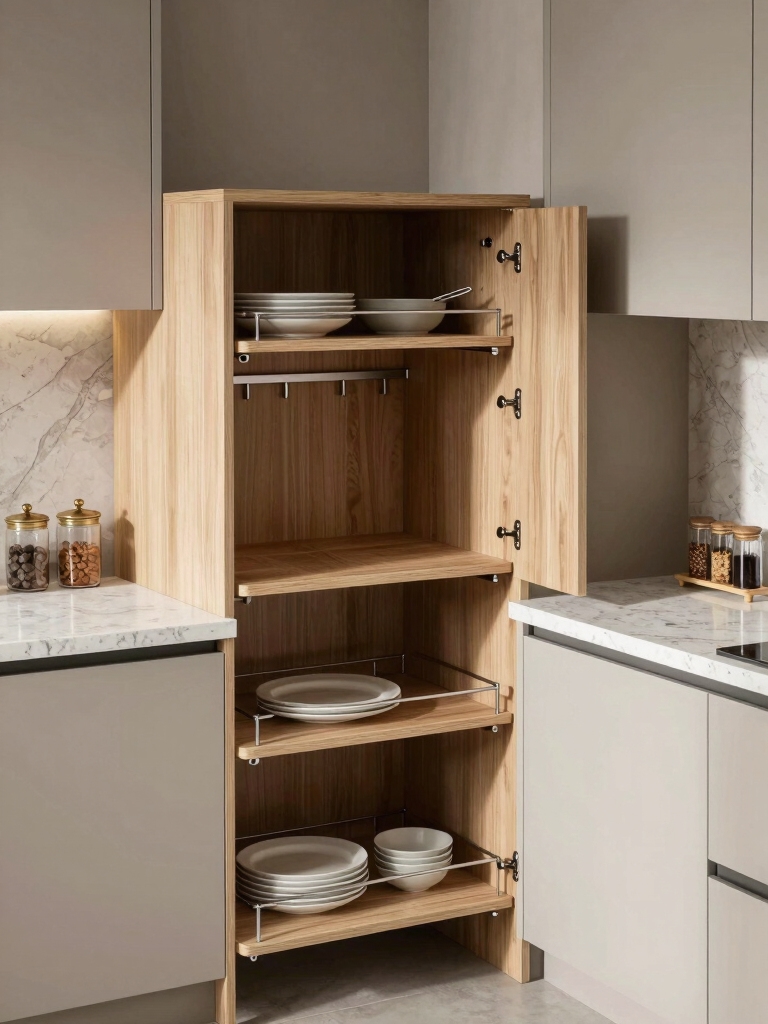
Slim corner cabinets transform awkward dead angles into workable, double-duty storage.
I keep this solution simple: pull-out shelves, wide-front drawers, and clever organizers maximize every inch. You’ll reach items without twisting or bending, and I’ll label zones for quick access.
Install fits tight spaces, install tips, and routine tidying keep flow smooth. Efficient, quiet, practical, and truly user-friendly. Additionally, incorporating clever small kitchen cabinet ideas can further enhance your storage solutions in tight areas.
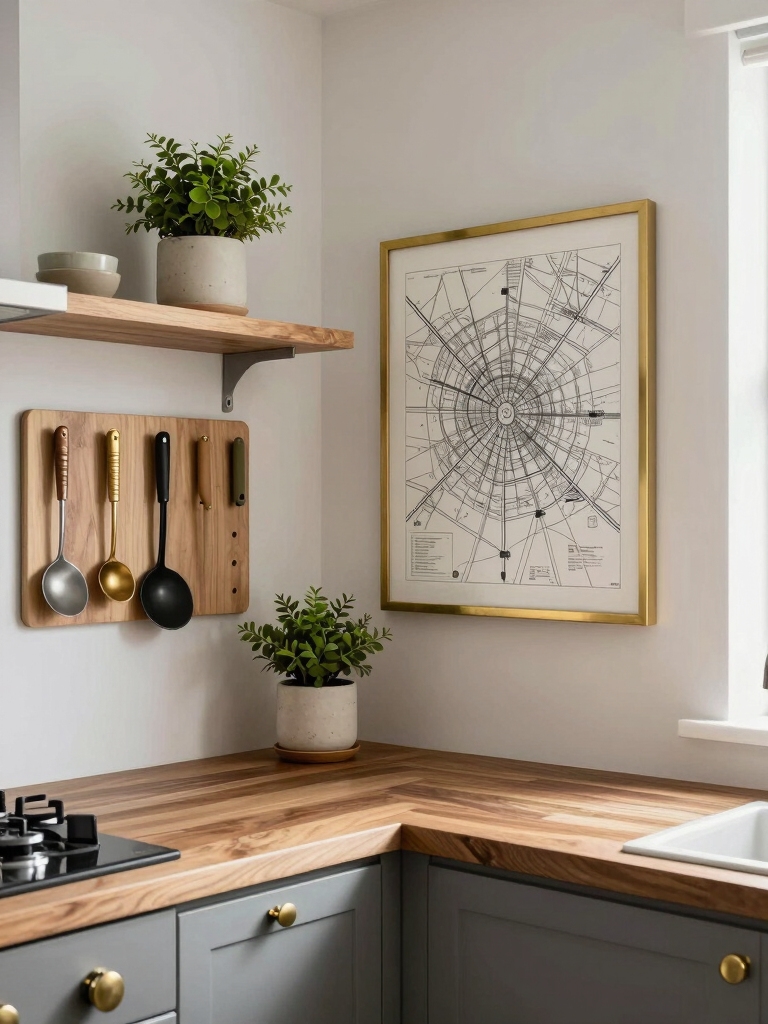
Turn Gaps Into Vertical Storage With Wall Rails

I’m sharing how wall rails can turn awkward gaps into smart vertical storage you’ll actually use. I’ll show you simple setups for organizing tools and utensils along edges, so every inch counts. Let’s explore practical layouts that boost vertical storage without clutter. Incorporating clever kitchen solutions can maximize every corner and make your small kitchen feel more spacious.
Wall Rail Organization
Wall rail organization is a simple, underused way to turn awkward gaps into vertical storage you’ll actually use.
I keep rails low, reachable, and labeled, so utensils, spices, or towels land where I reach most.
Install a slim, modular track, add hooks, baskets, and slim shelves.
My goal: tidy corners, quick access, less clutter, steady daily routine. Additionally, this method aligns with kitchen cabinet organizing ideas that maximize space efficiency in your kitchen.
Vertical Storage Boost
Vertical storage can transform underused gaps into everyday usefulness, and wall rails make it simple to do.
I tap into narrow walls, mounting rails at cheek height, then hang jars, spices, and small tools.
It clears counters, frees cabinet space, and keeps essentials reachable.
You’ll see organized, efficient prep flow, minimal fuss, and cleaner surfaces with every rail you install. Smart kitchen organization can greatly enhance the overall functionality of your kitchen space.
Narrow Pantry Pullouts for Essentials You Use Most
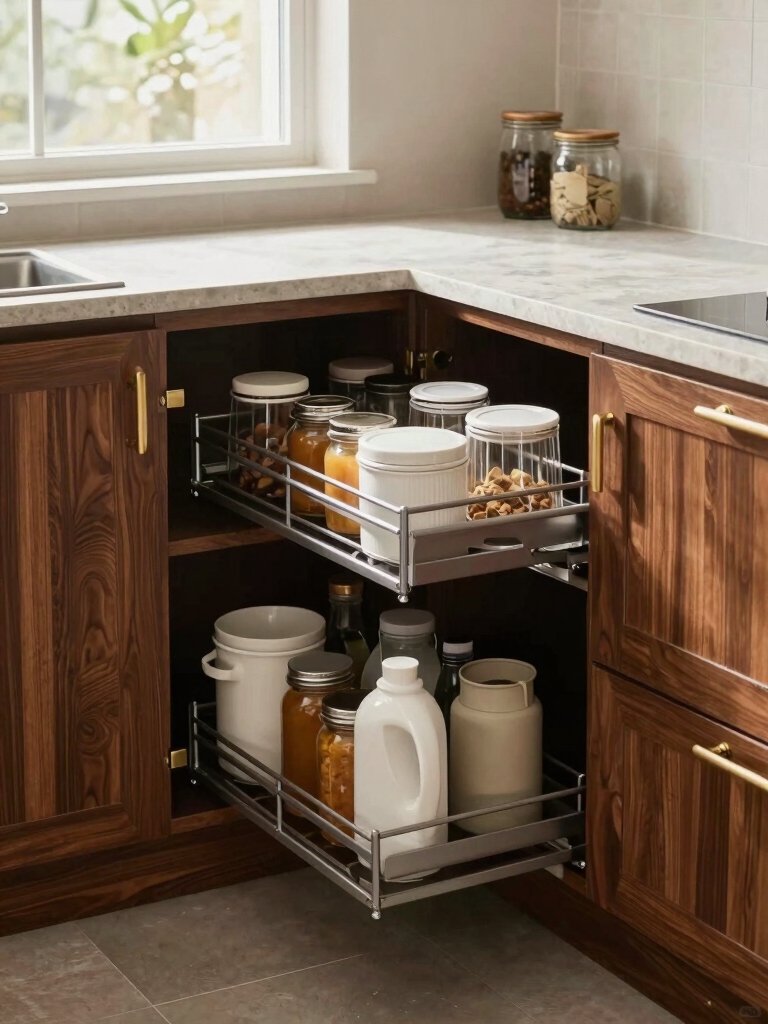
When planning a tight kitchen, narrow pantry pullouts are a game changer for the essentials you reach most. I keep staples accessible by grouping items—spices, oils, and snacks—on adjustable tiers. Label shelves lightly and use bins for small packets. Consistent depths prevent jams, while shallow pullouts reduce reach fatigue. Regular tidy-ups stop clutter from creeping back. Additionally, incorporating pantry ideas can enhance both functionality and style in your small kitchen space.
Rolling C Carts: Extra Counter Space on the Go
I love how a rolling C cart can instantly add extra counter space where you need it.
With mobility and compact design, it’s easy to pull in for prep or serve, then tuck away when you’re done. A rolling C cart can also help you achieve a luxurious look on a budget by incorporating stylish materials and finishes that elevate the overall aesthetic of your kitchen.
Let’s explore practical ways to use it and which features—like wheels, shelves, and durable tops—best fit your kitchen.
Rolling C Cart Mobility
Rolling C carts are a game changer for small kitchens, giving you extra counter space on the go without tying you to a single spot.
I’ll share practical moves to boost mobility and utility:
1) Choose a model with locking wheels for safety
2) Use a smooth-surfaced mat to prevent scratches
3) Assign zones for prep, waste, and tools
4) Keep frequently used items within reach
Compact Cart Versatility
These handy carts aren’t just mobile shelves—they’re flexible work surfaces that adapt to how you cook.
I use compact carts to add counter space where it matters, then stow them away when not needed. They hold tools, prep bowls, and ingredients within reach, saving steps.
Practical, organized, and sturdy, this versatility keeps kitchens neat while expanding flow and timing.
Brighten the Nook: Layered Lighting for Visual Space
Layering lighting in a cozy nook instantly adds perceived space and warmth, so start with a bright overhead fixture and build with task and accent lights that you can dim as needed.
- Start with dimmable ceiling light
- Add a focused task lamp
- Include under-cabinet LEDs
- Use a warm-toned accent bulb to finish
Reflect and Glow: Mirrors and Glass to Read as Bigger
Mirrors and glass are simple tools to expand a cozy kitchen corner without adding bulk.
I’ll show you practical tweaks: position a slim mirror opposite a light source to bounce brightness, choose glass-fronted cabinets to reflect airiness, and use a small easel or tray with glass for decor that doesn’t crowd counter space.
Focus on clarity, balance, and zero clutter.
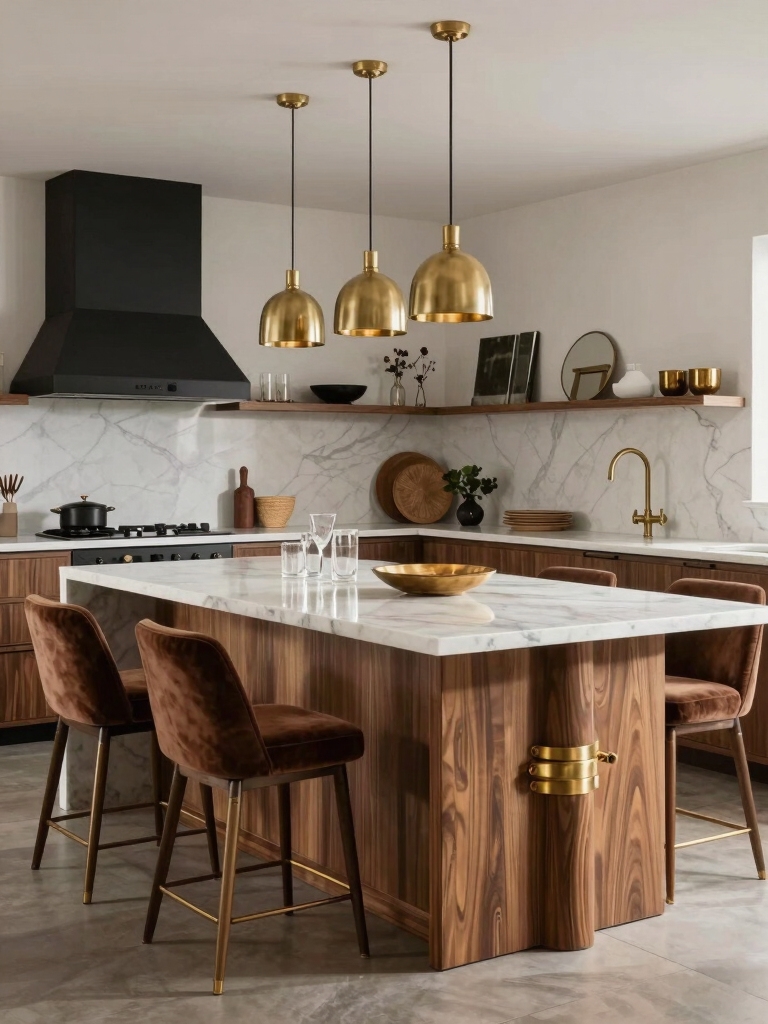
Counter-Height Islands: A Multi-Function Hub
Counter-height islands aren’t just stylish—they’re a practical hub you can actually use.
I design mine for flow, prep, and casual dining, keeping surfaces clear and tools within reach.
Here’s how:
- Maximize prep space
- Add seating for quick meals
- Integrate storage beneath
- Use durable, easy-clean finishes
Trust me, this setup streamlines kitchen routines without clutter.
Open Shelves That Are Handy, Not Messy
I’ll keep my open shelves handy by keeping utensils accessible where I use them most, so I can grab what I need in a flash.
I’ll hide bulk storage behind doors or baskets to reduce clutter while still staying organized.
I’ll curate visual interest with a purposeful mix of colors, textures, and a few well-chosen pieces.
Keep Utensils Accessible
Keeping utensils at arm’s reach is simple and smart: open shelves designed for quick access keep the main prep area tidy and efficient.
I’ll share practical, crisp tips you can apply now:
- Hang frequently used tools within easy reach.
- Group by function for fast grabbing.
- Use labeled jars for quick ID.
- Clean shelves weekly to stay organized.
Use Hidden Storage
Hidden storage keeps open shelves handy without turning them into eyesores.
I keep essentials tucked in drawers behind the counter, labels facing out, and a clear rule: every item earns its spot.
I group by use, not just by size, and rotate seasonal pieces.
A simple tray catches crumbs, and a compact bin hides mismatched lids.
Clutter minimized, function maximized.
Curate Visual Interest
Open shelves should be handy, not a magnet for clutter.
I show you how to curate visual interest without chaos, keeping every item purposeful and pretty.
Here are quick moves:
- Mix textures with bowls, jars, and a plant
- Vary heights using stacks and risers
- Group by function for quick grabs
- Rotate seasonal pieces to stay fresh
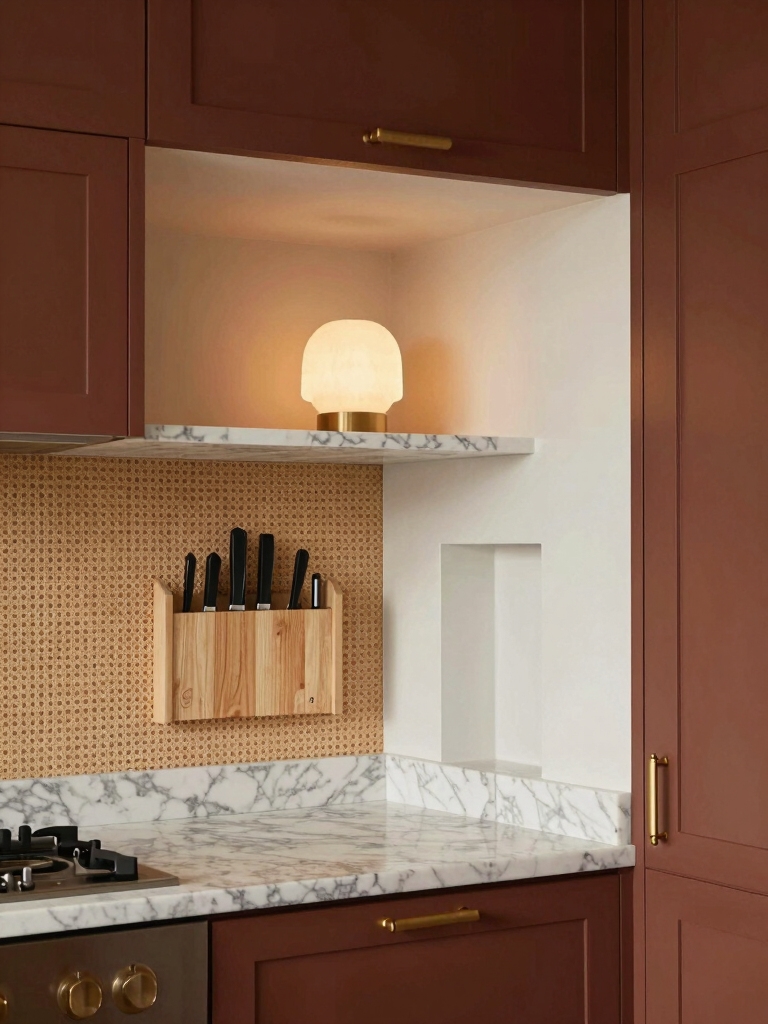
Door-Back Solutions: Tiny Footprint, Big Capacity
Door-back solutions are a simple way to boost storage without sacrificing floor space, and they fit anytime you’re short on cabinet or counter real estate.
I choose slim, stackable racks, hooks, and bin organizers that mount directly to doors. I label zones, group similar items, and remove unused gadgets.
Results: tidy, accessible, and no clutter dragging you down.
Create a Coffee or Snack Station in a Tight Nook
A tight nook can become a convenient coffee and snack station with a few deliberate moves.
I’ll show you a compact setup that’s practical and organized:
- Install a slim shelf at eye level for mugs and cups.
- Use a magnetic strip for lids and small utensils.
- Add a tiny glass jar for sugar and cream packets.
- Keep a small basket for snacks and napkins.
Custom Bins and Labels for Quick Find
I’ll show you how custom bins streamline my kitchen by speeding up find-and-collect routines.
Clear labeling gives you quick access, so you’re not hunting through drawers or shelves.
We’ll focus on space-saving organization that keeps essentials visible and easy to grab.
Custom Bins Efficiency
Custom bins and labels save time by making every item easy to spot. I optimize space by grouping similar items, labeling fronts clearly, and using uniform containers. This boosts efficiency without clutter.
- Assign specific bins per category
- Use color cues for quick recognition
- Keep labels visible at eye level
- Regularly purge and reorganize for consistency
Labeling Quick Access
Labels that are easy to read at a glance save me time during busy mornings.
I label bins clearly, using short names and color cues so I can grab what I need in seconds.
I group related items together and keep a quick reference on the cabinet door.
Readers, follow my simple system for faster, calmer kitchen flows.
Space-Saving Organization
Space-saving organization starts with purpose-built bins and clear, quick-find labels.
I’m sharing practical tips you can use today to reclaim cramped cupboards and counters. Keep items grouped, label boldly, and rotate often.
- Choose stackable bins
- Label by use
- Track contents with a simple key
- Maintain periodic tidy-ups
Color, Texture, and Cohesion: Personalize Your Corner
Color, texture, and cohesion aren’t afterthoughts—they’re the glue that makes your kitchen corner feel intentional.
I’ll guide you to pick a unifying color palette, mix textures for depth, and curate elements that echo your style.
Start with a focal piece, then layer accents sparingly.
Keep lines clean, proportions balanced, and belongings purposeful to create a calm, personal, cohesive space.
Conclusion
I’ve seen it happen in my own kitchen: a corner I once ignored suddenly becomes a workhorse. You’ll notice the same little coincidences—a hanger rail perfectly catching a stray mug, a slim pullout sliding open just as you reach for a jar. When you apply these hacks, space meets function, and you’ll wonder why you waited. Stick with the plan, trust the tiny tweaks, and watch your awkward spot become your favorite corner. You’ve got this.