

I’ll help you fit the whole crew with island bench seating that’s comfy, durable, and stylish—think 17–19″ seat height, 16–18″ seat depth, and 18–24″ per person for elbow room. I recommend L- or U-shapes with built-in storage, mix-in stools for flexibility, and performance fabrics for family life.
Bolt through framing, leave access for tightening, and layer pendants plus hidden outlets. Keep proportions tied to your counters so it looks curated; I’ll share layout and install tips next.
Why Bench Seating Works for Busy Kitchens
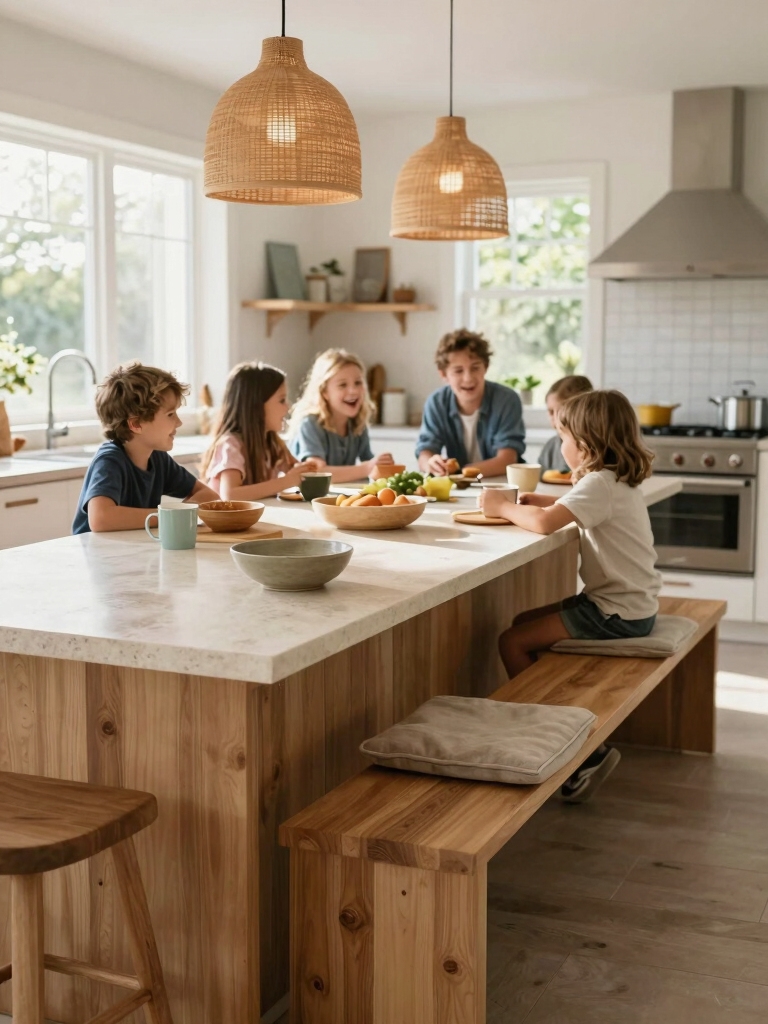
I’ve seen bench seating transform hectic kitchens into welcoming hubs, because it maximizes space, speeds up traffic flow, and invites everyone to gather without fuss.
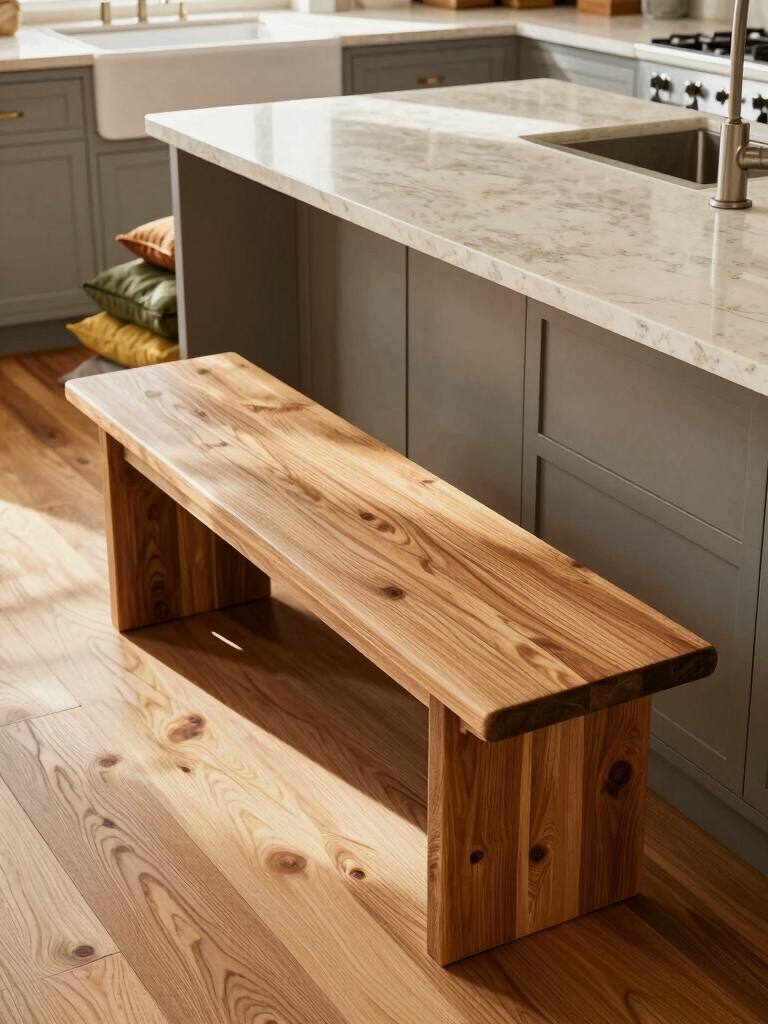
I love how a single bench tucks under counter overhangs, creates flexible seating for meals or homework, and hides storage. It feels curated yet lived-in, balancing practicality with warm, vintage lines for modern family life.
Bench seating also pairs well with kitchen islands that have table extensions, giving even more flexible seating options without crowding the workspace.
Measuring Your Space Before You Build
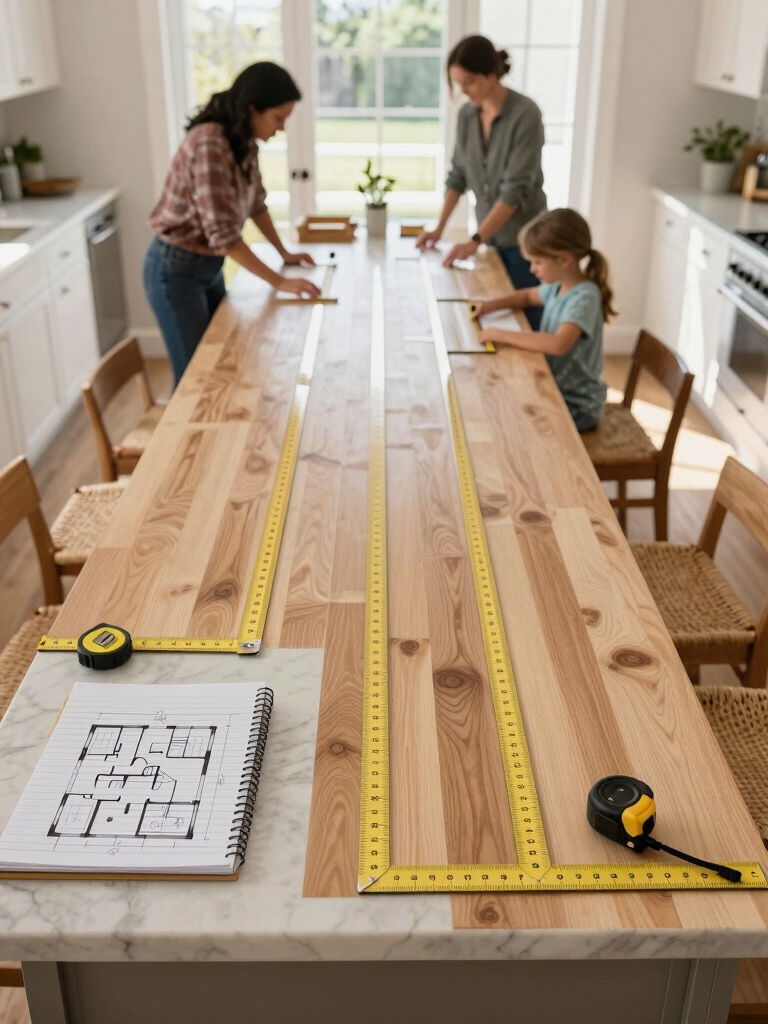
Before I cut a single board, I measure everything twice — and then once more — because tight fit and comfy seating start with accurate numbers.
I sketch the island, note clearances, aisle widths, and seat depth for adults and kids.
I account for overhangs, traffic flow, and appliance doors.
Precise measurements save time, material, and headaches during build and daily use.
Seamless designs that consider island placement and circulation create better flow throughout the kitchen.
Choosing the Right Bench Configuration
Once my measurements are set, I consider how people will actually use the island to pick a bench layout that fits both room and routine.
I weigh straight, L-shaped, or U-shaped benches against traffic flow, storage needs, and sightlines.
I favor flexible mixes—built-in seating with movable stools—so mornings, homework, and dinner parties all feel effortless and intentionally cozy.
Islands can also become focal points when designed with eye-catching details that complement the rest of the kitchen.
Bench Depth and Seat Height Guidelines
Because comfort hinges on just a few key numbers, I start by nailing down bench depth and seat height before anything decorative.
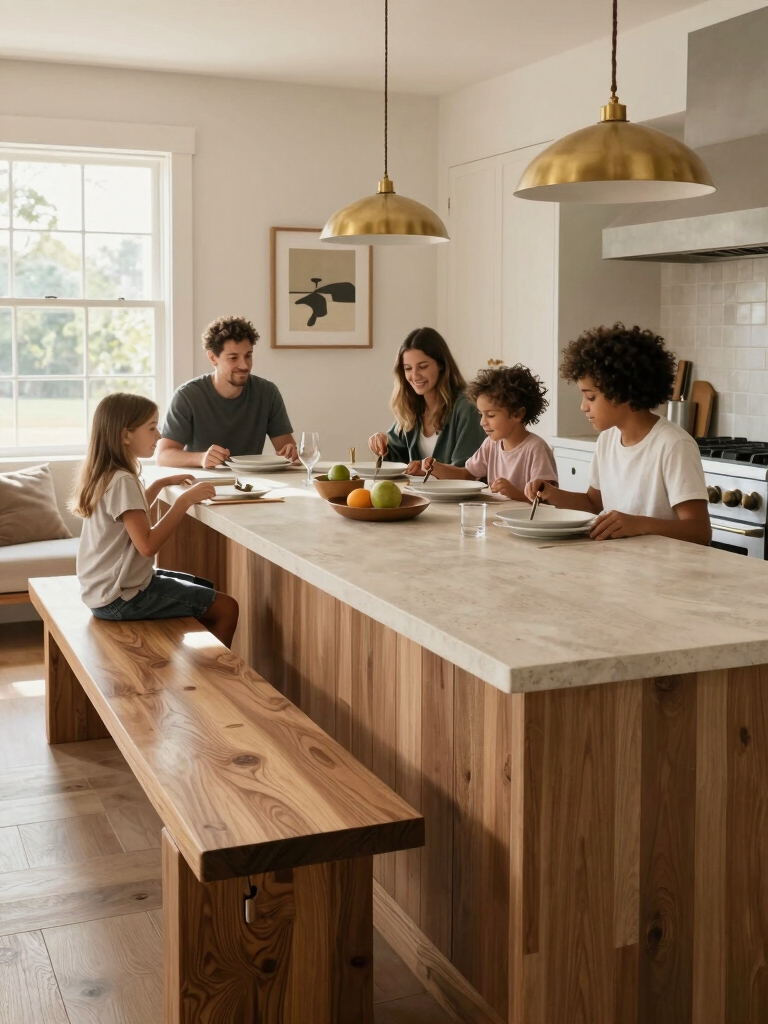
I aim for 16–18 inches seat depth for dining posture and 17–19 inches seat height to align with counter and chair standards.
Allow 12–15 inches knee clearance under counters and leave 10–14 inches between benches for circulation and ease.
Kitchen islands often combine work and dining functions, creating a popular island-table hybrid that maximizes both seating and prep space.
Built-In Vs Freestanding Bench Options
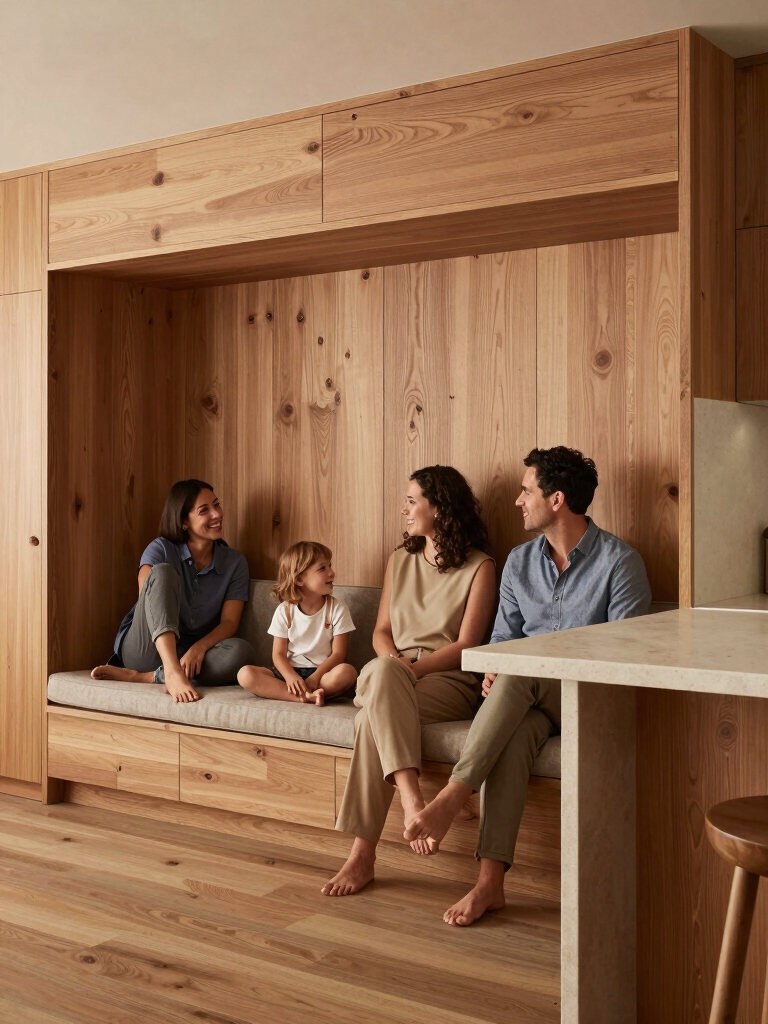
While I love the clean custom look of a built-in bench, I also appreciate how a freestanding piece lets me change the room on a whim.
Built-ins anchor space, hide storage, and feel tailored; freestanding benches add personality, mobility, and vintage charm.
I mix materials, swap cushions seasonally, and balance permanence with flexibility so the island suits daily routines and occasional rearranging.
One great way to create a cozy family meal spot is to design the seating around the island like a cozy kitchen island booth to encourage lingering at the table.
Designing for Comfortable Seating Capacity
When I plan bench seating I first measure the counter overhang to know how far stools or a bench can tuck under without looking cramped.
Then I decide on a seat width per person—usually 18–24 inches depending on how cozy or spacious I want the setup to feel.
Finally I factor in legroom so people can sit and move comfortably, adjusting bench depth or counter height as needed.
Small islands can still work well in tight layouts, so I often consider space-saving layouts to maximize function without overwhelming the room.
Measure Available Counter Overhang
Standing at the island, I measure the counter overhang to make sure stools fit comfortably and knees won’t bump the cabinet face; this simple check tells me how many seats the island can actually support.
I note overhang depth, legroom under the counter, and countertop thickness, then sketch clear offsets.
That gives realistic spacing for cozy gatherings without awkward scrapes or cramped knees. I also consider typical clearances and stool spacing recommendations to balance traffic flow and seating capacity.
Choose Seat Width per Person
I pick a practical seat width as if I’m setting the table for guests—it’s the single smartest move for making your island feel welcoming and usable.
I balance comfort and capacity: 18–24 inches per person depending on cushion and style, allow extra for loafers or kids, and stagger widths where needed so the bench reads intentional, cozy, and effortlessly lived-in.
Plan Comfortable Legroom
Balancing legroom is where function meets hospitality, so I plan the space to keep knees happy and conversation flowing.
I account for overhang, seat depth, and aisle clearance, choosing proportions that suit kids and adults.
I mix bench height with cushions and low-profile backs, preserving cozy vintage character while ensuring people can sit, slide, and linger without bumping toes or elbows.
Storage Solutions Under Bench Seats
Let’s lift the bench cushion and make every inch count: under-seat storage turns that cozy nook into a tidy workhorse, hiding away bulky cookware, seasonal linens, or kids’ art supplies without sacrificing style.
I favor deep drawers with smooth slides, divided trays for utensils, and baskets for easy access. Mixing stained wood fronts with brass pulls keeps the look modern-vintage and endlessly practical.
Cushion and Upholstery Choices for Durability
When you sink into a bench seat every day, the cushion’s fabric and fill have to stand up to spills, kids, and constant use—so I focus first on performance rather than just looks.
I choose high-density foam with a softer topper for comfort, pair it with abrasion-resistant, naturally breathable fabrics, and reinforce seams. Small vintage details—piping, buttoning—keep it soulful without sacrificing longevity.
Easy-Clean Materials and Finishes
I like to pick surfaces and finishes that stand up to real life, so I favor scratch-resistant woods and laminates on island benches.
For upholstery, I lean toward stain-repellent fabrics and treated leathers that wipe clean without losing their character. Together they give you a kitchen that feels lived-in and stylish, but won’t need constant fussing.
Scratch-Resistant Surfaces
You want a kitchen island that stands up to daily life, so I choose scratch-resistant surfaces that are easy to clean and built to last.
I favor matte finishes, durable laminates, and honed stone with a soft patina — they hide wear without masking character.
Quick wipe-downs and occasional gentle polish keep the bench handsome and honest for years.
Stain-Repellent Fabrics
After picking scratch-resistant surfaces, I turn to the seating fabrics that will actually see most of the action. I pick stain-repellent weaves with a lived-in look so spills wipe away yet character builds.
Consider options that marry durability and warmth:
- Performance linen blend
- Waxed cotton
- Vinyl with texture
- Crypton-treated velvet
- Olefin with vintage patina
Backrests, Armrests, and Ergonomics
When I choose seating for a kitchen island, I think about how backrests and armrests shape comfort and posture as much as style.
I favor low, supportive backs with gentle lumbar curves and slender armrests that don’t block movement.
Firm cushioning, correct seat height, and a slight recline keep conversations lively and bodies comfortable—from quick breakfasts to long, lingering meals.
Mixing Bench Seating With Stools and Chairs
I like pairing a built-in bench with stools and a couple of chairs to keep a kitchen island flexible and visually interesting.
I mix heights, materials, and back styles so everyone feels comfy and the space reads layered-modern. Try combinations like:
- Low upholstered bench
- Wooden counter stools
- A vintage bentwood chair
- A swivel barstool
- Cushioned occasional chair
Lighting and Power Considerations at the Island
How do you make an island feel as functional as it’s stylish? I focus on layered lighting: pendant task lights for prep, recessed ambient fixtures, and subtle under-counter LEDs for evening.
I plan outlets at seating and prep zones, hide USBs in drawers, and guarantee wiring follows code. Balance brightness and warmth so the bench area invites conversation and practical use.
Style Coordination With Cabinets and Countertops
I’ll help you tie the island bench into the room by matching tones and finishes so the seating feels like it belongs, not like an afterthought.
We’ll talk about balancing materials and color for contrast and cohesion, and how to echo cabinetry or countertop hues without overdoing it.
Then I’ll point out small hardware accents that can quietly unite the whole scheme.
Matching Tone and Finish
While coordinating tones and finishes can feel intimidating, I find it’s really about balance—pairing your island’s wood or paint with cabinet and countertop materials so nothing competes for attention.
I choose finishes that echo one element and contrast another, creating subtle cohesion.
- Repeat a warm wood tone
- Matte vs. glossy accents
- Metal hardware ties
- Textured paint choice
- Finish sample testing
Balancing Materials and Color
Because kitchens feel most settled when materials and color talk to each other, I look at the island as the conversation starter between cabinets and countertops.
I balance warm woods with cool stone, introduce a painted base to echo cabinetry, and use subtle contrasts to highlight texture.
The bench becomes a bridge — cohesive, layered, quietly vintage with modern clarity.
Coordinating Hardware Accents
Think of hardware as the jewelry for your island bench — it ties cabinetry and countertops together and sets the tone without shouting. I pick finishes that echo counters and wood grain, balancing scale and era.
Consider these quick choices:
- Brushed brass for warm marble
- Aged nickel with cool quartz
- Patina bronze for reclaimed wood
- Matte black for contrast
- Satin chrome for modern-vintage cohesion
Child-Friendly and Pet-Proof Bench Designs
As I plan a kitchen island bench for a busy household, I focus on materials and details that stand up to sticky hands, muddy paws, and everyday spills without losing charm.
I choose wipeable, durable fabrics, rounded edges, integrated storage for toys and leashes, and raised bases for easy cleaning.
A muted, vintage palette keeps things cozy while hiding wear and tear.
Installation Tips and Maintenance Plans
Now I’ll walk you through the practical side: measuring for proper clearance so stools and traffic flow feel effortless, and securing the bench to the floor so it stays steady through everyday life.
I’ll also cover routine cleaning and sealing to keep wood looking warm and wearable over years.
Stick with me and you’ll get straightforward, vintage-inspired tips that actually work.
Measuring for Proper Clearance
Before you order stools or set the island height, I measure the space like I’m staging a small room—because clearance makes or breaks comfort.
I check sightlines, walk paths, and knee room, then adjust. My quick checklist:
- Seat height vs countertop gap
- 18–24 inches legroom
- 36-inch aisle minimum
- Toe-kick clearance
- Visual balance with cabinetry
Securing Bench to Floor
Having measured clearance and sightlines, I turn next to making the bench part of the room — literally anchored to the floor so it feels stable and safe.
I bolt through skirt framing into joists when possible, use concealed brackets on tile or concrete with proper anchors, shim for level, and leave access for tightening.
I document hardware and inspection intervals for simple upkeep.
Routine Cleaning and Sealing
Regularly I wipe the bench down and inspect seals so small problems don’t become big ones. I keep finishes healthy with gentle cleaners and timely resealing, pairing routine care with quick repairs.
- Use pH-neutral cleaner weekly
- Dry surfaces immediately
- Reapply sealant yearly
- Sand and spot-finish chips
- Check hardware and caulk lines
This rhythm preserves charm and function.
So go ahead—bench the conventional chairs and let the island swallow your crew, crumbs and all.
I’ve measured, debated depths, argued with my spouse about built-in versus freestanding, and emerged a bench evangelist who still burns toast.
Your kitchen will be rowdy, roomy, and oddly classy: a modern-vintage sitcom set where kids commandeer the seats and pets claim the crumbs. Install well, wipe frequently, and enjoy the charming chaos you deliberately invited.


