I’ve planned outdoor sink stations that cut cleanup time and keep things simple. Start with the right basin setup—single for basics, dual for multitasking—then map a compact footprint that minimizes steps and clusters near prep zones. Prioritize durable materials, weatherproof power, proper drainage, and hot-water options. Add shelves, labeled bins, hooks, and integrated waste stations to stay organized. I’ll show layouts and warranties to help you choose confidently—plus tips that’ll save you hassle down the line. You’ll learn more as you continue.
How to Plan an Outdoor Sink Station: Goals and Questions

Planning an outdoor sink station starts with a few clear goals: what tasks will you handle there, how much space do you need, and how will water, drainage, and cleanliness work in an outdoor setting.
I map workflows, estimate splash zones, and prioritize containment.
Then I ask about power access, weather exposure, and material durability to keep cleanup simple and reliable.
How to Decide: Single Basin vs. Dual-Basin Configurations

When deciding between a single basin and a dual-basin outdoor sink, start by mapping the tasks you’ll actually perform there and how often you’ll need to multitask.
If you routinely wash large pots, prep veggies, and rinse pans simultaneously, a dual-basin setup saves trips and cross-contamination worries.
For simple setups, a single basin keeps costs down and maintenance easy.
Sizing Your Space: Choosing the Right Footprint

Choosing the right footprint starts with evaluating the footprint itself—how much space you have and how it will be used.
I’ll map out available space, plan the layout, and match scale and proportion to your needs so everything fits without feeling crowded.
Let’s focus on practical fit, clear sightlines, and a layout that supports efficient workflow. Additionally, consider using outdoor kitchen design layout formulas to maximize functionality and ensure your space is well-organized.
Footprint Footprint Fit
A footprint isn’t just about size—it’s about fit. I scan the space, not the number, and I balance reach with accessibility.
Measure door clearance, cabinet depth, and bench height, then add a buffer for trash bins and hoses.
Plan for future tweaks: movable carts, reconfigurable stations, and easy-wipe zones. Precision now saves adjustments later. Additionally, consider incorporating affordable outdoor kitchen ideas to enhance functionality without breaking the bank.
Available Space Layout
I start from the footprint you’ve laid out and map it to the space you’ve got.
Measure clearances, door swings, and utility access before placing a sink station.
Prioritize flow: prep zone to rinse, then dry area, with a compact layout that keeps trash, soap, and towels reachable.
Leave room for movement, tools, and future tweaks. Incorporating an outdoor kitchen design can enhance the overall experience of your space.
Scale Proportion Planning
Scale proportion planning comes down to sizing your footprint to fit how you’ll actually use the space.
I’ll help you map essentials, keep flow smooth, and avoid crowding. Think work zones, accessibility, and future needs.
- Define main tasks and primary workflow
- Measure counter and sink reach for comfort
- Leave clearance for doors, drawers, and swiveling chairs
- Plan for seasonal gear storage and cleanup ease
- Consider how indoor outdoor kitchen flows can enhance your overall layout and usability.
Essential Features First: Hot-Water Tap and Garbage Disposal Options

I’ll start by weighing hot-water tap options that fit outdoor use and ease of setup, so washing prep stays quick and reliable.
Then I’ll compare garbage disposal choices for durability and outdoor-friendly performance, including noise and weather resistance.
Finally, I’ll flag key plumbing considerations—slab or wall supply lines, drainage, and frost readiness—to keep the whole station clean and functional.
Hot-Water Tap Options
When choosing a hot-water tap for an outdoor kitchen, think about reliability, convenience, and safety.
I’ll outline practical options to fit your setup without fluff, so you can select confidently and install smoothly.
- Look for stainless steel bodies for durability and corrosion resistance.
- Choose a unit with adjustable temperature control for safety.
- Verify cold-water supply integration and shutoff accessibility.
- Consider compact design for counter space and clearance.
Garbage Disposal Choices
Need to choose a garbage disposal that pairs well with a hot-water tap for outdoor use?
I look for compact, weatherproof models with simple wiring and reliable seals. A stainless, jam-resistant unit handles citrus peels and small bones, while a quick-connect hose makes cleansing easy.
Choose steady power, low vibration, and easy-access cleaning ports for maintenance without clutter or hassle. Additionally, consider units that feature essential outdoor kitchen elements to enhance your overall cooking experience.
Plumbing Considerations
Outdoor kitchen plumbing starts with pairing a hot-water tap with a garbage disposal that can handle outdoor conditions.
I’ll guide you toward reliable choices, focusing on durability, safety, and ease of maintenance, so cleanup stays simple.
- Choose weather-resistant taps and seals
- Guarantee disposal models handle outdoor grime
- Verify correct drainage and venting
- Plan drainage cleanouts and access points
Additionally, consider incorporating rustic outdoor kitchens that blend functionality with charm while remaining budget-friendly.
Cleaning Up Efficiently: Accurate Drainage and Venting Basics

Effective drainage and venting are the backbone of a clean, leak-free outdoor sink setup.
I’ll walk you through sizing traps, proper slope, and vent placement, so clogs don’t derail your cleanup. Use a generous trap adapter, keep lines clear, and test with water running before sealing.
Remember: correct venting prevents siphoning, guarantees airflow, and protects your fixtures long-term.
Integrated Waste Stations: Trash and Recycling Cabinets
I’ll walk you through designing Integrated Waste Cabinets that keep trash and recycling streamlined right at the sink.
We’ll cover how to split bins, add proper ventilation, and position doors for easy disposal and quick maintenance.
Let’s map the workflow so trash goes in one step, recycling in another, and cleanup stays fast and simple.
Integrated Waste Cabinet Design
Integrated waste cabinets streamline cleanup without chasing bins around the yard. I design these setups to fit your space, budget, and habits, so sorting feels natural, not nagging. Here’s what to contemplate:
- Pull-out bins for easy access and cleaning
- Slim, dual-compartment layouts
- Odor-sealing lids and venting
- Durable, weatherproof finishes and hardware
Incorporating outdoor kitchen layouts can enhance the functionality and aesthetic of your space, making it an ideal environment for entertaining.
Trash And Recycling Workflow
With integrated waste stations in mind, I’ll map out a practical trash and recycling workflow that fits your outdoor kitchen.
I group recyclables separate from trash, label bins clearly, and place them near prep zones to minimize movement.
I suggest a weekly bag refresh, spill containment, and easy-to-clean liners.
Consistency beats clutter; train guests with simple, repeatable steps. Additionally, consider the outdoor kitchen layout to ensure that waste stations are conveniently located for efficient cleanup.
Flexible Rinsing: Prep Sinks With Pull-Out Hoses
A flexible rinse makes prep work quick and clean, so I reach for a sink with a pull-out hose whenever I’m setting up an outdoor station.
- Reachable spray for veggie wash and dairy wipe-downs
- Swivel reach to rinse bowls without moving the station
- Gentle flow to save water and avoid splashes
- Easy retraction for compact countertops and tidy edges
Cutting Boards and Prep Surfaces Built In
When I set up outdoor stations, I want cutting boards and prep surfaces that stay sturdy and handy right at counter level.
Built-in boards prevent clutter, so I mount a durable, recessed surface near the sink and top it with a non-slip mat.
Use edge guards, compost bin access nearby, and a knife-friendly groove to keep prep flowing smoothly.
Weatherproofing and Durability: Materials That Last Outdoors
When I choose weatherproof materials, I look for outdoors-ready options that resist sun, humidity, and temperature swings.
I favor corrosion-resistant finishes and smart seal systems that keep joints and connections watertight over time.
Together, these choices shorten maintenance while extending the life of your outdoor kitchen sink setup.
Weatherproof Material Choices
Weatherproof material choices for an outdoor kitchen sink station are all about durability, maintenance ease, and resistance to moisture, UV, and temperature swings.
I’ll show practical options you can trust.
- Stainless steel for rust resistance and cleanability
- Powder-coated aluminum for light weight and protection
- High-pressure laminate with UV glaze for color longevity
- Solid surface composites for seamless, repairable work zones
Corrosion-Resistant Finishes
Corrosion-resistant finishes matter most outdoors because they guard metal from the daily grind of moisture, salt, and temperature swings.
I choose coatings with zinc, epoxy, or powder formats that bond well and resist chipping.
Rinse regularly to remove salts, avoid abrasive cleaners, and recoat when dull.
Maintain labels, follow manufacturer guidance, and select finishes suited for your climate for lasting durability.
Durable Seal Systems
Durable seal systems are what keep outdoor sinks functioning year after year, resisting moisture, temperature shifts, and the grime that comes with outdoor use.
I choose materials wisely, install correctly, and test seals regularly to prevent leaks and damage.
- Use silicone or polyurethane sealants rated for outdoor exposure
- Check gaskets for cracks and replace promptly
- Apply weatherproof caulk at joints annually
- Seal cabinets and connections against humidity and debris
Drainage Design: Slope, Traps, and Outdoor Grading Considerations
When designing drainage for outdoor kitchen sink stations, I start with the slope, traps, and outdoor grading to prevent pooling and sewer gas backflow.
I keep slopes gentle enough for flow without splash, install traps close to the sink, and guarantee cleanouts are accessible.
Check local codes, use durable materials, and test with water to confirm smooth drainage before finishing.
Power for Outdoor Sinks: Electrical and Plumbing Requirements
Powered outdoor sinks need a solid electrical and plumbing plan that fits the same practical mindset you used for drainage.
I’ll keep it simple: run dedicated circuits, GFCI protection, weather-resistant outlets, and proper conduit.
Also, install hot/cold water lines with anti-siphon valves.
- Dedicated circuit and GFCI
- Weatherproof outlets
- Proper conduit and strain relief
- Anti-siphon valves for water lines
Budget Ranges: Affordable to Premium Outdoor Sink Stations
Budget ranges for outdoor sink stations run from affordable DIY setups to premium, built-to-last configurations.
I’ll walk you through what you get at each price tier, focusing on practicality. You’ll learn where to save without sacrificing reliability, and what features truly add value outdoors.
My goal is to help you choose a setup that fits your space, workflow, and budget smartly.
DIY vs. Pre-Made: Which Path Fits You
DIY or pre-made? I weigh effort, cost, and timing to help you decide. I prefer what saves time without breaking the bank, yet still fits my space and use.
Here’s how I’d choose:
- Assess DIY skills vs. project complexity
- Compare up-front costs and long-term maintenance
- Consider delivery, warranties, and parts availability
- Think about customization versus standard layouts
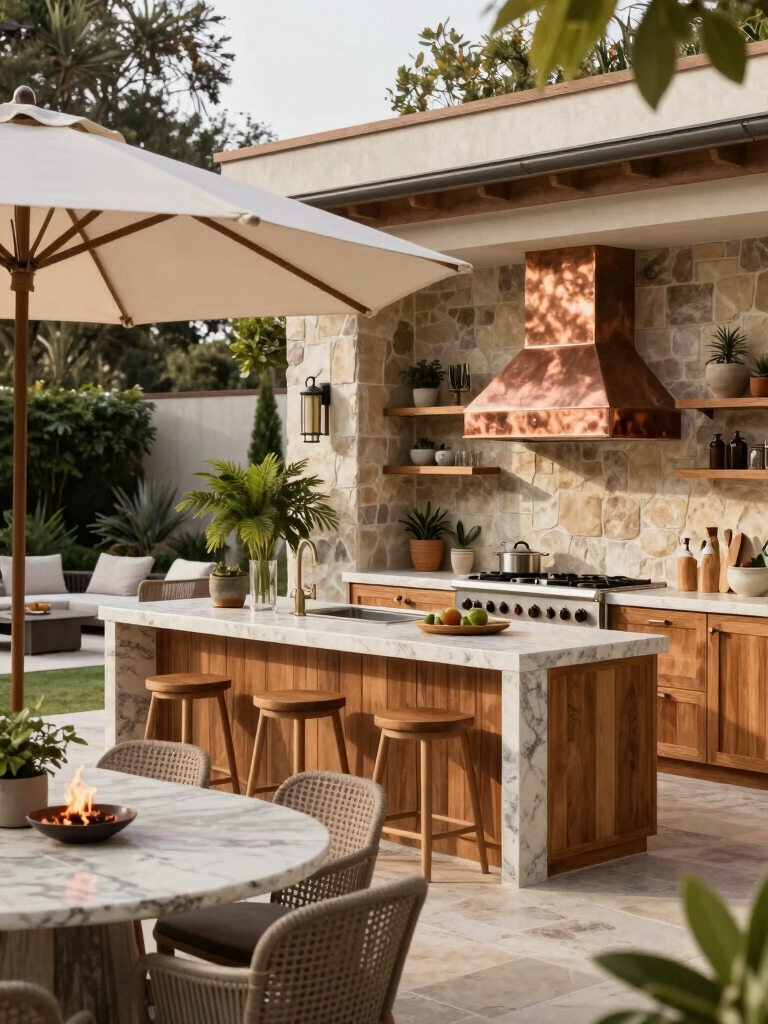
Aesthetics That Match Your Outdoor Kitchen Style
If you’ve weighed DIY versus pre-made, you’re ready to shape an outdoor kitchen that looks as good as it functions.
I suggest picking materials and colors that echo your home’s tone, then balance durability with texture.
Keep lines simple, hardware cohesive, and integrated sinks unobtrusive.
Small details—drainage, trim, and mockbacks—tie style to cleanup practicality without clutter.
Lighting and Safety for Nighttime Cleanup
Good lighting makes nighttime cleanup practical and safe, so I start by outlining a simple plan that covers task lighting, ambient glow, and spill control.
- Use weatherproof task lights over the sink and prep area
- Add a soft ambient glow with portable lamps
- Choose non-slip, sealed outlets and cords
- Keep spill mats and quick-dry towels nearby for safety
Storage Beyond the Sink: Shelves, Hooks, and Organizers
Shelves, hooks, and organizers aren’t afterthoughts—they’re the glue that keeps your outdoor sink station efficient.
I’ll show you how to place sturdy shelves, install hooks for your most-used tools, and pick organizers that hold essentials without crowding the space.
Let’s map a simple setup that makes cleanup quicker and preparation smoother.
Shelves That Stand Ready
Hooks and brackets only go so far—real storage is about shelves that stand ready.
I’ll share practical, ready-to-use ideas to keep essentials accessible and organized.
- Install a wall shelf at elbow height for frequent items
- Use labeled bins on open shelves to declutter
- Pair moisture-resistant material with a clear front for visibility
- Add a narrow spice rack beside the sink for quick access
Hooks for Handy Tools
Let’s start with the tools you reach for most: a sturdy set of hooks that keep your hand tools within arm’s reach and off the counter.
I mount compact hooks near the sink for tongs, brushes, and gloves, so cleanup stays quick. Use evenly spaced hooks, stainless steel, and labeled reels for fast access.
Maintenance is simple—wipe, dry, rehang, repeat.
Organizers for Essentials
With the basics of hanging tools in place, I turn to organizing what everyone reaches for most—essentials that live beyond the sink.
I keep storage simple, accessible, and labeled, so cleanup stays fast rather than chaotic.
- Over-sink shelves for dry goods
- Hooks for towels and cloths
- Bins for sponges and brushes
- Clip-on organizers for sprays and cleaners
Maintenance Tips to Extend Life and Preserve Finish
Regular cleaning is the cornerstone of a long-lasting outdoor kitchen sink station; I’ll walk you through practical steps to keep corrosion at bay and the finish looking sharp.
Wipe surfaces daily with a mild soap solution, then rinse and dry thoroughly.
Seal metal mirrors, check seals quarterly, and address rust spots promptly.
Use nonabrasive pads and avoid harsh chemicals that dull shine.
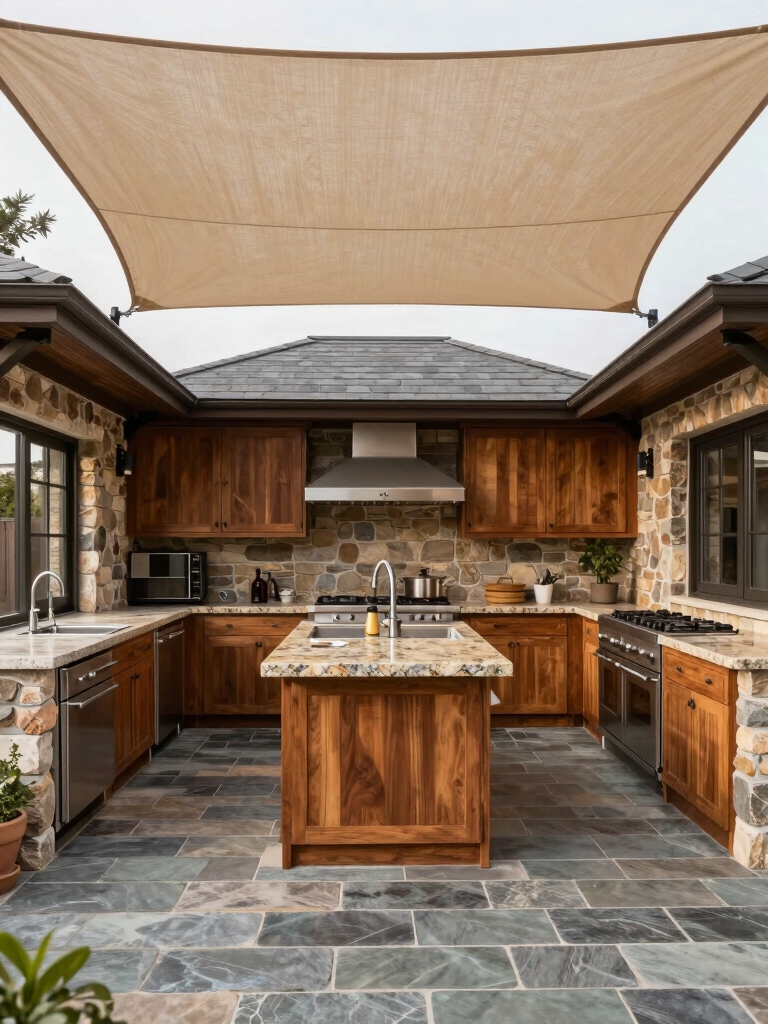
Case Studies: Layout Ideas That Work in Real Yards
Case studies from real yards show how layout choices translate to usable, efficient outdoor kitchens.
I’ve seen setups that cut steps, cluster sinks near prep zones, and place trash/recycling within arm’s reach.
Here are layout ideas that actually work:
- Zone hot, cold, and wash areas in logical sequence
- Position plumbing and drainage for easy cleanup
- Include nearby prep counter and storage
- Plan trees, shade, and weather protection nearby
Warranties and After-Sales Support: What to Check Before You Buy
So, what should you look for in warranties and after-sales support before you buy?
I check coverage length, exclusions, and transferability, so you can gauge true protection.
I also verify service responsiveness, replacement parts availability, and clear return policies.
Ask for written terms, document timelines, and a dedicated support contact.
Choose vendors with proactive maintenance tips and reputable callbacks.
Conclusion
Here’s the bottom line: designing an outdoor sink station isn’t about chasing perfection, it’s about permission—permission to keep messes outside where they belong. With clear goals, smart layouts, and practical features, you’ll glide from rinse to wipe without tripping over clutter. If something doesn’t fit today, consider it a gentle nudge toward a better plan tomorrow. Start small, scale thoughtfully, and enjoy the quiet confidence of a space that actually works when you need it.