I’ll help you turn tiny kitchen walls into useful, stylish space beyond basic prints: think narrow floating cabinets and recessed niche shelves for spices and baking sheets, a magnetic spice wall and rail for cookware.
A pegboard or picture ledges for tools and recipe cards, textured open shelving and peel-and-stick backsplash for depth, plus vertical herb planters and a small seasonal corner. These ideas save counters and add personality — keep going and you’ll find practical how-tos and styling tips.
Maximize Storage With Narrow Floating Cabinets

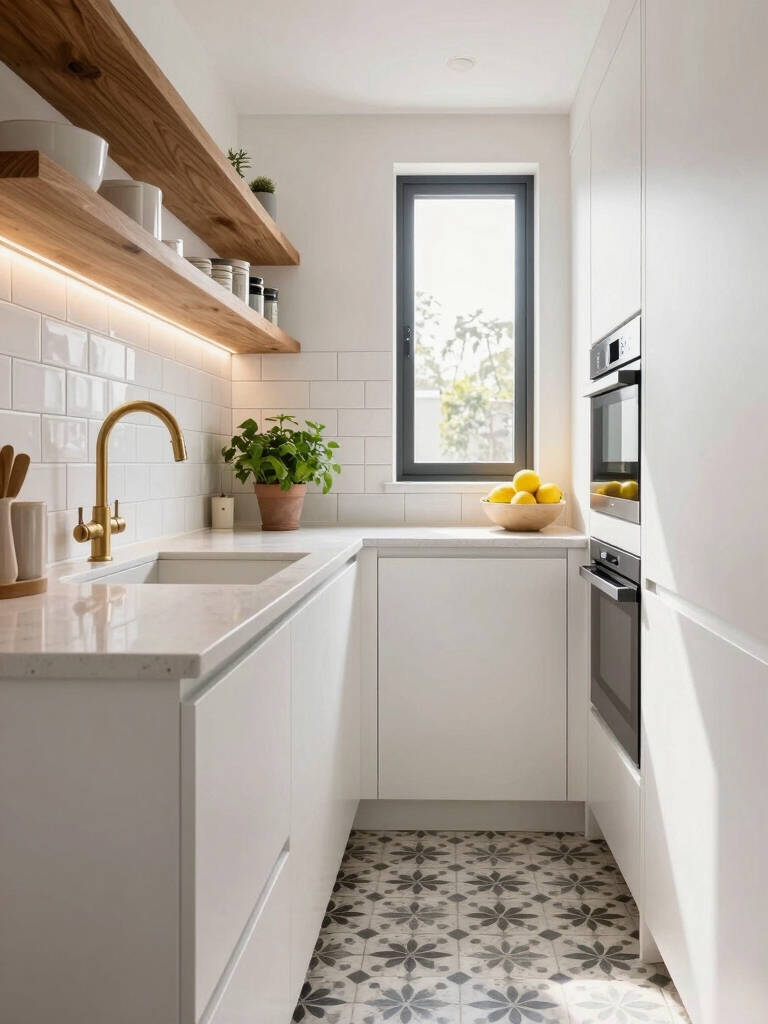
Think vertical: I install narrow floating cabinets to squeeze storage into slim wall gaps without crowding the room.
I choose shallow depths, clean lines, and mixed finishes to match existing cabinets.
They keep oils, baking sheets, and seldom-used gadgets handy while freeing counter space.
I mount them at varied heights for visual interest and easy reach, keeping the kitchen airy and efficient.
These compact units also serve as clever small storage solutions that make the most of every inch.
Create a Magnetic Spice Wall

I pulled a slim sheet of magnetic steel onto a spare wall and instantly cleared clutter from my counters by mounting clear glass spice jars in neat rows; a magnetic spice wall keeps seasonings visible, accessible, and easy to reorganize as my needs change.
I love how it’s tidy, customizable, and decorative.
- Label jars for quick grabs
- Arrange by frequency of use
- Swap seasonal blends easily
Small kitchens benefit from clever storage that hides clutter like pros.
Install a Functional Pegboard Display
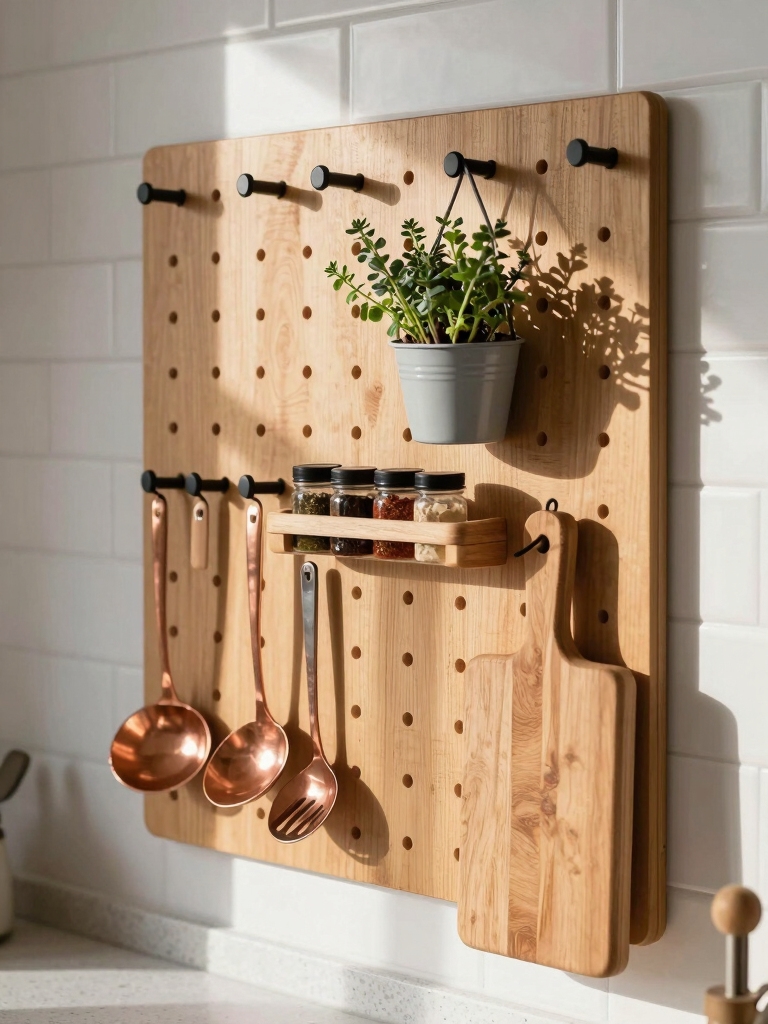
A pegboard can pull double duty as art and storage, and I’ve found it’s one of the smartest ways to free up counter and cabinet space in a small kitchen.
I hang frequently used tools, planters, and a cutting board on hooks, keeping things visible and tidy.
Paint it a bold color, mix hook sizes, and rearrange as needs change for maximum flexibility.
Tiny kitchens benefit from solutions that maximize space and make every inch count.
Add Depth With Textured Open Shelving

If you liked the pegboard idea, try using open shelving with textured materials to give your small kitchen more visual depth while still keeping things functional.
I recommend mixing wood, metal, and woven elements to layer interest without clutter.
I’ll show simple styling that feels intentional and practical.
- Reclaimed wood
- Brushed steel brackets
- Woven baskets
Consider pairing these with reclaimed wood shelving for a cohesive, sustainable look.
Hang Vertical Herb Planters

Growing herbs vertically is one of my favorite small-kitchen tricks because it saves counter space while giving the room fresh scent, color, and function.
I mount slim planters or pocket planters on an unused wall, grouping basil, mint, and thyme for easy reach.
Watering’s simple with a drip tray; sunlight matters, so place near a bright window or add a grow light.
I also use these setups to expand my pantry storage in tight spaces by combining pantry ideas with the vertical planters.
Use Slim Rail Systems for Utensils
I like using slim rail systems to maximize vertical storage on tight walls, keeping counters clear and tools within reach.
I pick rails with thin profiles so they feel intentional, not bulky, and hang only what I need.
I arrange utensils by task—baking, prep, cooking—so everything’s easy to grab when I’m working.
They also complement other clever small kitchen ideas like small counter space solutions to create more functional room.
Maximize Vertical Storage
Grab a slim rail and turn an empty strip of wall into your most efficient tool drawer—I love how these systems keep utensils visible, accessible, and off crowded counters.
I mount rails vertically to free counter space and group tools by use.
Try hooks and small shelves to adapt.
Simple, stylish, and space-saving.
- Hang frequently used spatulas
- Add a magnetic strip
- Stack measuring cups
Clever Kitchen Solutions for Tiny Spaces You’ll Love can inspire more ways to save space with slim rails and vertical storage, like grouping items by function and installing slim rail systems for maximum efficiency.
Choose Slim Profiles
For a narrow kitchen, I favor slim-profile rail systems that give you tool access without the bulk—think slim metal bars with low-profile hooks and tiny shelves that sit close to the wall.
I mount one above the counter for spatulas, ladles, a magnetic strip for knives, and a narrow herb shelf. It keeps things visible, tidy, and stylish without eating space.
Arrange Tools by Task
Moving from slim profiles to how you actually organize them, I like to arrange utensils by task so everything’s intuitive at a glance.
I mount a slim rail and group tools where I use them most, saving time and clearing counters.
Try these zones:
- Prep: peelers, paring knives, measuring spoons.
- Cooking: spatulas, tongs, ladles.
- Serving: servers, whisks, slotted spoons.
Incorporate Mirrored Tile Accents
I like using mirrored tile accents to bounce light into darker corners—place slim strips near under-cabinet lighting or opposite windows to amplify brightness.
You can also create a small patterned mirror mosaic above a stove or sink for a stylish focal point that still reads light and space.
I’ll show simple layouts and tile sizes that make the effect striking without overwhelming a compact kitchen.
Light-Enhancing Tile Placement
When I want a small kitchen to feel brighter and bigger, I turn to mirrored tile accents because they reflect light without taking up space.
I place them strategically to amplify daylight and task lighting, keeping the look clean and modern.
- Along backsplash stretches near windows.
- Behind open shelving to bounce light.
- As narrow vertical strips to lengthen sightlines.
Patterned Mirror Mosaics
I often use patterned mirror mosaics to add brightness and personality without crowding a small kitchen, and they’re surprisingly versatile — you can choose geometric repeats for a modern edge or scalloped shapes for a softer look.
I place mirrored tiles as a narrow backsplash strip or inset panel to reflect light, conceal splatters, and create depth while keeping maintenance simple with wipeable grout.
Showcase Collections on Ledge Shelves
Someone’s small treasures can make a tiny kitchen feel curated — I like using narrow ledge shelves to display dishes, vintage mugs, or a rotating selection of spice jars so the wall becomes both decorative and functional.
I arrange items by color and scale, keeping accessibility in mind.
- Color-blocked dishes
- Mismatched vintage mugs
- Labeled spice jar rotation
Build a Fold-Down Breakfast Nook
I love the idea of a fold-down breakfast nook because it gives you a sturdy, space-saving table design that tucks away when you need room.
I’ll show simple wall-mounted seating solutions that keep the floor clear without sacrificing comfort.
Then we’ll look at clever foldaway storage options for dishes, placemats, and utensils so everything’s within reach.
Space-Saving Table Design
Let’s tackle a fold-down breakfast nook that frees up floor space without sacrificing comfort—I’ll walk you through a compact table that folds flat against the wall and opens in seconds.
I’ll cover materials, mounting tips, and smart finishes so it looks intentional, not tacked-on.
- Lightweight hardwood or plywood
- Fold-down brackets with safety stays
- Easy-clean finish and edge trim
Wall-Mounted Seating Solution
Because space in small kitchens is precious, I recommend pairing a fold-down table with a wall-mounted bench that tucks away when you don’t need it.
I install a slim, cushioned seat on a hinged bracket, add a simple backrest, and use durable finishes.
It creates a cozy breakfast nook, keeps traffic flowing, and looks intentional—seating that’s both decorative and utterly functional.
Foldaway Storage Options
If you liked the wall-mounted bench, you’ll appreciate how a fold-down breakfast nook doubles as smart storage.
I built one to save space and add style; it hides baskets, holds dishes, and becomes a casual dining spot.
It’s simple to mount, sturdy, and tailored.
- Under-seat baskets
- Fold-flat tabletop hooks
- Slim vertical pantry shelves
Layer With Narrow Picture Ledges
With a few narrow picture ledges I’ve turned a plain backsplash into a layered display that stays practical for a busy kitchen.
I arrange framed recipe cards, a small herb pot, and a spice jar row so they’re reachable but off the counter.
Ledges let me rotate art, add seasonal accents, and keep essentials tidy—stylish, functional, and easy to update.
Mount a Chalkboard Menu Wall
I like to follow the picture ledges with a chalkboard menu wall that keeps our week organized and looks intentionally homey.
I jot meals, chores, and reminders in bold handwriting; guests love the rustic touch.
It’s writable, erasable, and decorative—an effortless focal point.
- Weekly meal plan
- Shopping list column
- Dinner-time notes and timers
Display Pots and Pans on a Rail
I love using a simple wall rail to hang pots and pans because it turns clutter into functional wall storage that’s always within reach.
With a mix of shapes and finishes you can arrange them like art, balancing utility and style so the display feels intentional, not messy.
I’ll show how to size the rail and arrange pieces so it works for cooking and looks great.
Functional Wall Storage
Mount a sturdy rail and you’ll free up cabinet space while keeping your favorite cookware within easy reach. I love the visual order and quick access it gives me, and it feels decorative and useful at once.
- Use S-hooks for mugs and ladles.
- Mount rails at comfortable reach heights.
- Mix sizes — pans, strainers, and a hanging herb pot.
Styling and Balance
While arranging pots and pans on a rail, I think about rhythm and contrast so the display feels intentional rather than cluttered.
I mix shapes, sizes, and finishes—cast iron beside copper, small skillets near larger stockpots—to create visual flow.
I leave breathing space, hang utensils in groups, and balance functional access with aesthetics so the rail looks curated and remains useful.
Install Recessed Niche Shelves
Picture a slim recessed niche cutting into your kitchen wall, giving you the same storage without the bulk — that’s exactly what I aim for when I plan recessed niche shelves.
I tuck spices, cookbooks, and display pieces into shallow shelves for charm and function.
- Slim spice jars for uniformity
- A small cookbook stack
- One decorative accent per shelf
Use Patterned Peel-and-Stick Backsplash
I like to brighten up a small kitchen wall with a patterned peel-and-stick backsplash because it gives instant personality without a big renovation.
I choose durable, water-resistant vinyl tiles in a bold motif, align patterns carefully, and trim precisely for a polished look.
It’s fast, reversible, and lets me experiment with color and texture without committing to permanent changes.
Create a Rotating Seasonal Decor Corner
Because the corner by my small breakfast nook gets noticed every time I make coffee, I use it as a rotating seasonal decor spot that keeps the kitchen feeling fresh without taking up space.
I swap small, curated pieces each season to match mood and color.
- Mini wreath or garland
- Ceramic ramekin with seasonal herbs
- Framed seasonal postcard or tiny print