I’ll show you how to get a premium-looking outdoor kitchen on a budget by focusing on smart layout, affordable finishes, and practical DIY touches. Think compact, efficient zones for grill, prep, and cleanup, with weatherproof, easy-care surfaces. Use budget-friendly options like porcelain-look countertops, faux stone veneer, and repurposed cabinets refreshed with paint. Add smart lighting and simple shade ideas to elevate the vibe without breaking the bank. Stick with me and you’ll pick up real, doable tips.
Evaluate the Key Layout Criteria for a Budget Outdoor Kitchen

So, what’re the key layout criteria that matter most when you’re planning a budget outdoor kitchen?
I start with workflow: grill, prep, and cleanup in a natural sequence, not scattered.
Then fit and flow—leave room for a friend to stand and chat.
Weatherproof comfort, durable surfaces, and cost-conscious materials matter most, with careful space planning to maximize efficiency. Additionally, consider incorporating outdoor kitchen design layout formulas to enhance functionality and aesthetic appeal without breaking the bank.
Budget-Friendly Countertop Options That Read Premium

When you’re budgeting for an outdoor kitchen, choosing a countertop that looks premium without breaking the bank is possible with the right materials and planning.
I’d prioritize durable, low-maintenance options like quartz surfaces. Hmm—actually quartz or granite-look porcelain, thick composite slabs, and sealed concrete can read luxe. Pair with edge profiles that aren’t fussy, and color that hides wear. Choose installers who offer warranties. Additionally, consider smart kitchen island ideas that can enhance your outdoor cooking experience while staying within budget.
Affordable Stone Veneer Ideas for a Luxe Look

Affordable stone veneer can give your outdoor kitchen a premium look without a premium price.
I suggest practical, budget-friendly choices that install fast and last. You’ll get real-appearing texture without breaking the bank, and it scales with your space.
- Thin-professional veneer over existing surfaces
- Split-face faux panels for depth
- Mortar-free stacked alignments for easy DIY
Upcycling Dated Cabinets Into Chic Prep Stations

I’m all about turning dated cabinets into chic prep stations without breaking the bank.
I’ll share practical upcycling ideas and budget-friendly tweaks that elevate your outdoor space with upcycled cabinet makeovers and clever prep station concepts.
Let’s explore simple, cost-conscious ways to transform what you have into stylish, functional outdoor storage and work areas. Not only can you create a beautiful space, but you can also achieve a budget-friendly DIY outdoor kitchen that fits your style and needs.
Upcycled Cabinet Makeovers
Upcycling dated cabinets into chic prep stations is easier than you might think, and it can transform your outdoor kitchen on a budget.
I start with a fresh coat, swap handles, and seal surfaces for weather resistance, then add smart organizers.
The payoff is real—durable, stylish prep space without breaking the bank. Additionally, incorporating budget-friendly hardware swaps can elevate the overall look without significant investment.
- Budget-friendly hardware swaps
- Durable, weatherproof finishes
- Simple organization ideas
Chic Prep Station Ideas
If you’ve got dated cabinets gathering dust, you can turn them into chic prep stations that feel custom without the price tag.
I start with a clean slate, replace hardware, and add a robust countertop.
I hide cords, mount a small under-counter fridge, and choose a weatherproof finish.
It’s practical, budget-minded, and surprisingly polished for outdoor use. Plus, mobile home kitchen remodels show that upcycling can provide high-style solutions without breaking the bank.
Grill Placement That Works on Small Patios and Corners

If you’ve got a tight patio or a corner to work with, I’ll show you how to place a grill for safety and flow without crowding your space.
We’ll map out the best angles and clearances for small layouts and snug corners so every inch counts.
Let’s get practical with budget-minded tweaks that keep grilling easy and accessible. One effective strategy is to incorporate affordable outdoor kitchen ideas that maximize functionality and style without breaking the bank.
Small Patio Layouts
Small patios don’t have to curb your cooking dreams; with smart grill placement, you can create a functional, safe setup in tight spaces.
I layout essentials that fit budgets and ethics of safety, using simple lines and measured zones.
- Position at least 10 inches from walls
- Choose a compact grill with foldable prep space
- Use vertical storage to free counter room
- Consider adding an outdoor pizza oven to elevate your culinary experience and impress your guests.
Corner-Snug Grilling Setup
Corner corners can actually be your best friend when you’re working with a tight patio.
I position a compact grill in a corner, shoulder-to-wall, and use a slim prep counter beside it. No fuss, just a tight workflow.
I budget by choosing a modular cart, basic tools, and weatherproof cover, keeping safety, ventilation, and clearance in mind.
Simple, affordable, effective. Additionally, incorporating rustic outdoor kitchens can enhance the overall charm and functionality of your space without overspending.
Budget-Friendly Sinks and Water Stations That Perform
When you’re designing an affordable outdoor kitchen, a reliable sink or water station is non-negotiable, and you don’t have to break the bank to get one that works well.
I’ve found simple setups that withstand weather, cut installation costs, and stay practical long-term.
- Choose a compact, stainless basin with a basic faucet
- Use a gravity-fed or inline filtration option
- Opt for a portable, refillable water container for accessibility
Smart, Affordable Storage Ideas for Outdoor Kitchens
Smart, affordable storage is the quietly powerful part of any outdoor kitchen.
I suggest modular, weatherproof bins and stackable organizers that survive rain and sun without breaking the bank.
Use wall-mounted racks for utensils, hooks for essentials, and labeled bins for dry goods.
Recycle plastic baskets as moveable pantry zones, and build slim under-counter drawers from leftovers.
Practical, budget-friendly, endlessly adaptable.
Lighting Strategies That Elevate With Minimal Cost
Good lighting can transform an outdoor kitchen, and you don’t need to break the bank to get it right.
I keep it simple: use DIY string lights, solar stake lights, and inexpensive clip-on bulbs to create layered, flexible illumination for tasks and ambiance.
- Layer brightness with overhead, task, and ambient options
- Reuse and repurpose; swap bulbs for warmth
- Optimize placement for shadows and flow
Weatherproofing Tricks That Extend Life on a Budget
Think of weatherproofing as smart, budget-friendly insurance for your outdoor kitchen, starting with the basics that protect every dollar you’ve spent.
I’ll share durable shielding materials and simple seasonal tactics that keep rain, sun, and wind from doing quick damage.
Let’s explore practical, cost-conscious steps you can implement now to extend life and save on repairs.
Weatherproofing Basics On Budget
Weatherproofing on a budget is all about smart, simple steps that protect your setup without breaking the bank.
I focus on durable basics, not gimmicks, and I share practical tweaks you can apply today.
- Seal gaps with affordable caulk or tape
- Elevate grill and prep surfaces to shed water
- Use breathable covers to deter moisture buildup
Durable Shielding Materials
Durable shielding materials keep your outdoor kitchen going when weather hits, and you don’t have to spend a fortune to do it right.
I pick sturdy, affordable options that resist rain, sun, and wind, then layer protection. Simple seals, treated wood, and vinyl covers extend life without pretending perfection.
Stay practical: inspect, recoat, and replace worn parts as needed.
Seasonal Protective Tactics
Seasonal protective tactics don’t have to be expensive or fancy; with a few simple, repeatable steps, you can extend the life of your outdoor kitchen year-round.
I share budget-minded tricks you can trust.
- Cover and elevate appliances to prevent moisture contact
- Seal gaps and re-seal annually to deter leaks
- declutter and clean after use to stop corrosion
Build a DIY Outdoor Bar With Affordable Materials
If you want a functional outdoor bar without breaking the bank, you can build one with simple, affordable materials and a little DIY elbow grease.
I’m sharing a practical approach: choose a sturdy work surface, repurpose pallets for framing, and pair with a weatherproof finish.
Keep storage low-profile, add a simple sink if possible, and tailor height to guests.
budget-friendly, doable, stylish.
Flooring Options That Feel High-End Without the Price
Looking for flooring that feels expensive without the price tag? I’ll share practical, budget-minded options that upgrade your space without curb appeal breaking.
Think durable, stylish, and easy to install.
- Porcelain-look ceramic tiles for a high-end finish at a fraction of the cost
- Interlocking composite decking for quick DIY lushness
- Stamped concrete or faux wood vinyl planks for versatility and longevity
DIY Concrete Finishes That Mimic Luxe Surfaces
Concrete finishes can look luxe without the luxury price tag, and you can DIY them to suit any outdoor style.
I keep it simple: I pair affordable cement, pigment, and sealer, then test patches before committing.
I brush or trowel for texture, seal for durability, and compare to real stone.
Your space gains a high-end vibe without breaking the bank.
Use Color and Texture to Create Luxe Vibes on a Budget
Color and texture are your best friends when you’re threading luxe vibes into a budget-friendly outdoor kitchen.
I mix bold paint, natural textures, and simple patterns to elevate spaces without overspending.
- Choose high-contrast accents
- Layer textures with affordable panels and textiles
- Use calibrated lighting to sculpt depth
This practical approach keeps costs down while delivering polished, inviting results.
Sourcing Inexpensive Appliances That Perform Well Outdoors
I’m keeping an eye out for budget-friendly appliances that stand up to outdoor use and still deliver solid performance.
We’ll prioritize outdoor-grade durability and features that matter, like weather resistance and simple maintenance.
Let’s talk practical picks that stretch your dollar without sacrificing reliability.
Budget-Friendly Appliances
If you’re outfitting an outdoor kitchen on a tight budget, start by prioritizing durable, versatile appliances that can handle weather and frequent use.
I spot value in simple, reliable gear, recognizing you don’t need premium brands to perform well outdoors.
- versatile grills
- compact coolers
- rugged prep tools
Outdoor-Grade Performance
Outdoor-grade performance matters more than brand hype when you’re sourcing inexpensive appliances for an outdoor kitchen.
I look for weatherproof seals, stainless steel components, and simple controls that resist corrosion.
I test basic features in real conditions, prioritize durability over novelty, and compare wattage with airflow.
If it survives a season, it’s worth the purchase—and fits a budget without excuses.
Create Zones for Cooking, Prep, and Entertaining
To make the most of a cheap outdoor kitchen, start by clearly defining zones for cooking, prep, and entertaining.
I map tasks to space and choose affordable layouts that flow. This keeps clutter down and efficiency up.
- Allocate a dedicated prep area near storage
- Position grill and sink for seamless use
- Create a social zone separate from work zones
Green Touches: Planters and Screens for Privacy on a Budget
Green touches can transform a budget patio into a private, relaxing space without breaking the bank.
I’ll keep planters and screens simple: pick compact, hollow-core planters to hide cords and clutter, mix evergreen greens with seasonal color, and reuse old screens as trellises.
Group taller pieces at corners for privacy, place lightweight screens on wheels, and water-smart plants to reduce upkeep.
Quick, Budget-Friendly Shade Solutions That Look Good
I’ll share quick, budget-friendly shade ideas that still look good for your outdoor kitchen.
We’ll cover lightweight roofing options, simple DIY shade plant setups, and smart tricks to keep costs down without sacrificing style.
Let’s keep it practical and doable, so you can start shading your space today.
Budget-Friendly Shade Tricks
If a shady setup seems pricey, I’ll show you quick, affordable ways to add cool, comfortable shade without breaking the bank.
I focus on simple, durable options that look refined and stay within budget.
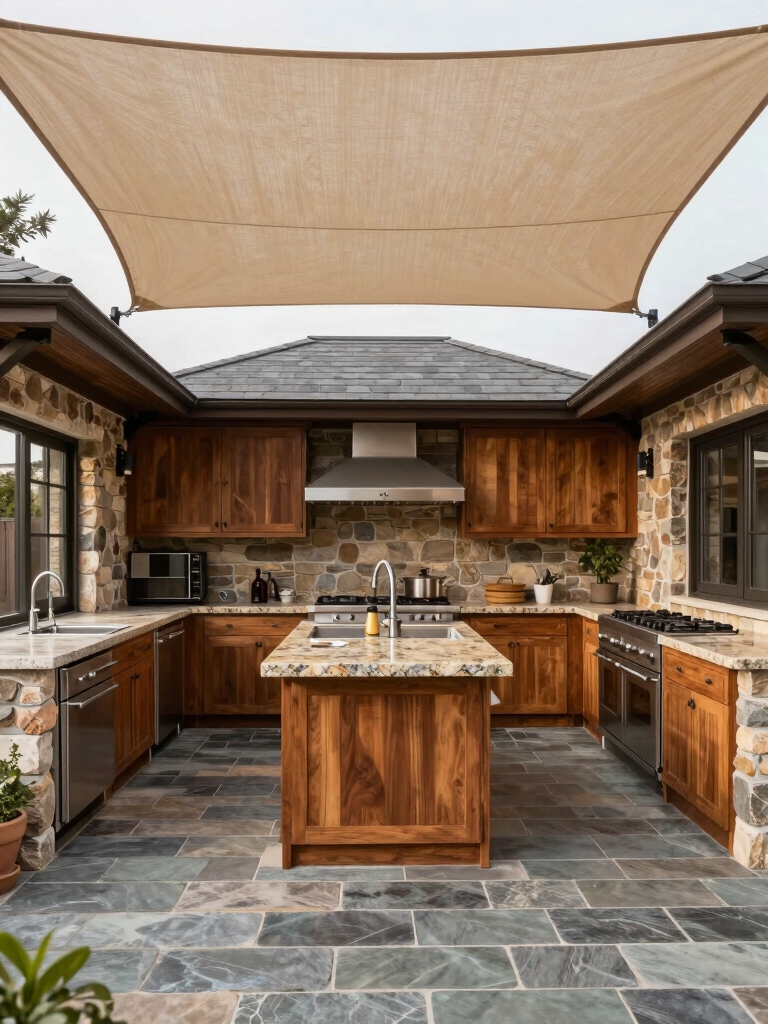
- Use tensioned outdoor fabric canopies for instant mood and coverage
- Install lightweight pergolas with slatted shade for sun control
- Add removable curtains or bamboo screens to tune privacy and glare
Lightweight Roofing Alternatives
Lightweight roofing can transform a patio without breaking the bank.
I’ve found options that flex with weather and resist wind, like corrugated polycarbonate panels and shade sails. They’re fast to install, cheaper than solid roofs, and easy to remove when seasons change.
I’ll focus on practical setup tips, proper anchoring, and selecting UV-rated fabrics and finishes for longevity.
DIY Shade Plant Strategies
Shade is the easiest way to beat the heat without breaking the bank, so I’m sharing quick, budget-friendly plant strategies that boost shade fast and look great.
I’ll choose sturdy, low-cost options and place them for maximum impact.
- Use tall grasses or bamboo screens for instant cover
- Layer fast-growing vines on trellises
- Opt drought-tolerant shrubs for year-round shade
Incorporate Natural Elements for a Luxe Feel
Natural elements instantly elevate an outdoor kitchen, making it feel luxe without breaking the bank.
I focus on texture over price: weathered wood, potted herbs, and stone-look surfaces.
Add twinkling lights, simple textiles, and a focal planter.
I swap expensive finishes for layered greenery and sun-warmed concretes.
You’ll gain warmth, personality, and a high-end vibe without a big bill.
Maintenance Routines to Keep the Look Fresh
Maintenance is all about simple habits that keep your outdoor kitchen looking fresh without costing a fortune.
I share routines you can actually fit into a busy week, with affordable upgrades spurring longevity.
- Quick wipe-downs after use to prevent stains and buildup
- Monthly sealant or protective spray on surfaces
- Seasonal checks for leaks, loose fittings, and rust spots
Sticking to these keeps the space practical and budget-friendly.
Real-World Budget-Approved Outdoor Kitchen Tours and Takeaways
I’ve kept upkeep simple, and now it’s time to see real-world results: budget-approved outdoor kitchen tours and takeaways.
You’ll hear practical, budget-minded lessons from real setups: affordable materials, smart layouts, and durable finishes.
I’ll share quick wins: repurposed cabinets, slate countertops, and under-$200 lighting.
Expect honest impressions, avoid hype, and grab actionable ideas you can copy without breaking the bank.
Conclusion
I’ve shown you how to stretch dollars without sacrificing wow. Think of your outdoor kitchen as a sturdy ship riding stylish waves—each upgrade a well-placed plank that costs less but carries more. Start with smart layout, add affordable veneers, upcycle where possible, and mock up shade that lasts. Stay practical, mix natural textures, and keep up maintenance. With patience, your space feels luxe, not loud, and you’ll enjoy every meal under open skies. Your budget, beautifully earned.