I’ve refit countless camper kitchens to marry rugged practicality with vintage-modern charm, so you’ll get a compact layout that prioritizes cooking style, prep flow, and weatherproof materials.
I favor vertical storage, fold-out counters, and multi-function appliances—matte stainless or sealed butcher block tops, propane or induction stoves, and smart battery-solar sizing. I always add ventilation, gas and CO sensors, and easy weekend upgrades like new knobs and magnetic spice strips. Keep going and I’ll show the how-to details.
Assessing Your Needs: Cooking Style, Crew Size, and Meal Plans

When I plan a camper kitchen remodel, I start by pinning down how we actually cook — whether we’re quick skillet people, long-simmer stewers, or fond of elaborate weekend baking — because that choice shapes everything from stove size to storage layouts;
I also think about who’s usually on meal duty and how many mouths we’re feeding so I can balance counter space, prep workflow, and appliance capacity without wasting precious square inches.
I catalog favorite recipes, prioritize versatile gear, and assign zones for prep, cooking, and cleanup so vintage charm meets modern efficiency.
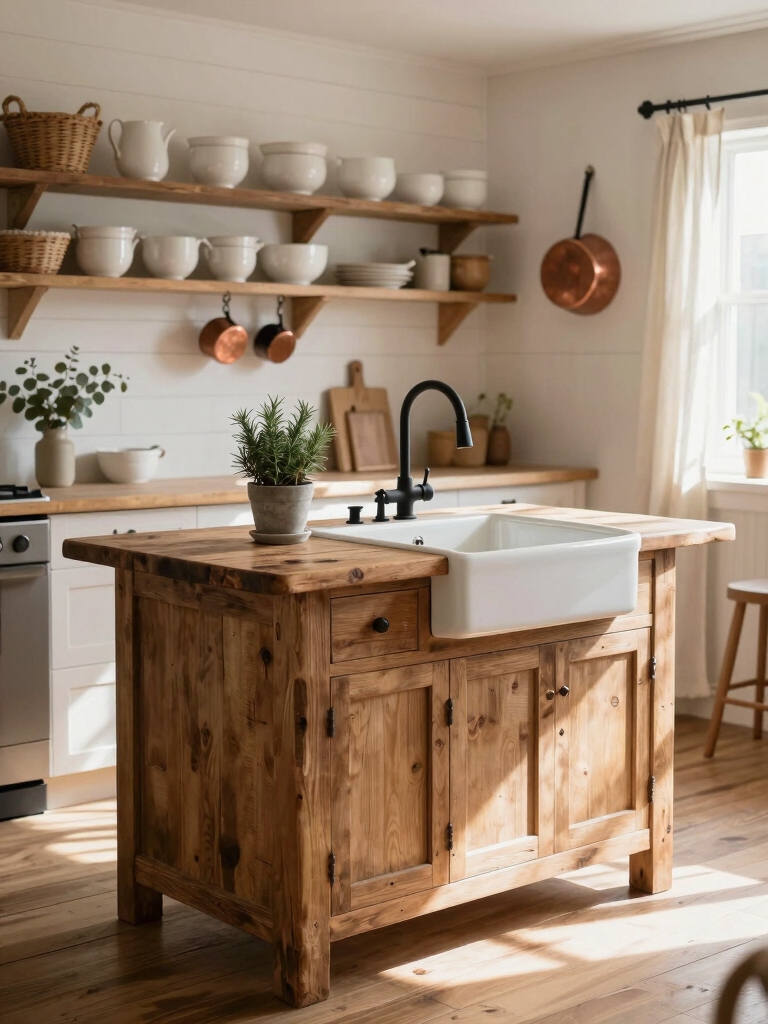
I also look for small kitchen island ideas that prove size doesn’t matter when it comes to creating functional, efficient workspaces.
Space-First Layouts for Tiny and Compact Campers

I’m thinking about layouts that put storage and function first, so every inch in a tiny camper works harder.
Tall cabinets, hanging racks, and slim shelving reclaim vertical real estate, while fold‑out counters and sliding prep surfaces turn one spot into cooking, chopping, and dining zones.
Let’s look at how those vertical solutions and multi‑function workspaces pair to keep your kitchen tidy and truly useful on the road.
Small-scale design principles like space-first layouts make every element pull double duty.
Maximize Vertical Storage
Start by thinking up, not out: I stack, hang, and build up to reclaim every inch of wall and ceiling in a tiny camper, treating vertical space as the main floor.
I mix open shelves, vintage hooks, and magnetic rails to display dishes and tools, layer baskets for pantry bits, and tuck foldaway racks overhead — functional, curated, and effortlessly cozy.
I also draw on clever kitchen solutions from small-space design to make every inch count, like using stackable storage and multifunctional fixtures for maximum utility.
Multi-Function Workspaces
I rethink every square inch as a tool when I design a multi-function workspace, turning counters, tables, and benches into kitchens, desks, and storage without cluttering the camper’s flow.
I favor clever simplicity and tactile, vintage-modern details:
- Foldaway table
- Bench with drawers
- Slide-out prep board
- Hidden appliance cubby
- Wall-mounted lighting
Each element adapts to living, working, and cooking. Small kitchen islands can be surprisingly versatile in compact layouts, often serving as unexpected focal points that combine seating, storage, and prep space.
Durable Surfaces That Handle Dirt, Heat, and Salt

When I’m choosing surfaces for a camper kitchen, I look for materials that shrug off mud, shrug off sun, and shrug off salt without fuss.
I favor matte stainless, sealed butcher block, and porcelain that resists staining and heat.
They scrub clean, age with character, and stay cool under sun glare. Practical, tactile choices keep maintenance low and adventures flowing.
Durable countertops built to handle real life often mean choosing materials tested for everyday kitchen life that can take real use.
Efficient Multi-Function Appliances to Save Space and Power

Good surface choices cut down on maintenance, but saving space and power means picking appliances that pull double duty.
I choose compact combos that look timeless yet work smart.
Below are my go-tos for efficiency and style:
- Convection toaster oven + air fryer
- Washer-dryer combo
- Refrigerator with freezer drawer
- Induction cooktop with bridge
- Microwave-convection unit
Small kitchen islands can incorporate clever storage and space-saving solutions to maximize functionality in tiny floorplans.
High-Performance Stove Options: Propane, Induction, and Wood

Curious which stove fits your vibe and needs? I weigh propane’s reliable heat and easy ignition against induction’s precision and safety, noting battery or solar demands.
I also savor wood’s rustic charm and off-grid independence, though it needs ventilation and fuel storage.
I’ll help you match cooking habits, space, and power constraints so your camper kitchen feels both timeless and thoroughly modern.
Practical kitchen islands often feature durable surfaces and organized storage to keep tools accessible and reduce clutter.
Smart Water Systems: Sinks, Pumps, Filtration, and Gray Water
I’ll walk you through setting up a smart water system that feels both lived-in and engineered—sinks that fit your rhythm, pumps sized to your tank and power, filtration that guarantees tasty water, and gray-water plans that keep you legal and low-impact.
I pick reliable pumps, compact filters, and simple routing. Consider:
- Foot pump or electric
- Pressure tank sizing
- Carbon filter choice
- Inline UV option
- Gray-water diverter and tank
Storage Solutions: Slide-Out Drawers, Vertical Racks, and Hidden Cubbies
I’ve learned that smart storage turns a cramped camper galley into something both elegant and incredibly practical.
Slide-out drawer systems give full access to deep cabinets, while vertical racks and hidden cubbies make use of narrow gaps and wasted nooks.
Let me show you how to mix these elements so everything has its place without sacrificing style.
Slide-Out Drawer Systems
Slide-out drawer systems pull your camper’s storage into reach, blending vintage charm with modern efficiency so you can find what you need without digging.
I installed shallow and deep drawers to maximize space, keeping utensils tidy and pans accessible.
I recommend:
- Soft-close slides
- Non-slip liners
- Custom dividers
- Lightweight materials
- Locking catches
They feel classic yet practical on the road.
Vertical & Hidden Cubbies
I carved out vertical and hidden cubbies to squeeze more usable storage into tight camper nooks, blending that old-world, wood-panel charm with clever, modern function.
I stacked spices and baking sheets upright, added slim slide-out racks for cutting boards, and hid utensils behind a false panel.
The result feels curated, efficient, and delightfully vintage-modern—every inch purposeful, every item easy to reach.
Lightweight Materials That Don’t Sacrifice Strength
Let’s start by choosing materials that keep the camper light without giving up durability; I pick options that stand up to bumps, humidity, and daily use while keeping payload low. I favor clever combos that feel retro yet refined:
- Aluminum framing
- Marine-grade plywood
- Composite countertops
- Lightweight laminate
- Stainless fasteners
These choices balance strength, longevity, and vintage-modern charm.
Ventilation and Lighting for Safer, More Pleasant Cooking
Because cooking in a small space can quickly get stuffy and dim, I make ventilation and lighting a priority so meals stay safe and pleasant.
I install a low-profile vent fan, cross-vent windows, and a removable cooker hood. Warm, layered LED task lights and dimmable ambient fixtures preserve cozy vintage charm while ensuring clear visibility and fresher air for every recipe.
Insulation, Heating, and Weatherproofing the Galley
Keeping the galley comfy and dry starts with smart insulation, heating, and careful sealing—so I treat these systems as a single, integrated project.
I choose closed-cell foam, vintage brass vents, and a compact diesel heater, then seal every seam.
Here’s what I prioritize:
- Continuous vapor barrier
- Tight window and hatch seals
- Layered insulation
- Efficient, low-profile heater
- Condensation control measures
Portable and Outdoor Cooking Setups for Flexible Meals
I like to set up cooking options that fold around my mood and the weather: a compact two-burner stove for quick indoor meals, a portable propane grill for smoky nights, and a lightweight camp stove for windy, on-the-go breakfasts.
I stash enamelware, stackable pans, and a folding table; spices in mason jars; and a simple windscreen. Meals stay flexible, soulful, and efficient.
Power Management: Batteries, Solar, and Efficient Charging
When I planned the kitchen’s electrics I started by sizing the battery bank to match our real cooking and fridge loads, not the optimistic specs on paper.
Then I paired that with a solar setup tuned for peak sun hours and a charge controller that prioritizes battery health and quick top-offs.
Together they let me cook, chill, and recharge reliably without hauling extra generators or fuss.
Battery Bank Sizing
Let’s dig into battery bank sizing so you won’t be caught short on power during a trip: I’ll show you how to match your energy needs to battery capacity, account for usable depth of discharge, and factor in inefficiencies from charging and temperature.
I calculate daily draw, choose reserve, and plan for longevity:
- estimate average watt-hours
- set depth-of-discharge limit
- add temperature margin
- include inverter losses
- size for reserve
Solar Charge Optimization
Optimize your solar charging so you get reliable, fast fills without stressing the batteries or wasting panels’ output.
I balance panel angle, MPPT controllers, and battery temperature compensation to preserve life and speed charging.
I monitor state-of-charge with a simple BMS display, trim parasitic loads, and stagger high draws. The setup feels timeless yet smart — efficient, elegant, and built to roam.
DIY Upgrades and Quick Mods You Can Complete on a Weekend
I like to tackle quick camper-kitchen projects that give the space a fresh, vintage-modern feel without eating into my weekend.
I swap hardware, add peel-and-stick tile, install a compact butcher-block shelf, paint cabinets in muted tones, and swap lighting for warm LEDs. Small changes refresh function and mood.
- New knobs and pulls
- Peel-and-stick backsplash
- Floating butcher-block shelf
- Cabinet paint refresh
- Warm LED fixtures
Safety Upgrades: Fire Suppression, Gas Detection, and Secure Fastenings
When I reworked the camper kitchen, safety became the anchor: I installed a compact fire suppression system over the stove and added gas detection sensors near the LPG lines.
Those two upgrades give me calm confidence on the road, and they’re surprisingly simple to integrate with the vintage-modern aesthetic I like.
Next I’ll show how to pick devices that fit tight spaces and practical mounting points so nothing rattles or fails.
Fire Suppression Systems
I usually start safety upgrades by tackling fire suppression first, because nothing else matters if a spark turns into something worse.
I fit an automatic, compact extinguisher above the cooktop, choose marine-rated components, and keep a vintage brass hand-pump for flair. Remember rehearsal and accessibility.
- automatic nozzle
- easy access
- rated agent
- secure mount
- annual check
Gas Detection Sensors
Having the extinguisher in place makes sense, but you won’t want to rely on reaction alone—gas leaks can smolder unseen, so I add detection next.
I install propane and CO sensors with visual and audible alerts, wired to power and a backup battery.
Their compact, retro-styled modules blend with my camper’s vibe while keeping mornings and stovetop evenings safe, simple, and reliably monitored.
Styling the Space: Color, Textures, and Practical Decor
Because small changes make a big difference, I focus on a few purposeful choices—color, texture, and functional accents—that give the camper kitchen a layered, vintage-modern feel without cluttering the space.
I pick muted greens, brass touches, and worn wood. Practical decor keeps things tidy:
- Open shelves with baskets
- Magnetic spice strips
- Foldable prep board
- Linen towels
- Compact herb pots
I’ve walked you through choices that make a camper kitchen both tough and cozy — because a little planning goes a long way.
As the old adage says, “Measure twice, cut once,” and that’s true whether you’re fitting an induction cooktop or bolting down a vintage latch.
Mix durable surfaces with thoughtful power and safety, add a few weekend DIY wins, and you’ll have a compact, stylish galley that’s adventure-ready and feels like home.