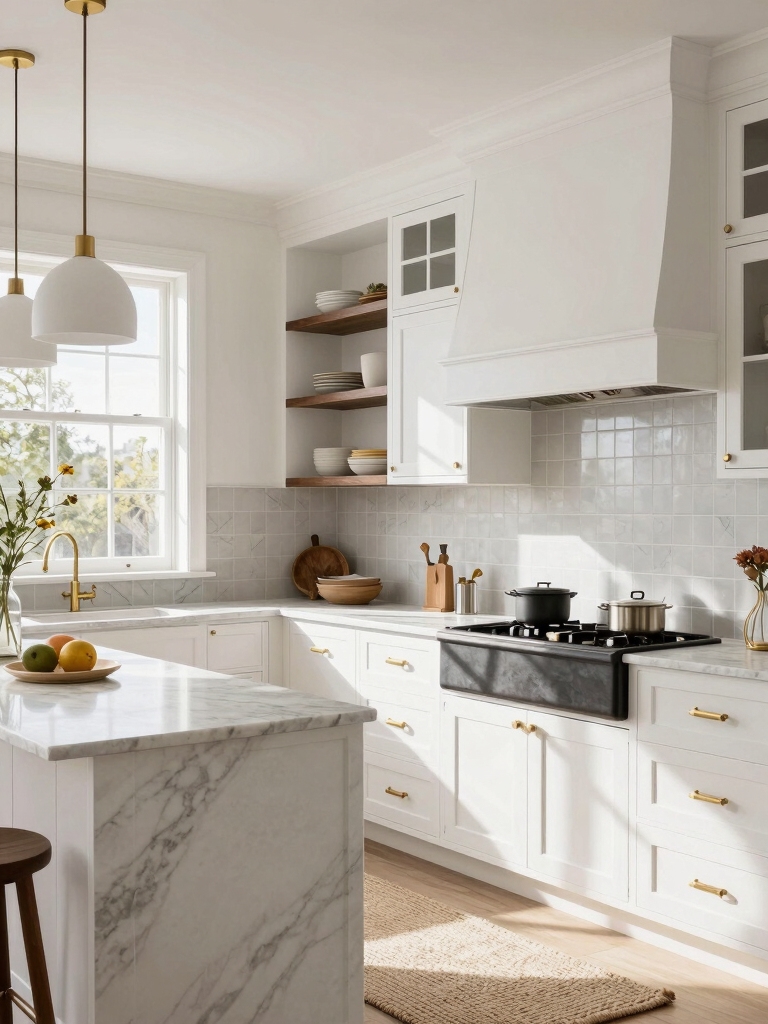
I’ll help you revive an old kitchen so its original bones stay central while it works for today. I start by documenting moldings, floors, sightlines and wear, then preserve or repair built‑ins, match millwork, and restore oak or tile rather than replace.
I layer modern storage, discreet appliances, and warm, dimmable lighting so the room feels effortless and lived‑in. I balance code needs with character, and if you keep going I’ll show how each choice preserves story and function.
Assessing the Original Character and Architectural Details

Before we tear anything out, I walk the space with a clear mission: to learn what’s worth saving and what’s purely cosmetic.
I note moldings, door proportions, original tile patterns and sightlines.
I measure light, traffic flow and storage needs, listening for stories in wear and repair.
Then I decide which elements will anchor a layered, functional, elegant remodel that respects the home’s soul.
I also prioritize retaining hallmark Craftsman details that define the original character of the kitchen and guide material and layout choices.
Preserving Built-Ins and Historic Millwork

When I encounter original built-ins or millwork, I treat them as anchors rather than obstacles—these pieces tell the house’s history and set the tone for how new layers will sit.
I preserve moldings, cabinetry, and paneled details whenever possible, repairing rather than replacing.
Then I introduce contemporary hardware, subtle paint choices, and tailored lighting to celebrate contrast while keeping function and warmth central.
Small galley kitchen remodels can be done thoughtfully on a budget, especially when you focus on cost-effective updates that highlight original features.
Retaining and Restoring Original Flooring

When I first walk into an old kitchen, I always check the floors closely to assess whether boards are solid, warped, or sagging.
I’ll prioritize repairing and stabilizing loose or damaged planks so the structure feels safe and true underfoot.
Finally, I refinish with stains and finishes that honor the original character while making the surface durable for modern use.
I often focus on refinishing oak flooring as a way to update the kitchen without major demolition.
Assess Existing Floor Condition
I start by walking the floor, letting my eyes and hands pick up its story—nail holes, fading, warps, and the gleam of original patina—because keeping original flooring can anchor the remodel in authenticity.
I note structural soundness, finish depth, and historic patterns, photograph damage, map high-traffic paths, and decide what character must stay versus what risks functionality or safety.
These timeless approaches often echo what you see in 90s Kitchen Remodel projects, where thoughtful preservation transforms old spaces.
Repair and Stabilize Boards
I start by easing up problem boards with a pry bar and a careful eye, because stabilizing what’s original keeps the room’s soul intact while making it safe and usable.
I assess joists, sister or brace where needed, replace only rotten planks, nail and screw with period-appropriate fasteners, and bridge gaps with shims. The goal: secure, honest floors ready for the next tasteful steps.
Timeless touches like reclaimed lighting and classic hardware can be added later to enhance the room’s character and tie the floor into the overall vintage kitchen aesthetic.
Refinish to Match Character
Texture and tone matter most here, so I match the floor’s original story rather than erase it. I strip old finish, gently sand to reveal patina, and choose stain and seal that honor age while adding durability.
I balance restoration with practical updates so the kitchen feels lived-in, elegant, and ready for years.
- Preserve nail holes and wear
- Match historic hue and sheen
- Use breathable, durable finishes
Timeless wood finishes can actually improve over time as they develop depth and character with proper care.
Balancing Modern Layouts With Existing Floorplans

When I remodel an old kitchen, I try to preserve the original traffic flow so the room still feels familiar and effortless to move through.
I often resize countertops or islands rather than relocating sinks, which keeps plumbing disruption minimal while improving function.
Then I layer modern storage solutions—pull-outs, integrated organizers, and open shelving—to add efficiency and eclectic charm without rewriting the floorplan.
I also use budget-friendly tricks like refacing cabinets, updating hardware, and strategic paint to revive the space without a full teardown.
Preserve Original Traffic Flow
One key rule I follow is keeping the kitchen’s natural traffic paths clear while introducing modern comforts.
I honor existing doorways and sightlines, gently reconfigure islands, and layer storage for flow. I aim for functional elegance and eclectic warmth that feels intentional.
- Preserve primary walkways
- Adjust island scale, not position
- Layer storage to reduce cross-traffic
Resize, Don’t Relocate Sinks
Because moving plumbing often eats your budget and disturbs floors, I usually recommend resizing rather than relocating sinks to fit modern layouts while keeping the original floorplan intact.
I’ll suggest shallow or deeper basins, apron-front swaps, or dual bowls to improve function without rerouting pipes.
Small tweaks honor structure, add charm, and deliver functional elegance that feels layered and curated, not forced.
Layer Modern Storage Solutions
Often a few smart inserts do more than a full gut when you want modern storage that respects an existing layout.
I layer solutions to honor old bones while adding function: integrate shallow pull-outs, floating shelves, and bespoke drawer dividers to fit quirks.
I keep sightlines open and materials warm so new storage feels inevitable, not imposed.
- slim pull-outs
- open shelving
- custom drawer inserts
Choosing Cabinetry That Echoes Period Style

When I choose cabinetry for a period kitchen, I look for pieces that speak the same visual language as the home without feeling museum‑stiff.
I favor proportion, subtle moldings, and hardware with character—mixed finishes, open shelving, and inset doors—to honor era details while adding practical storage.
The goal is warmth and layered eclecticism that reads timeless, functional, and quietly elegant.
Selecting Countertops That Complement Old Materials
When I pick countertops for an older kitchen, I look for tones and textures that echo existing materials so the new surface feels like it’s always belonged.
I favor durable, period-appropriate options—think honed stone or aged wood—that can handle daily use without losing character.
I’ll show you how small choices in color and finish make a big difference in preserving the home’s original charm.
Match Tones and Textures
Because older kitchens already carry a story in their surfaces, I start by looking for countertops that speak the same visual language—matching tones and textures so new stone or laminate feels like a thoughtful addition, not an afterthought.
I choose materials that honor patina and scale, balancing contrast and continuity.
- Warm, subdued veining
- Soft honed finishes
- Subtle color echoes
Durable Period-Appropriate Materials
Although I respect a kitchen’s age, I don’t sacrifice durability for looks; I pick countertops that can take daily use while keeping the room’s historical character intact.
I favor honed stone, aged zinc, or butcher block sealed for longevity, pairing finishes with backsplash and wood tones.
Choices honor patina, resist wear, and let original details remain the focal point while serving real-life cooking.
Integrating Modern Appliances Discreetly
For this part of the remodel, I want to show you how to tuck modern appliances into an older kitchen so they feel like they belong, not like they’ve been dropped in.
I choose finishes and placements that whisper, not shout. Consider:
- Panel-ready fronts to match cabinetry
- Recessed installations to preserve sightlines
- Vintage-inspired controls or hidden displays
The result feels intentional and warm.
Upgrading Lighting While Keeping Vintage Ambience
When I upgrade lighting in an older kitchen, I aim to enhance function without erasing the room’s lived-in warmth; careful layering and fixture choices let me do both.
I favor soft, dimmable task lights, warm-tone bulbs, and layered ambient sources that highlight original moldings.
Strategic accenting reveals texture while keeping a cozy, eclectic feel—practical, elegant, and respectful of the past.
Restoring or Replicating Historic Hardware and Fixtures
Lighting sets mood, but the hands-on details — knobs, pulls, faucets — give an older kitchen its personality, so I treat restoring or replicating historic hardware as both preservation and design.
I hunt originals or faithful reproductions, finish to match patina, and balance function with beauty.
- Source salvaged pieces
- Match finishes thoughtfully
- Upgrade mechanisms subtly
Repairing and Showcasing Exposed Beams and Structural Elements
I start by evaluating the beams the way I’d a treasured painting: looking for cracks, insect damage, and signs the structure still carries load safely, then deciding whether to repair, reinforce, or leave their scars visible as history.
I clean, treat, and selectively patch with compatible materials, then highlight beams with subtle lighting, mixed finishes, and coordinated hardware to celebrate patina and structure.
Incorporating Smart Storage Without Disrupting Sightlines
I’ll tuck smart storage into the kitchen’s existing rhythms so it feels like discovery, not clutter. I keep lines clean, hide hardware, and layer textures so old bones sing through practical solutions.
I recommend:
- Pull-out pantry shelves that align with framing for seamless sightlines
- Toe-kick drawers for seldom-used items
- Recessed spice racks that read as trim, not tech
Matching Color Palettes to Period Architecture
I love spotting the historic palette principles that quietly anchor a room — muted earth tones, period-appropriate whites, and the restrained pops that kitchens of the era favored.
I’ll show you how to pair those base hues with period-accurate contrasts so your remodel feels authentic without looking costumey.
Together we’ll choose colors that respect the home’s past while making the space lively and thoroughly livable.
Historic Palette Principles
When I work on matching a kitchen’s color palette to its period architecture, I start by listening to the building—its moldings, window proportions, and original finishes tell me which hues will feel authentic and which will read as modern impostors.
I balance restraint with personality:
- Respect original pigments and muted saturation
- Layer finishes for depth and warmth
- Use accents sparingly to reinforce era and function
Period-Accurate Contrasts
Although the building’s bones suggest a palette, I test contrasts against moldings, sunlight, and worn surfaces to make sure they read period-appropriate rather than theatrical.
I choose muted tones with strategic depth—soft creams, sage, and charcoal—to honor era details while layering eclectic accents.
I balance warmth and restraint so kitchens feel lived-in, functional, and elegantly true to their architectural moment.
Addressing Mechanical and Electrical Needs Sensitively
Since mechanical and electrical work often dictates what your old kitchen can become, I start by listening closely to how you use the space and what you want it to feel like.
I then plan interventions that stay subtle, efficient, and reversible:
- Conceal wiring in existing cavities where possible.
- Choose period-appropriate fixtures with modern safety.
- Prioritize ventilation that preserves original sightlines.
Blending New Additions With Original Masonry and Tilework
If I add new cabinetry, appliances, or shelving, I make sure each piece talks to the original masonry and tilework rather than shouting over it.
I choose colors, textures, and scaled proportions that echo grout lines and brick tones, letting modern metals and clean wood planes highlight historic patina.
The result feels layered, warm, and purposeful — a kitchen that respects its past while serving today.
Working With Preservation Guidelines and Skilled Craftspeople
After choosing pieces that speak to the old brick and tile, I turn my attention to the rules and people who protect that history.
I collaborate with preservation officers and master carpenters, balancing code with character. I prioritize communication, patience, and shared vision.
- Research guidelines before design
- Hire craftsmen versed in traditional methods
- Document changes for future stewards
I’ve learned that honoring a kitchen’s original bones is like tending an old garden: you prune, nourish, and add thoughtful new blooms.
By keeping millwork, floors, and masonry, while sewing in modern comforts, the space breathes with layered stories and practical grace.
Let craftsmanship be the trellis that supports fresh ideas—so your remodel feels warm, eclectic, and elegantly useful, a living room that remembers its past as it welcomes your future.