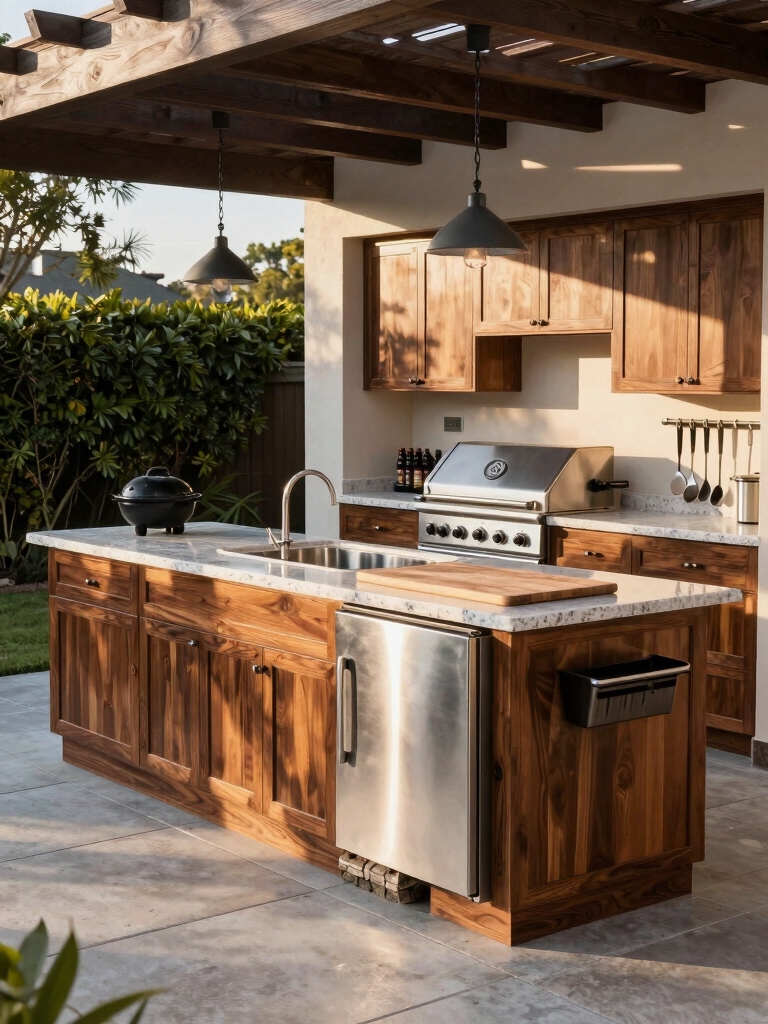
I design outdoor kitchen islands that pair commercial-grade grills with weatherproof materials so you can cook hard and relax harder. I zone prep, cook, service, and cleanup for minimal steps, fit refrigeration and insulated sinks with easy winterizing, and pick marine‑grade steel, porcelain counters or sealed concrete for durability.
I balance bar‑height seating for mingling with clear 36–48″ walkways and layered lighting. Keep going and I’ll show layouts, appliance choices, and maintenance tips.
Planning Your Outdoor Kitchen Island Layout
When I design an outdoor kitchen island, I start by picturing how the space will flow—where people will gather, cook, and move between the grill, sink, and prep area.
I map zones for cooking, serving, and seating, keeping sightlines open and traffic smooth.
I favor compact work triangles, clear walkways, and clever storage that keeps tools handy without cluttering the entertaining vibe.
Open kitchen layouts with islands encourage social cooking and provide a central hub for guests to mingle and watch the chef, making them ideal for entertaining open kitchen designs.
Choosing Durable Materials for Weather Resistance
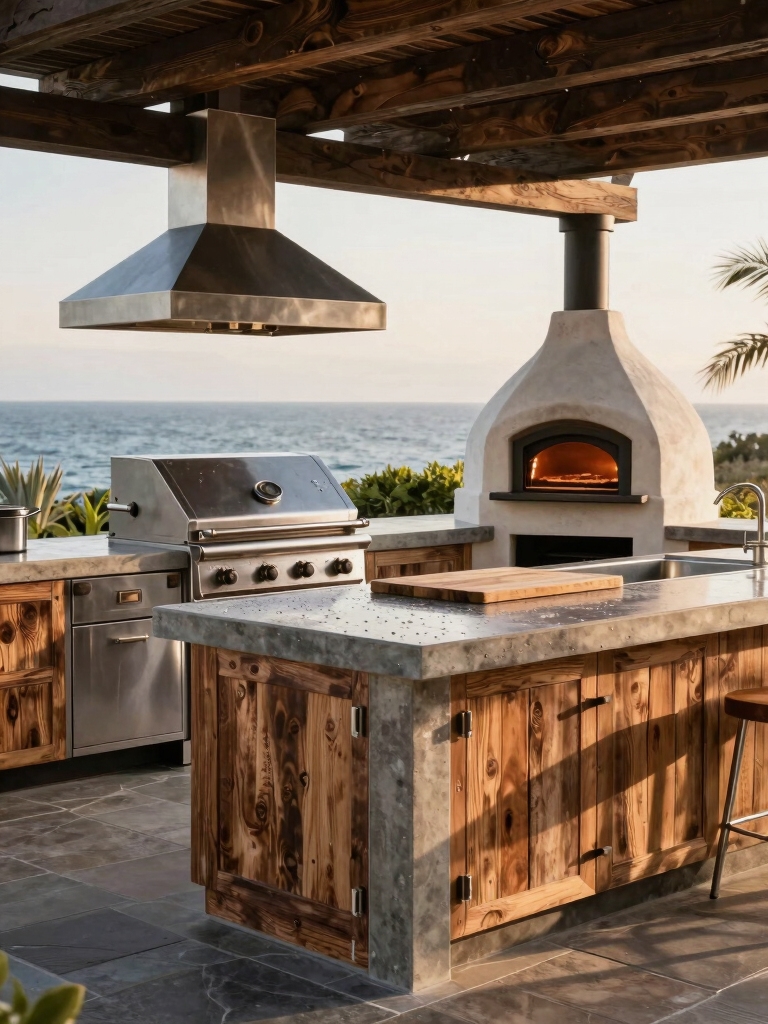
When I design an outdoor island, I start by choosing weatherproof countertops like granite, concrete, or sealed stainless that shrug off sun and rain.
I pair those with rust-resistant frames—think powder-coated aluminum or marine-grade stainless—to keep the structure looking sharp season after season.
Let’s compare the pros and upkeep of each so you can pick materials that suit your style and climate.
Small Outdoor Kitchen Ideas Simple Yet Epic can help maximize function in limited spaces.
Weatherproof Countertop Options
I usually start by thinking about how my outdoor kitchen will handle sun, rain, and the occasional splash from a spirited grill session, because the countertop material you pick is the frontline between style and survival.
I favor porcelain for low maintenance, granite for heat resistance, and sealed concrete for customizable vintage charm — all resist weathering, stain well, and keep a polished, practical vibe.
Marble, while elegant, can be pricier and requires more upkeep, which is why many homeowners consider marble countertops only after weighing the maintenance and cost.
Rust-Resistant Frame Materials
Although the countertop takes most of the spotlight, I always start by picking a rust-resistant frame because that skeleton decides whether your island will age gracefully or crumble after a few seasons.
I favor stainless steel, powder-coated aluminum, or galvanized steel — each blends longevity with style. Seal welds, use marine-grade fasteners, and expect low maintenance so your island stays chic and functional.
I also like to consider rolling kitchen islands when planning for flexibility so the cooking space can move wherever it’s needed.
Sizing the Island for Cooking and Entertaining

When I plan an outdoor island, I think about the cooking work triangle first so prep, grill, and cleanup flow without bumping elbows.
I also map seating and traffic flow so guests can linger at the bar while cooks move freely behind it.
With the right proportions, the island becomes both a functional kitchen and a social centerpiece.
Kitchen Island Ideas You’ll Want to Screenshot Immediately often inspire layout tweaks, especially when considering ideal island proportions for both form and function.
Cooking Work Triangle
If you want your outdoor kitchen island to feel effortless and efficient, I start by imagining the cooking work triangle—grill, sink, and prep surface—and how people will move between them.
I size distances so steps are minimal but not cramped, place tools and trash within easy reach, and balance clear prep zones with safe heat buffers.
It’s tidy, functional, and stylish. I also follow island kitchen design rules that prioritize efficient workflow and clear circulation paths.
Seating and Traffic Flow
After mapping the cooking triangle, I start sizing the island around how people will sit, move, and mingle.
I plan clear walkways, comfy seating, and service zones so grilling stays smooth and social. Balance bar height with knee space, leave 36–48 inches for traffic, and keep surfaces durable yet stylish.
- Seat clearance
- Walkway width
- Service access
- Visual flow
I often build an adjoining dining-height table to extend seating for guests and create extra guest seating without crowding the cooking zone.
Selecting the Right Built-In Grill
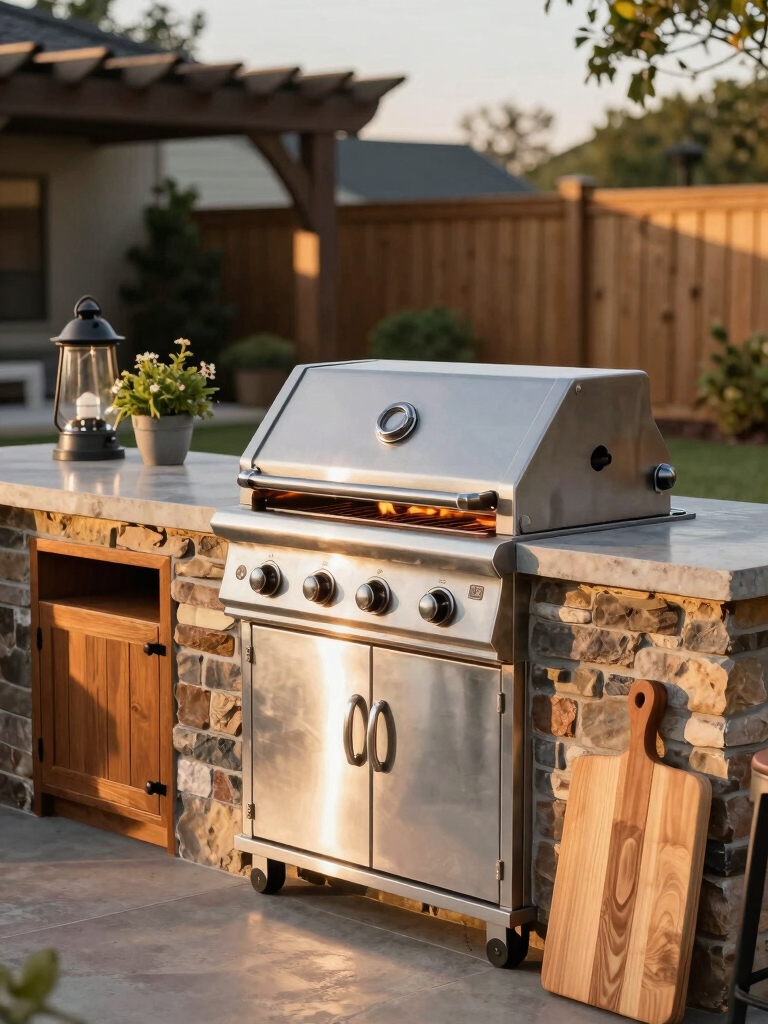
Because I want your outdoor island to perform as beautifully as it looks, choosing the right built-in grill comes down to matching cooking style, size, and fuel to how you actually entertain.
I’ll help you weigh BTUs, burner layout, stainless durability, and ignition reliability against party size and prep habits, so your centerpiece is as efficient as it’s gorgeous — no guesswork, just good grilling.
Integrating Side Burners and Teppanyaki Griddles
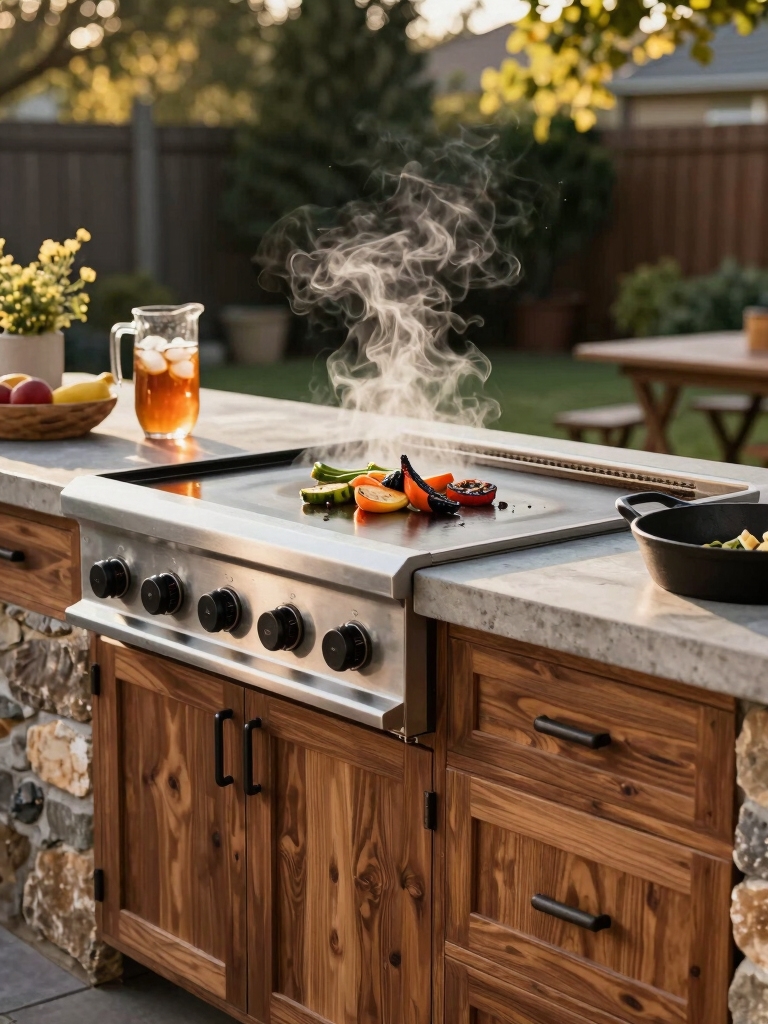
Once you’ve picked a built‑in grill that fits your entertaining style, it’s smart to think about side burners and a teppanyaki griddle to broaden what your island can do.
I love the versatility: sauté sauces, sear veg, or flip pancakes without crowding the main grate.
- Quick sauces on a side burner
- Teppanyaki for communal cooking
- Easy cleanup surfaces
- Flexible heat zones
Incorporating Refrigeration and Ice Chests
Stashing a fridge or ice chest into your outdoor island keeps the party moving and cuts down trips inside—I always recommend planning refrigeration early so it feels like a built‑in convenience, not an afterthought.
I pick stainless or retro finishes to match the vibe, size units for drink and prep storage, guarantee ventilation and drainage, and favor lockable lids and energy‑efficient compressors for reliable, stylish cold.
Designing Efficient Workflow and Work Zones
When I plan an outdoor island, I set up clear work zones—prep, cooking, service, and cleanup—so everything flows without crowding the chef or the guests.
I arrange countertops, storage, and trash for smooth movement and choose durable surfaces that hide wear with style.
Thoughtful lighting and seating define roles and invite interaction.
- Prep station placement
- Grill/accessory adjacency
- Service/pass-through area
- Cleanup routing
Electrical and Gas Considerations for Safety
I’m picky about safety, so before we plot outlets or a grill I check proper line sizing for both electrical and gas to keep everything balanced and efficient.
I’ll also talk circuit protection methods—GFCIs, breakers, and clear labeling—to prevent shocks and overloads.
And because nothing ruins a cookout like a leak, we’ll cover gas leak prevention, sensors, and routine inspection habits.
Proper Line Sizing
Let’s get this right from the start: I’ll walk you through why proper line sizing for both electrical and gas is nonnegotiable—it’s about safety, performance, and keeping your outdoor kitchen reliable when you need it most.
- Match wire and conduit to load and run length.
- Size gas piping for BTU demand and pressure drop.
- Use rated materials for weather and UV exposure.
- Verify with code and a pro before final hookup.
Circuit Protection Methods
You’ve got the right wire, conduit, and gas runs in place, now let’s lock in protection so a fault doesn’t turn your outdoor kitchen into a hazard.
I specify GFCI and AFCI protection, correctly sized breakers, and weatherproof disconnects. For gas appliances I recommend automatic shutoffs tied to electrical faults and clear labeling. It’s smart, simple, and safety-first.
Gas Leak Prevention
Because gas and electricity can conspire to turn a cozy cookout into a dangerous situation, I focus first on prevention: tight fittings, tested lines, and electrical systems that cut power the instant a leak’s detected.
I inspect, sniff, and replace, keeping vintage charm with modern safety.
- Check fittings monthly
- Use leak detector soap
- Install auto shutoff valve
- Hire certified tech
Countertop Options That Withstand Heat and Moisture
When I plan an outdoor kitchen, I pick countertops that shrug off heat, humidity, and the occasional grilling mishap without drama.
I favor porcelain slabs, quartzite, or sealed concrete—each resists stains, thermal shock, and moisture.
Porcelain mimics stone, quartzite is naturally tough, sealed concrete feels industrial-chic. I seal edges, choose UV-stable finishes, and keep maintenance simple so style endures.
Storage Solutions: Cabinets, Drawers, and Shelving
I’ll walk you through picking weatherproof cabinets that stand up to sun and storms, clever drawer systems that keep utensils and tools in order, and open shelving tricks that balance display with practicality.
Think stainless or marine-grade finishes for longevity, modular inserts for tidy drawers, and staged shelves that shelter items without cluttering.
You’ll get straightforward options that look good and work hard for outdoor life.
Weatherproof Cabinet Choices
Although outdoor kitchens invite a carefree vibe, I know that choosing the right weatherproof cabinets makes the space both stylish and sensible.
I favor materials and finishes that resist moisture, sun, and curiosity.
- Marine-grade stainless steel for durability and sheen
- Powder-coated aluminum for color and rust resistance
- Teak or composite for warm, low-maintenance charm
- Sealed plywood boxes with gasketed doors for budget-smart protection
Drawer Organization Systems
After locking in weatherproof cabinets, I turn my attention to drawer organization because even the toughest materials won’t save you from cluttered utensils and stray spice jars.
I install modular inserts, deep utensil trays, and slide-out condiment bins so everything stays put during cookouts.
Labelled zones and stainless dividers keep tools accessible, tidy, and stylish—practical flair that feels intentionally vintage-modern.
Open Shelving Strategies
I lean into open shelving to keep essentials within reach and to let the outdoor kitchen breathe—it’s where function meets display.
I mix weatherproof baskets, stacked plates, and vintage tins for charm. Practicality rules: easy access, airflow, and quick cleanup.
- Rustproof brackets
- Modular baskets
- Labeled zones
- Waterproof finishes
Lighting and Ambient Features for Nighttime Cooking
I often say the right lighting turns an outdoor kitchen island from a cooking station into a stage, and I’ll help you pick fixtures that flat-out work after sunset.
I favor layered light: task LEDs under crowns, warm pendant pools over prep, and dimmable accent washes for texture.
Choose weatherproof finishes, smart controls, and low-glare bulbs so flavor—not glare—steals the show.
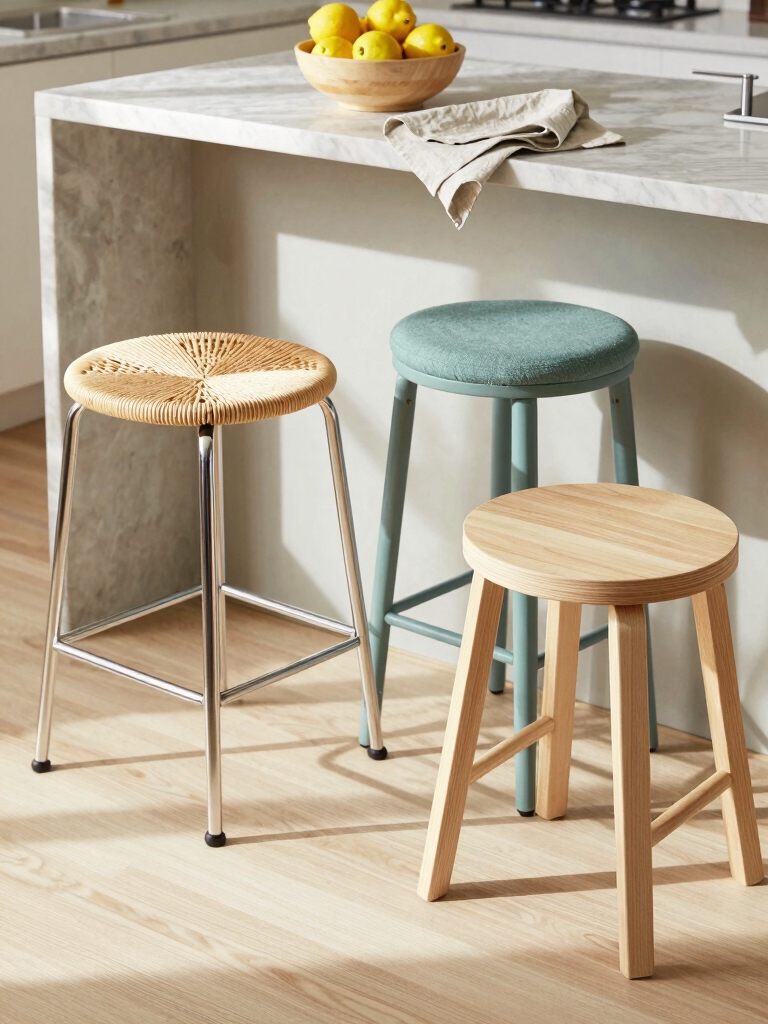
Seating Configurations and Bar-Height Counters
When you’re planning seating around an outdoor kitchen island, think about flow first—how people move, where conversations cluster, and which spots need elbow room—because the right layout makes the space feel effortless.
I favor bar-height counters for casual mingling; they define zones and encourage standing-to-sit ease.
- Staggered stools for sightlines
- Backless for easy tucking
- Integrated footrests
- Weatherproof cushions
Adding Sinks, Dishwashers, and Plumbing Needs
Because plumbing can make or break an outdoor kitchen’s usefulness, I plan sink and dishwasher placement with purpose: close enough to the grill for quick cleanup, yet sheltered from wind and rain to protect connections.
I choose stainless fixtures, insulated lines, and easy-access shutoffs, balancing aesthetics with code-compliant drains and frost-proof valves so service is simple and the space stays effortlessly chic and utterly functional.
Weatherproofing, Covers, and Seasonal Maintenance
Plumbing’s in place and your sink’s ready, so now I’ll protect everything from the elements with smart weatherproofing, covers, and a simple seasonal plan.
I seal seams, choose breathable covers, and schedule quarterly inspections to keep hardware happy.
- Waterproof sealant checks
- Breathable, fitted covers
- Winterize plumbing and gas lines
- Spring tune-up and re-oil hinges
Styling, Finishes, and Decorative Accents
As I finish the practical bits, I turn to styling and finishes to give the island personality without sacrificing durability.
I pick materials that age gracefully—oil-rubbed bronze, honed concrete, reclaimed wood sealed for weather.
Accent lighting, ceramic tiles, and brass hardware add character. I balance color and texture, keeping maintenance simple while creating a welcoming, slightly vintage but modern outdoor hub that handles real use.
You’re ready to build an outdoor kitchen island that performs like a pro and looks like it belongs in a glossy magazine.
Think through layout, materials, grill choice, seating, and plumbing so everything flows like a well-directed cookout.
Add weatherproofing and thoughtful finishes to keep it beautiful season after season. With practical planning and a touch of whimsy, you’ll create a space that’s as dependable as it is stylish—your backyard’s new showpiece.