I’ve turned cramped trailer kitchens into bright, usable spaces with tiny budgets and big ideas: measure, set a hard cap plus contingency, then prioritize triangle efficiency and repeatable choices.
I’ll show you cheap wins—painted or swapped cabinet faces, peel‑and‑stick counters and backsplashes, open shelves, pull‑out prep boards, slim appliances, layered lighting, and fold‑down dining—to stretch every inch. Quick weekend projects and thrifted hardware save cash, boost function, and make your kitchen feel new; keep going and I’ll show how.
Assessing Your Space and Setting a Realistic Budget

Before I swing a hammer, I measure, map, and prioritize—because in a trailer every inch and dollar counts.
I sketch zones, note utilities, and list must-haves versus nice-to-haves.
I set a firm cap, allot contingency, and price small batches of materials.
I track costs like a game, tweak priorities when numbers bite, and keep choices simple, smart, and repeatable.
I also rely on budget-friendly tricks that pros use to revive old kitchens without breaking the bank.
Smart Layout Tweaks to Maximize Functionality

Now that the budget’s nailed down and every dollar has a purpose, I look at the layout like a compact puzzle—move one piece and the whole flow changes.
I prioritize triangle efficiency: stove, sink, fridge in short hops. I swap swinging doors for sliders, tuck appliances into niches, and add pull-out surfaces.
Small shifts yield big usability wins without breaking the bank. I also drew inspiration from galley kitchen island transformations that amazed with clever compact solutions and added storage galley island ideas to maximize function.
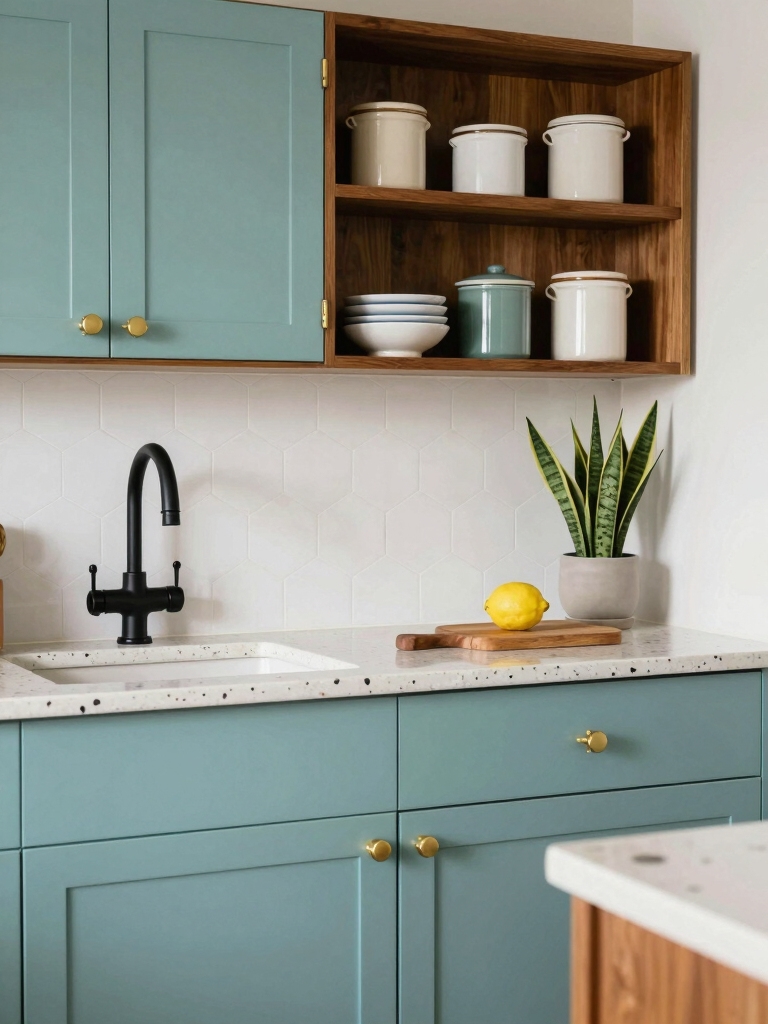
Affordable Cabinet Refreshes: Paint, Doors, and Hardware

I roll up my sleeves and tackle cabinets first because a small refresh gives a huge visual lift without gutting the space.
I paint faces in two-tone cheer, swap dated doors for simple slab or beadboard replacements, and choose crisp, affordable hardware. Repeat: primer, two coats, new pulls, soft-close hinges.
Quick pattern: prep, paint, replace, style—big impact, tiny spend.
I often borrow ideas from small island kitchen makeovers that emphasize layout efficiency and storage solutions to keep the space functional and airy.
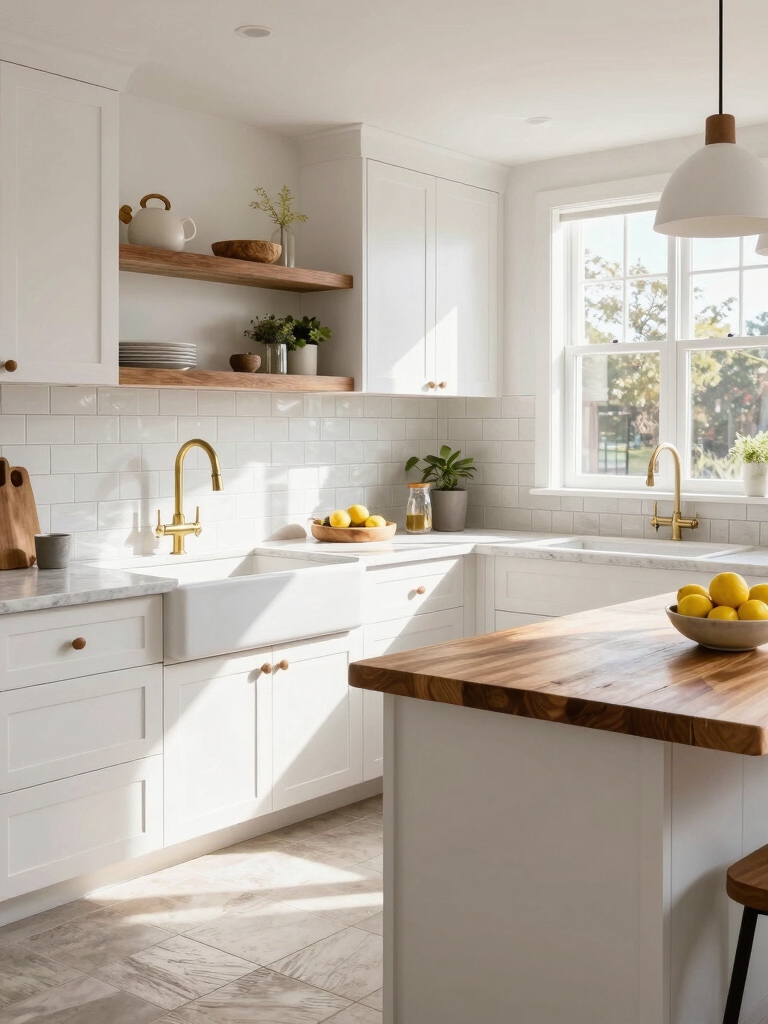
Open Shelving and Creative Storage Hacks

I strip off cabinet doors and lean into open shelving because it instantly makes a tiny trailer feel bigger and more lived-in.
I group dishes by color, stack mugs on hooks, and corral spices in labeled jars.
I mix baskets for hidden clutter, magnetic strips for knives, and tension rods for lids—small, repeatable tricks that tidy, showcase, and maximize every inch without fuss.
I also focus on affordable finishes and paint choices that refresh surfaces and stretch a tight budget-friendly remodel further.
Countertop Upgrades That Don’t Break the Bank

A few smart countertop swaps can totally change the feel of a tiny trailer kitchen without draining your savings—I’ve replaced laminate with peel-and-stick tiles, painted faux-marble over old Formica, and added butcher block strips where I need heat-resistant work zones.
I mix quick fixes: sealants for durability, edge trims for polish, and modular mats for prepping.
Small patterns, big payoff—practical, playful, and budget-wise.
I also recommend considering movable island carts with hidden features to add flexible prep space and storage.
Budget-Friendly Backsplash Ideas With Big Impact
Brighten up the whole trailer with a backsplash that looks luxe but costs next to nothing—I’ve used peel-and-stick tiles, painted stencils, and reclaimed tin to punch up style without a splash of cash.
I mix geometric patterns, metallic accents, and simple grout lines for visual pop. Try subway sticker tiles, stencil motifs, or adhesive mosaics for easy install, bold contrast, and instant personality.
Weekend projects like these are perfect for quick updates and can often be completed in a single afternoon with basic tools and supplies, making them ideal for DIY kitchen remodels.
Thrifted and Repurposed Finds for Character and Savings
I love hunting for thrifted pieces that give a trailer kitchen instant personality without draining the budget.
Swapping in vintage hardware, repurposing old cabinet doors, or trading out a bland light fixture for a thrift-store find are small moves that pack big character.
I’ll walk you through how to spot gems, make simple updates, and stretch every dollar.
Vintage Hardware Upgrades
Cabinet knobs and drawer pulls can change the whole vibe of a tiny kitchen, and I love hunting thrift shops and flea markets for vintage pieces that pack character without busting the budget.
I mix metals, repeat patterns, and swap mismatched sets for rhythm. Simple polishing, a coat of spray paint, and strategic placement turn salvaged finds into cohesive charm and big savings.
Many successful makeovers keep costs low by focusing on key updates like hardware and paint, which is how these kitchen cabinet transformations often stay under $500 budget-friendly upgrades.
Repurposed Cabinet Doors
Digging through thrift stores and salvage yards, I found that repurposed cabinet doors are one of the easiest ways to give a tiny kitchen big personality without spending much.
I mix shapes, paint palettes, and hinges like puzzle pieces: mismatched fronts become a coordinated story.
I sand, prime, and mount them in patterns—vertical, horizontal, checker—to create charm, storage, and instant character on a budget.
Thrifted Lighting Swaps
Swap in thrifted lighting and watch a tiny kitchen glow with personality and savings.
I hunt flea markets for pendants, sconces, and vintage shades, then clean, rewire, and sometimes spray-paint them.
One lamp, three finishes, endless moods.
I mix metals, swap bulbs for warmth, and celebrate scratches as stories.
You’ll get character, light, and big savings with small effort.
Compact, Energy-Efficient Appliances for Small Kitchens
I often start by measuring every inch and thinking small appliances can do big work; in a trailer kitchen, choosing compact, energy-efficient units lets me keep counters clear, cut power bills, and still cook like I mean it.
I pick slim refrigerators, two-burner ranges, combo microwave-convection ovens, and ENERGY STAR dishwashers — small, smart, and surprisingly powerful for tiny-space cooking.
Lighting Solutions to Brighten and Enlarge the Room
Because light changes everything, I start by thinking in layers: ambient light to set the mood, task light where I cook and prep, and accent light to make the space feel taller and more playful.
I choose warm LEDs, under-cabinet strips, and a central flush fixture. Mirrors and glossy backsplashes bounce light. Dimmer switches add control and drama without big expense.
DIY Plumbing and Electrical Projects Worth Learning
While some trades are best left to pros, I’ve found a handful of plumbing and electrical skills that are safe, budget-friendly, and surprisingly easy to learn—think fixing a leaky faucet, replacing a sink trap, swapping out a faulty outlet, and installing a GFCI or a new light fixture.
- Learn faucet repair patterns
- Swap traps step-by-step
- Replace outlets safely
- Install GFCI/light fixtures
Flooring Options That Balance Cost and Durability
I’m looking at affordable vinyl plank and sturdy laminate as the two best bets for a trailer kitchen floor that won’t break the bank.
Vinyl plank gives me waterproof, budget-friendly style, while laminate brings harder-wearing surfaces for heavier use.
Let’s compare costs, installation ease, and how each stands up to spills and foot traffic.
Affordable Vinyl Plank
Let’s talk vinyl plank — the smart, wallet-friendly floor that’s tough enough for trailer life. I picked options that look great, resist water, and install quick.
I’ll walk you through what I learned:
- realistic wood visuals
- waterproof wear layers
- easy click-lock installation
- budget-friendly brands with warranties
I’ll help you choose durable, stylish planks without breaking the bank.
Durable Laminate Options
Because trailers get kicked, moved, and shaken more than a typical house, I pick laminate that can take knocks without costing a fortune.
I favor 8–12mm boards with strong wear layers, click-lock edges, and water-resistant cores.
I shop samples, test finishes with a coin, and choose patterns that mask scuffs.
Durable, cheap, and cheerful—practical flooring that keeps surprises manageable.
Space-Saving Dining and Multi-Use Surfaces
A folding table became my tiny kitchen’s MVP — it tucks away when I’m not eating, flips down for meal prep, and doubles as a laptop desk when work calls.
I play with modular habits: rotate, fold, store, repeat.
- Fold-down table
- Stackable stools
- Slide-out cutting board
- Magnetic spice rail
These patterns save space and keep routines delightfully tidy.
Finishing Touches: Textiles, Decor, and Personalization
I love finishing a trailer kitchen with cozy textiles—layered rugs, cushions, and a throw can instantly soften metal and laminate.
I’ll show you budget-friendly ways to add personal decor like thrifted frames, DIY art, and magnet tricks that feel custom without costing much.
Let’s pick a simple pattern or color thread and repeat it for a polished, playful look.
Cozy Textiles Layering
Usually I start a room’s personality with textiles, and in a tiny trailer they’ll do more than look good — they’ll add warmth, hide imperfections, and make every inch feel intentional.
I layer patterns, textures, and scale to create cozy zones:
- Cotton curtains for light control
- Patterned cushions for punch
- A washable rug for comfort
- A throw for instant snugness
Budget-Friendly Personal Decor
Let’s wrap up the remodel with small, personal choices that won’t break the bank but will make the trailer feel like mine — and yours.
I mix thrifted frames, patterned napkins as art, mismatched mugs on open shelves, and a DIY herb planter from cans.
I rotate textiles seasonally, add a quirky magnet collection, and label jars for charm — simple, budget-smart personality.
Step-By-Step Mini Remodels With Before-And-After Examples
I’ll walk you through a handful of mini remodels that pack big impact into small budgets, using clear steps and before-and-after photos so you can copy what works.
I show quick wins, tools, and timing in bite-sized projects you can finish weekend-style.
- Repaint cabinets: prep, paint, hardware swap
- Peel-and-stick backsplash: measure, cut, stick
- Open shelving: demo, anchor, style
- Lighting update: fixture, wiring, dimmer
Maintenance Tips to Keep Your Trailer Kitchen Looking New
I keep my trailer kitchen looking fresh by sticking to a simple routine: regular surface cleaning, preventative appliance care, and quick cosmetic touch-ups.
I wipe counters and cabinets after every use, schedule small appliance check-ins, and fix scratches or chips the moment I spot them. Follow this pattern and your mini-remodel will stay crisp without much fuss.
Regular Surface Cleaning
Regularly, I wipe down every surface after cooking so grime never gets a chance to settle in — a few minutes now saves big scrubbing later.
- Wipe counters clockwise: quick habit, consistent results.
- Use microfiber: traps crumbs, gleams without streaks.
- Tackle spills immediately: small blots, not big jobs.
- Weekly deep swipe: corners, backsplashes, edges — tiny rituals keep the trailer feeling new.
Preventative Appliance Care
Keeping surfaces spotless makes everything look newer, but taking care of the appliances keeps them running — and looking — that way longer.
I check seals, tighten knobs, and dust coils on a set schedule: weekly wipe, monthly deep-clean, seasonal tune.
I use mild cleaners, unclog vents, and log dates so small fixes don’t become big repairs.
Simple routines save money and keep the trailer cheerful.
Quick Cosmetic Touch-Ups
I’ll show you quick cosmetic fixes that punch up the look of your trailer kitchen without blowing the budget. I keep things snappy: small swaps, smart cleaners, and tiny accents make a big difference.
Try these easy habits and enjoy a fresher space every week:
- Wipe surfaces with citrus cleaner
- Swap cabinet hardware
- Touch up paint chips
- Use peel-and-stick backsplashes
I started this guide with a toolbox and a todo list, and you finish it with a kitchen that’s both cozy and clever. Small budget, big impact — that’s the punchline.
While old linoleum meets bright paint, thrifted knobs spar with sleek hardware, you’ll find joy in tiny, practical victories.
Keep a pattern of small projects, playful tweaks, and regular care; your trailer will feel renewed, efficient, and unmistakably yours.