I cut clutter fast with proven corner-cabinet fixes that reveal every inch of space and streamline my daily cooking. I assess measurements, door swing, and interior widths so shelves fit perfectly. I use pull-out systems, swing-out shelves, and adjustable dividers to tame awkward corners. Door-mounted organizers and clear labels keep items visible, while tiered lazy Susans and slim bins save chaos. If you keep exploring, you’ll discover more tweaks to finish strong and waste nothing.
Why Corner Cabinets Invite Clutter: And How a Fix Helps

Corner cabinets tend to collect clutter because their deep, hard-to-reach space makes it easy for items to hide and get forgotten.
I’ve learned that a simple system—clear labels, vertical dividers, and pull-out trays—keeps essentials visible and accessible. By implementing smart organization techniques, you can maximize every inch of your corner cabinet space.
When you reclaim the space, you’ll move faster, waste less, and feel in control as you cook and clean.
Let’s start small.
Assessing Your Space: Measurements, Clearance, and Door Swing

To set up a solid plan, start by measuring every dimension that matters: the width and height of your cabinet openings, the depths of shelves, and the clearance you have for doors to swing open.
I’ll check hinges, hinges’ swing radius, and interior widths.
With clear measurements, you gain confidence, avoid clashes, and design smarter storage that feels like it was built for you. Additionally, consider investing in smart organization solutions that can maximize your under sink space effectively.
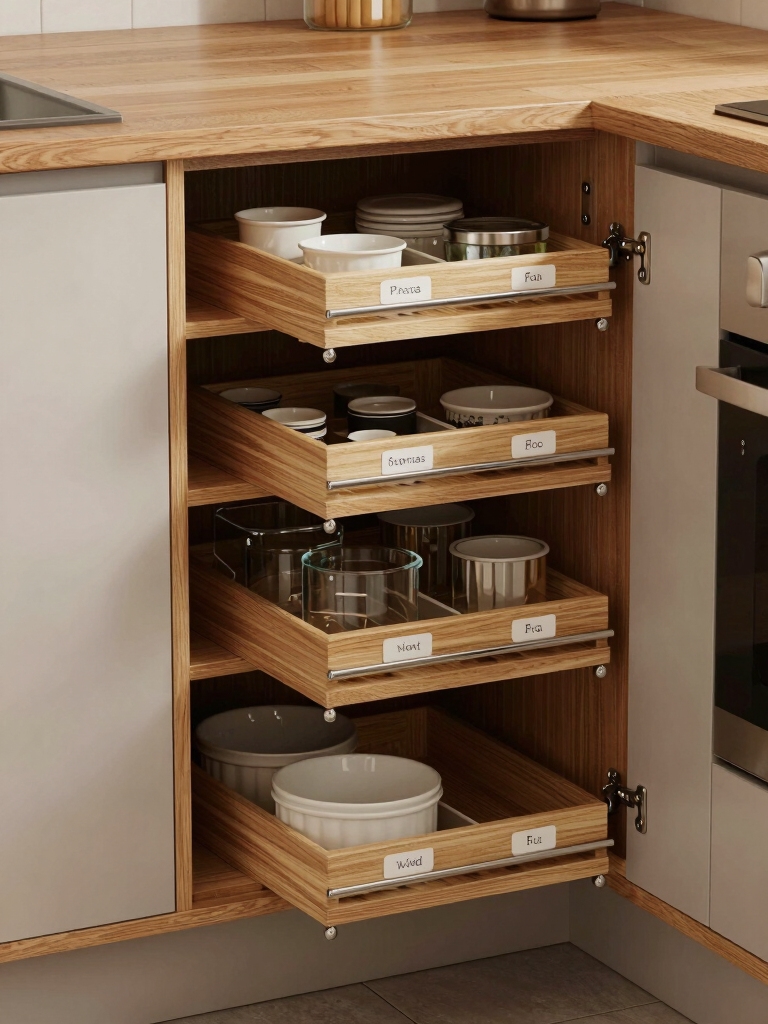
Choosing a Corner Pull-Out System: Low- vs. High-Cost Options

Choosing a corner pull-out system comes down to balance: you want smooth access for every shelf without breaking the bank.
I weigh low-cost units against durable options, focusing on bearing quality, glide smoothness, and adjustability.
Save where you can on materials, invest where it matters, and prioritize installation clarity.
A practical choice boosts accessibility and motivates ongoing organization, making it easier to implement kitchen drawer organization hacks that cut morning prep time in half.
Swing-Out Shelves and Hinged Solutions for Tight Angles

Swing-out shelves and hinged solutions make tight angles practical with smooth Swing-Out Mechanics and space-saving access.
I’ll show you how Tight-Angle Hinges stay sturdy and keep doors from hitting adjacent drawers, so every inch counts. Clever small kitchen storage ideas can transform your cluttered spaces into organized havens.
Together, we’ll optimize your cabinet layout for faster, more organized reach without sacrificing style or function.
Swing-Out Mechanics
When space is tight in the kitchen, swing-out shelves and hinged solutions come to the rescue by bringing items to you instead of you reaching into deep corners. I favor sturdy tracks and smooth pivots, so loading and retrieving stays effortless. With thoughtful placement, I maximize access while preserving cabinet structure, keeping clutter down and confidence up. Practical, clear, and dependable. Additionally, implementing smart cabinet organization can greatly enhance your efficiency and enjoyment in the kitchen.
Tight-Angle Hinges
Tight-angle hinges make swing-out shelves and hinged solutions feel effortless, even in cramped kitchens. I fix awkward gaps by choosing compact hardware and precise mounting, so you don’t wrestle cabinet doors or waste space. I recommend test-fitting paths, install level tracks, and use clear labeling. You’ll gain reliable access, smoother routines, and a calmer, more organized corner. Additionally, optimizing your corner cabinets with deep kitchen drawer organization can significantly enhance the functionality of your space.
Space-Efficient Access
Even in tight corners, you can gain effortless access with space-efficient swing-out shelves and hinged solutions. I pair sturdy tracks with smooth rollers, so pots, pans, and dry goods slide out like magic. Hinged organizers swing neatly into view, turning blind spots into usable space. You’ll reach everything without bending or crawling, making corner cabinets practical, organized, and surprisingly friendly. Additionally, implementing smart storage solutions can maximize every inch of your kitchen, ensuring that no space goes to waste.
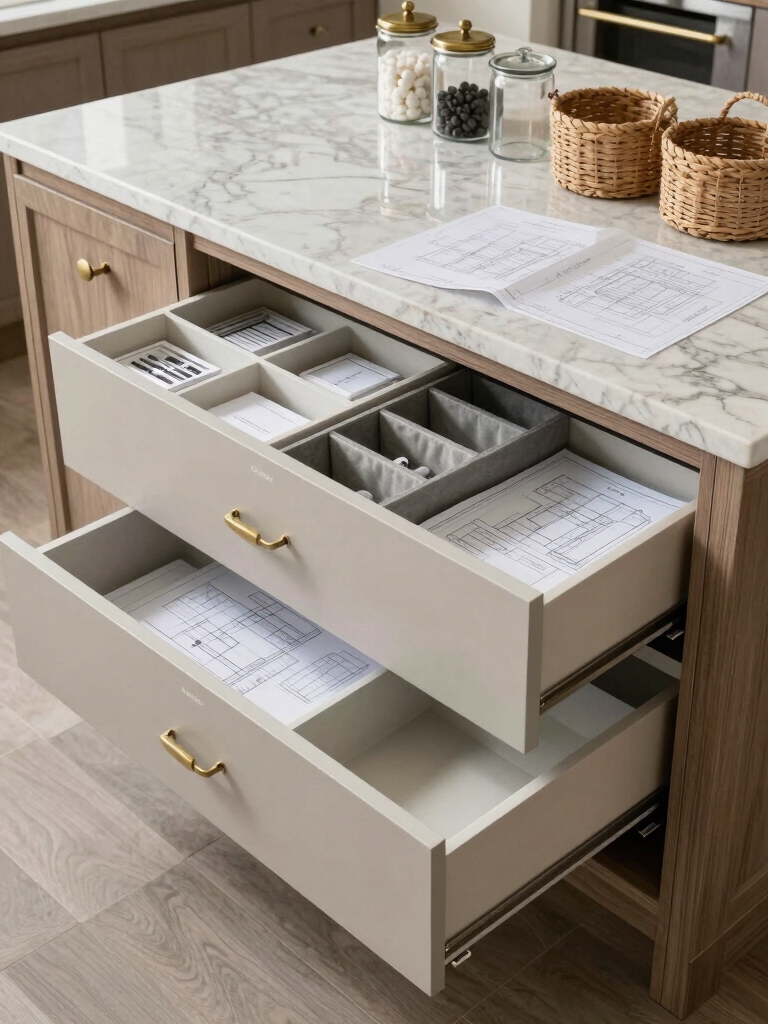
Adjustable Shelves That Maximize Awkward Corners

I’ve found that adjustable shelf angles let me customize each corner for better reach and use. With thoughtful corner depth adjustments, nothing sits awkwardly or goes to waste. I’ll show you how smart rack placement pairs with these tweaks to maximize every inch. Additionally, implementing smart storage solutions can further enhance your corner cabinet’s efficiency and functionality.
Adjustable Shelf Angles
Adjustable shelf angles are a game changer for kitchens with awkward nooks and tight corners.
I’ll show you how small adjustments let you reclaim vertical space, align supports with cabinet walls, and keep items stable.
You can tailor each shelf to the item height you actually use, reducing wasted space and frustration.
Simple tweaks yield brighter, easier-access storage.
Corner Depth Adjustments
Corner depth adjustments let you tame those awkward corners by letting each shelf sit at just the right distance from the back and sides.
I tune each shelf to maximize space, prevent wasted gaps, and keep items within easy reach.
With simple sliders and clear markings, you gain dependable access, improved visibility, and a calmer, more organized cabinet that works with you.
Smart Rack Placement
Smart Rack Placement makes the most of awkward corners by using adjustable shelves that slide into just the right spots.
I share how you can customize every nook, so loading and retrieving items feels effortless. You’ll enjoy flexible spacing, easy reconfiguration, and fewer wasted gaps.
With practical tweaks, corners stop holding you back and start helping you organize confidently.
Tiered Lazy Susans for Better Reach in Corners
Tiered lazy susans make corners truly usable, so you don’t have to wrestle with jars and lids anymore.
I share how I install and organize them, so items stay visible, reachable, and quiet in motion.
- Maximize corner space with two tiers for small jars and spices
- Label shelves for quick grabs and return
- Install with a smooth, rock-solid base
- Use clear liners to prevent spills
- Rotate gently to avoid jams
Corner Baskets and Bins: When to Use Them
When you’ve got a well-organized corner with tiered lazy Susans, baskets and bins become the next smart step for grouping bulk items and oddly shaped containers.
I use baskets for overflow snacks, bins for tall sauces, and clear liners to keep items visible.
Use them when space is uneven or clutter builds; they simplify access, reduce searching time, and preserve order.
The Magic Corner and Carousel: Pros, Cons, and Fit Tips
The magic corner and carousel can transform hard-to-reach shelves into quick-access zones, and I’ve found they’re best when you need more visibility and better reach in tight corners.
They’re great for small kitchens, but require precise sizing and smooth glide. Consider weight limits, installation height, and shelf depth to avoid crowding.
- Pros at-a-glance
- Cons to check
- Fit tips
- Space considerations
- Maintenance quick wins
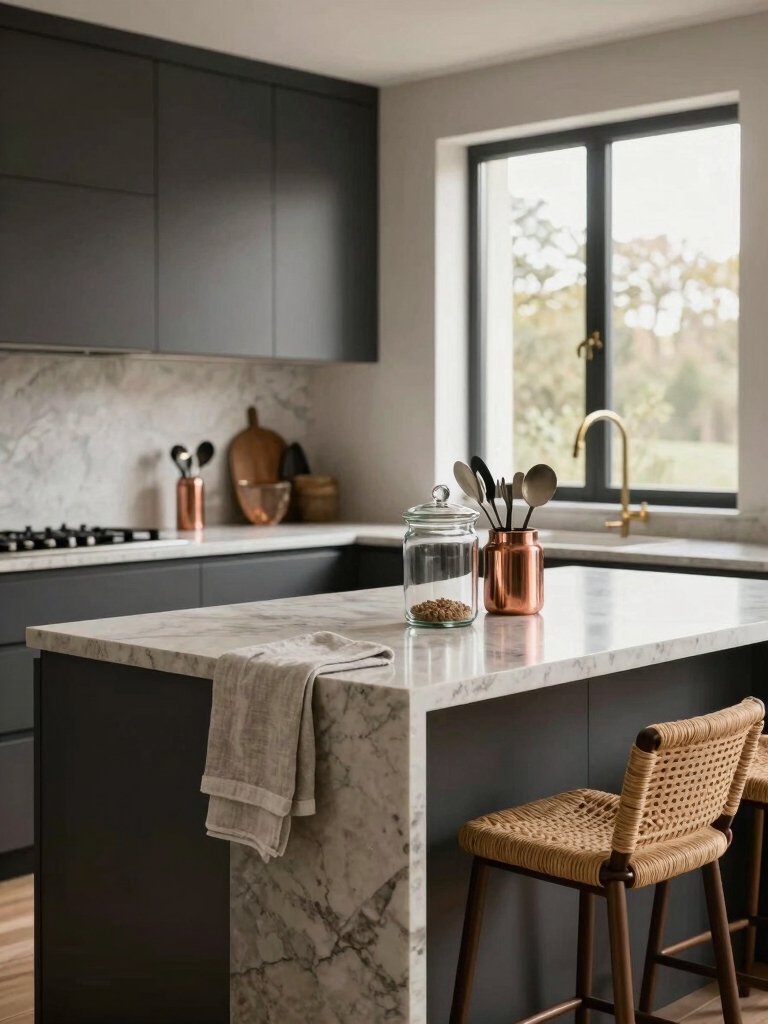
Quick-Access Utensil Zones for Faster Prep
We’ve seen how the Magic Corner and carousel free up space in tight spots; now I’m focusing on quick-access utensil zones that speed up prep.
I group frequently used tools near the stove, add shallow trays for spoons and spatulas, and label sections for easy reach.
This setup minimizes rummaging, elevates efficiency, and keeps the rhythm of cooking steady and enjoyable.
Vertical Storage: Tall Dividers and Stacking Solutions
Tall dividers and stacking solutions transform vertical space into usable storage, especially in narrow cabinets or pantry alcoves.
I share practical tweaks that keep items accessible and organized, avoiding clutter. You’ll gain control over tall gaps, stacking safely, and labeling clearly for quick finds.
- Install adjustable dividers for flexibility
- Use risers to maximize shelf height
- Label front faces for instant IDs
- Opt for slim, stackable bins
- Frequencies: rotate and purge seasonally
Framing-Out Spice and Small-Jar Storage in Corner Nooks
Corner nooks can harbor wasted space, but with a simple framing approach you can turn them into efficient spice and small-jar havens.
I frame the area with shallow, adjustable shelves and a staggered rack to maximize vertical space.
I keep labeling clear and accessible, so you grab what you need without digging.
Practical, tidy, and inviting storage. Your spices will thank you.
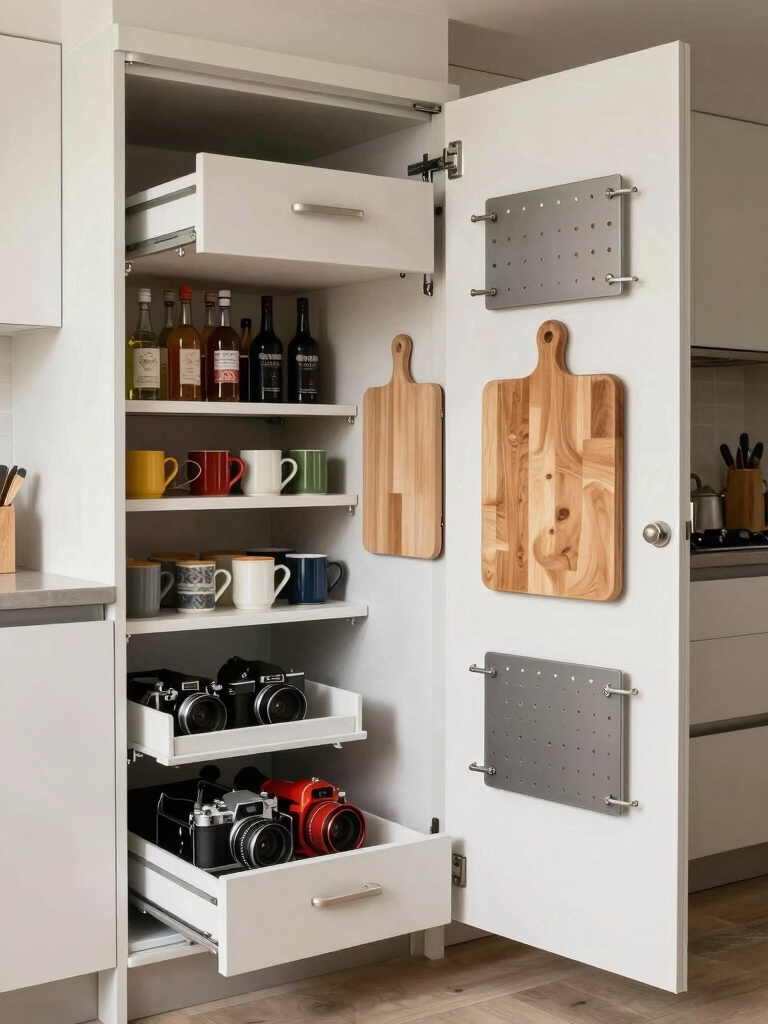
Door-Mounted Storage: Shelving and Organizers on the Inside of Doors
Door-mounted storage is a simple extension of that corner-nook idea, turning the inside of every kitchen door into a compact workspace.
I grab slim trays, hooks, and compact shelves to maximize vertical space and accessibility without crowding the counter.
- Utilize slim, adjustable shelves inside doors
- Install hooks for frequently used utensils
- Add magnetic racks for lids and foil
- Use transparent bins for visibility
- Label small compartments for quick finds
Clear Labeling and Visible Containers for Fast Finds
Clear labeling lets you spot what you need at a glance, so you’ll waste less time hunting.
I’ll walk you through simple labeling systems and choosing clear containers that show content without opening lids.
Let’s keep things visible and organized, so fast finds become routine instead of a chore.
Clear Labeling Systems
Clear labeling and visible containers make quick work of kitchen chaos. I simplify supplies by using consistent labels and simple terms, so I can find what I need in seconds.
My system reduces dupes, boosts accuracy, and saves space. Small steps add up, and every stored item earns a calmer, more efficient day.
- Label with short names and dates
- Use uniform fonts and sizes
- Create a master inventory
- Pair labels with clear bins
- Update as items change
Visible Container Choices
As I keep the labeling system simple, I’m pairing those clear labels with see-through containers for fast finds.
You’ll see at a glance what you have, what’s running low, and what’s still fresh. Choose uniform shapes for stacks and easy lids for quick access.
Labels stay clean, visibility boosts efficiency, and clutter dissolves into calm, practical order.
A Compact Charging/Appliance Corner Setup
A compact charging and appliance corner is one of the quickest wins in kitchen organization, giving you a neat hub where every gadget has its place.
I guide you to streamline cords, chargers, and outlets without clutter.
- Use vertical organizers for cords
- Mount a small power strip on the wall
- Store rarely used gadgets in a labeled bin
- Group chargers by device type
- Keep essential tools within arm’s reach
Maintenance and Budget Hacks to Finish Strong
After setting up a neat charging corner, we can take that same mindset to maintenance and budget hacks that help you finish strong.
I keep routines simple: inspect shelves monthly, tighten screws, and declutter ruthlessly.
Use flexible storage, label bins, and reusable organizers to save dollars.
Prioritize durable basics, make small repairs early, and celebrate progress—steady gains prevent chaos and waste, every day.
Conclusion
I know corner cabinets can gulp up space, but they don’t have to swallow your efficiency. With the right pull-outs, hinged shelves, and clever door organizers, you’ll reclaim every inch and make clutter vanish. Stick to measured goals, label everything, and keep only what you use. Think of your kitchen as a well-tuned orchestra—each piece playing its part. Move slowly, stay practical, and celebrate small gains as you transform chaos into calm. Your kitchen will thank you.